Getting started
Login to the Karelics Cloud
- Logging In
- First-Time Login
To access Karelics Cloud, you need an active account.
Steps
- Open https://karelics.cloud.
- Enter your email and password, or choose Sign in with Google or Sign in with Microsoft (SSO). See SSO feature for setup details.
- Press Sign in.
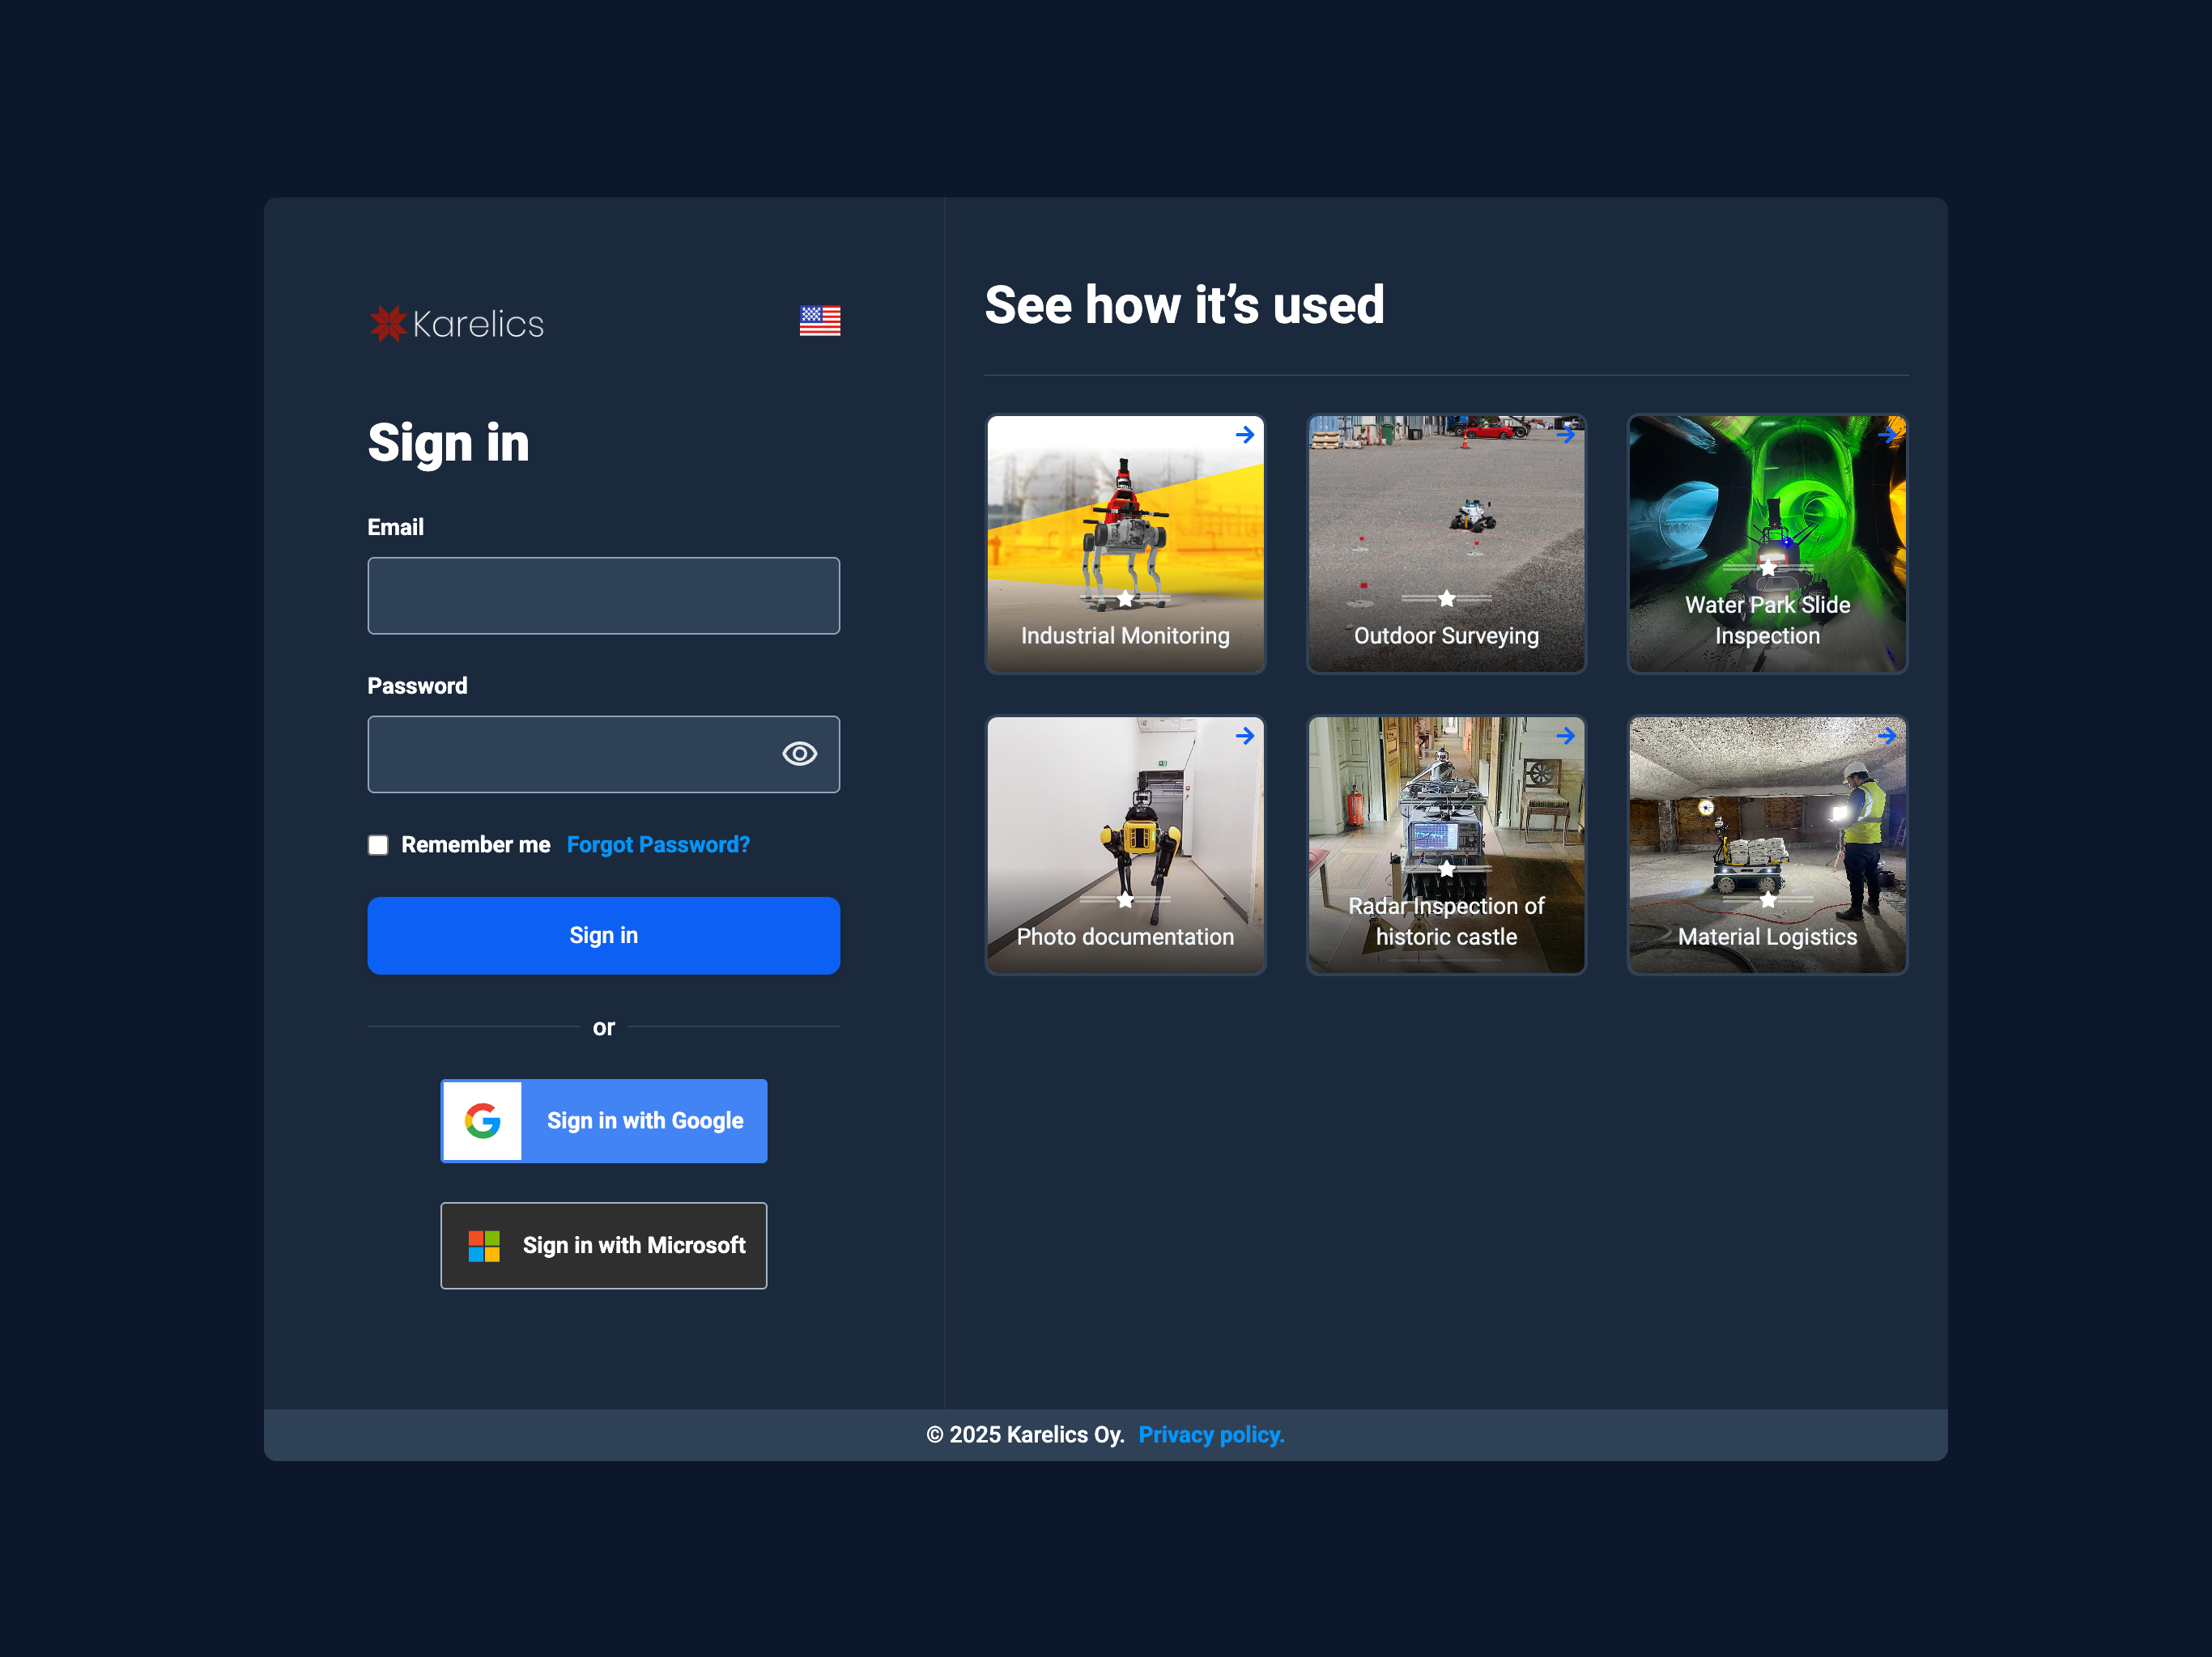
Remember me keeps you signed in on this device. Use it only on personal or trusted computers.
Forgot password?
- If you forgot your password → use Forgot password? link.
- If SSO is enabled in your organization, you will be redirected to your company’s login page. Learn more in the SSO feature.
- For access issues, contact your workspace admin.
- If you’re having trouble logging in, contact our support team at support@karelics.fi.
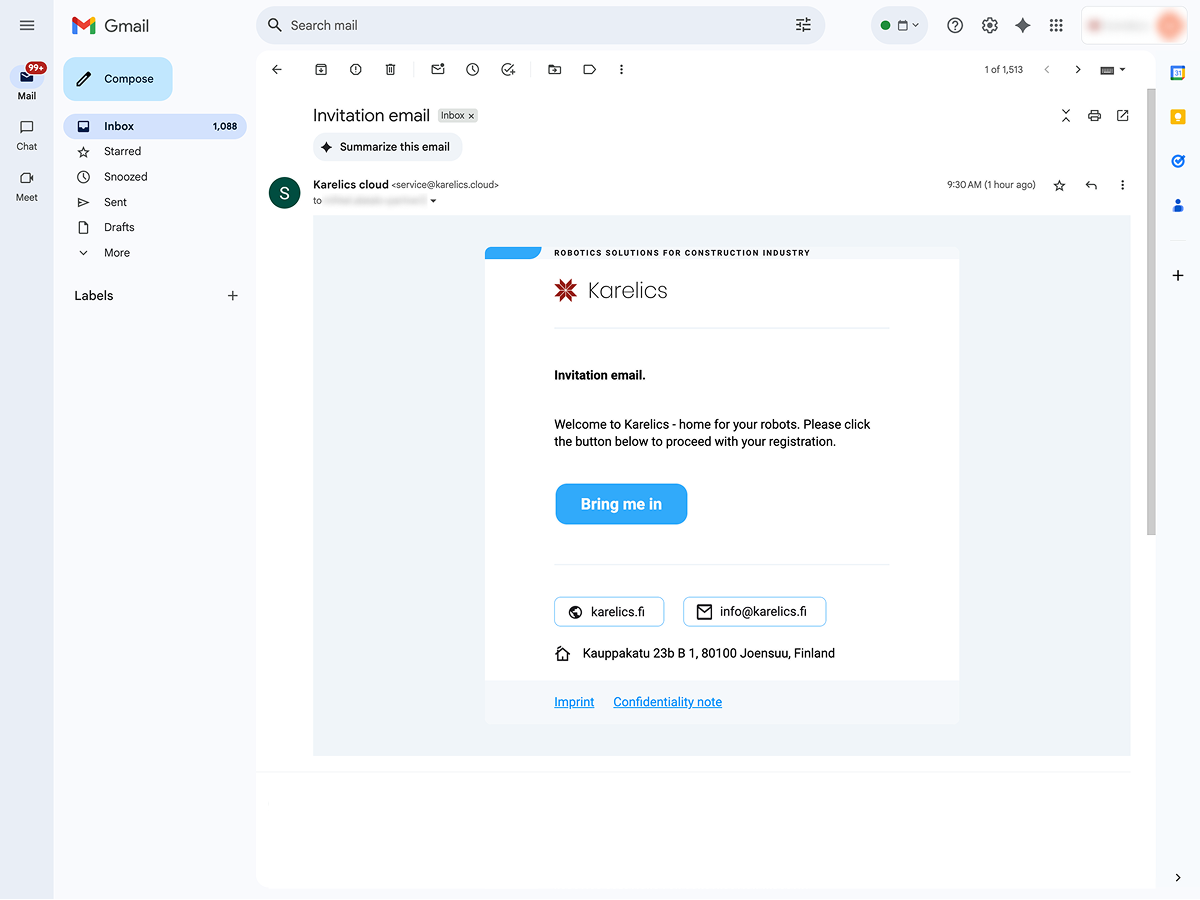
This short guide walks you through your very first sign-in to Karelics Cloud from an invitation email. Total time: ~2 minutes.
What you’ll need
- The invitation email sent to your work address.
- A browser where you’re not already signed in to another Karelics account (or use a private/incognito window).
Steps
1) Open the invitation email — Click Bring me in to start registration.
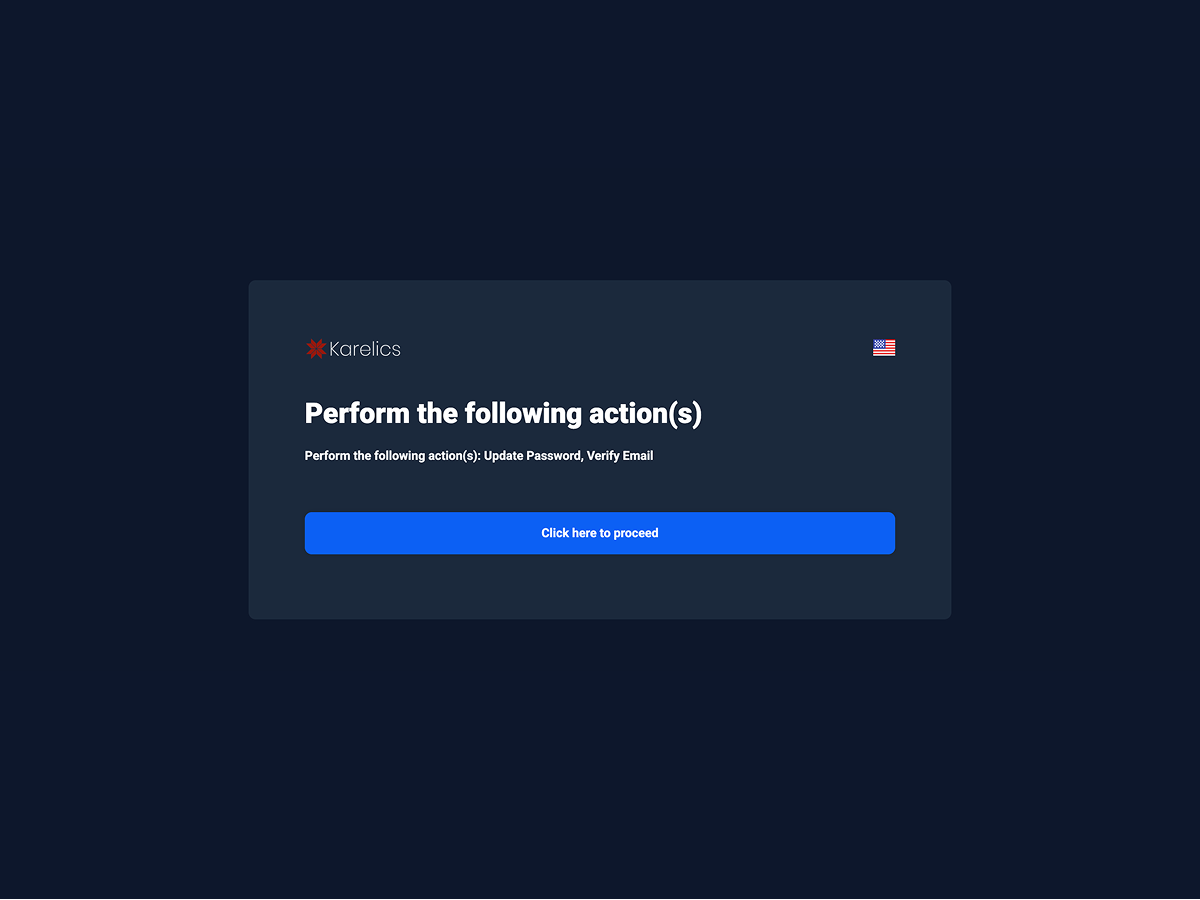
2) Confirm required actions — On Perform the following action(s), press Continue to start verification and password setup.
3) Create a secure password — Enter and confirm a new password, then press Continue.
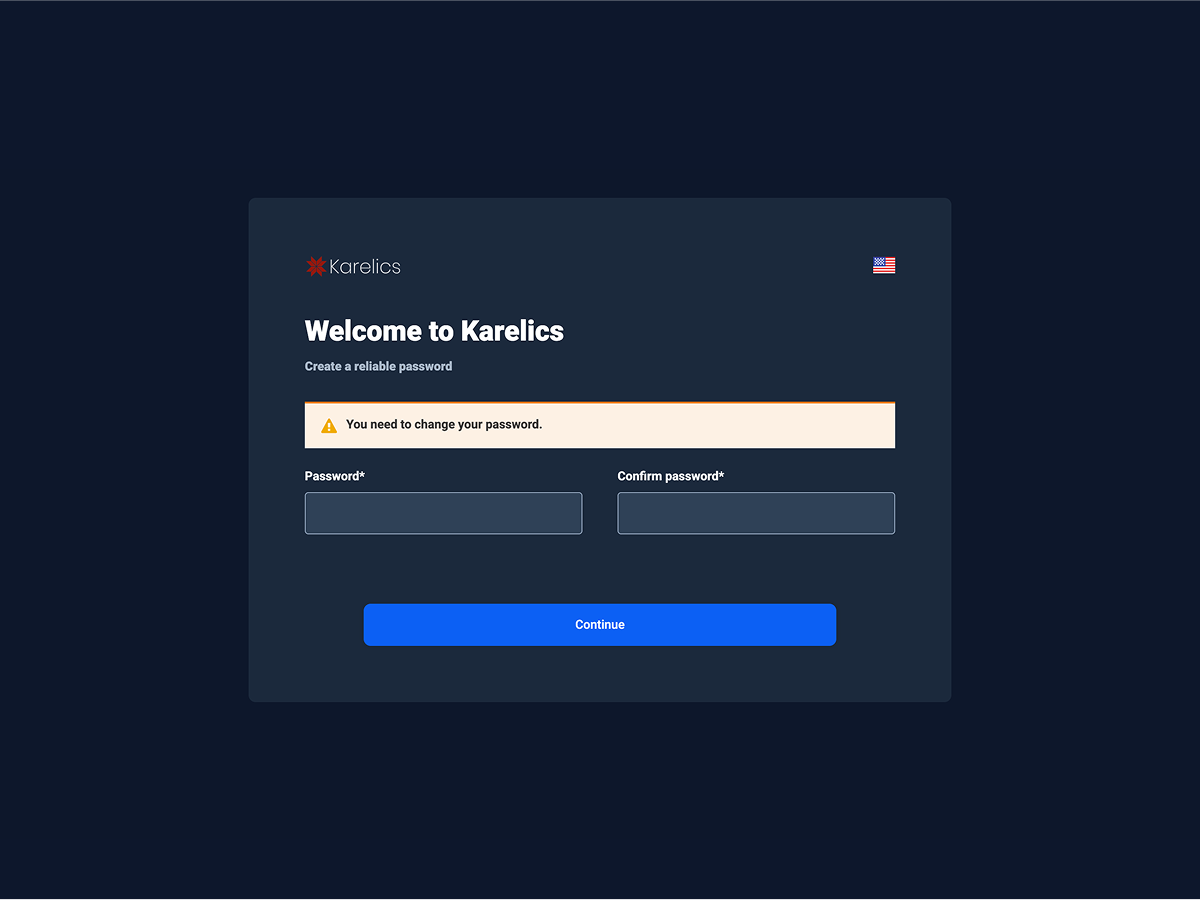
Use at least 8 characters. Combine letters, numbers, and symbols. Avoid reusing passwords from other services.
4) Account updated — When you see Your account has been updated, click Back to Application.

5) Sign in — Enter your email and password, or choose Sign in with Google / Sign in with Microsoft. Optional: enable Remember me.

If your organization uses Single Sign-On (SSO), simply click Sign in with Google or Sign in with Microsoft—no password needed here.
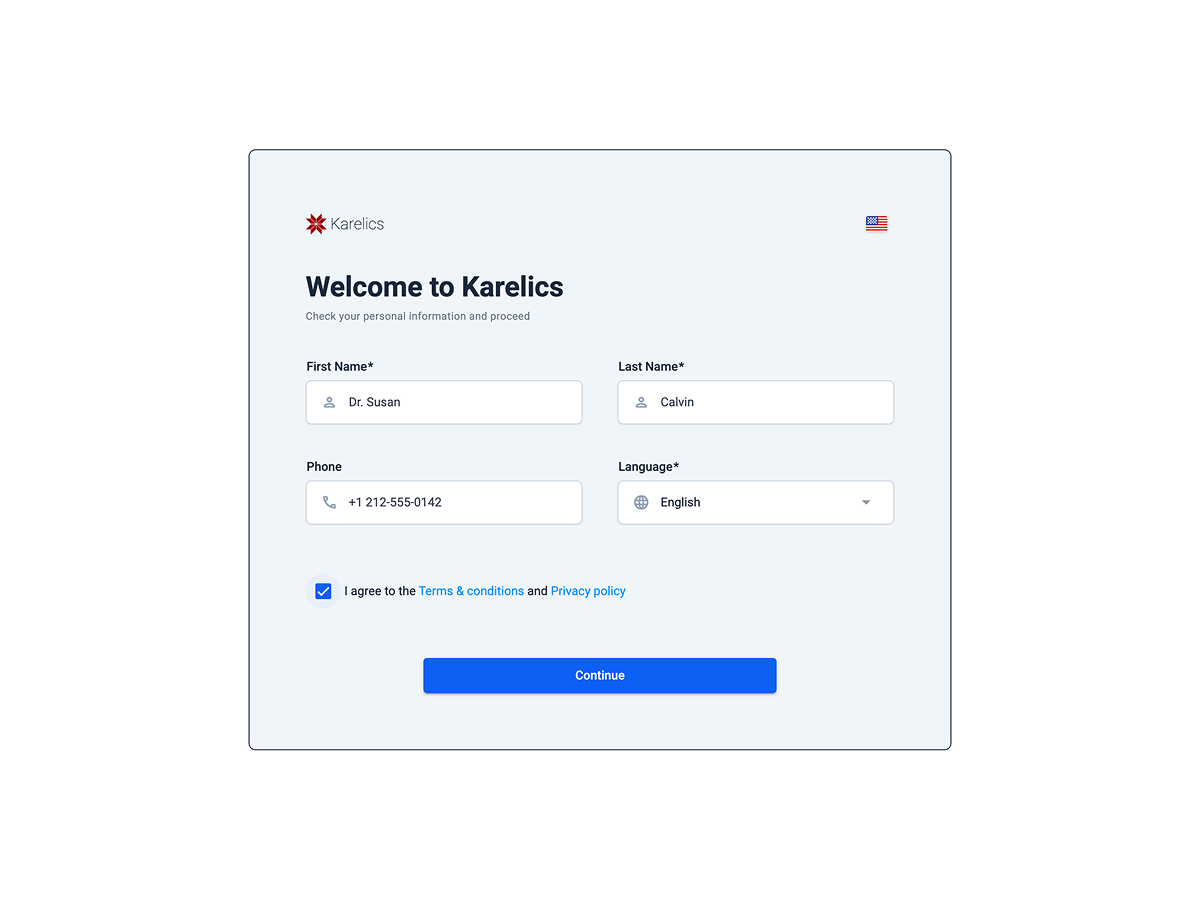
6) Complete your profile — Fill in First name, Last name, Phone, and choose your Language. Accept the Terms & Privacy, then click Continue.
Troubleshooting
Didn’t get the invitation email? — Check Spam/Junk and search for “Invitation email” from service@karelics.cloud.
If you still can’t find it, ask your administrator to resend the invitation.
Invitation link expired or doesn’t work? — Ask your inviter to send a new invitation.
Links have a limited lifetime for security reasons.
Forgot your password? — Use Forgot Password? on the sign-in screen.
You’ll receive a reset link at your registered email address.
Already signed in as a different user? — If you see “We are sorry…”, sign out of the current account or open the link in a private/incognito window.

Need help? — Contact support@karelics.fi.
Provide a brief description of the problem and a screenshot if possible.
Add new project
This guide explains how to add a new project in Karelics Cloud.
Projects help you organize robot operations under a specific location, client, and timeframe.
1. Start in Admin Hub
- Open the Admin Hub.
- Click Add new project.
Fill in General Information
When you add a new project, you can fill in the following fields:
- When is the project implemented?
- Select the project start date from the calendar.
- The end date can be left empty for continuous usage.
- You can modify these dates later if needed.
- Name
- Enter a descriptive name for your project (e.g., Stuttgart Inspection 2025).
- Fill in the address details:
- Address (location name)
- Street and House number
- City and Country
- Zip code
- Time zone
- Use the Find address on map button to automatically locate the project on the map.
- Verify the red pin is correctly placed on the map.
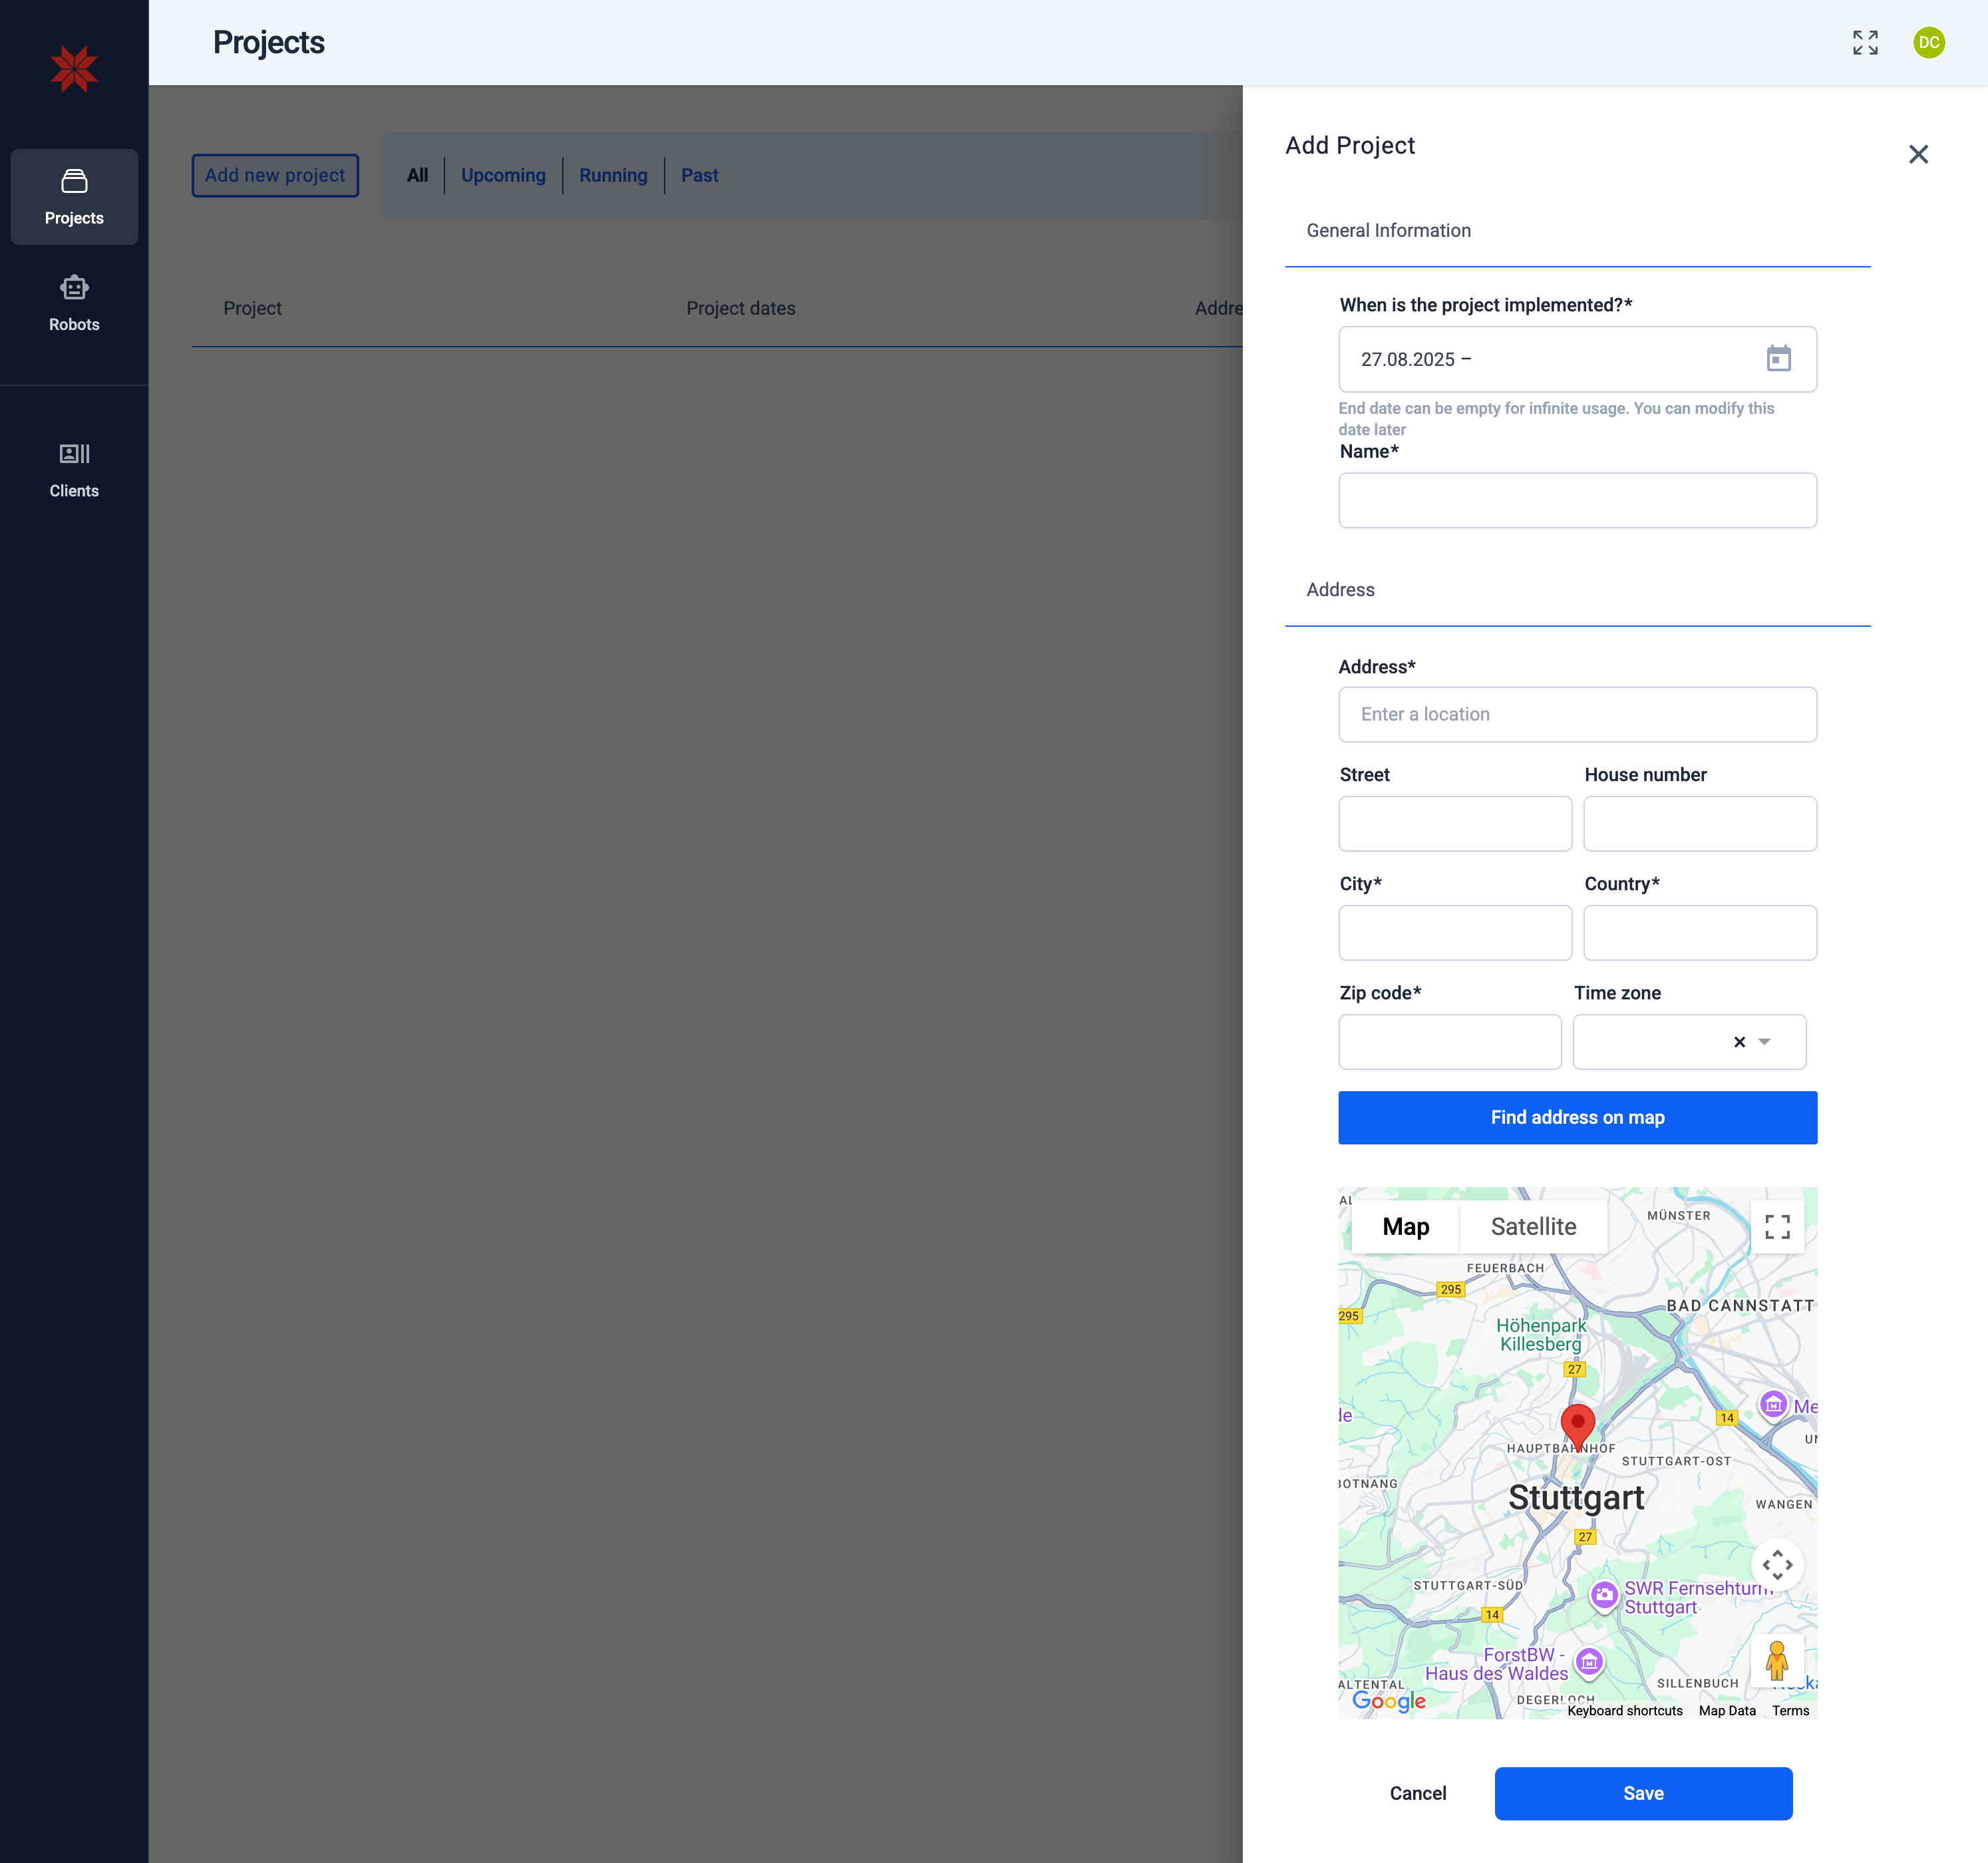
Save the Project
- Click Save to create the project.
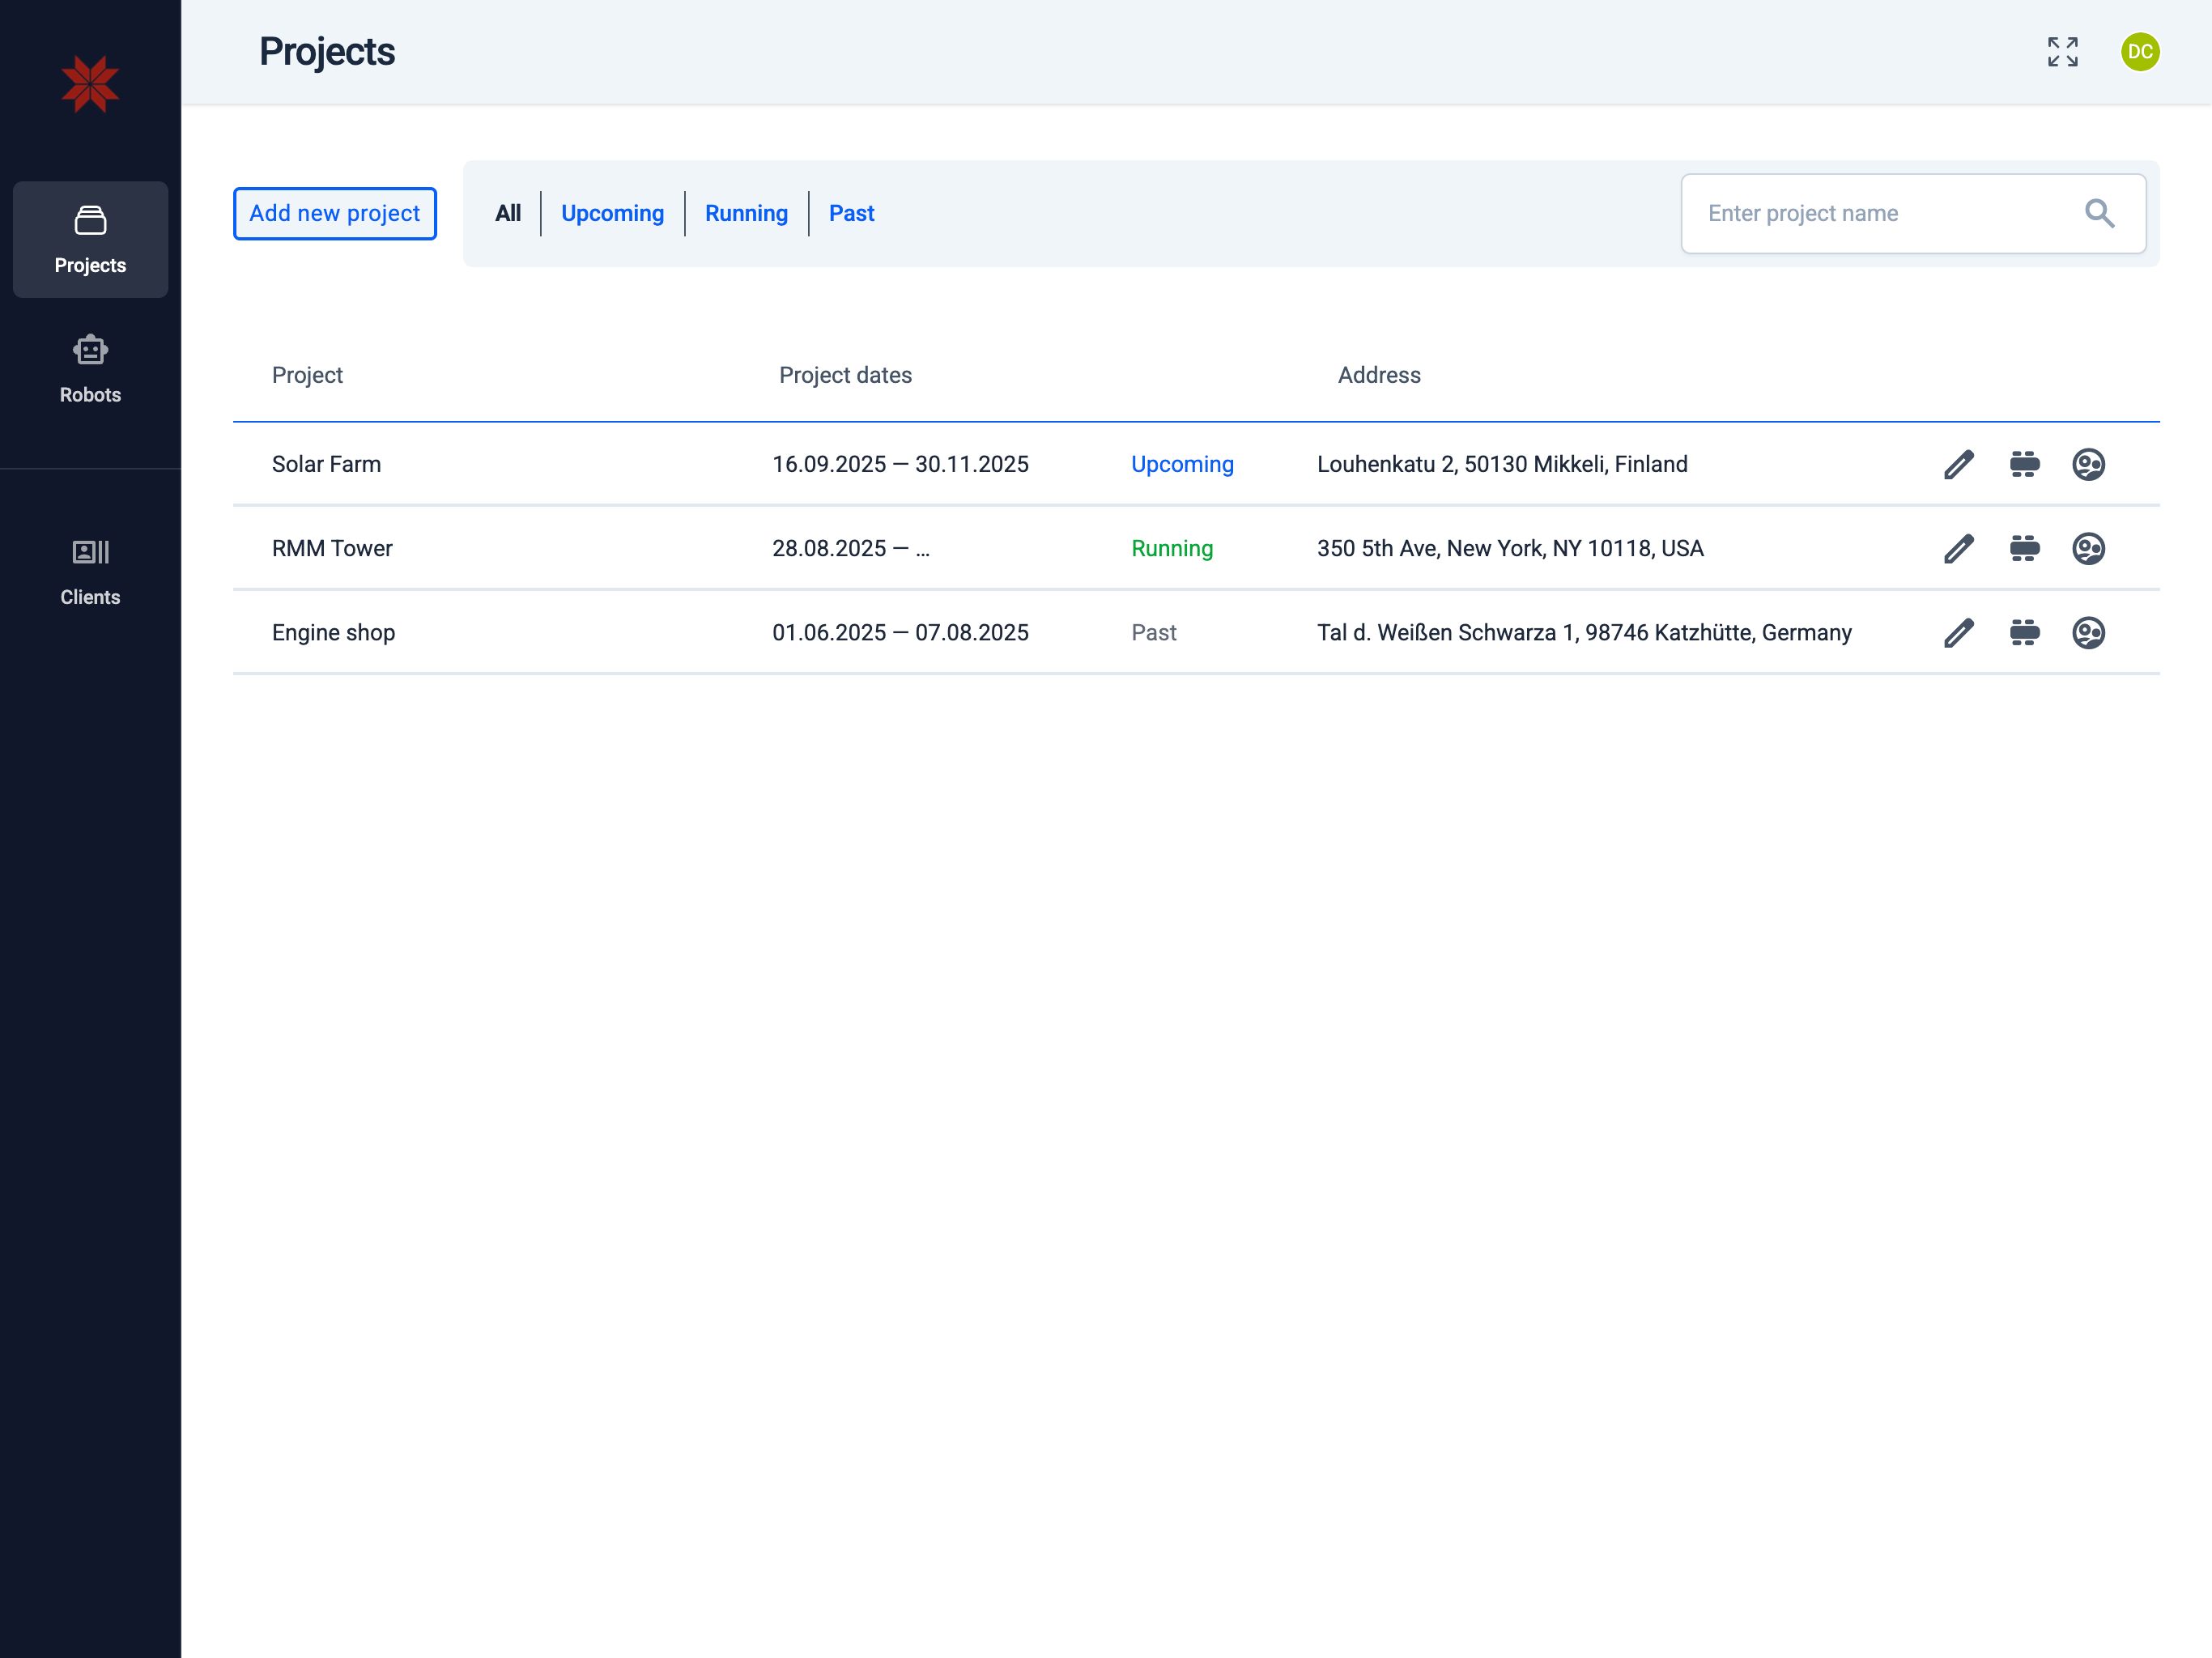
- The new project will now appear in the project list under Upcoming, Running, or Past, depending on the selected dates.
Karelics Cloud allows you to manage multiple projects at the same time.
This helps you organize operations across different sites, clients, or time periods without mixing data.
Learn more on the Multi‑Project Support page.
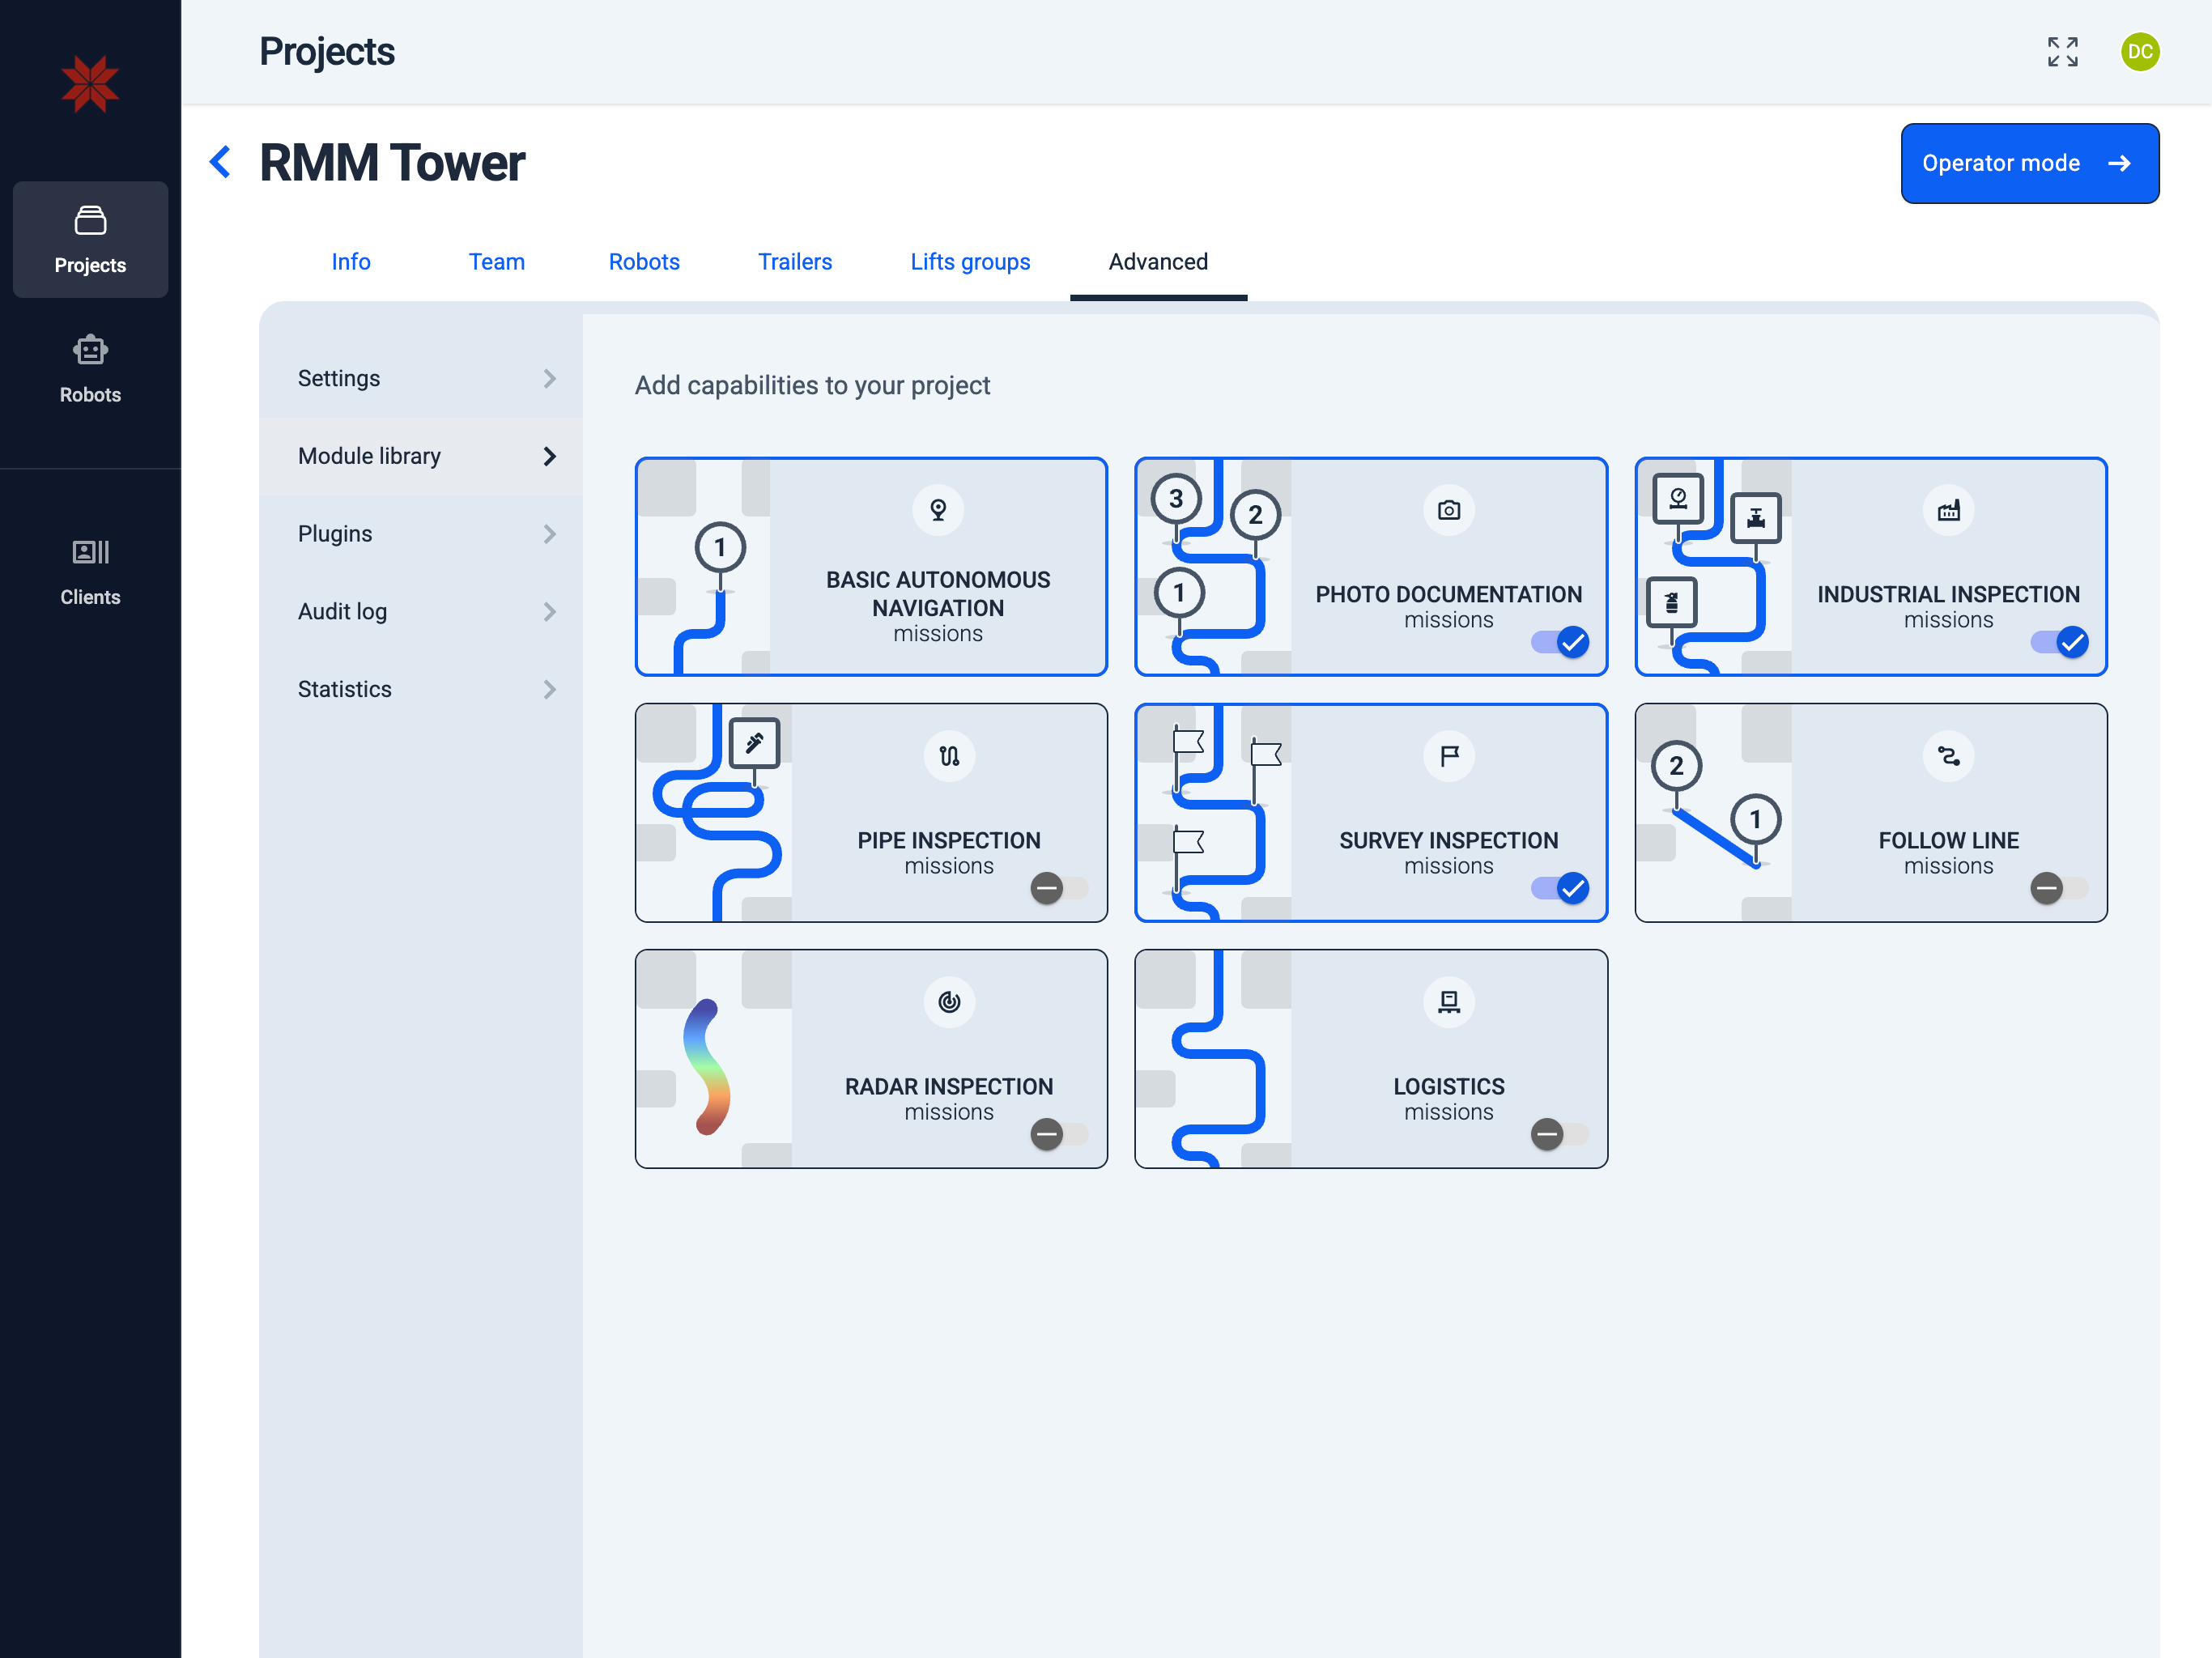
2. Configure Module Library
Admin Hub → Projects → Current Project → Advanced → Module Library
Add capabilities to the project by managing project‑specific modules available for your robots.
3. Configure Project Team
Admin Hub → Projects → Current Project → Project Team
The Project Team permission management includes all members of your company. Depending on the assigned role, members can manage that project and its assets.
You can invite, remove, and assign roles to users from your company, and to users from other companies (external).
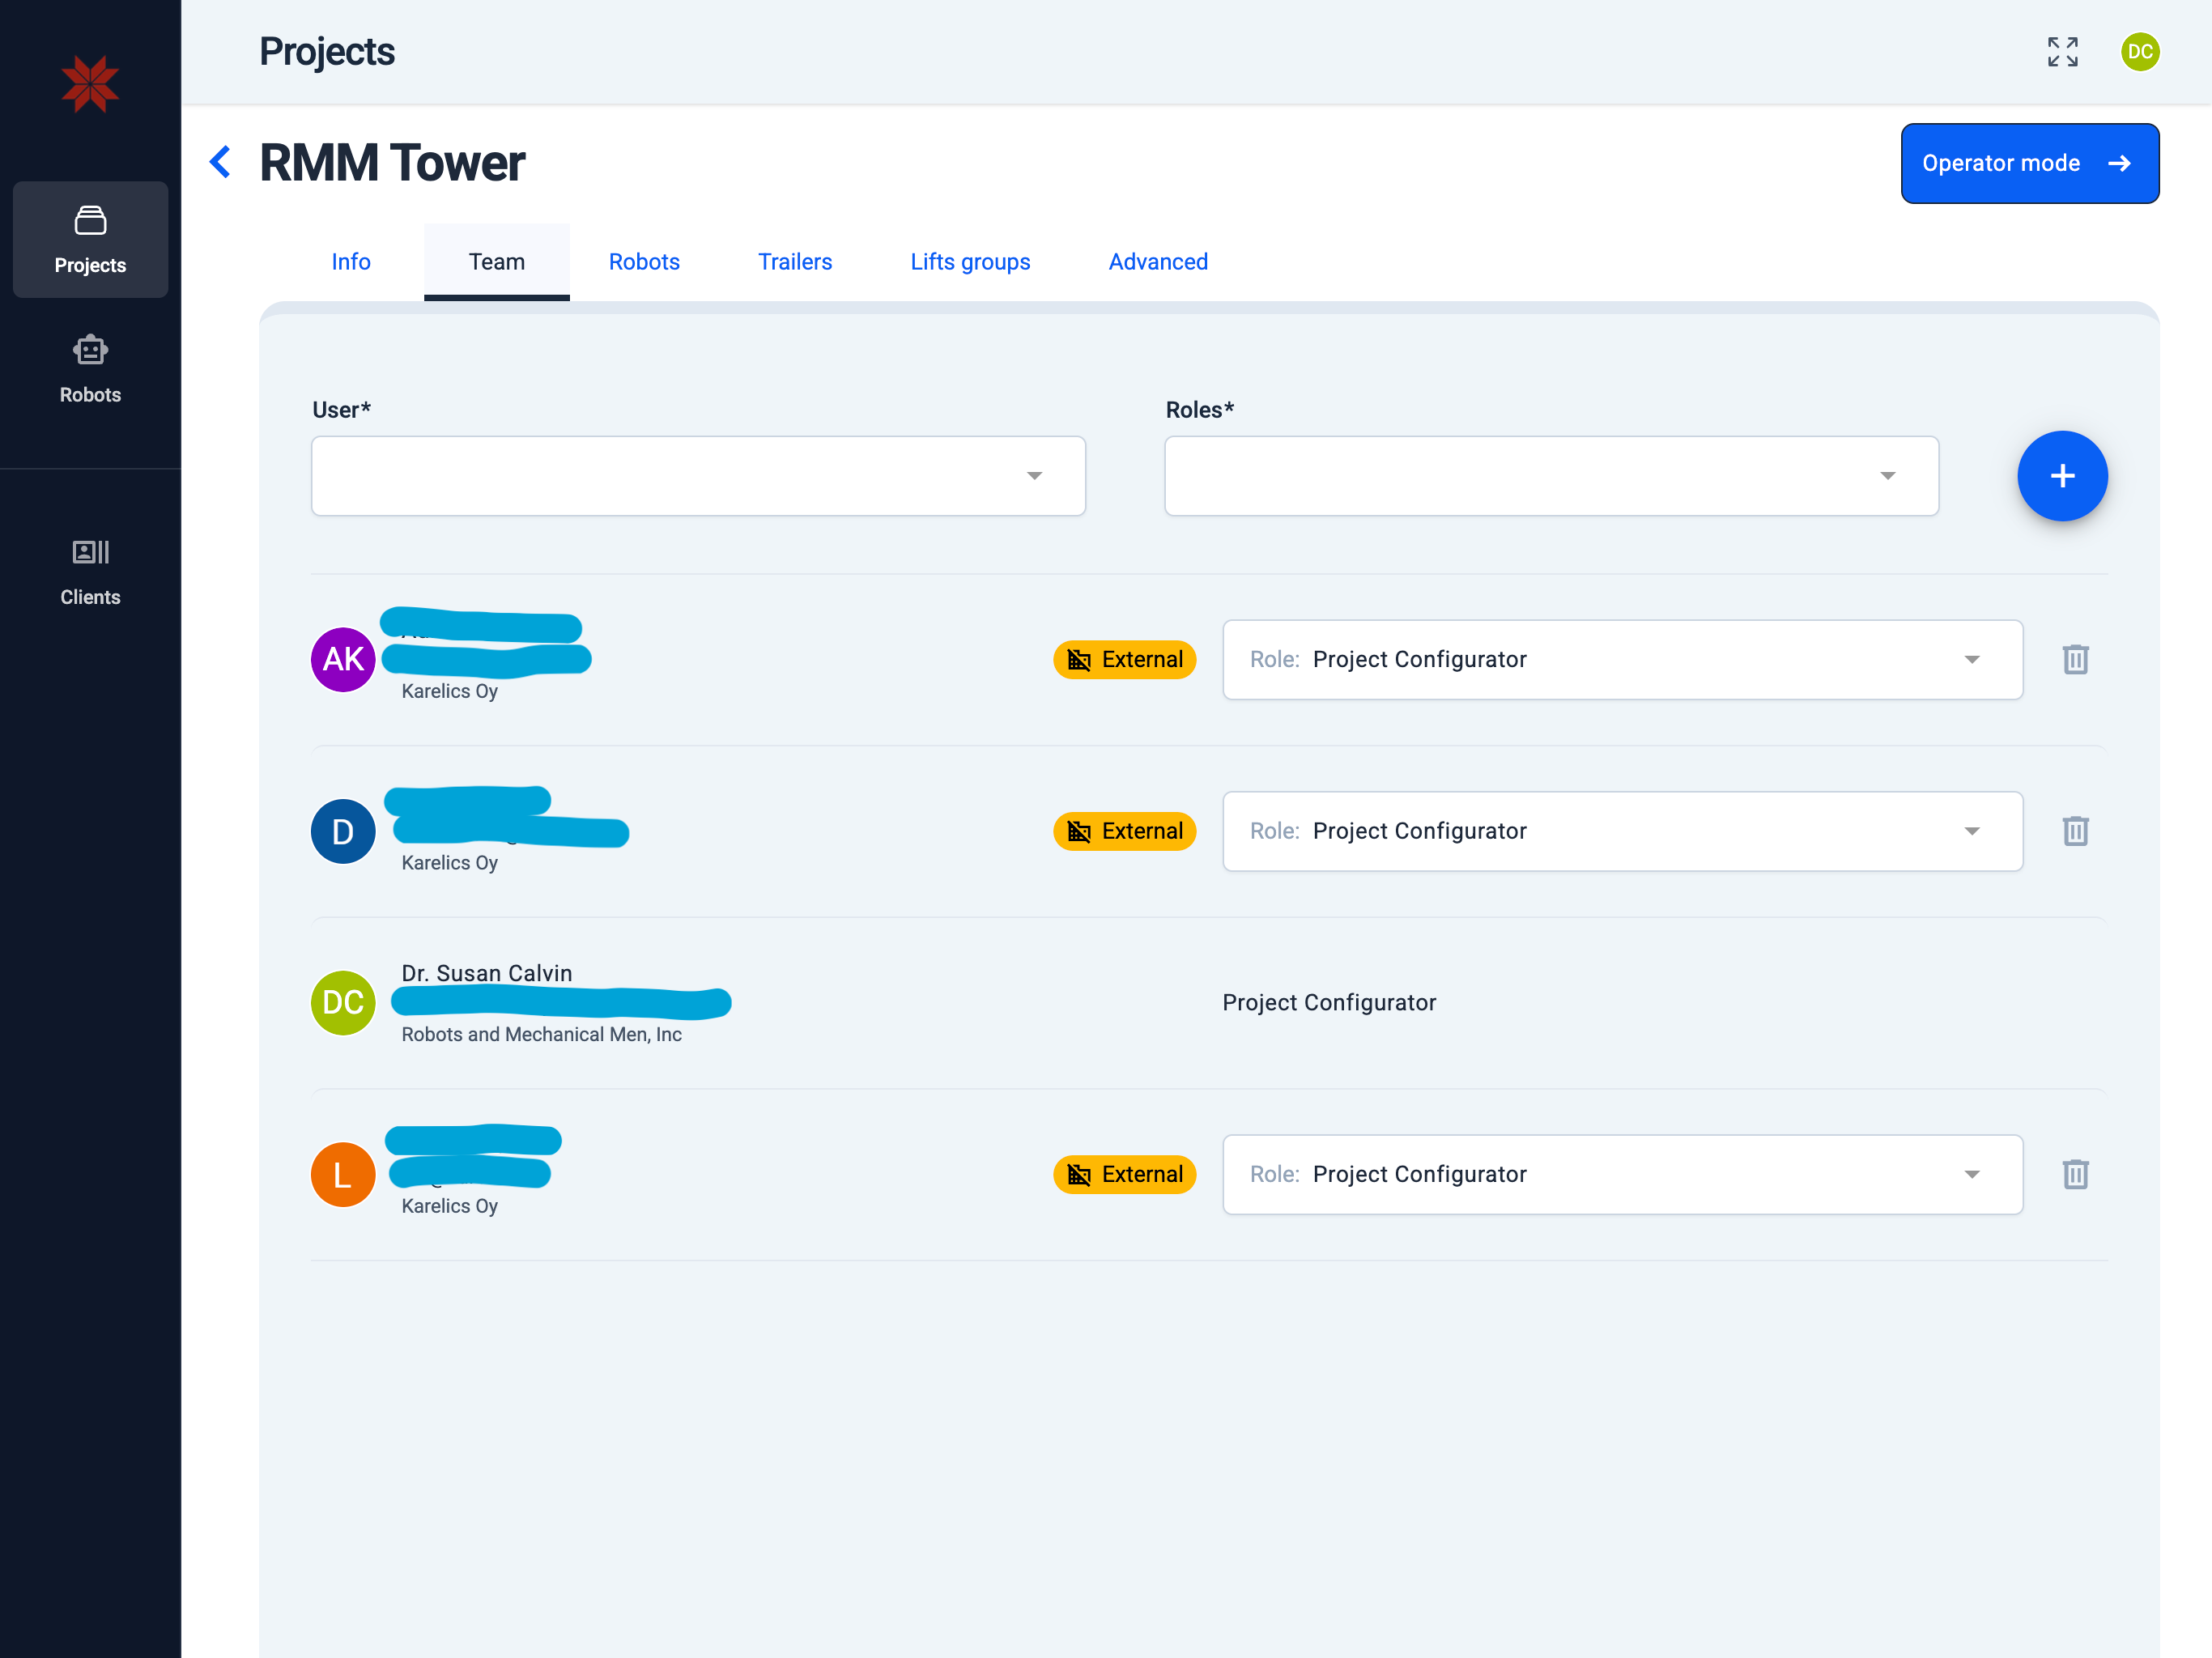
What each role can do:
| Role (description) | Read project / project.read_project | Update project / project.update_project | Manage users / project.manage_user | Invite users / project.invite_user | Assign device / project.assign_device | Operate device / project.operate_device | Manage maps / project.manage_map | Manage map data / project.manage_map_related_data |
|---|---|---|---|---|---|---|---|---|
| Project Configurator — Views project; edits maps; operates devices; manages map data & users | ✅ | ✅ | ✅ | ✅ | ✅ | ✅ | ✅ | ✅ |
| Project Manager — Views project; operates devices; manages map data & users | ✅ | – | – | ✅ | – | ✅ | – | ✅ |
| Project Device Operator — Views project; operates devices; manages map data | ✅ | – | – | ✅ | – | ✅ | – | ✅ |
| Project Viewer — Views project (devices, maps, positions, related data) | ✅ | – | – | – | – | – | – | – |
The Project Team permission management includes all members of your company. Depending on the assigned role, members can manage that project and its assets.
Learn more in the Permission management page.
4. Configure Project AI Settings
Admin Hub → Projects → Current Project → Advanced → Settings
Configure project‑level options.
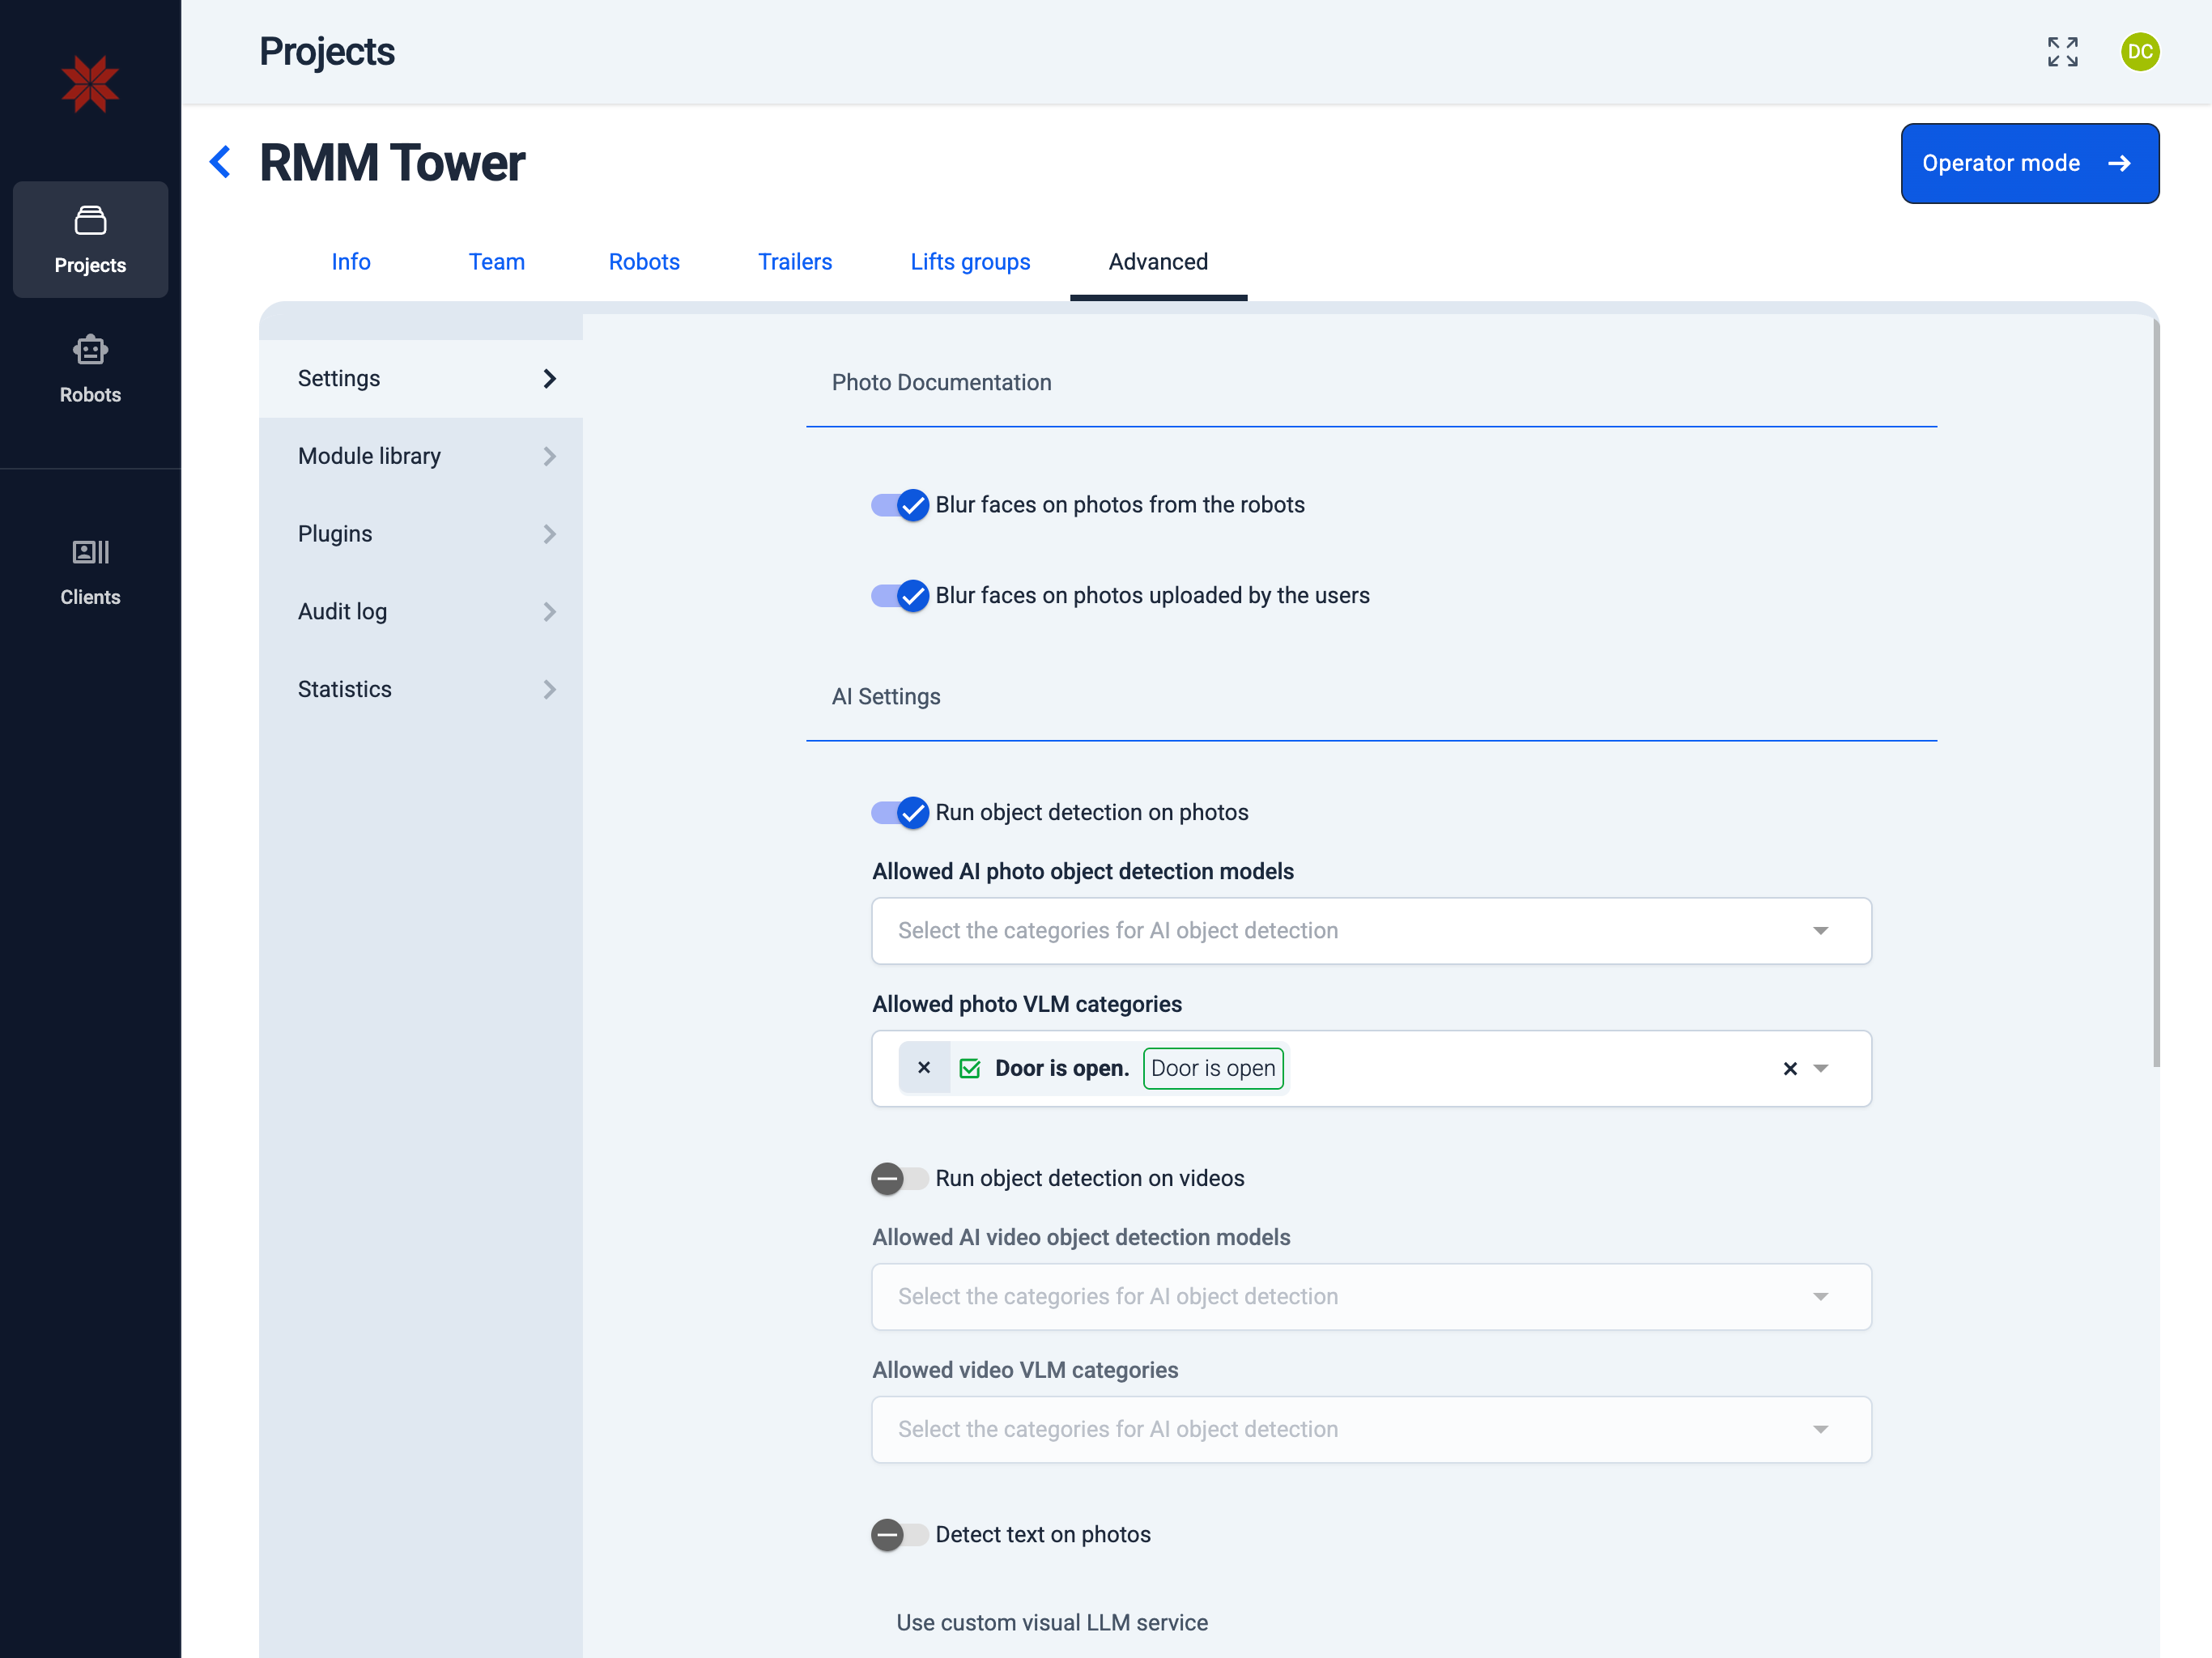
Photo Documentation
Toggle automated face blurring for assets captured by robots or uploaded by users. When enabled, the system anonymizes detected faces before the files appear anywhere else in the project.
Existing photos remain unchanged; only new uploads (or captures) are processed after the toggle is turned on.
AI Settings
Run object detection on photos — scans new images and tags them with the selected AI annotation categories. Disable the toggle to skip photo-level AI processing.
Run object detection on videos — performs the same classification for uploaded videos when enabled. Use the dropdown to restrict detections to the categories relevant to the project.
Custom visual LLM service
Provide the Service URL, Model name, and API key to override the built-in AI engine. Once configured, all image and video detections for this project run through the connected provider.
Reporting
Activate the hourly newsletter to email AI detection summaries. Choose which annotation categories should appear in the digest and list the recipients who need the updates.