DroneDeploy Integration
DroneDeploy is a cloud-based drone mapping and surveying platform that enables users to create detailed maps, 3D models, and orthomosaics from drone imagery.
The integration of DroneDeploy with Karelics Cloud allows photos taken by our autonomous robots to be automatically displayed on the map in DroneDeploy, both in Exterior and Interior modes.

In Karelics сloud Admin hub
1. Connecting
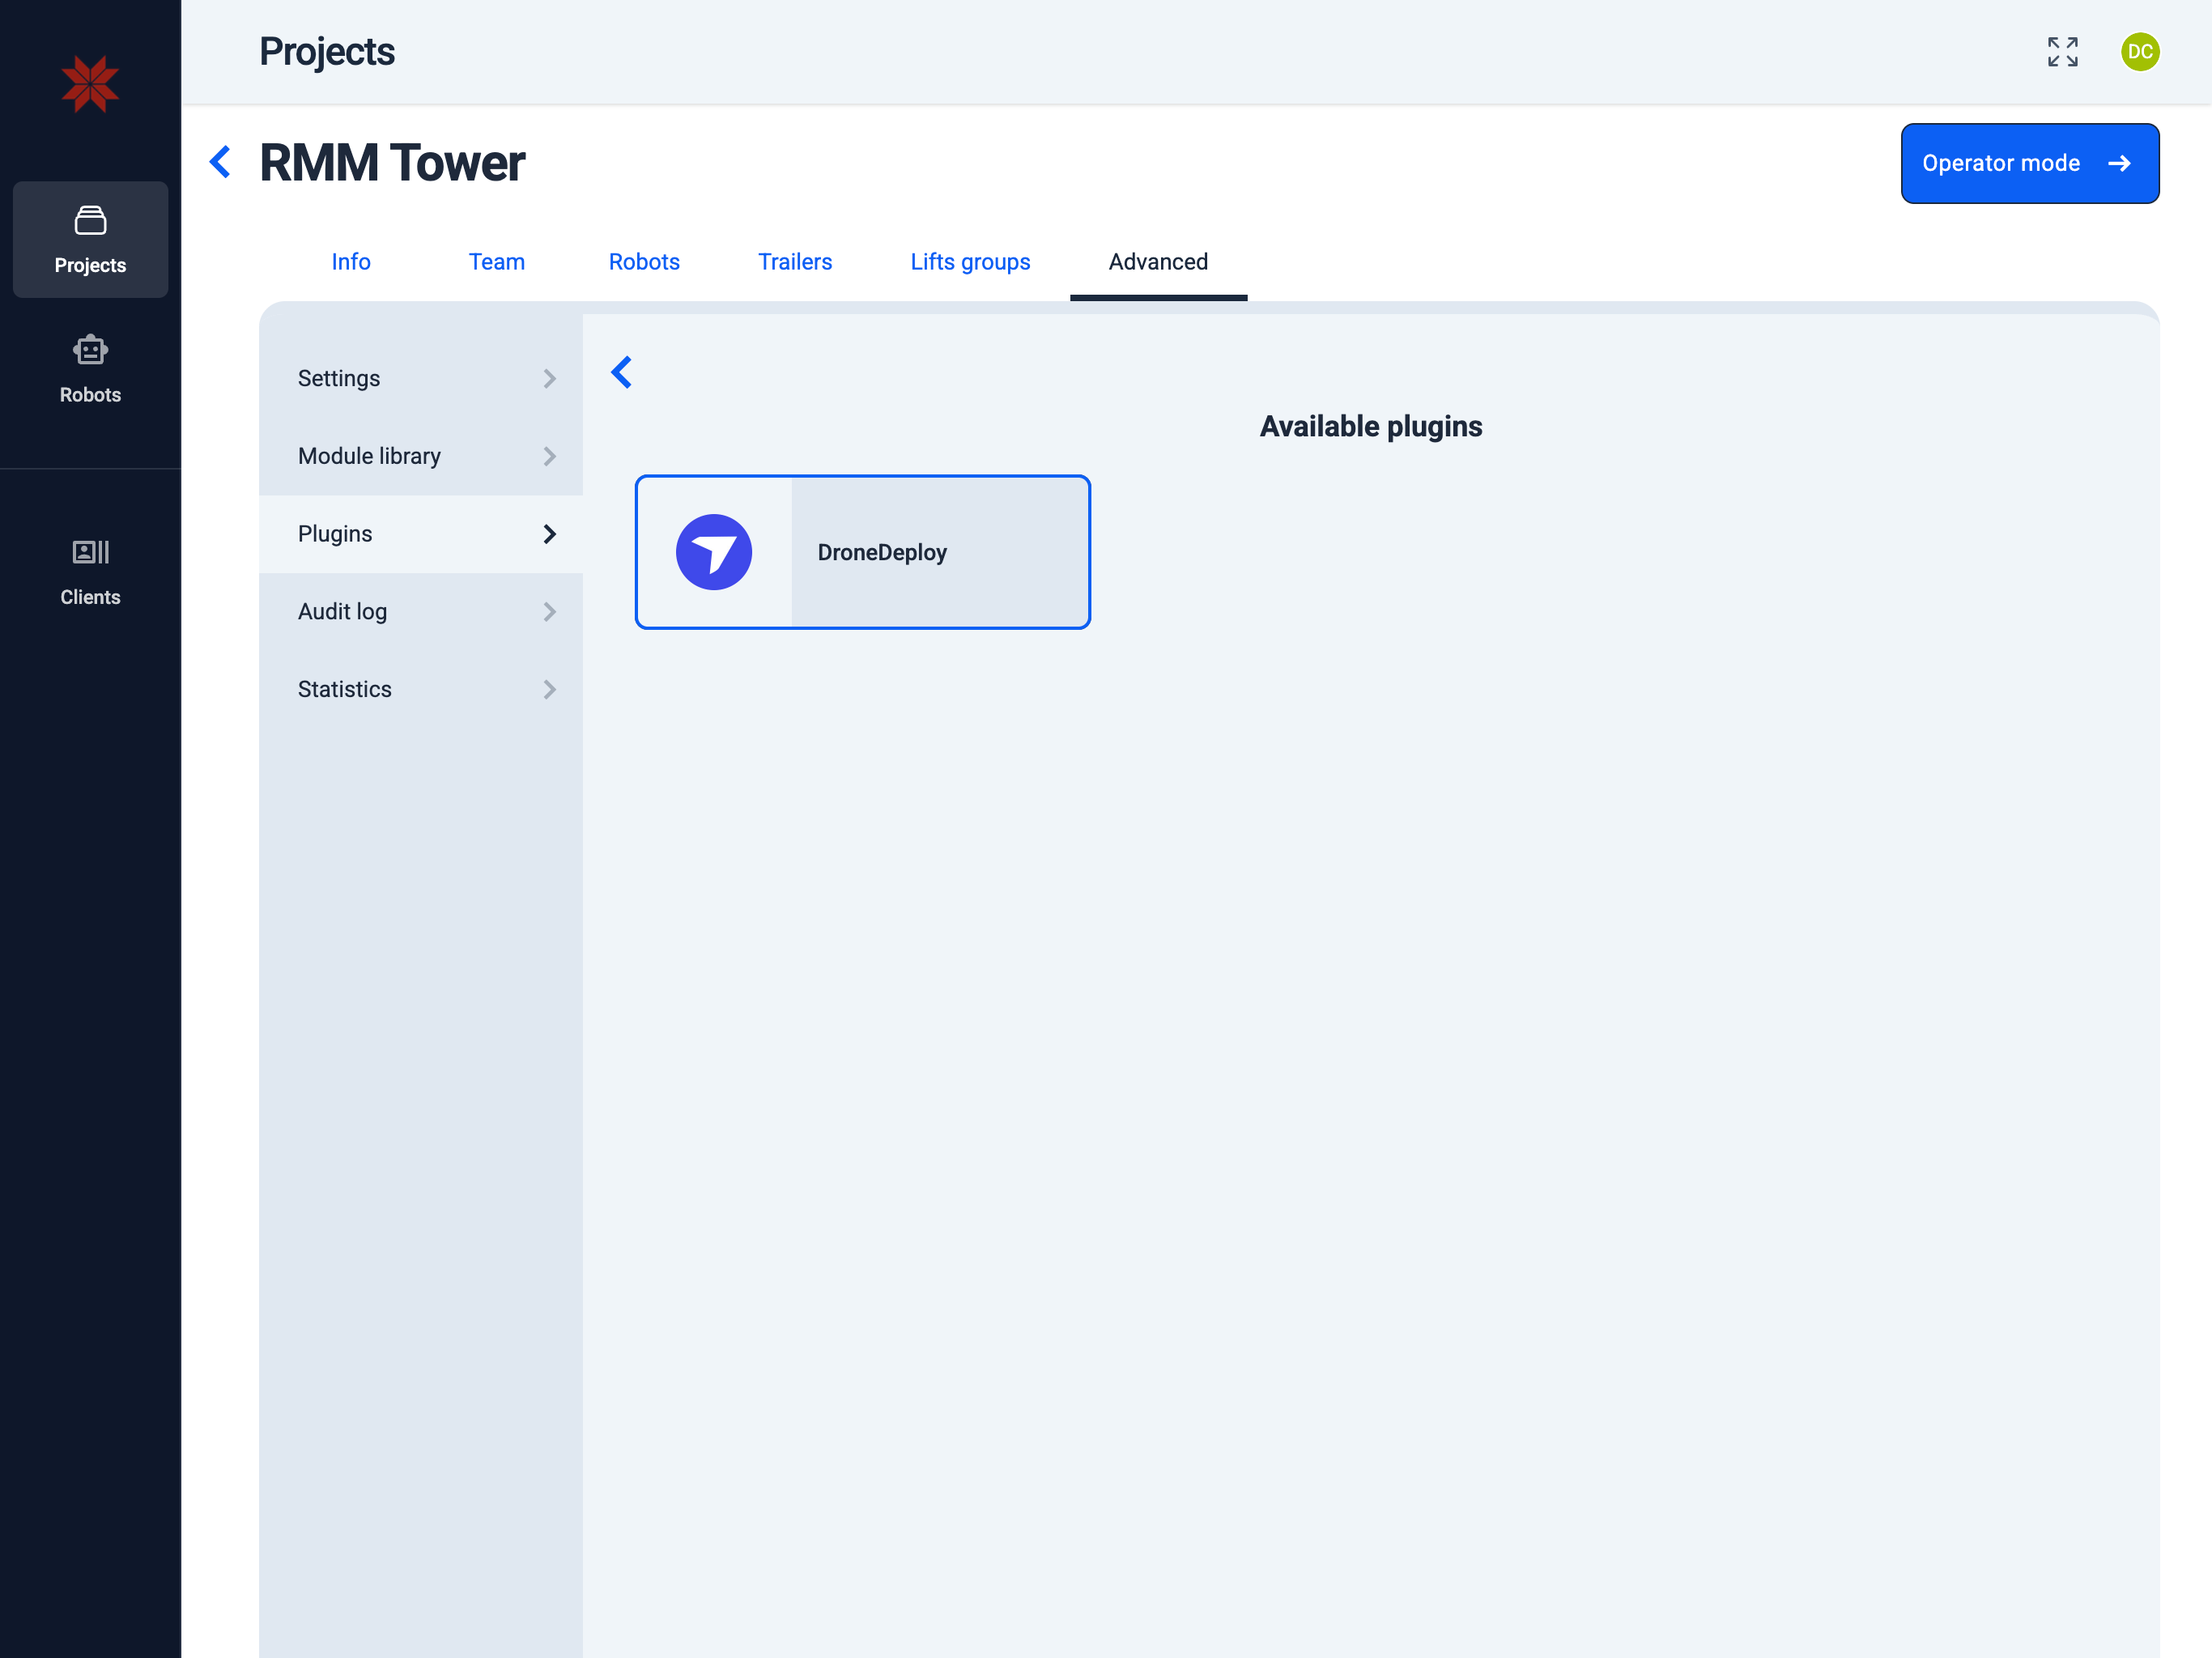
Navigate to the following path:
Admin Hub → Projects → Current Project → Advanced → Plugins
-
To connect a plugin, click the "Add plugins" button.

-
Select a plugin.
Setup the plugins:
📄️ DroneDeploy
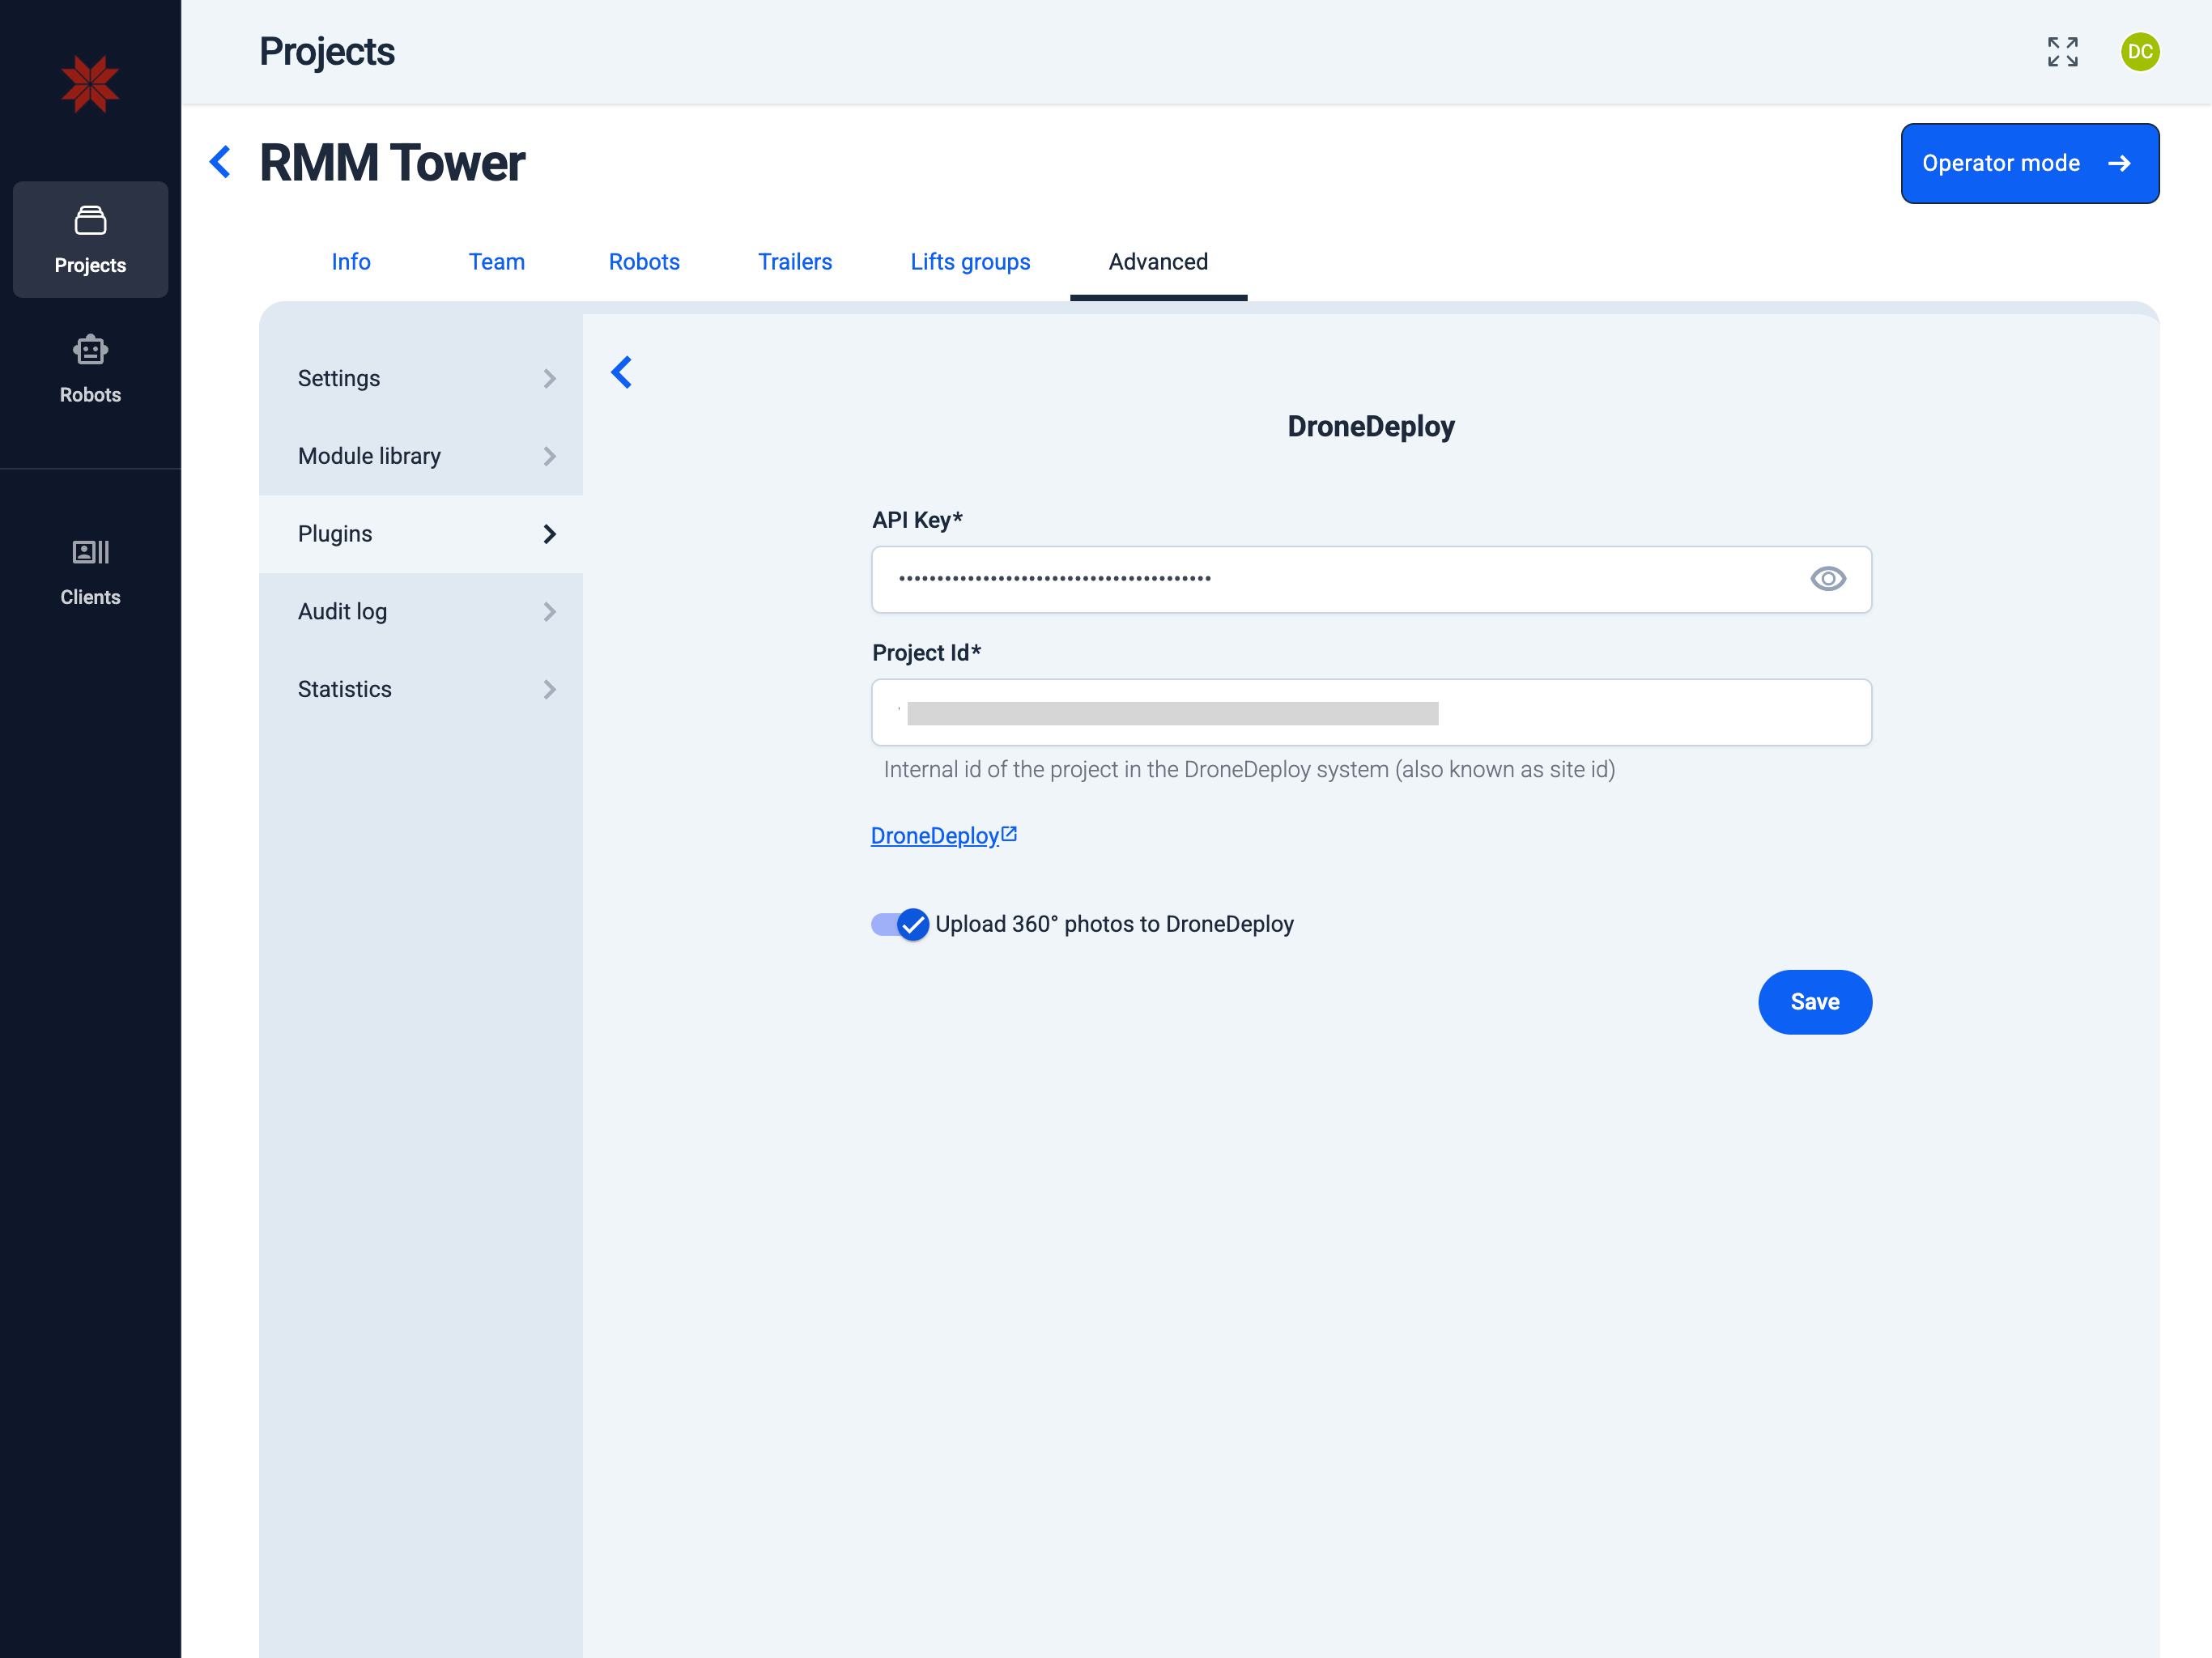
2. Add API key and project ID
Admin Hub → Projects → Current Project → Advanced → Plugins → DroneDeploy Plugin
-
Enter the DroneDeploy API key. (How to get the DroneDeploy API key?)
-
Enter the DroneDeploy project ID.
Info: You can find the project ID in the URL on the DroneDeploy website: For example, in
dronedeploy.com/app2/sites/1234567890abcdef12345678/..., the project ID is1234567890abcdef12345678. -
Select "Upload 360° photos to DroneDeploy" option.
-
Click the "Save" button.
For complete instructions on how to fully integrate with DroneDeploy, see DroneDeploy Integration.
In Karelics сloud Operator hub
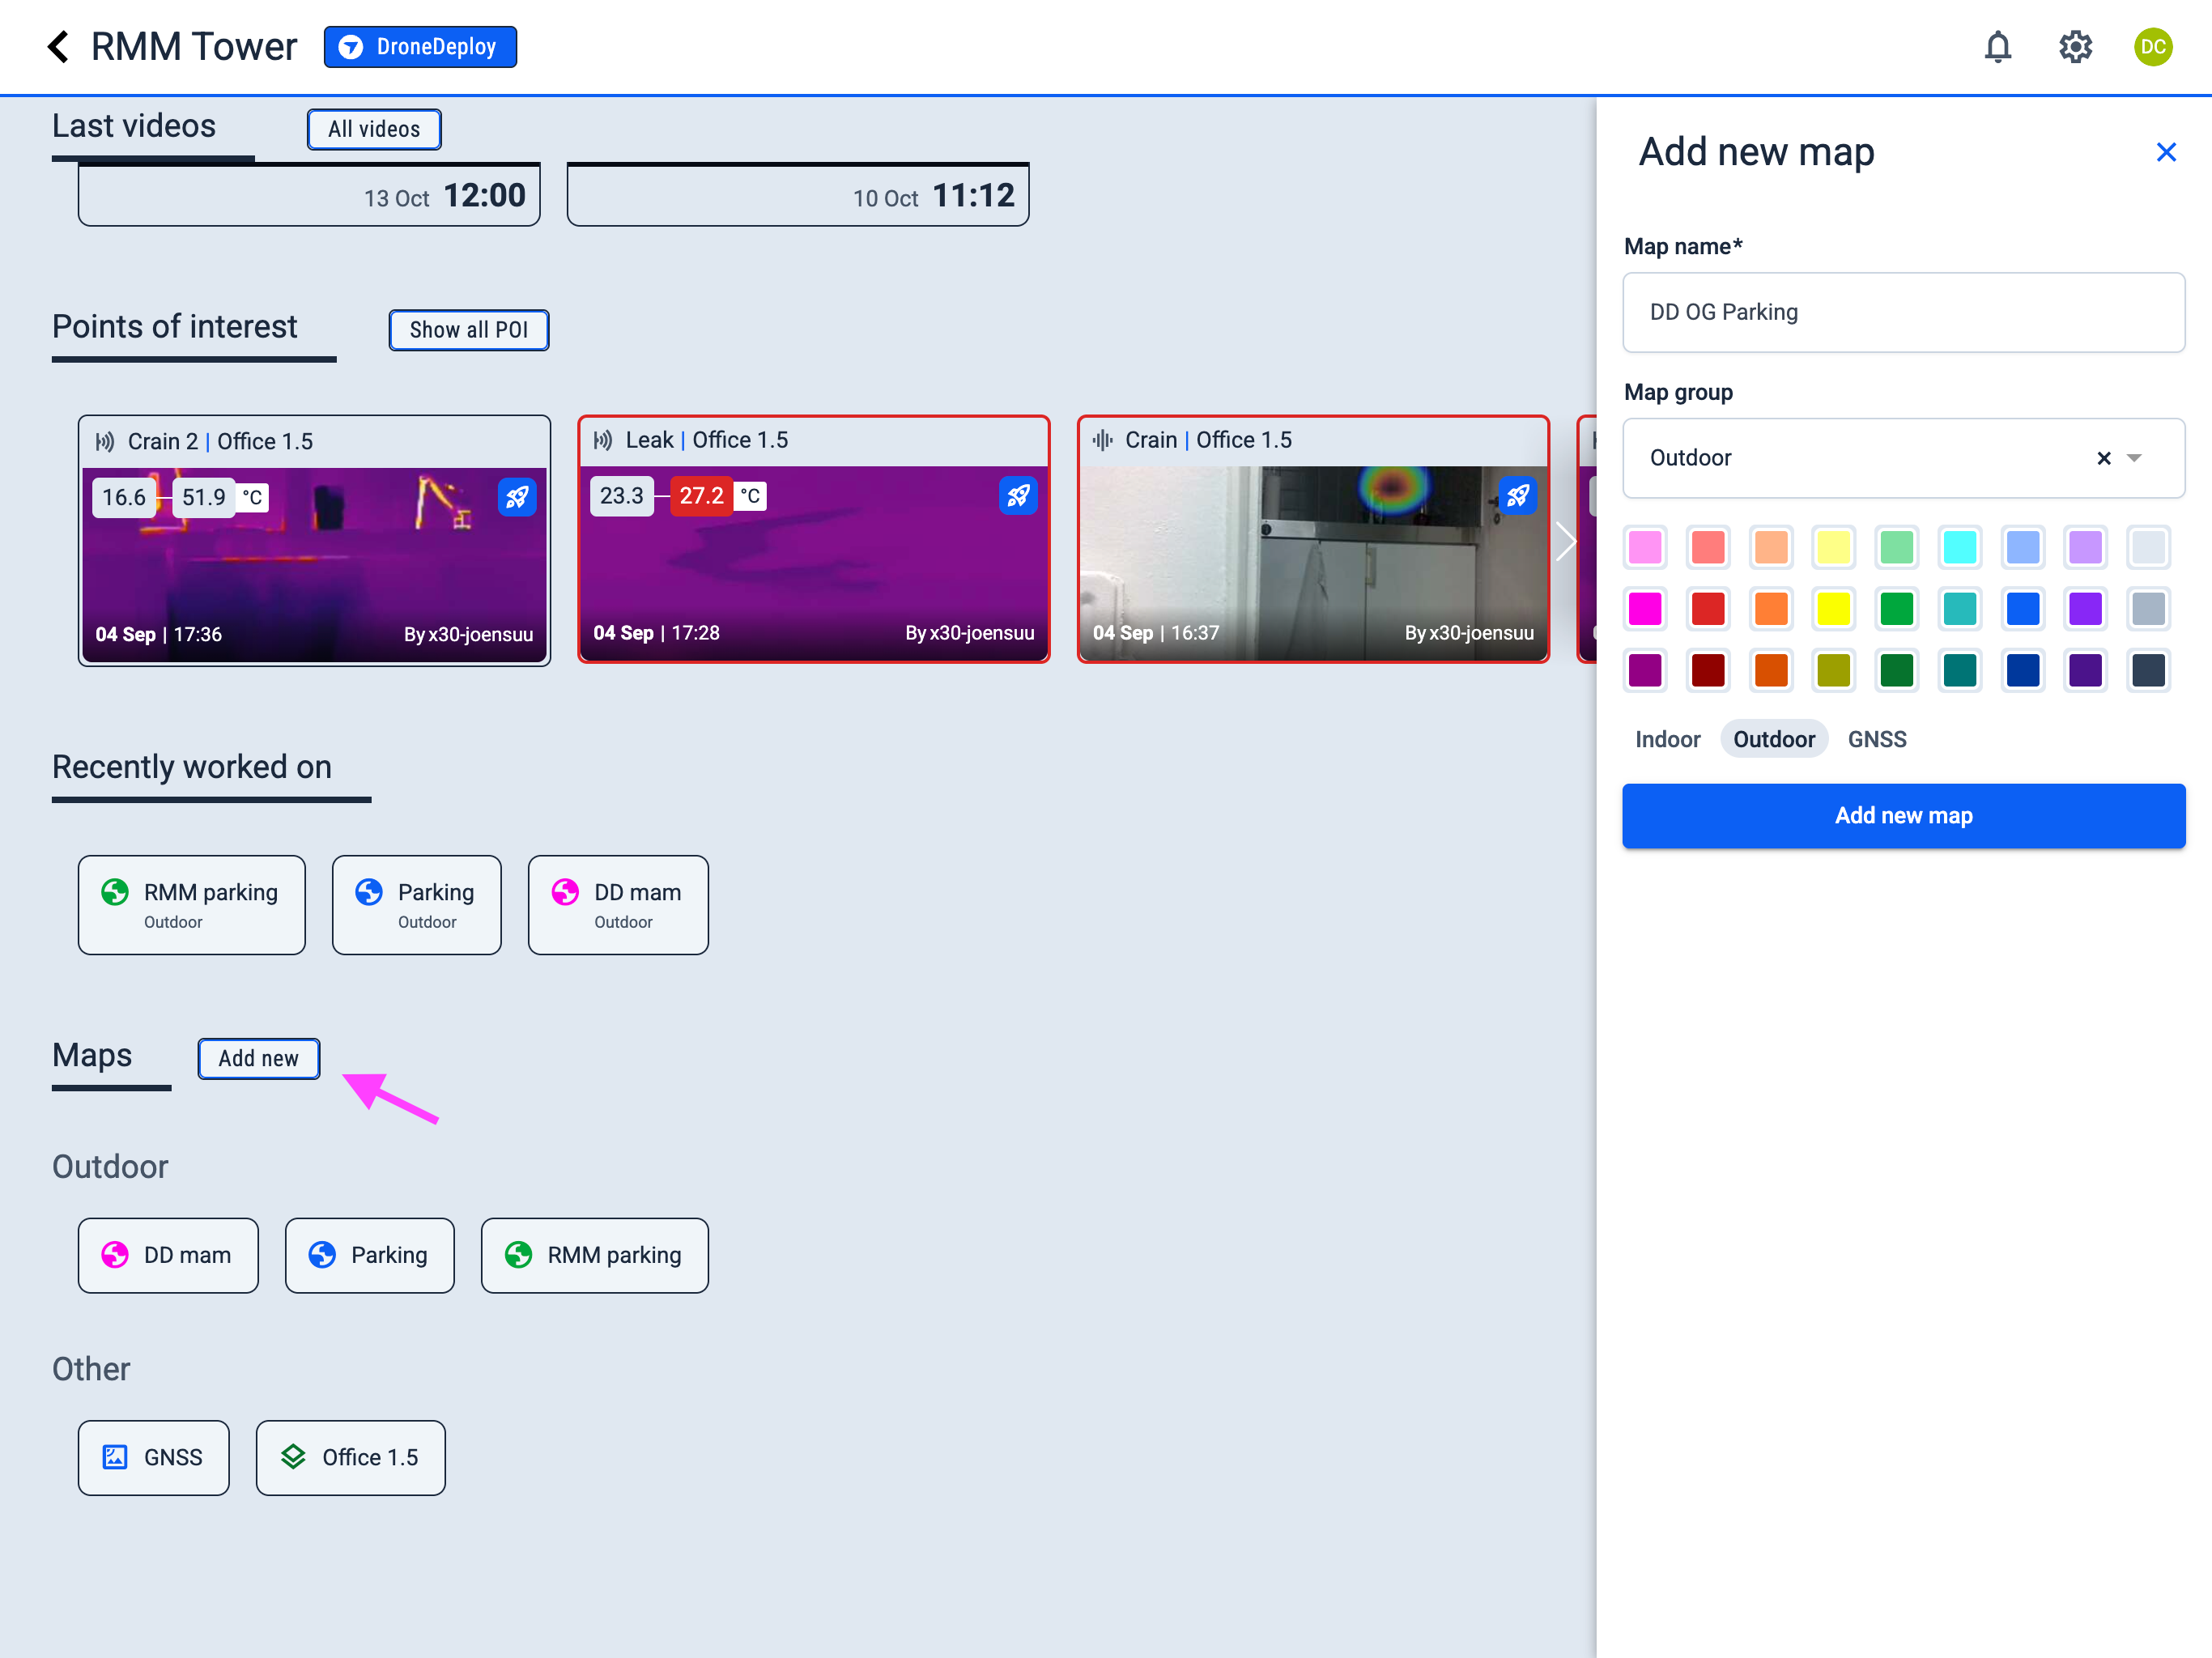
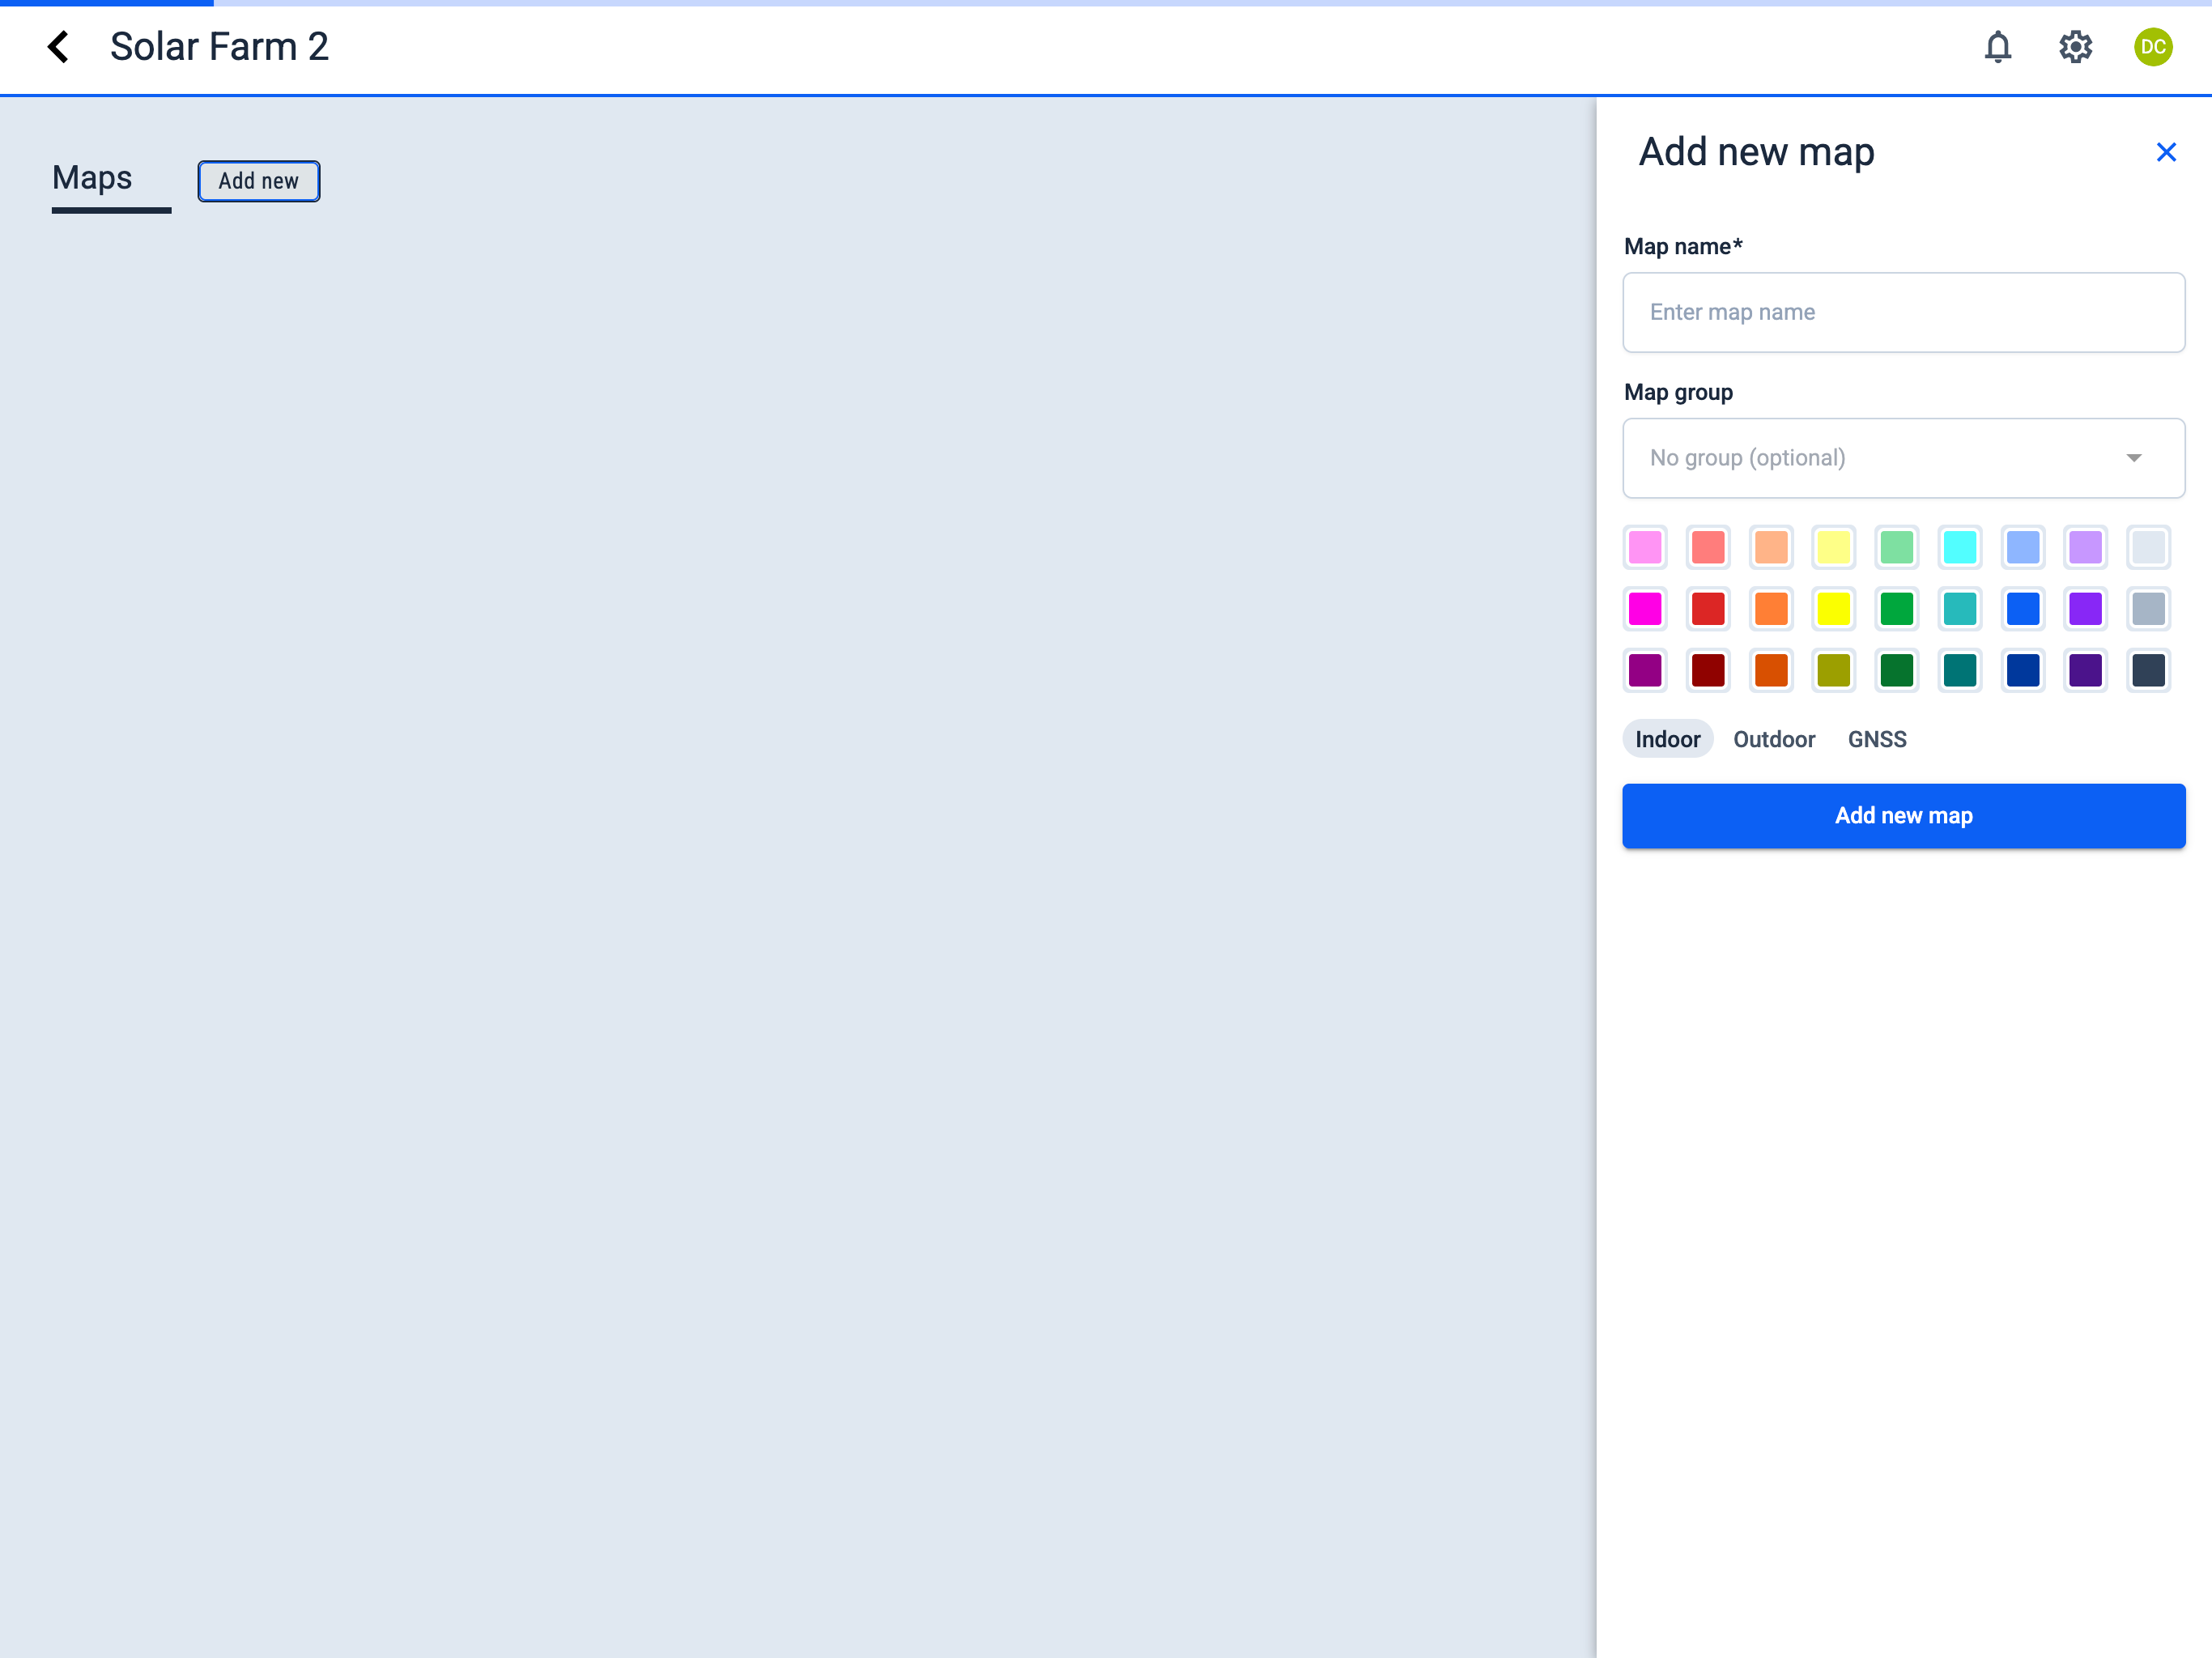
1. In the project, add a new Outdoor map.
Navigate to the following path:
Operator Hub → Current Project → Add new map
- Click the Add new button next to the Maps section.
- In the sidebar, fill in the required fields:
- Map name
- Map group (optional) — To create a new group, simply type its name in this field. When you save the map, the new group will be created and the map will appear within it.
- Select color for the map icon (to help distinguish maps)
- Select map type:
layers Indoor
globe Outdoor
satellite GNSS
circle Pipe
- Click the Add new map button.
- Active Project
- New Project
2. Create the map with a robot or upload an existing one.
Navigate to the following path:
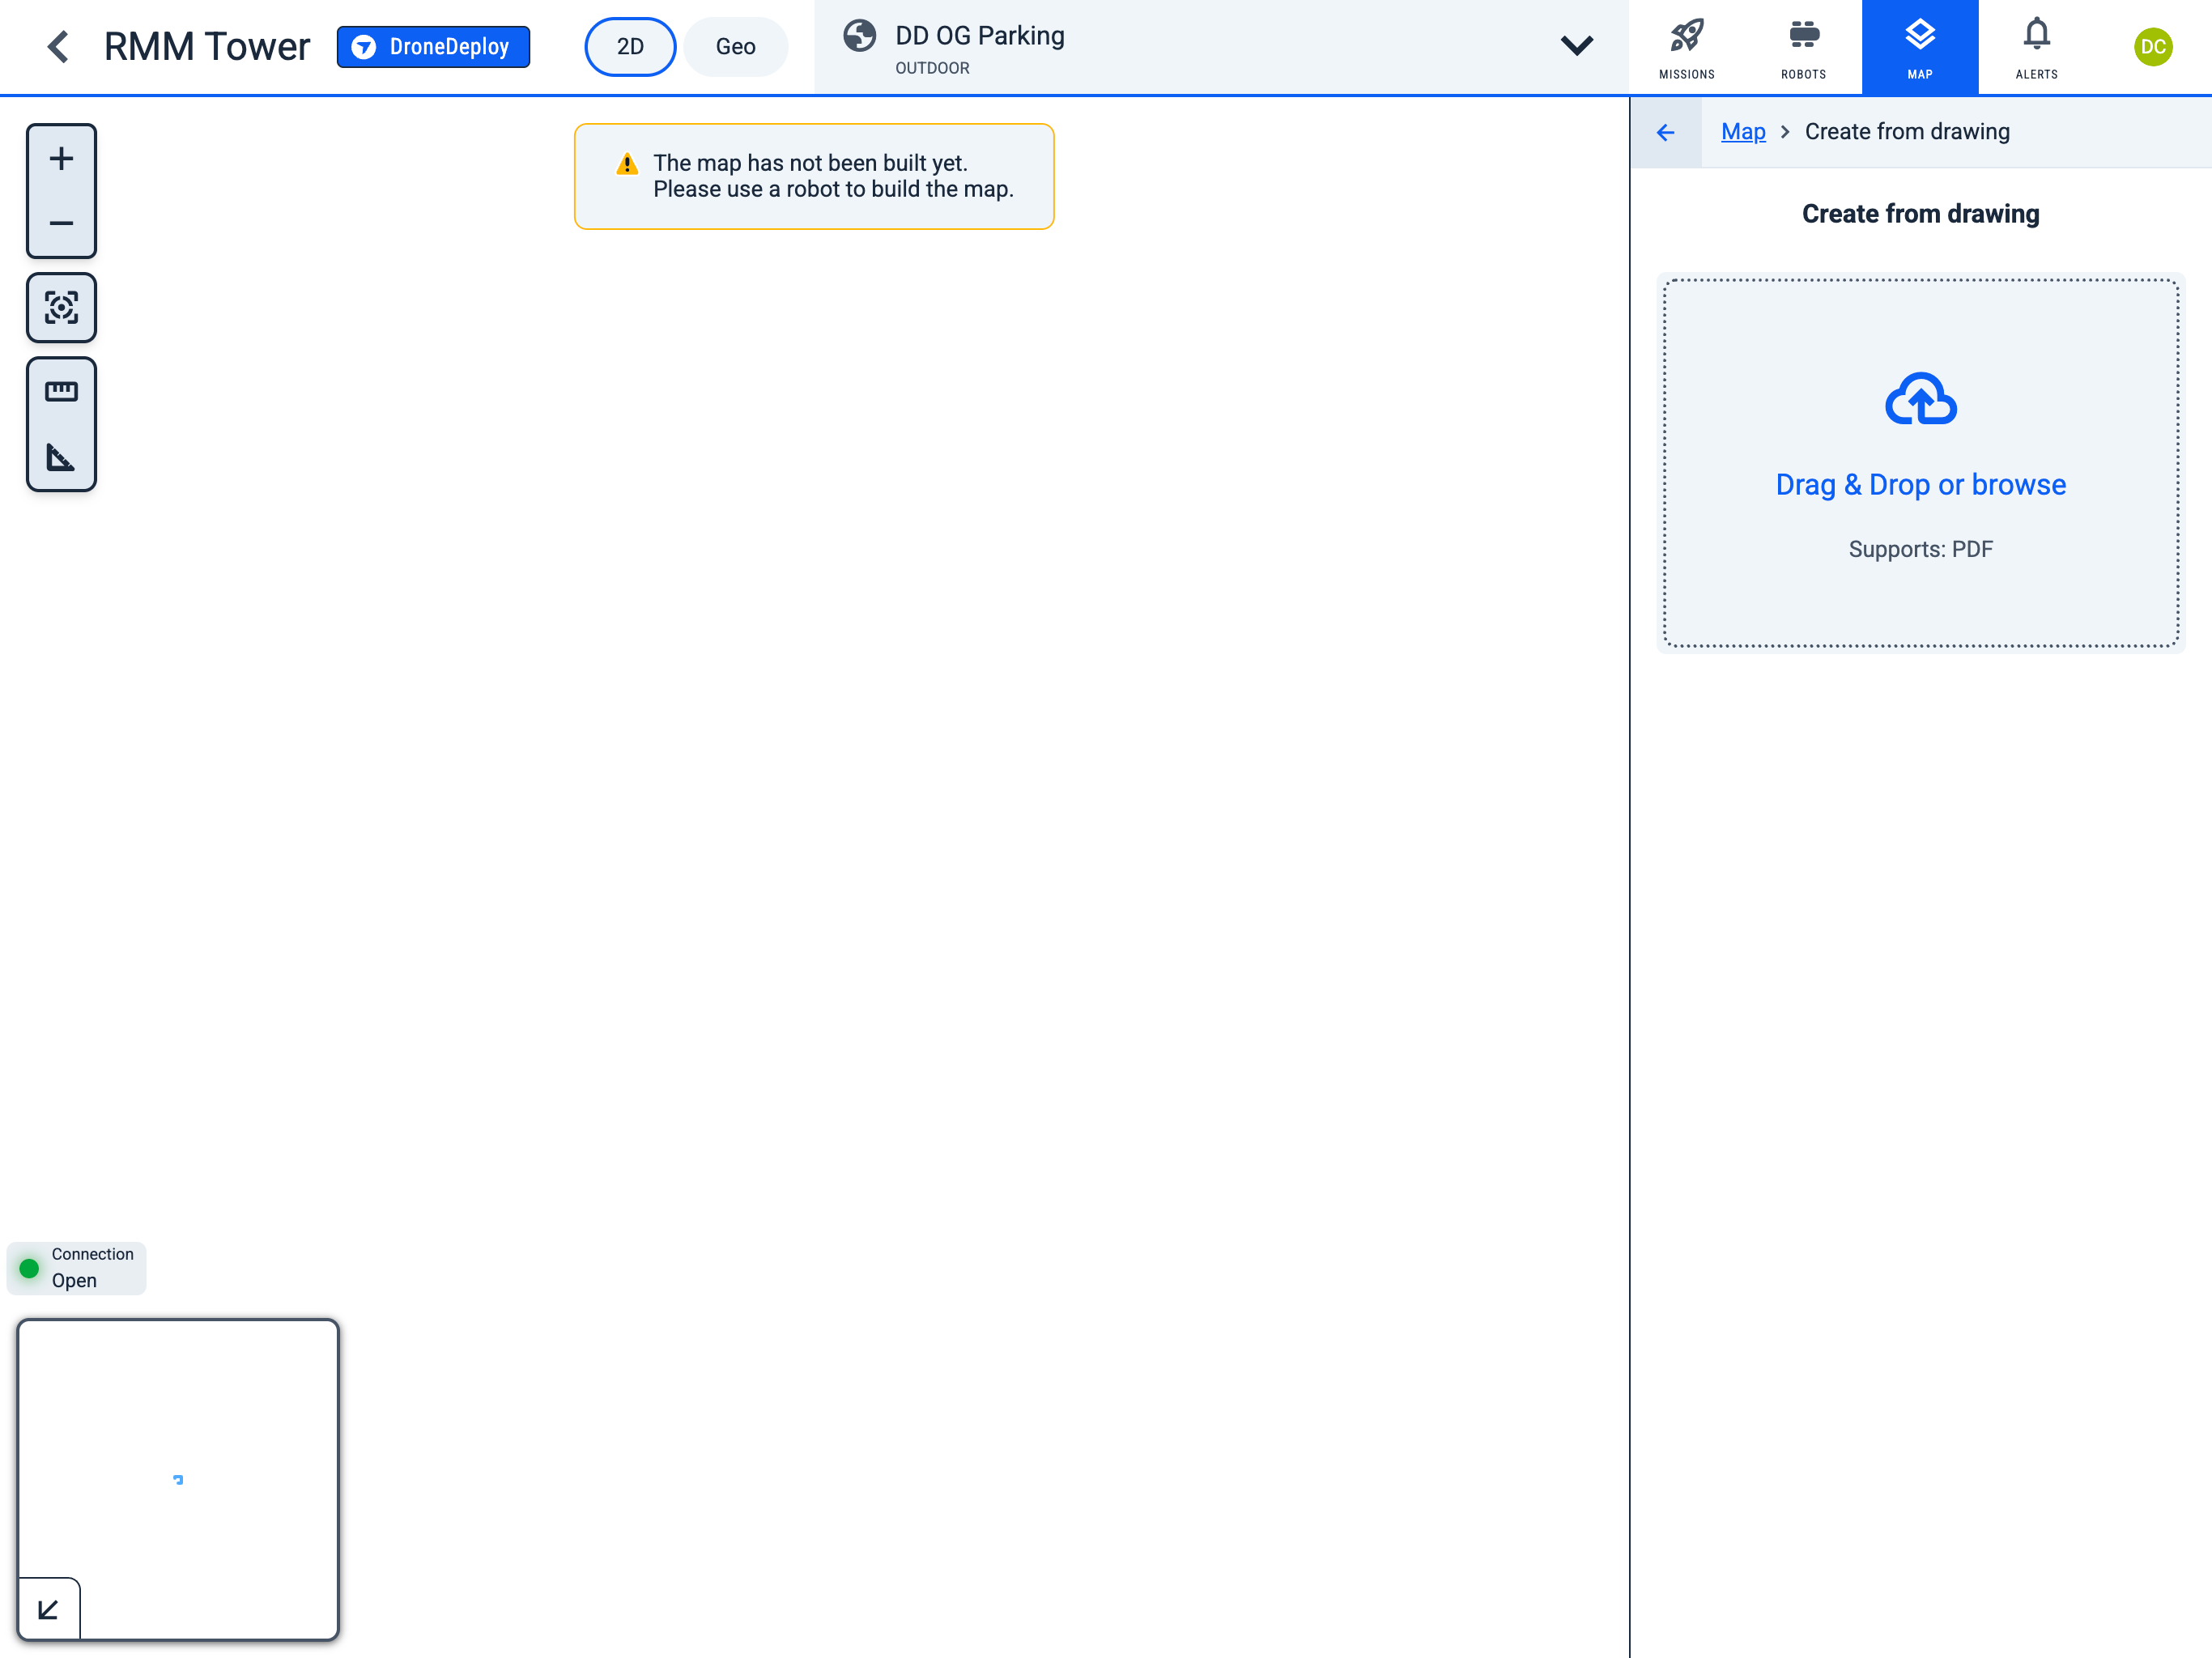
Operator Hub → Current Project → Workspace → Map → Upload from Drawing
-
To upload a map PDF file, use the "Drag & Drop or browse" window to either drag and drop a file into the area, or click the window to select a file from the desired folder.
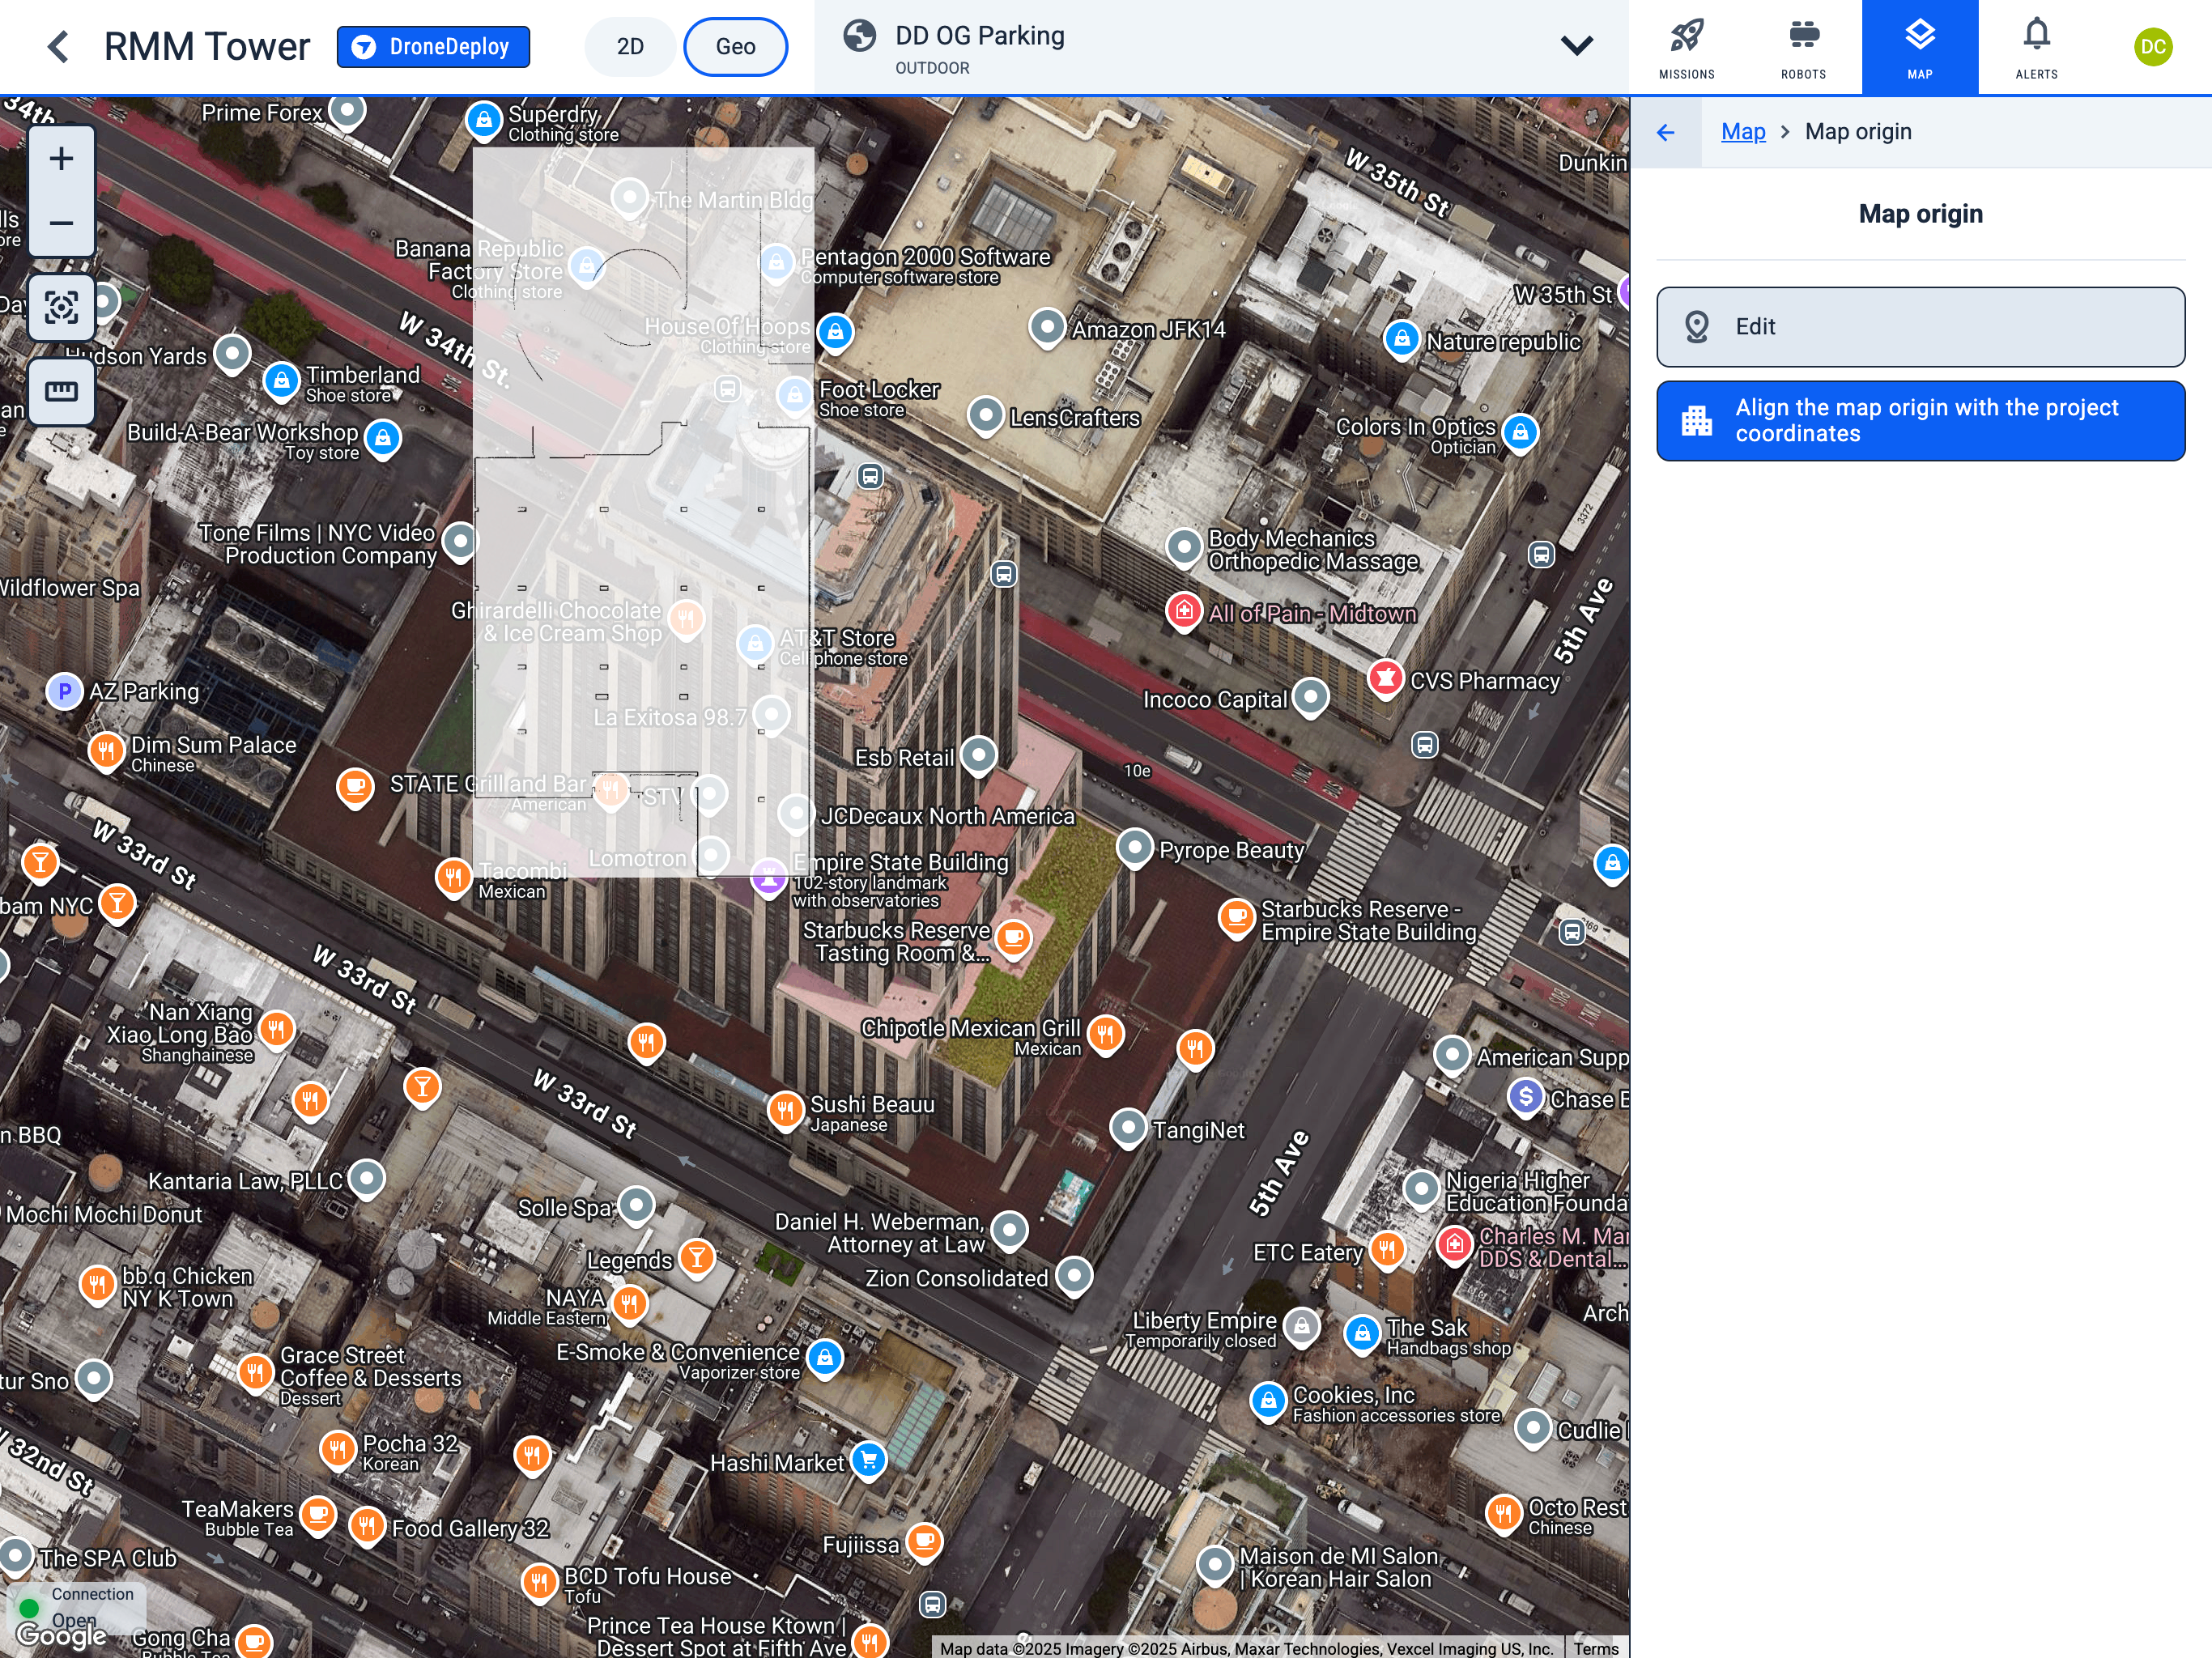
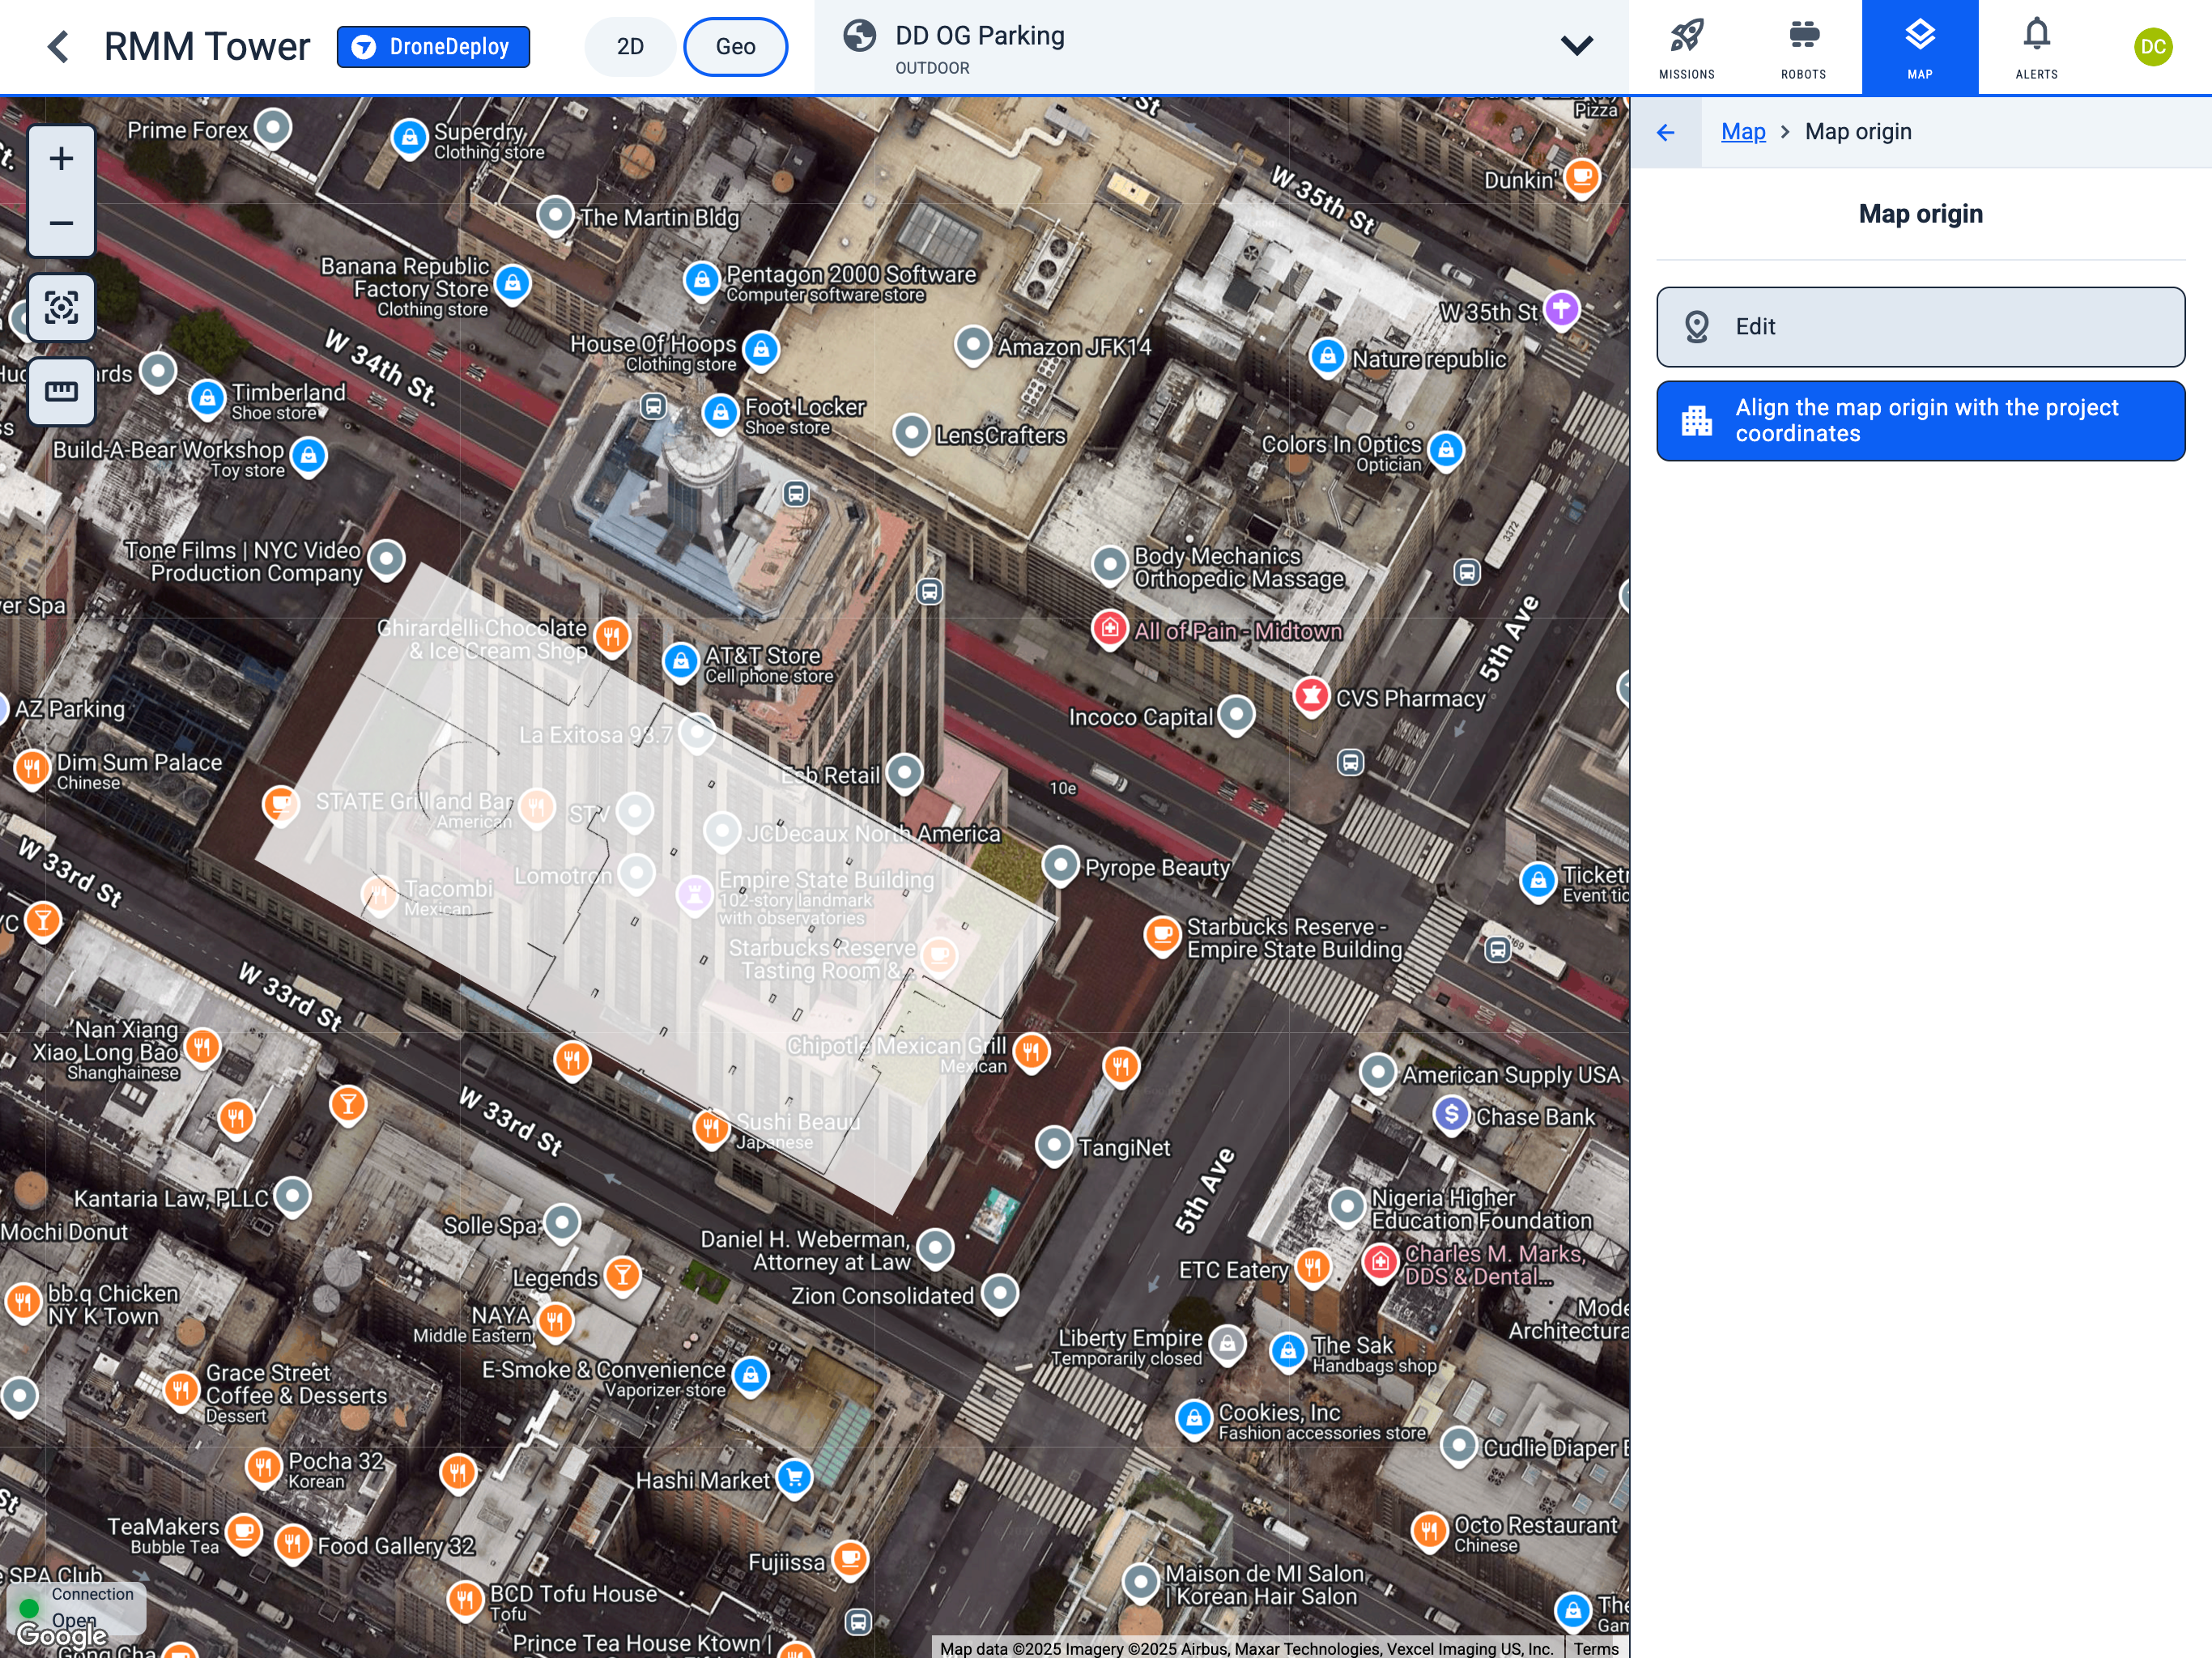
3. Position the map correctly on the GEO view.
Navigate to the following path on the GEO view:
Operator Hub → Current Project → Workspace → Map → Map origin in Geo view
-
Click the "Align the map origin with the project coordinates" button to automatically center the map in the Geo view.
-
Click the "Edit" button to modify the position of the map in the GEO view.
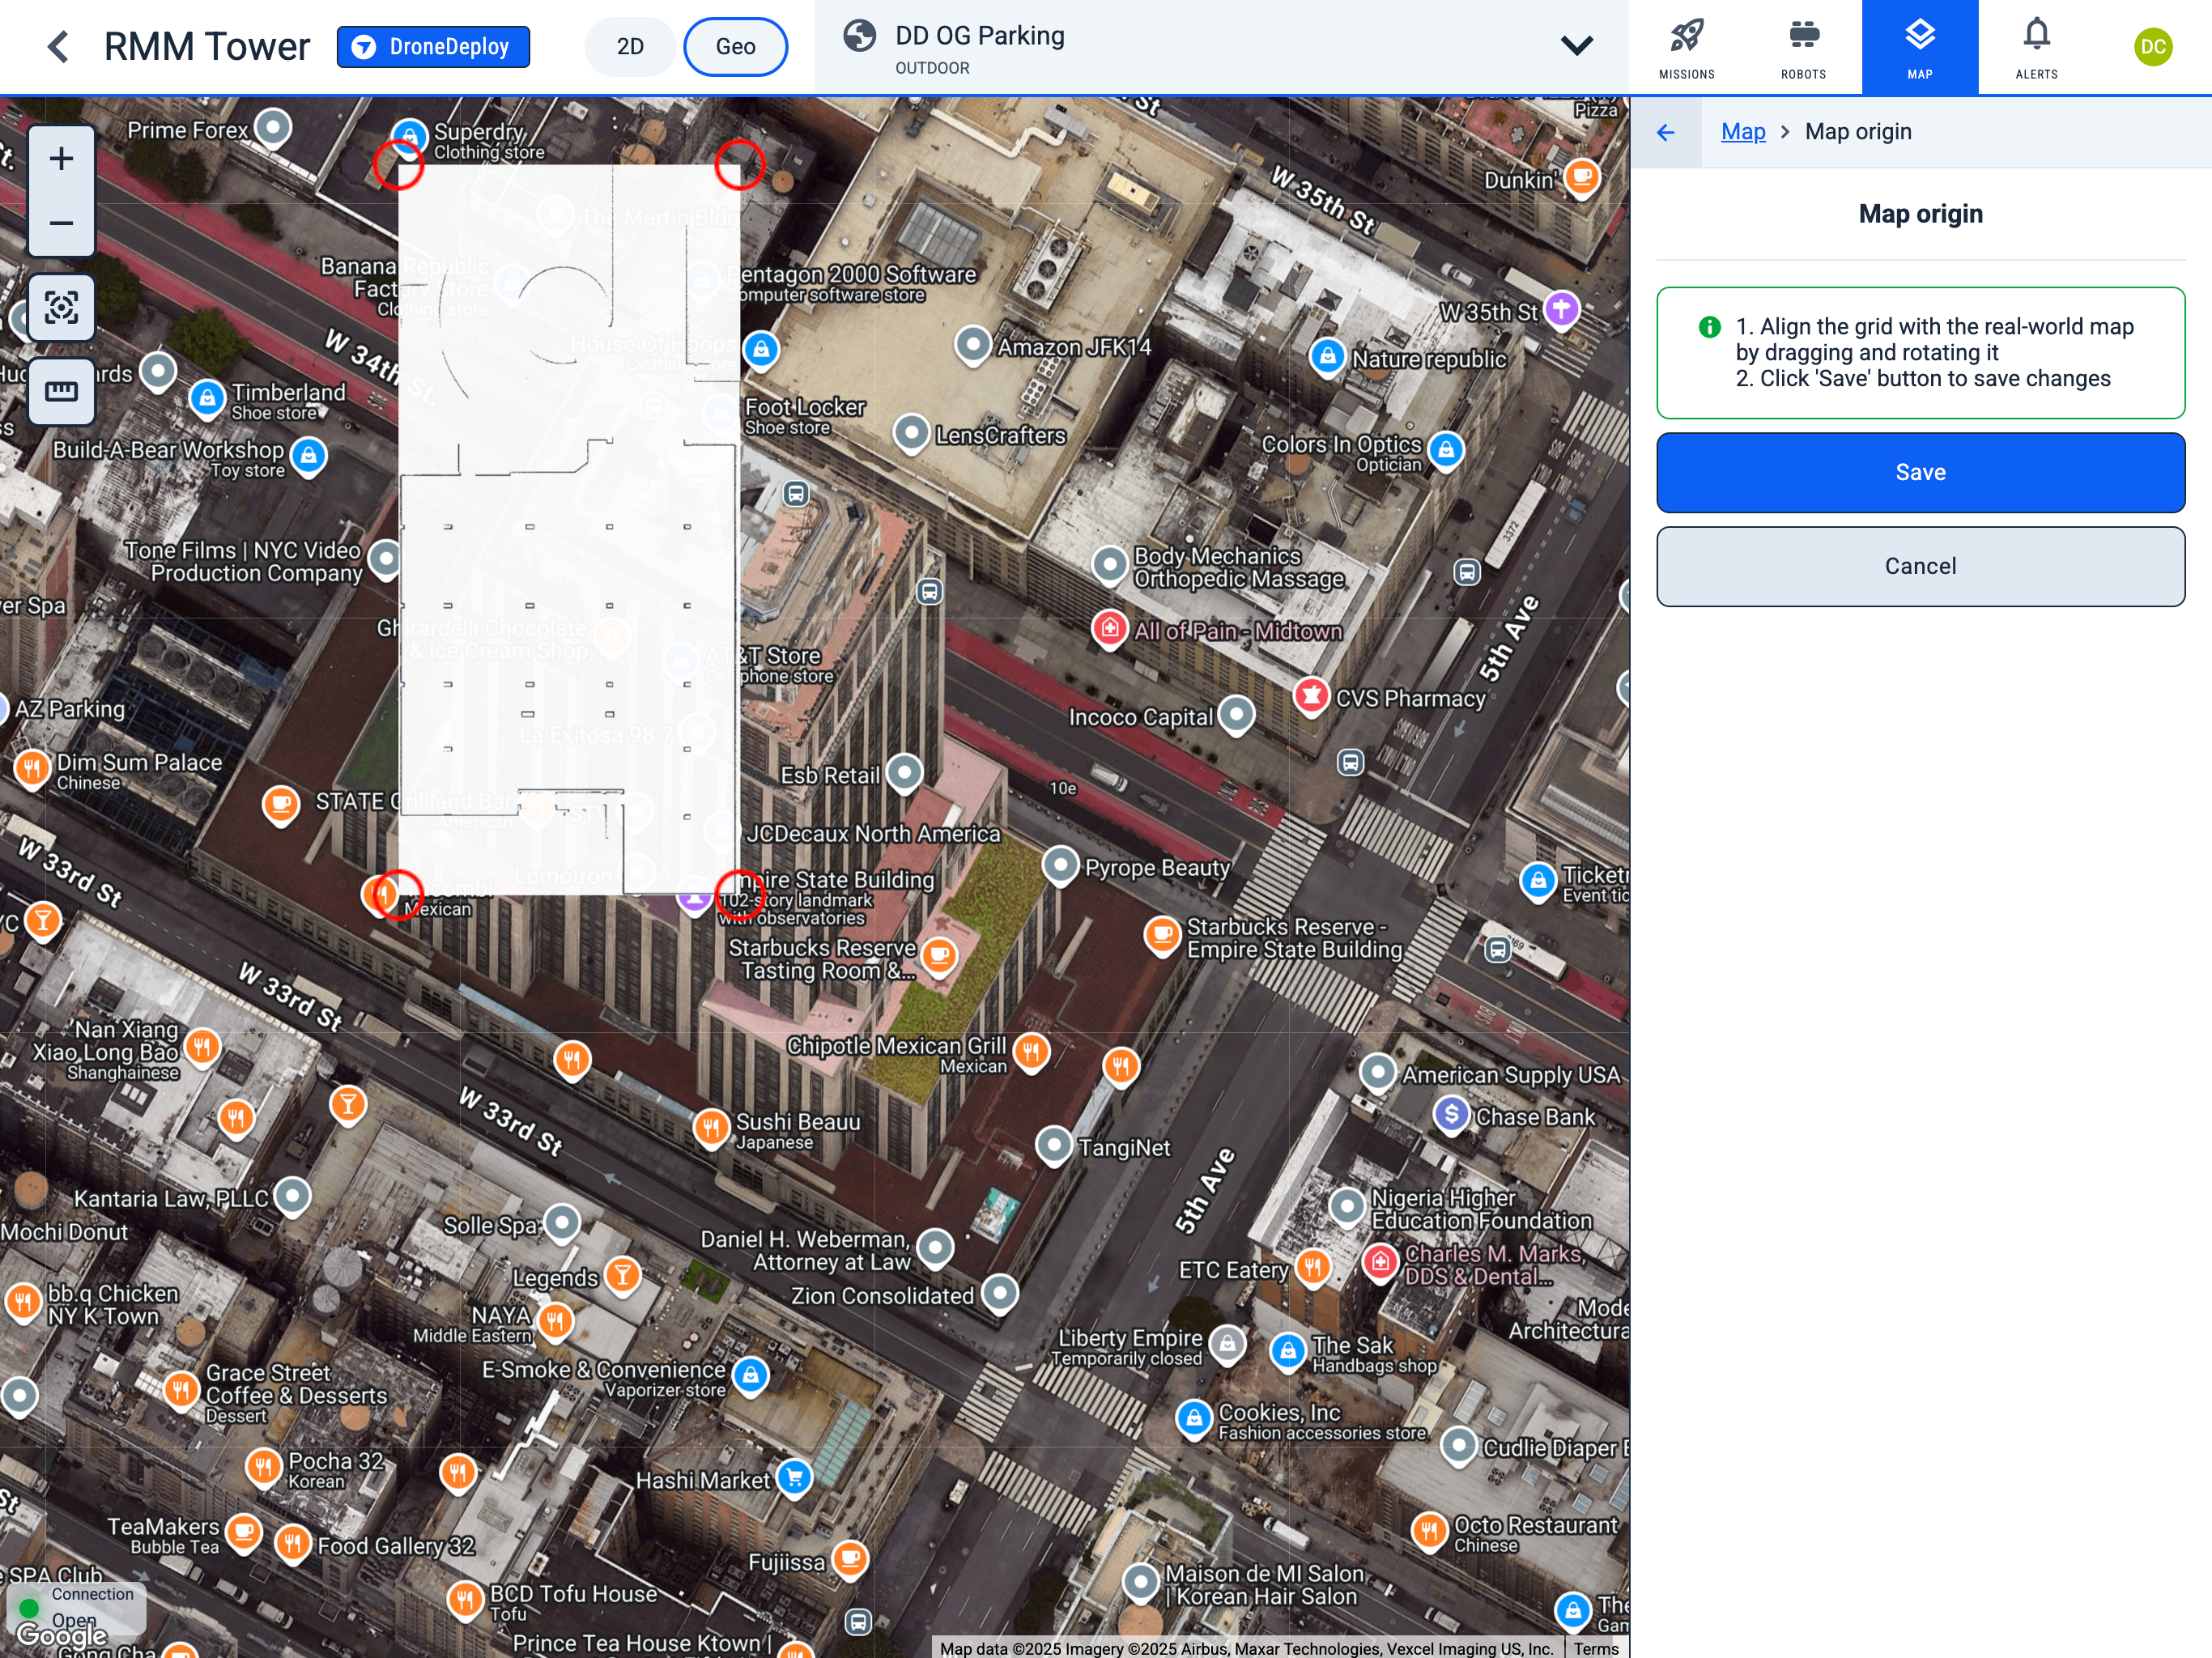
-
Align the grid with the real-world map by dragging and rotating it. (You cannot change the map size, as it is the real size of the map)
-
Click "Save" button to save changes.
-
During the map movement and rotation, you will see its original position.
-
After setting the map to the desired place, click the "Save" button to save changes.
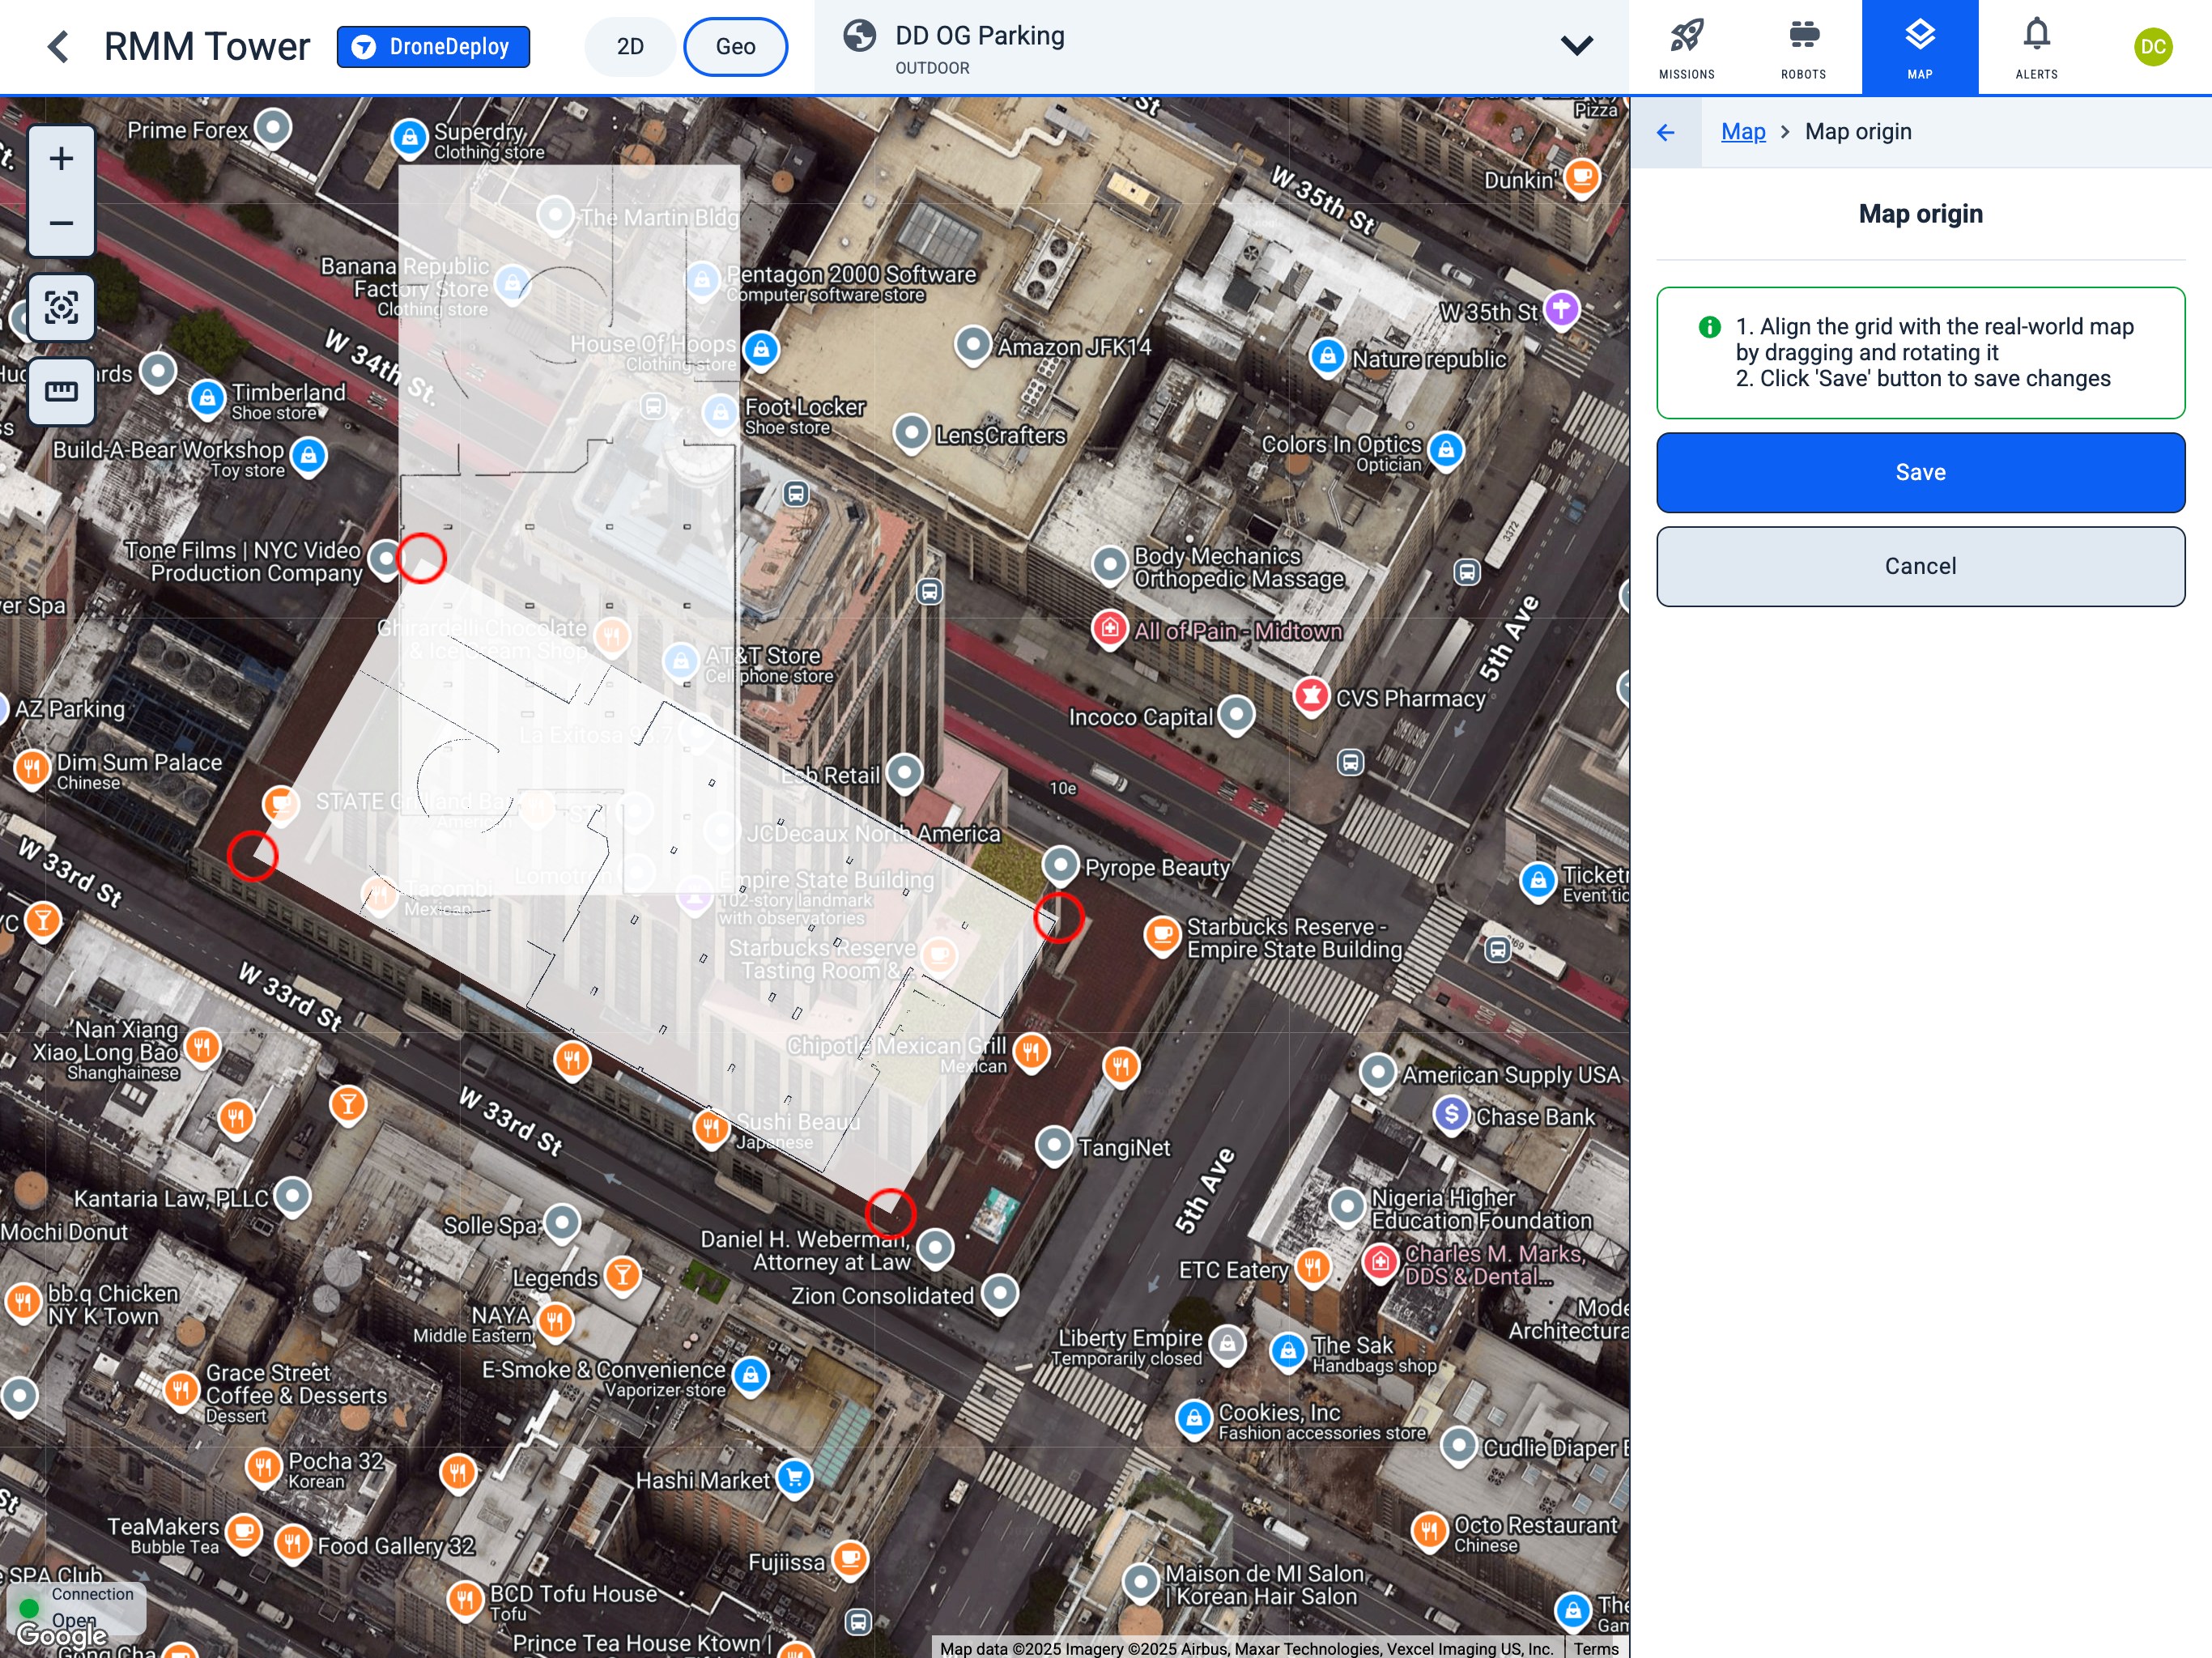
-
After saving, you will see the map in its new position.
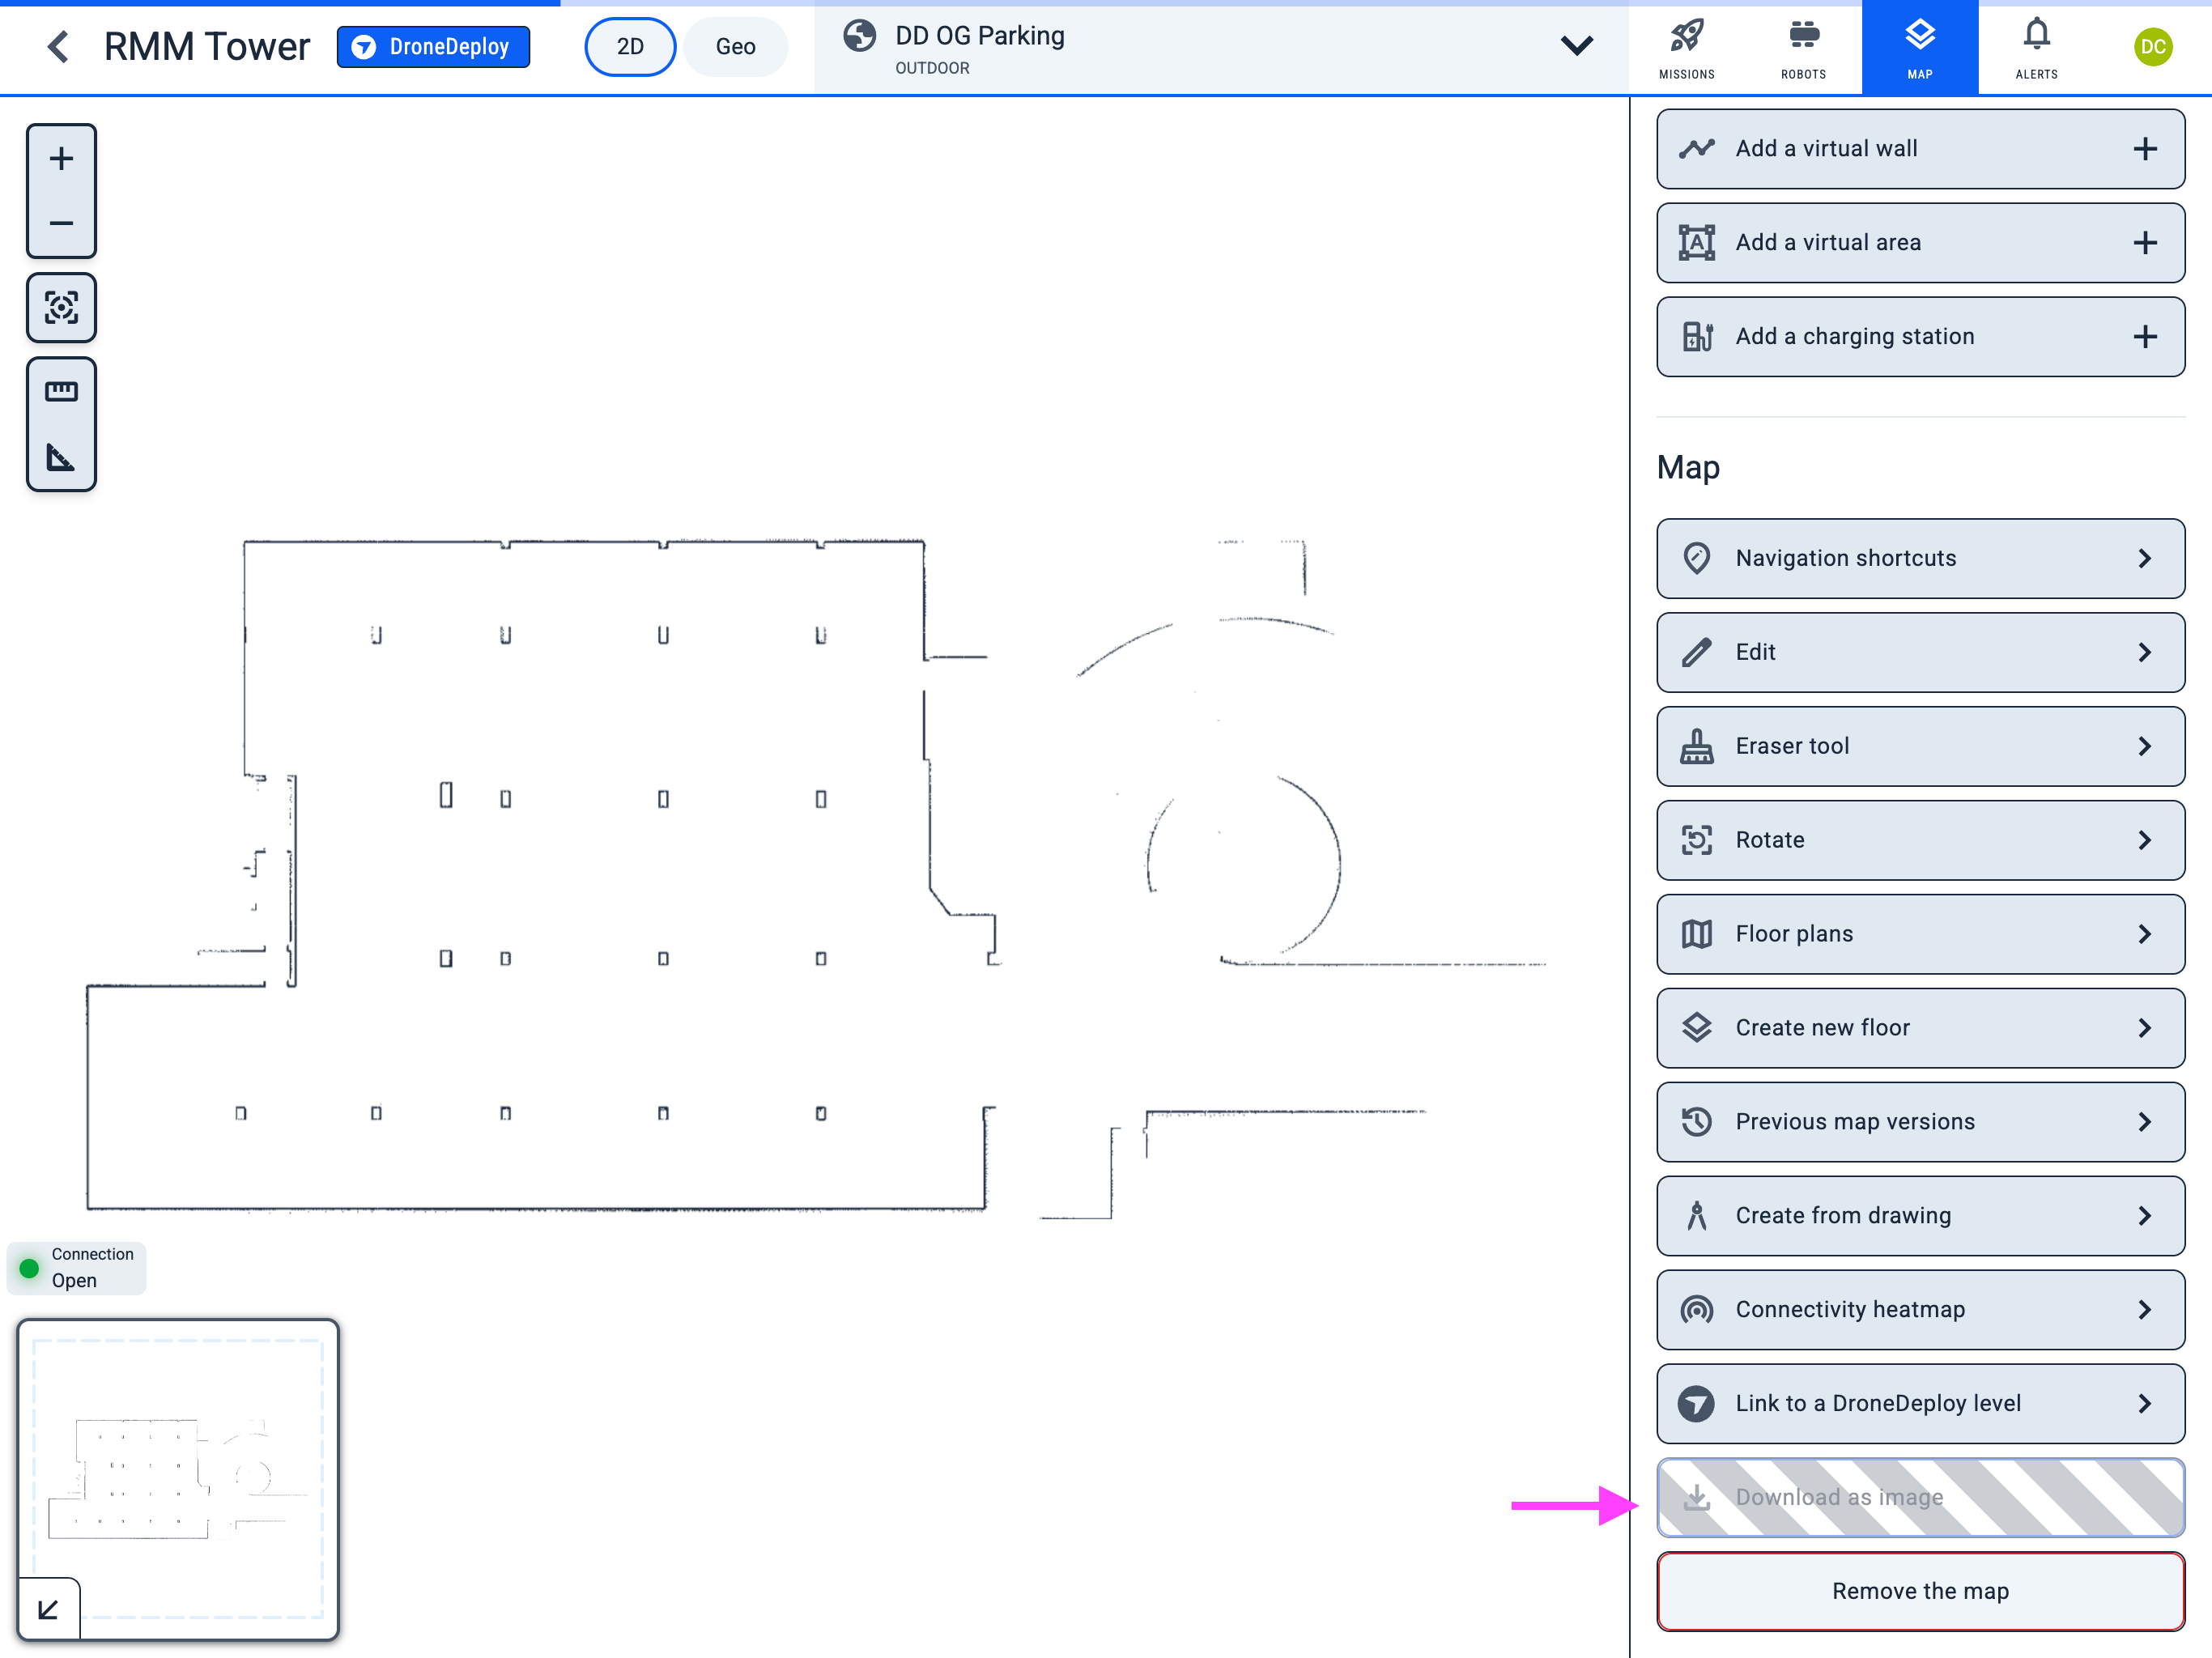
4. Download the map on the map 2D view.
Navigate to the following path:
Operator Hub → Current Project → Workspace → Map → Download map
-
Click the "Download as image" button to download the map as an image in .png format.
In DroneDeploy
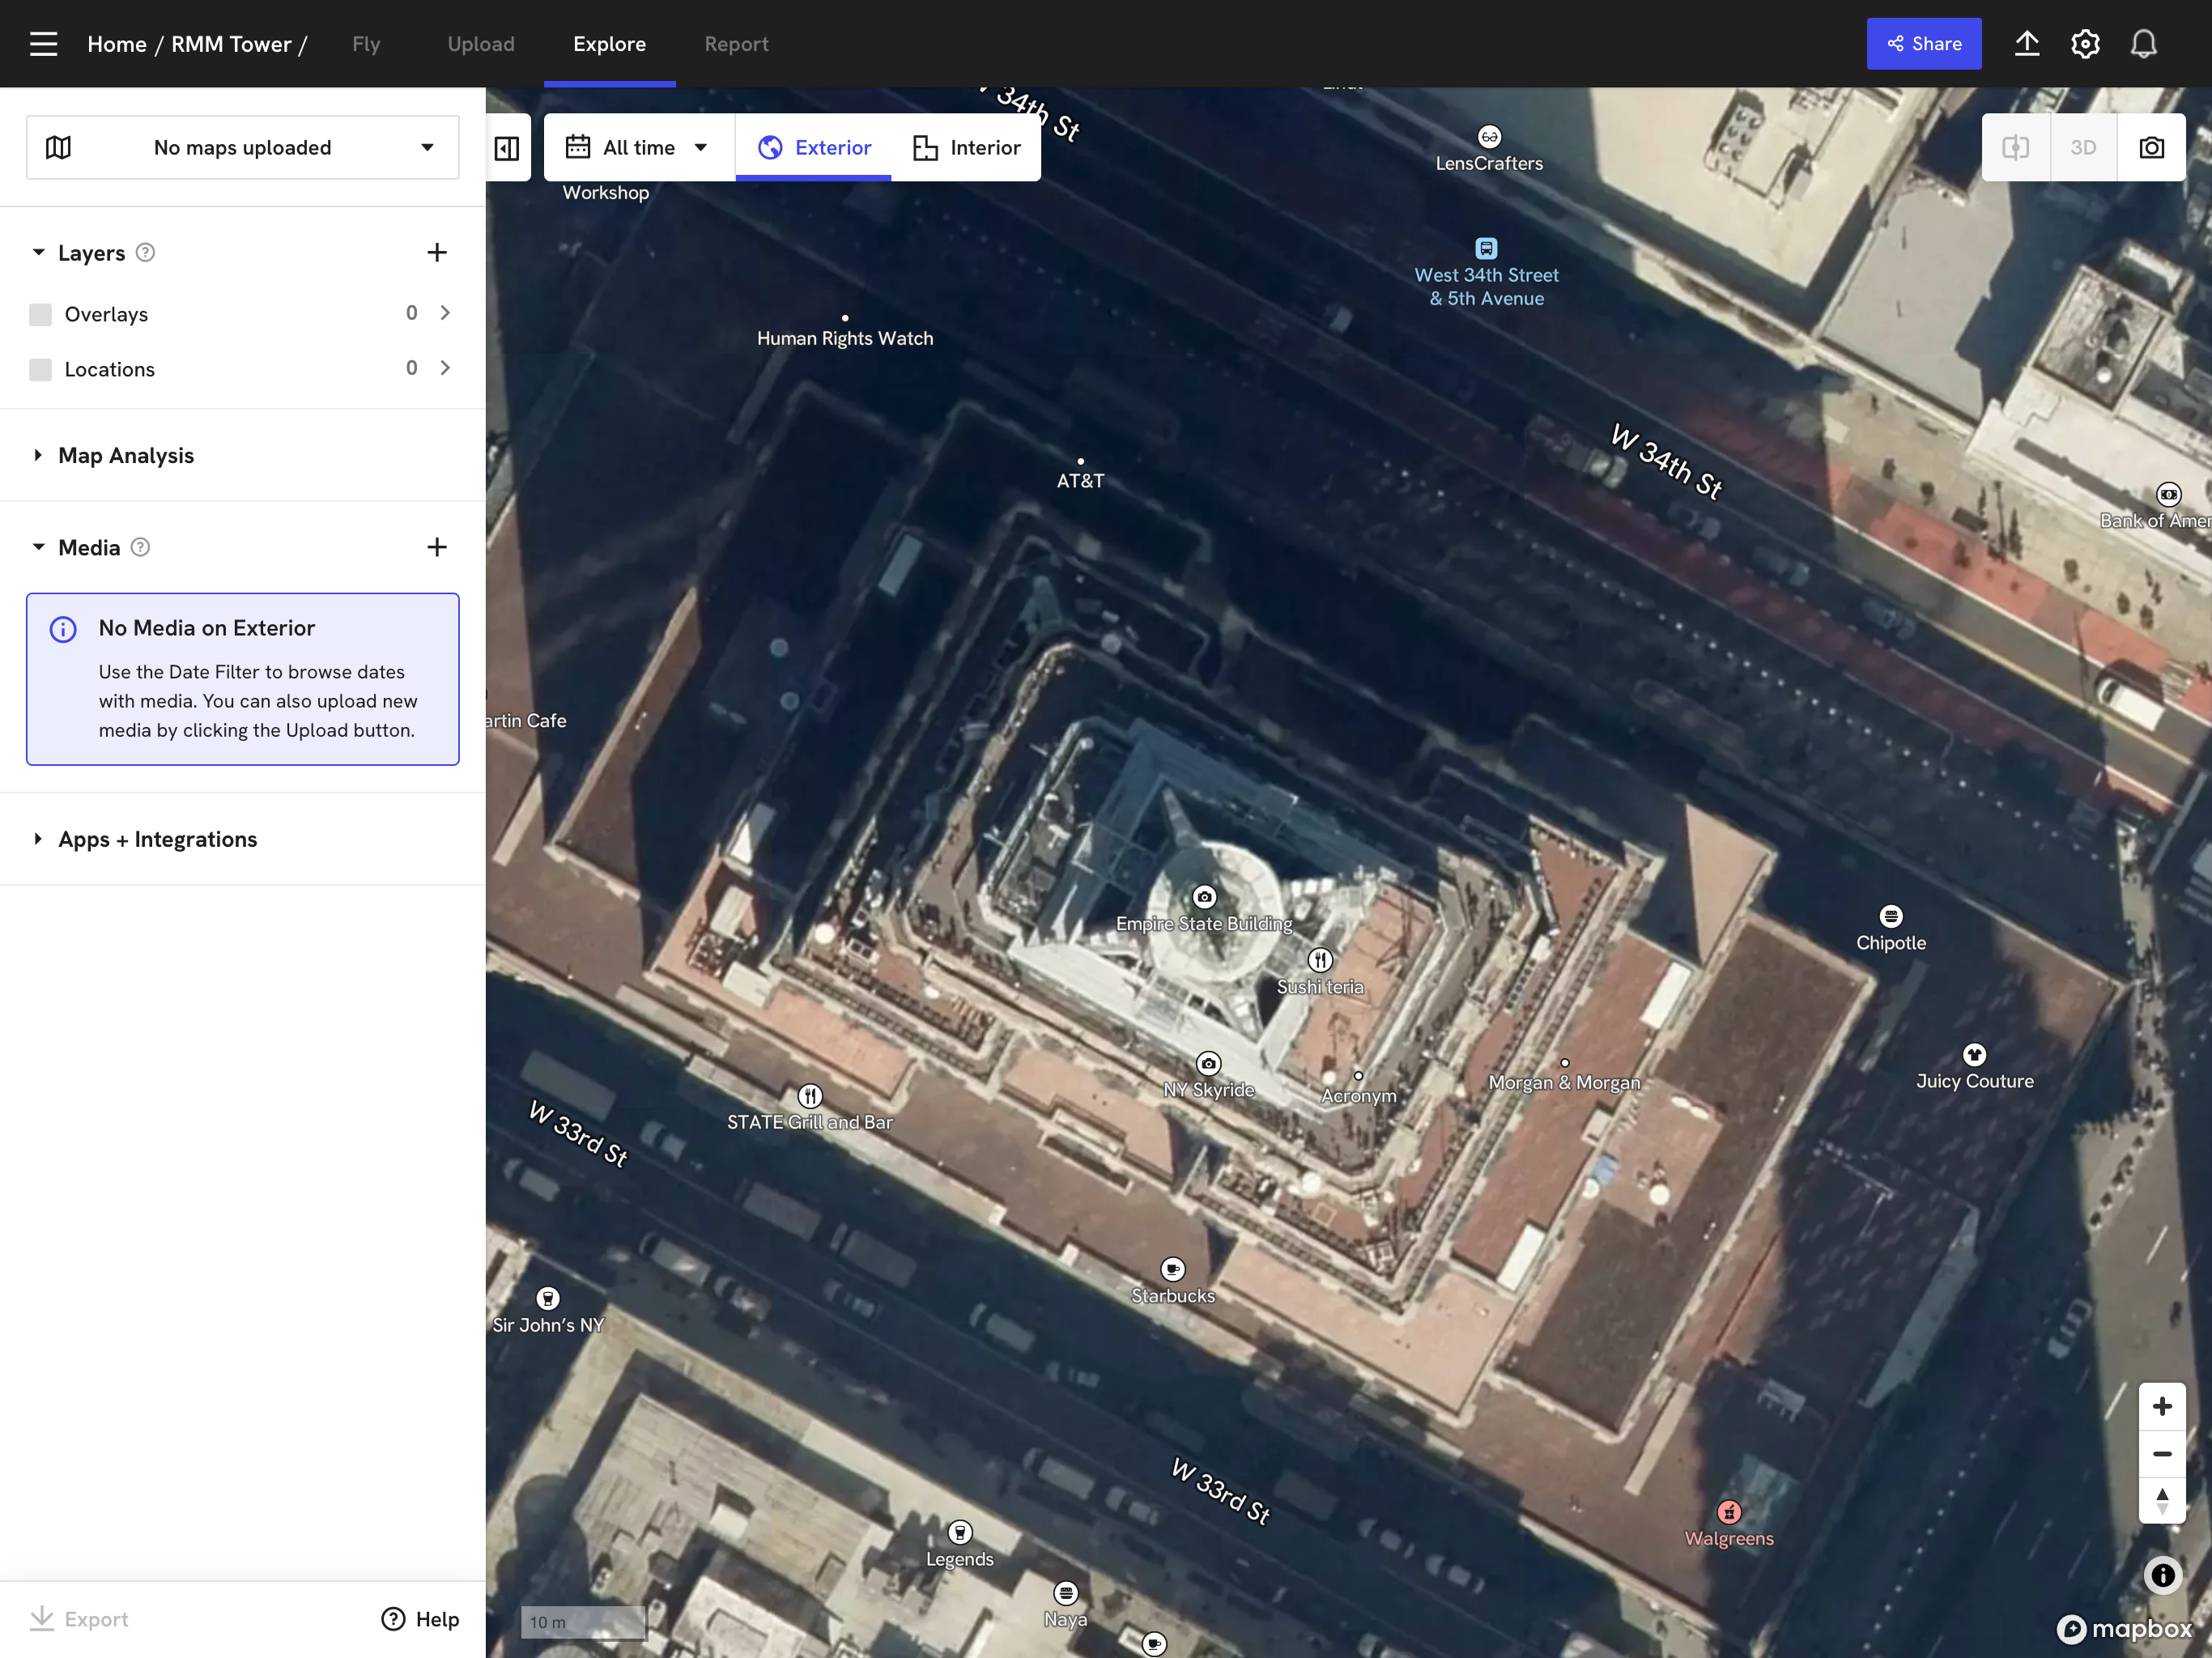
1. Exterior mode
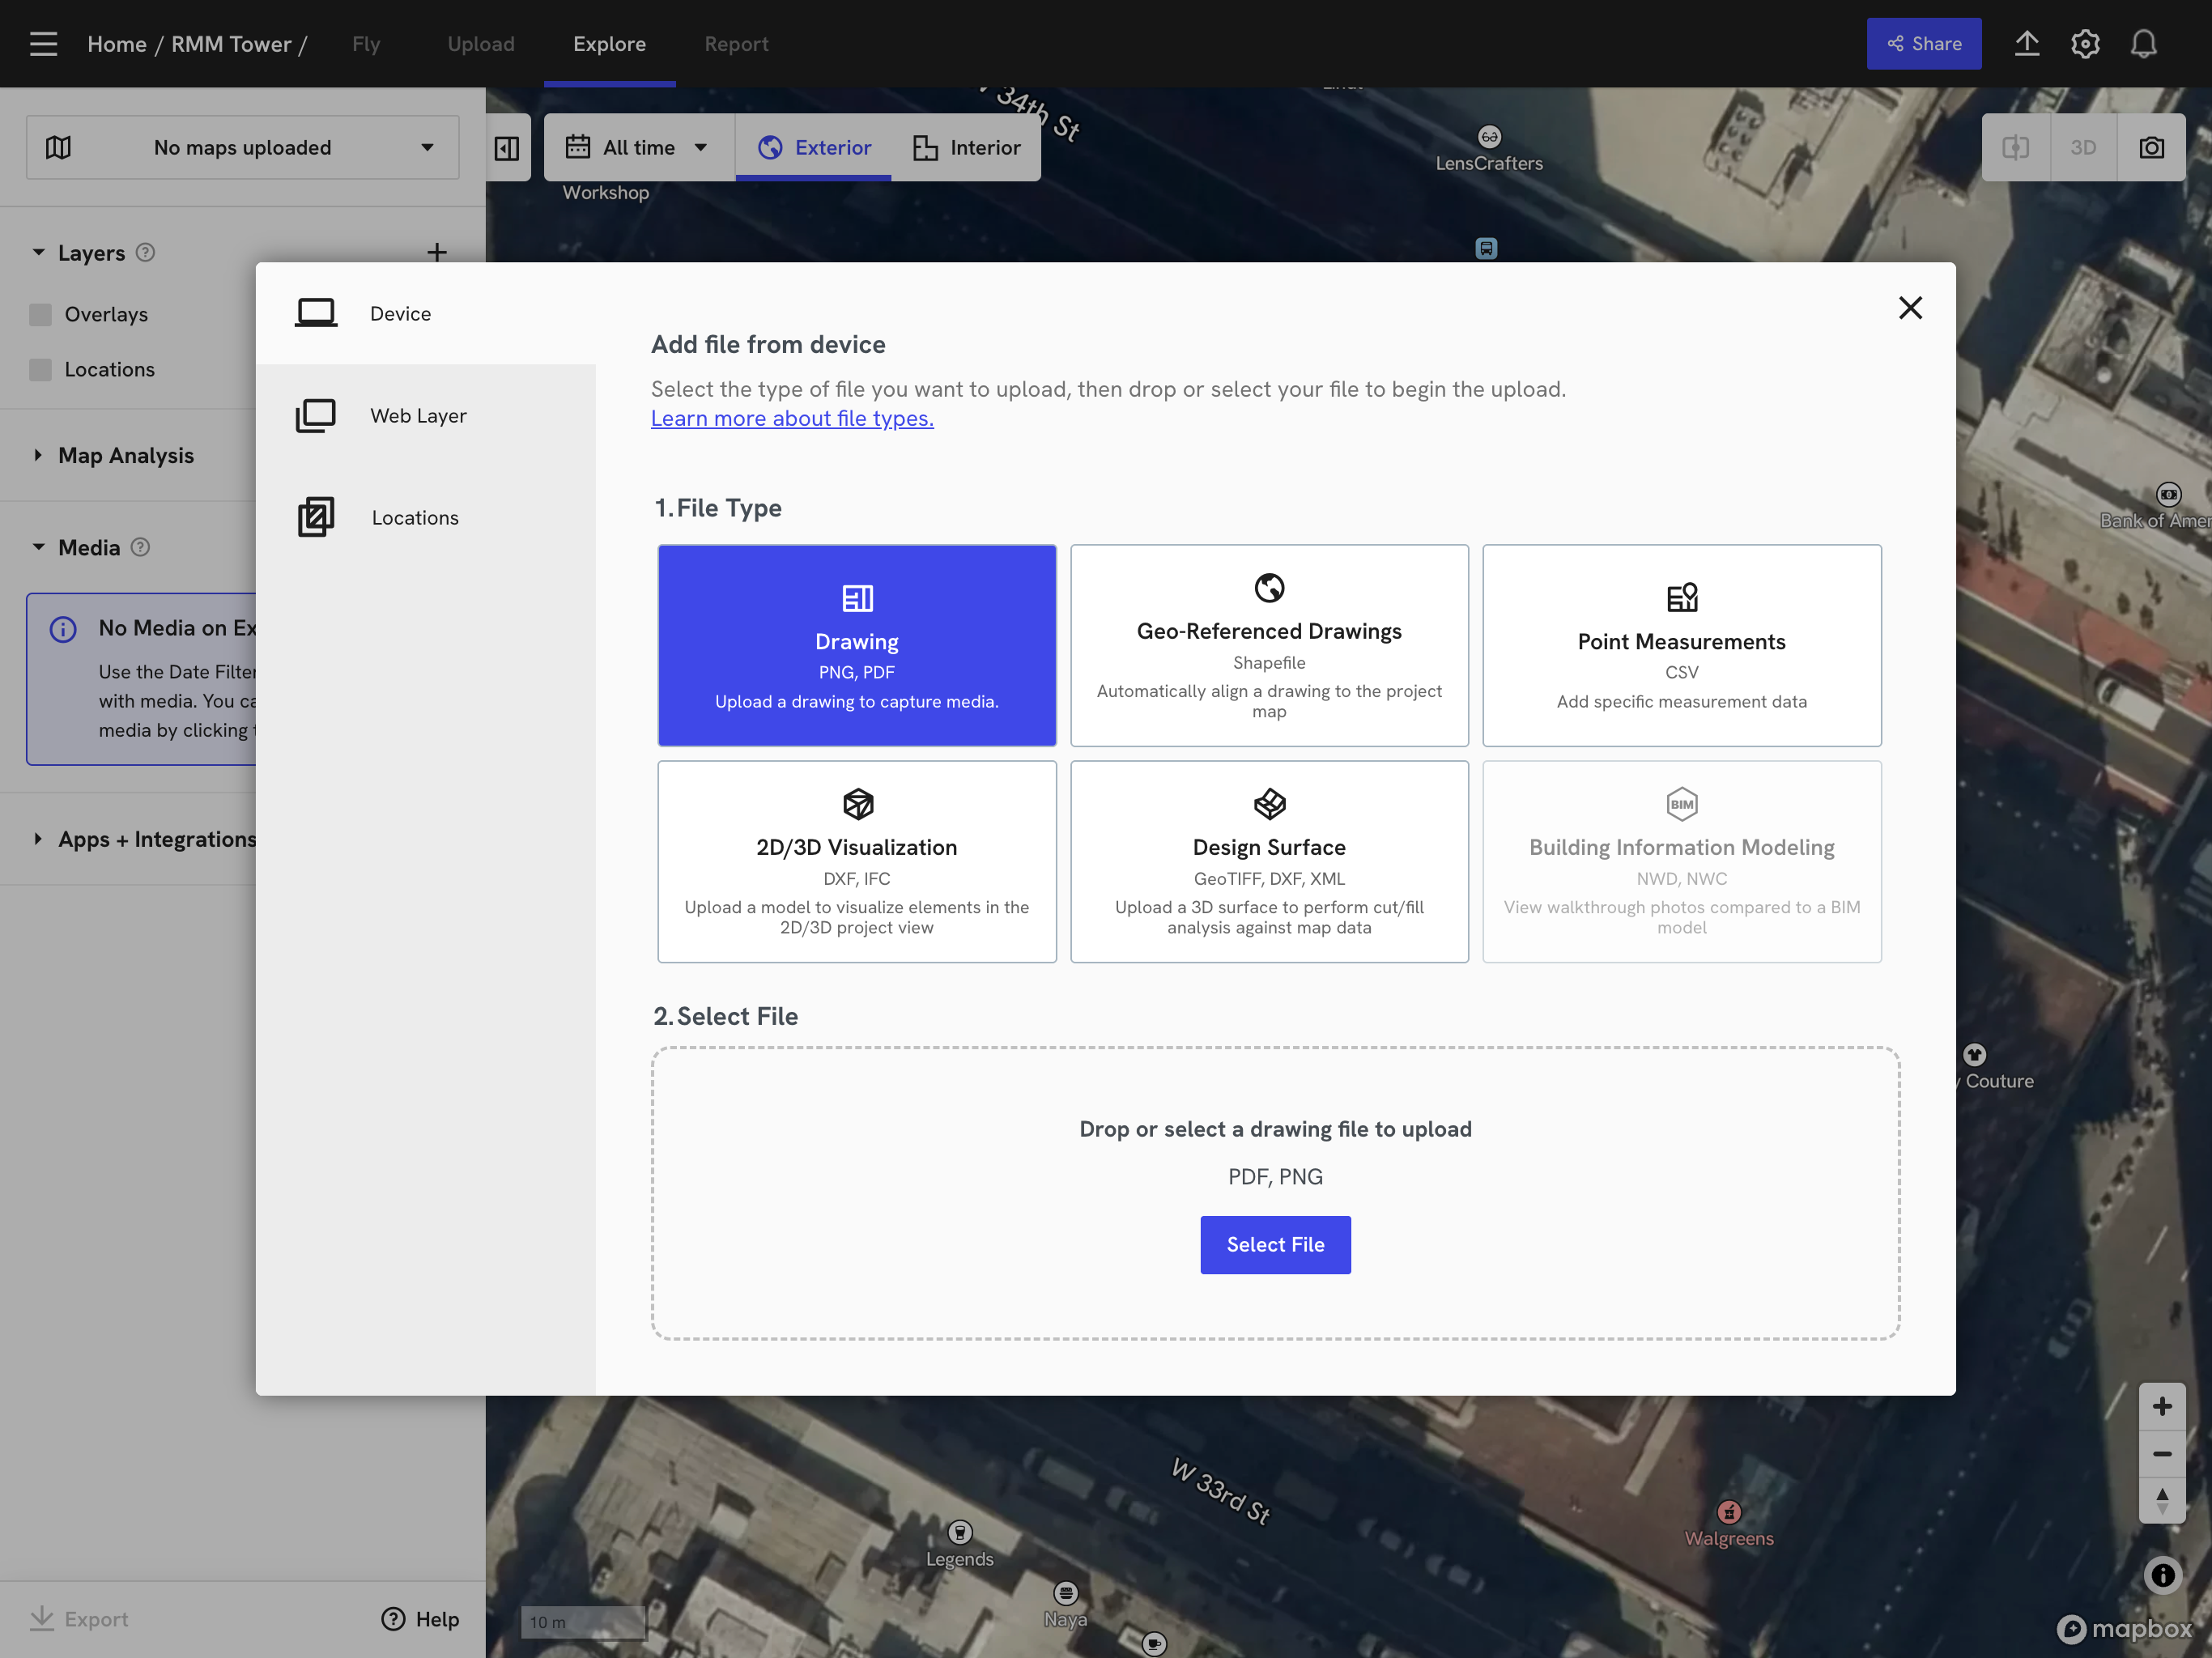
-
Add a new layer to the map.
-
Select the map layer in PNG format that you downloaded from Karelics Cloud.
-
Follow the instructions in the DroneDeploy app to position the map exactly as it was in Karelics Cloud.
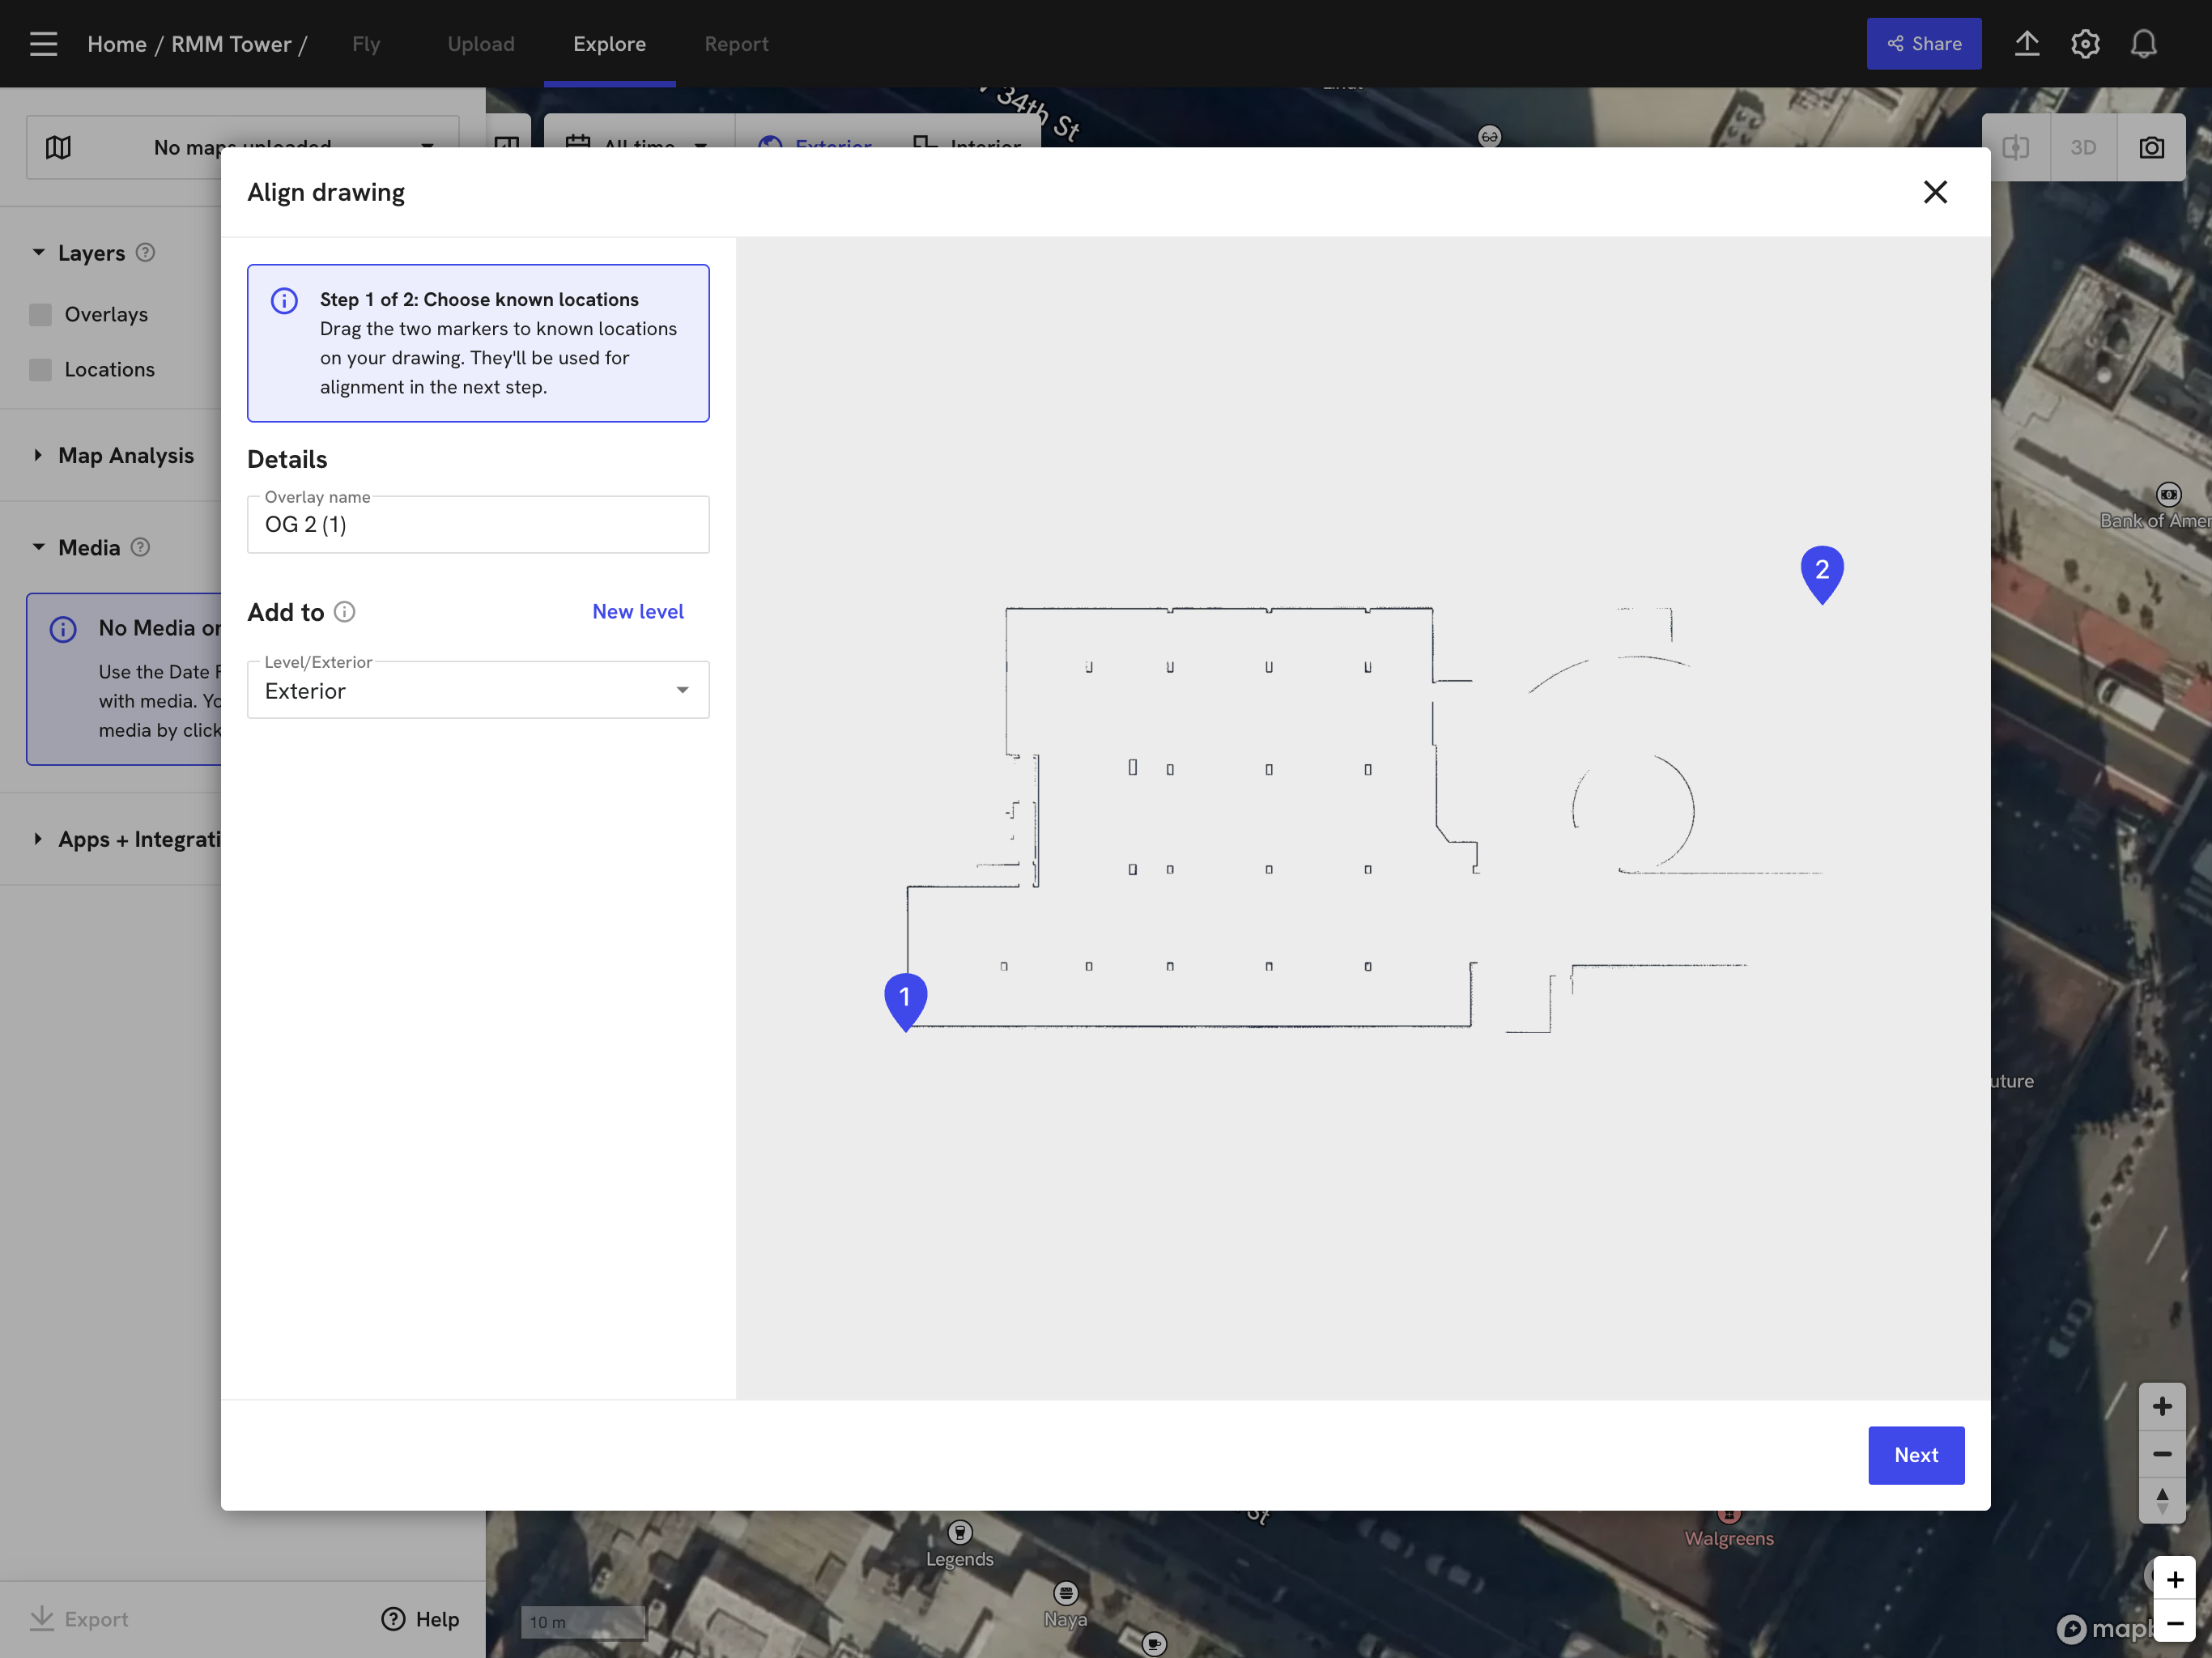
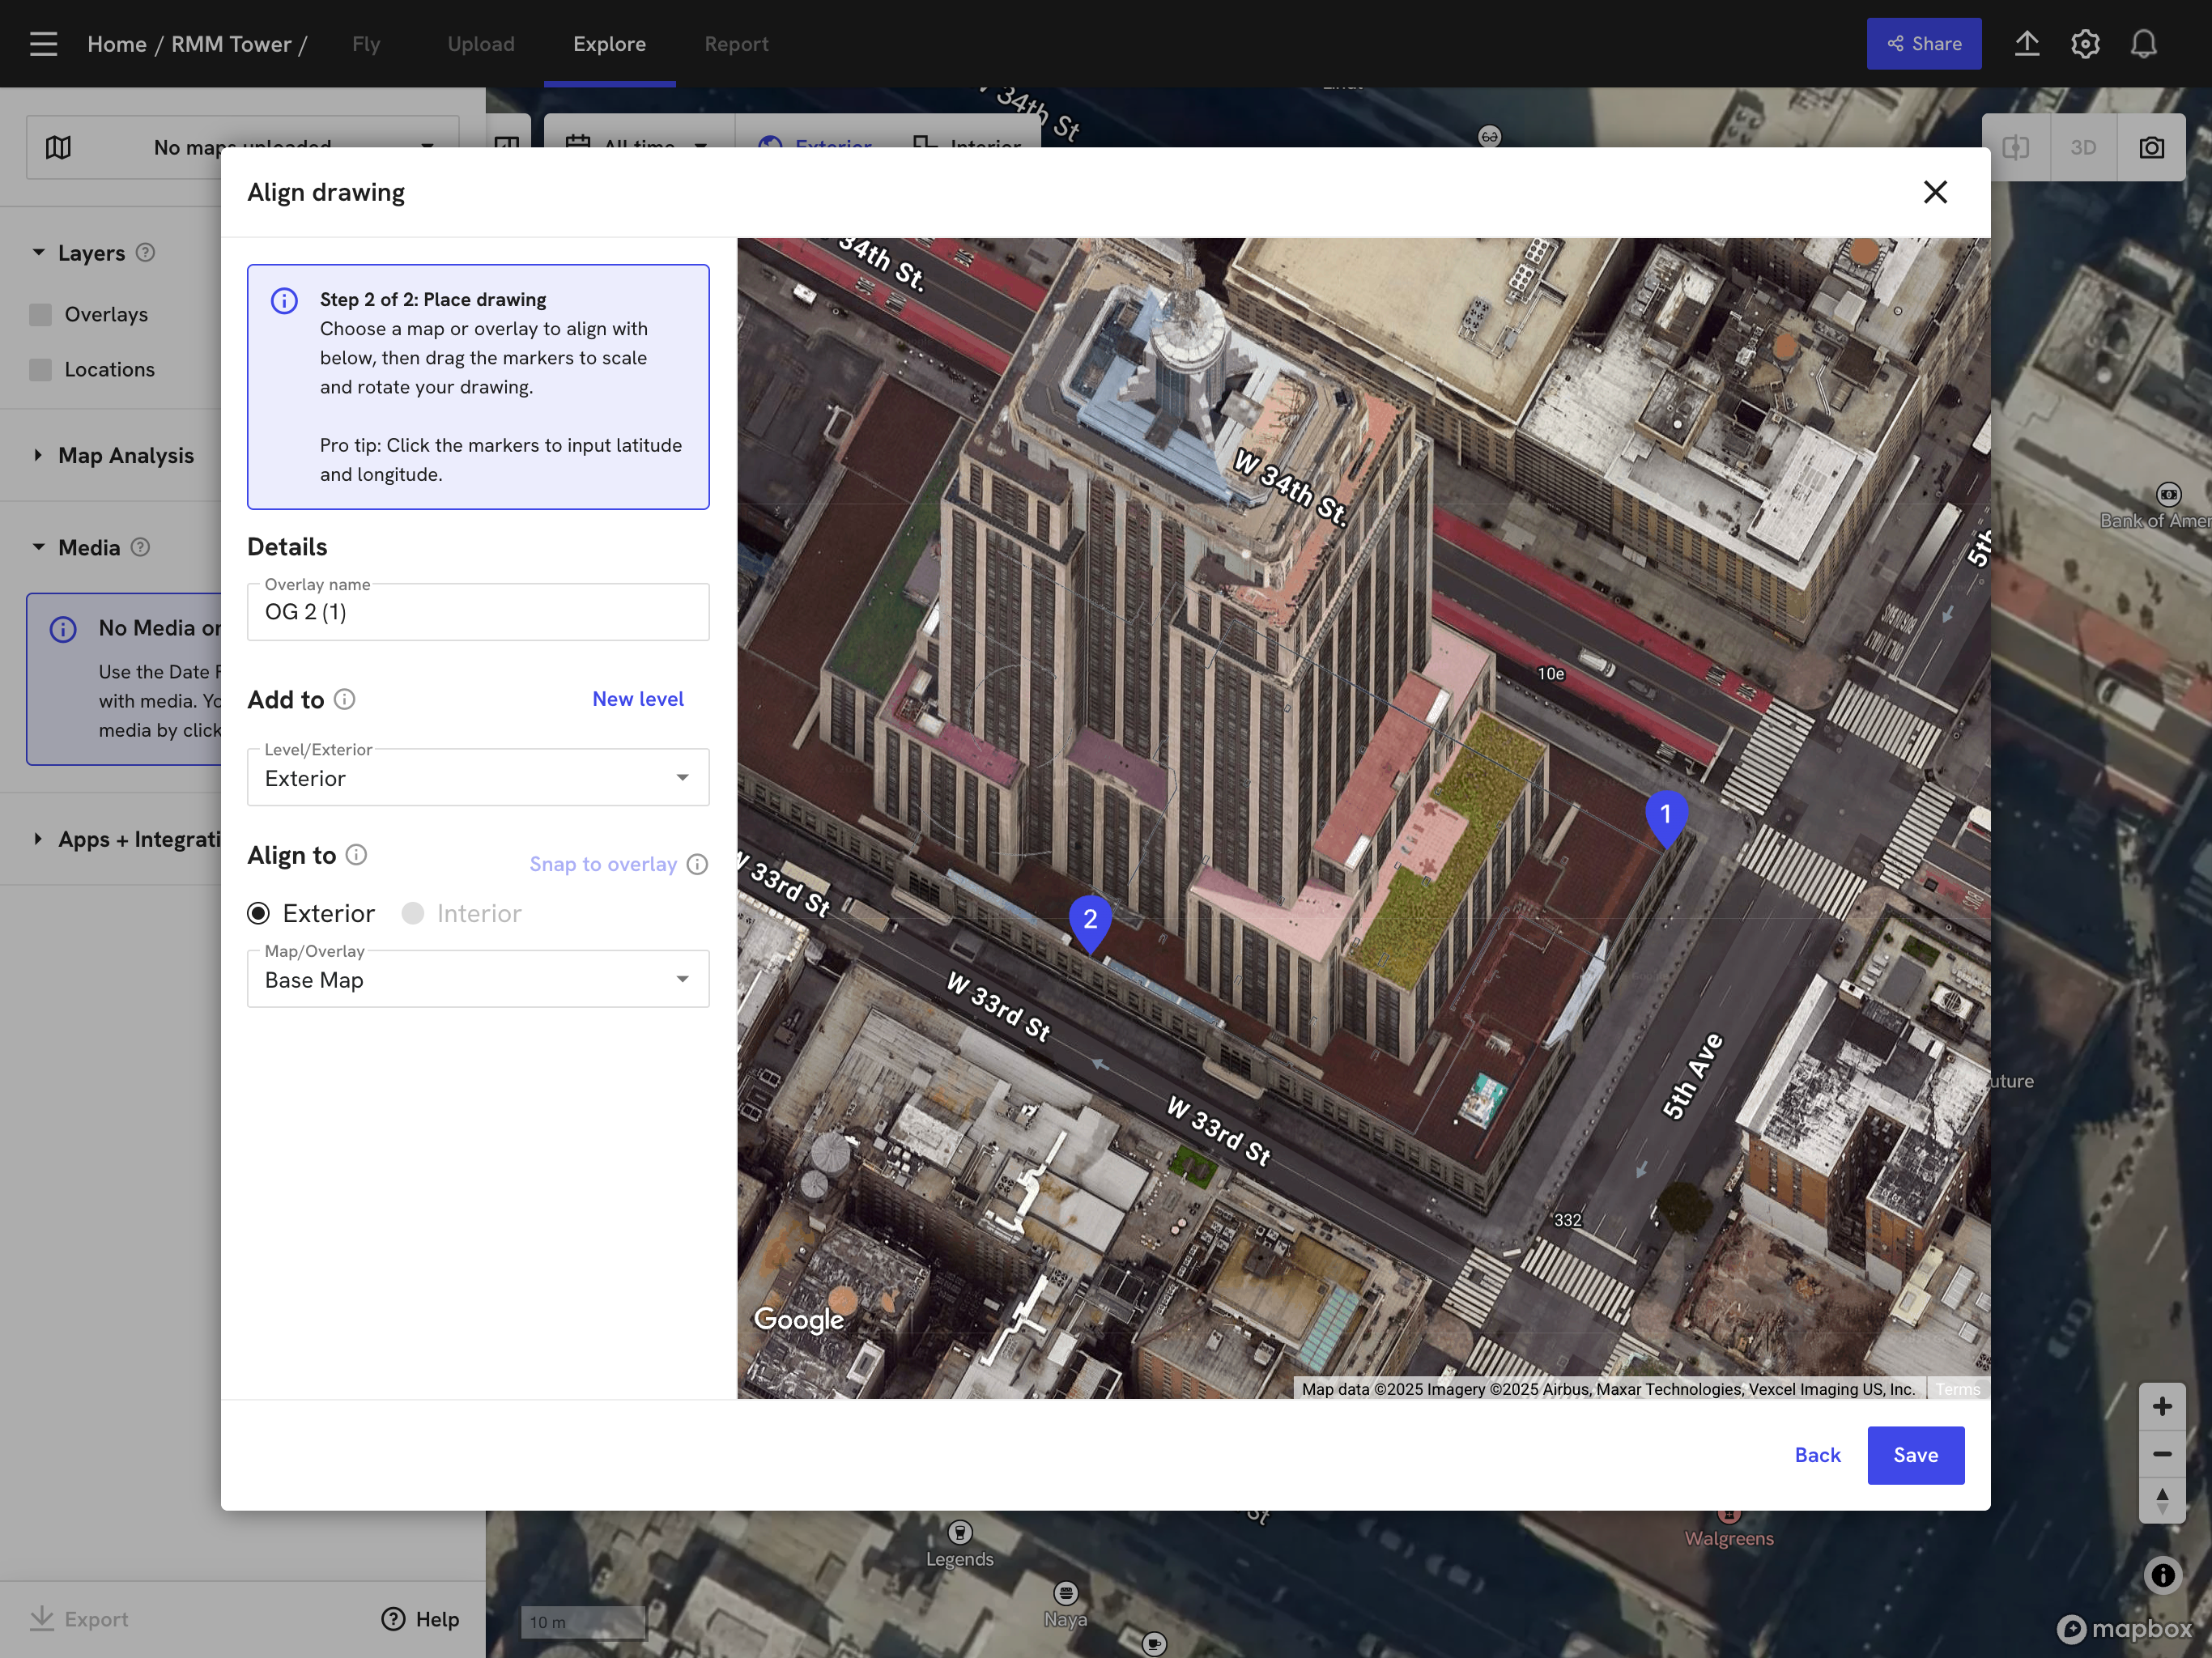
-
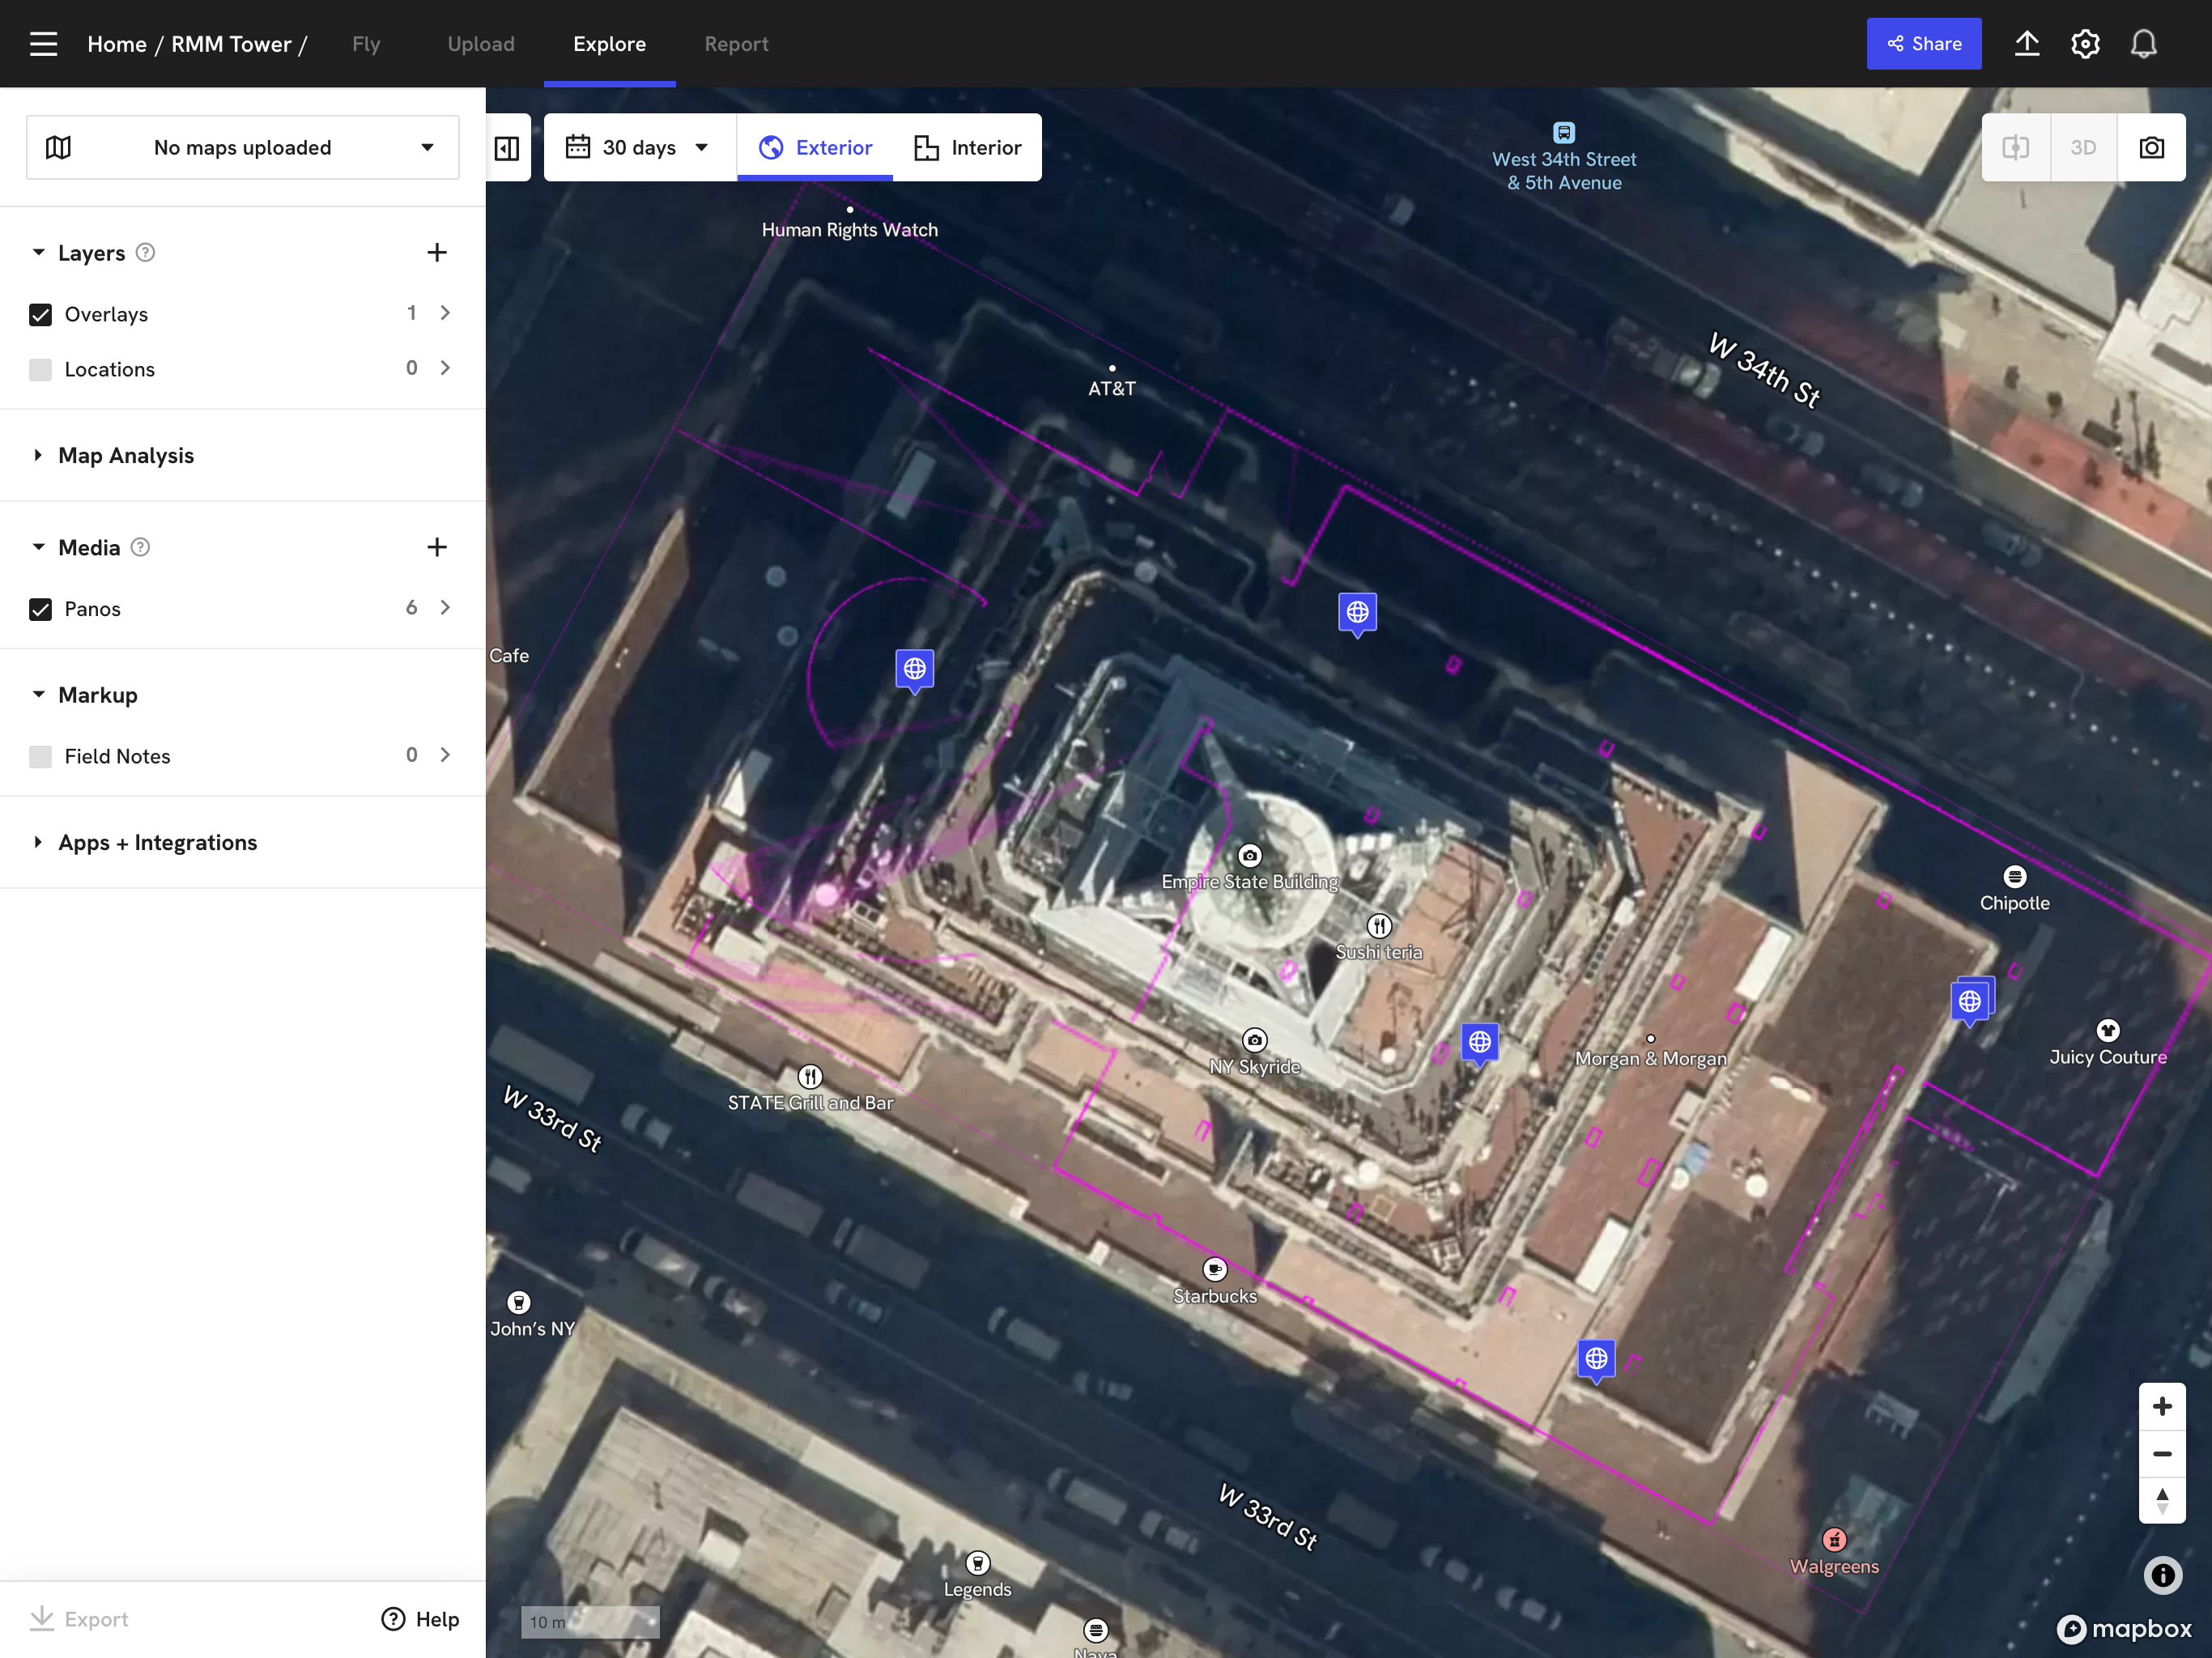
After saving the map in DroneDeploy, you will see it displayed on the map in Exterior mode.

-
Configure the visibility of the map in Exterior mode.

-
Now all photos added in Karelics Cloud will be displayed on the map in DroneDeploy's Exterior mode.
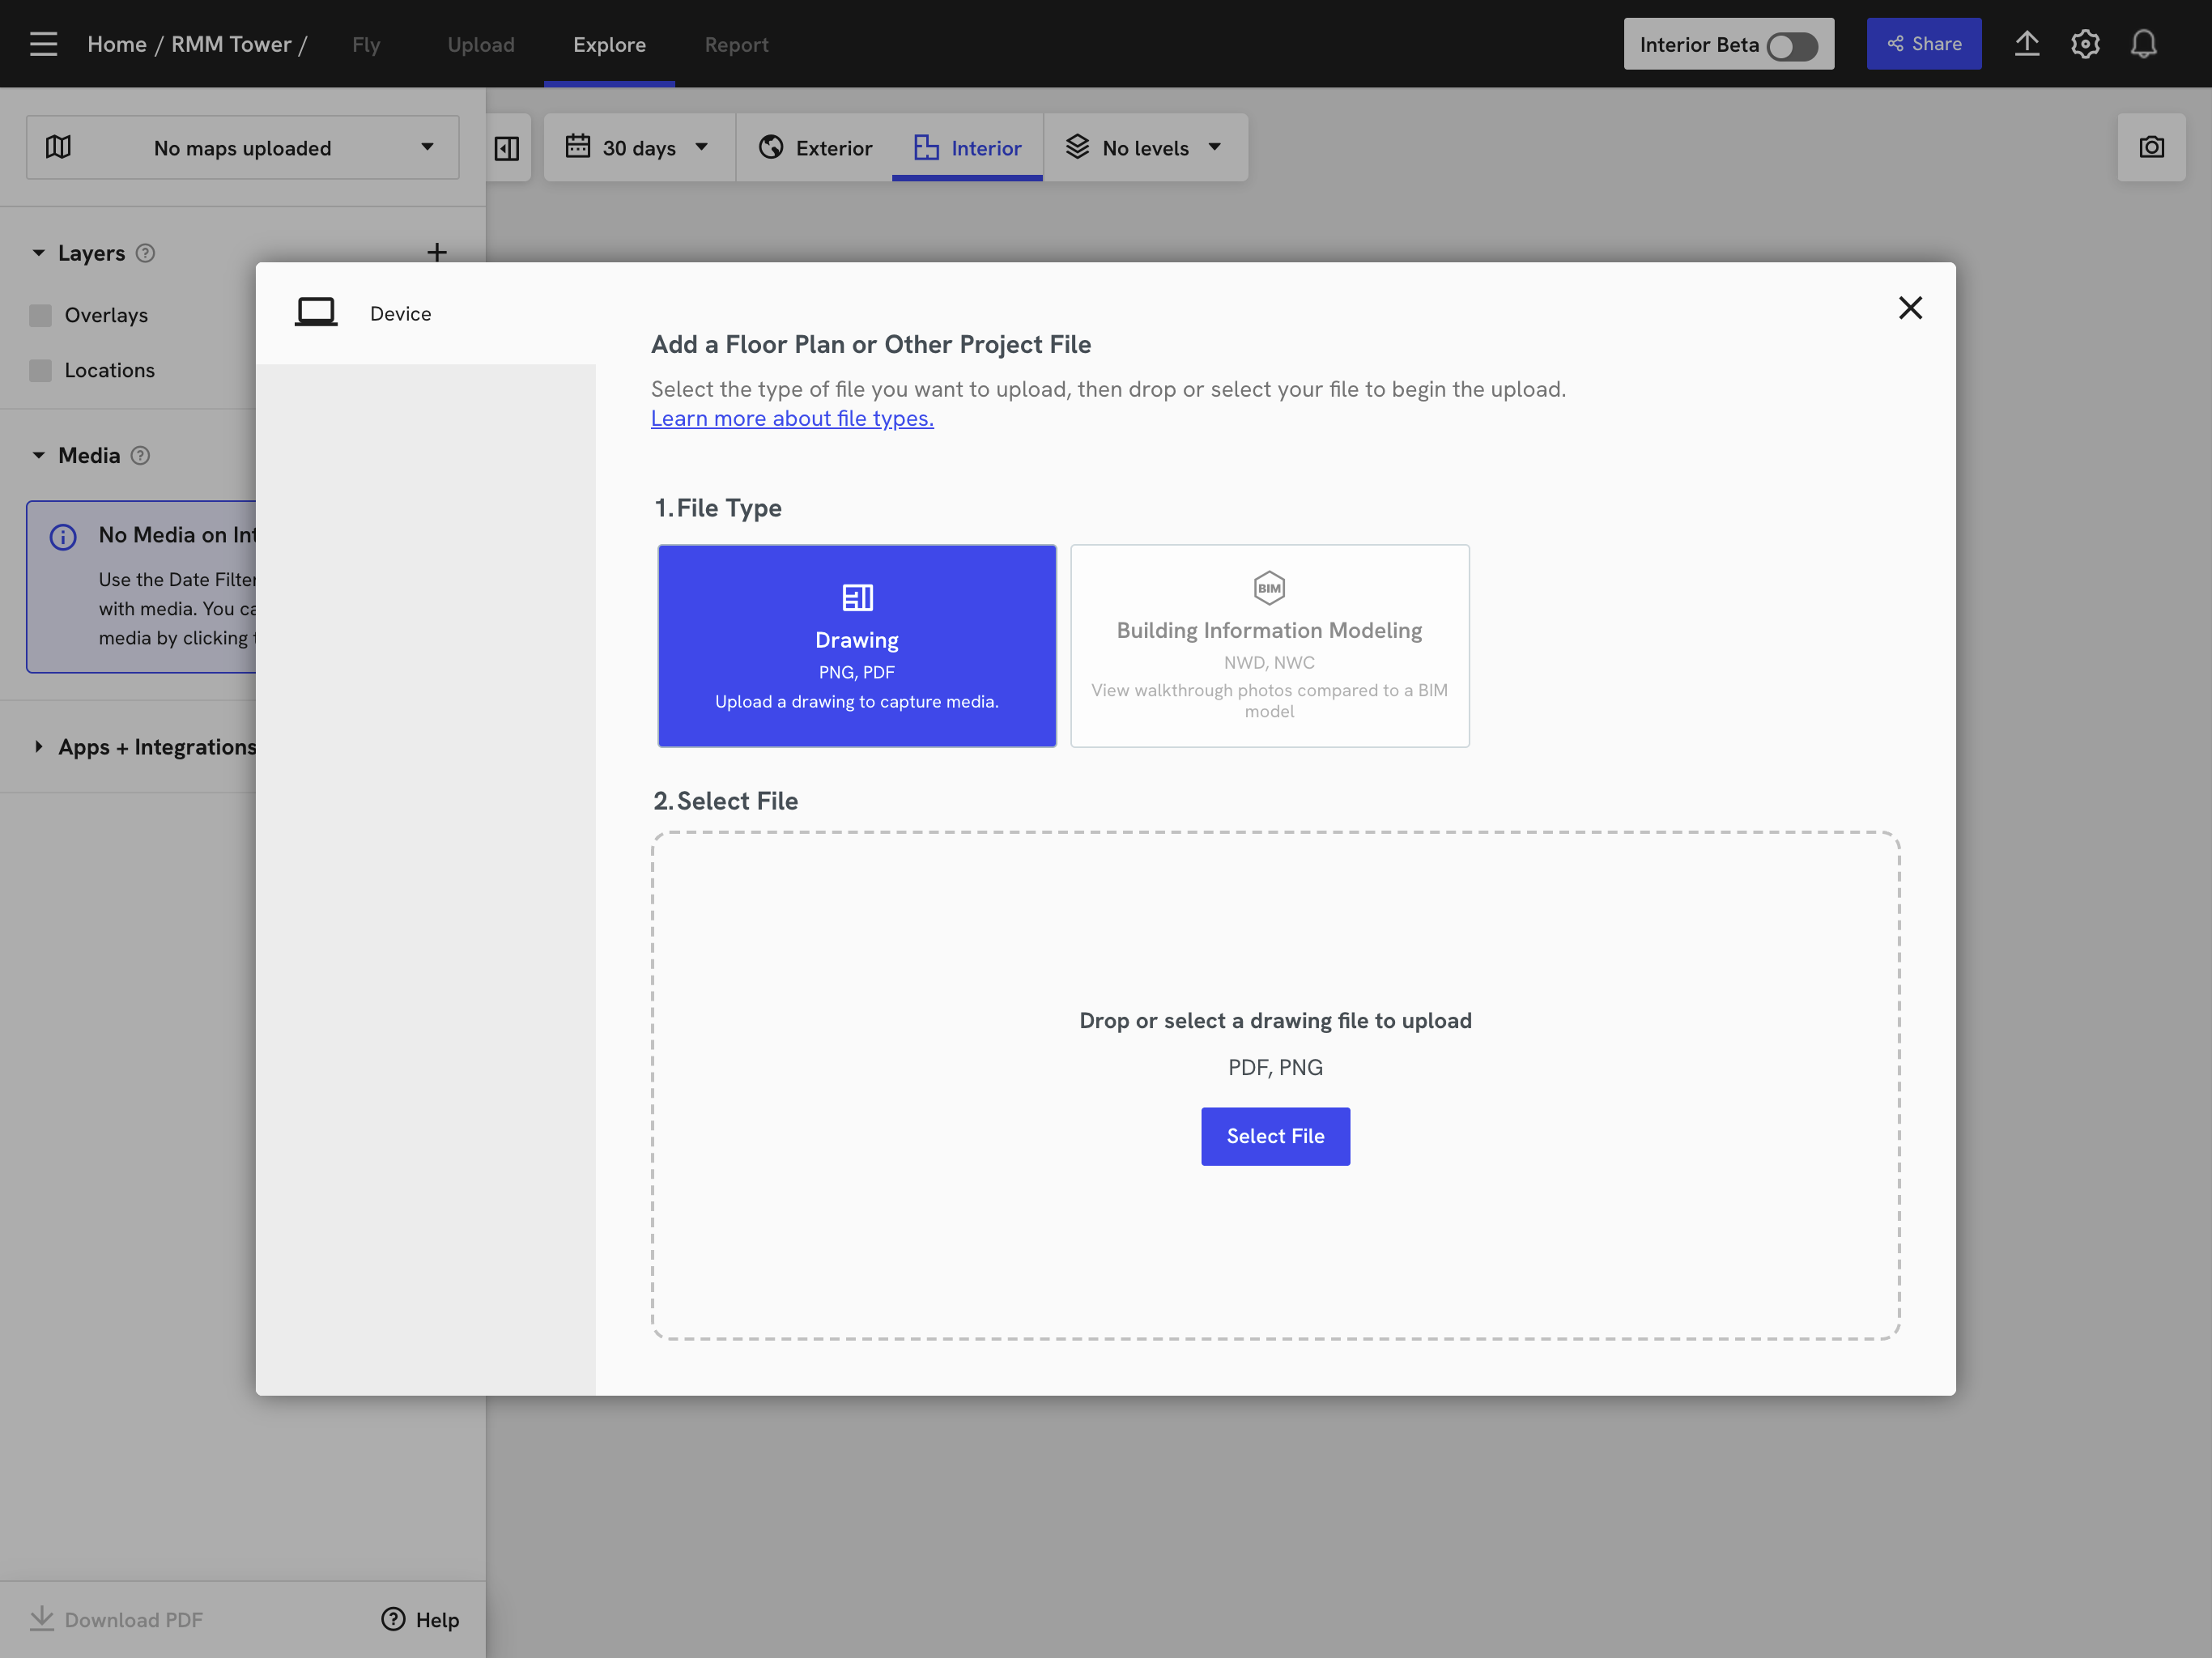
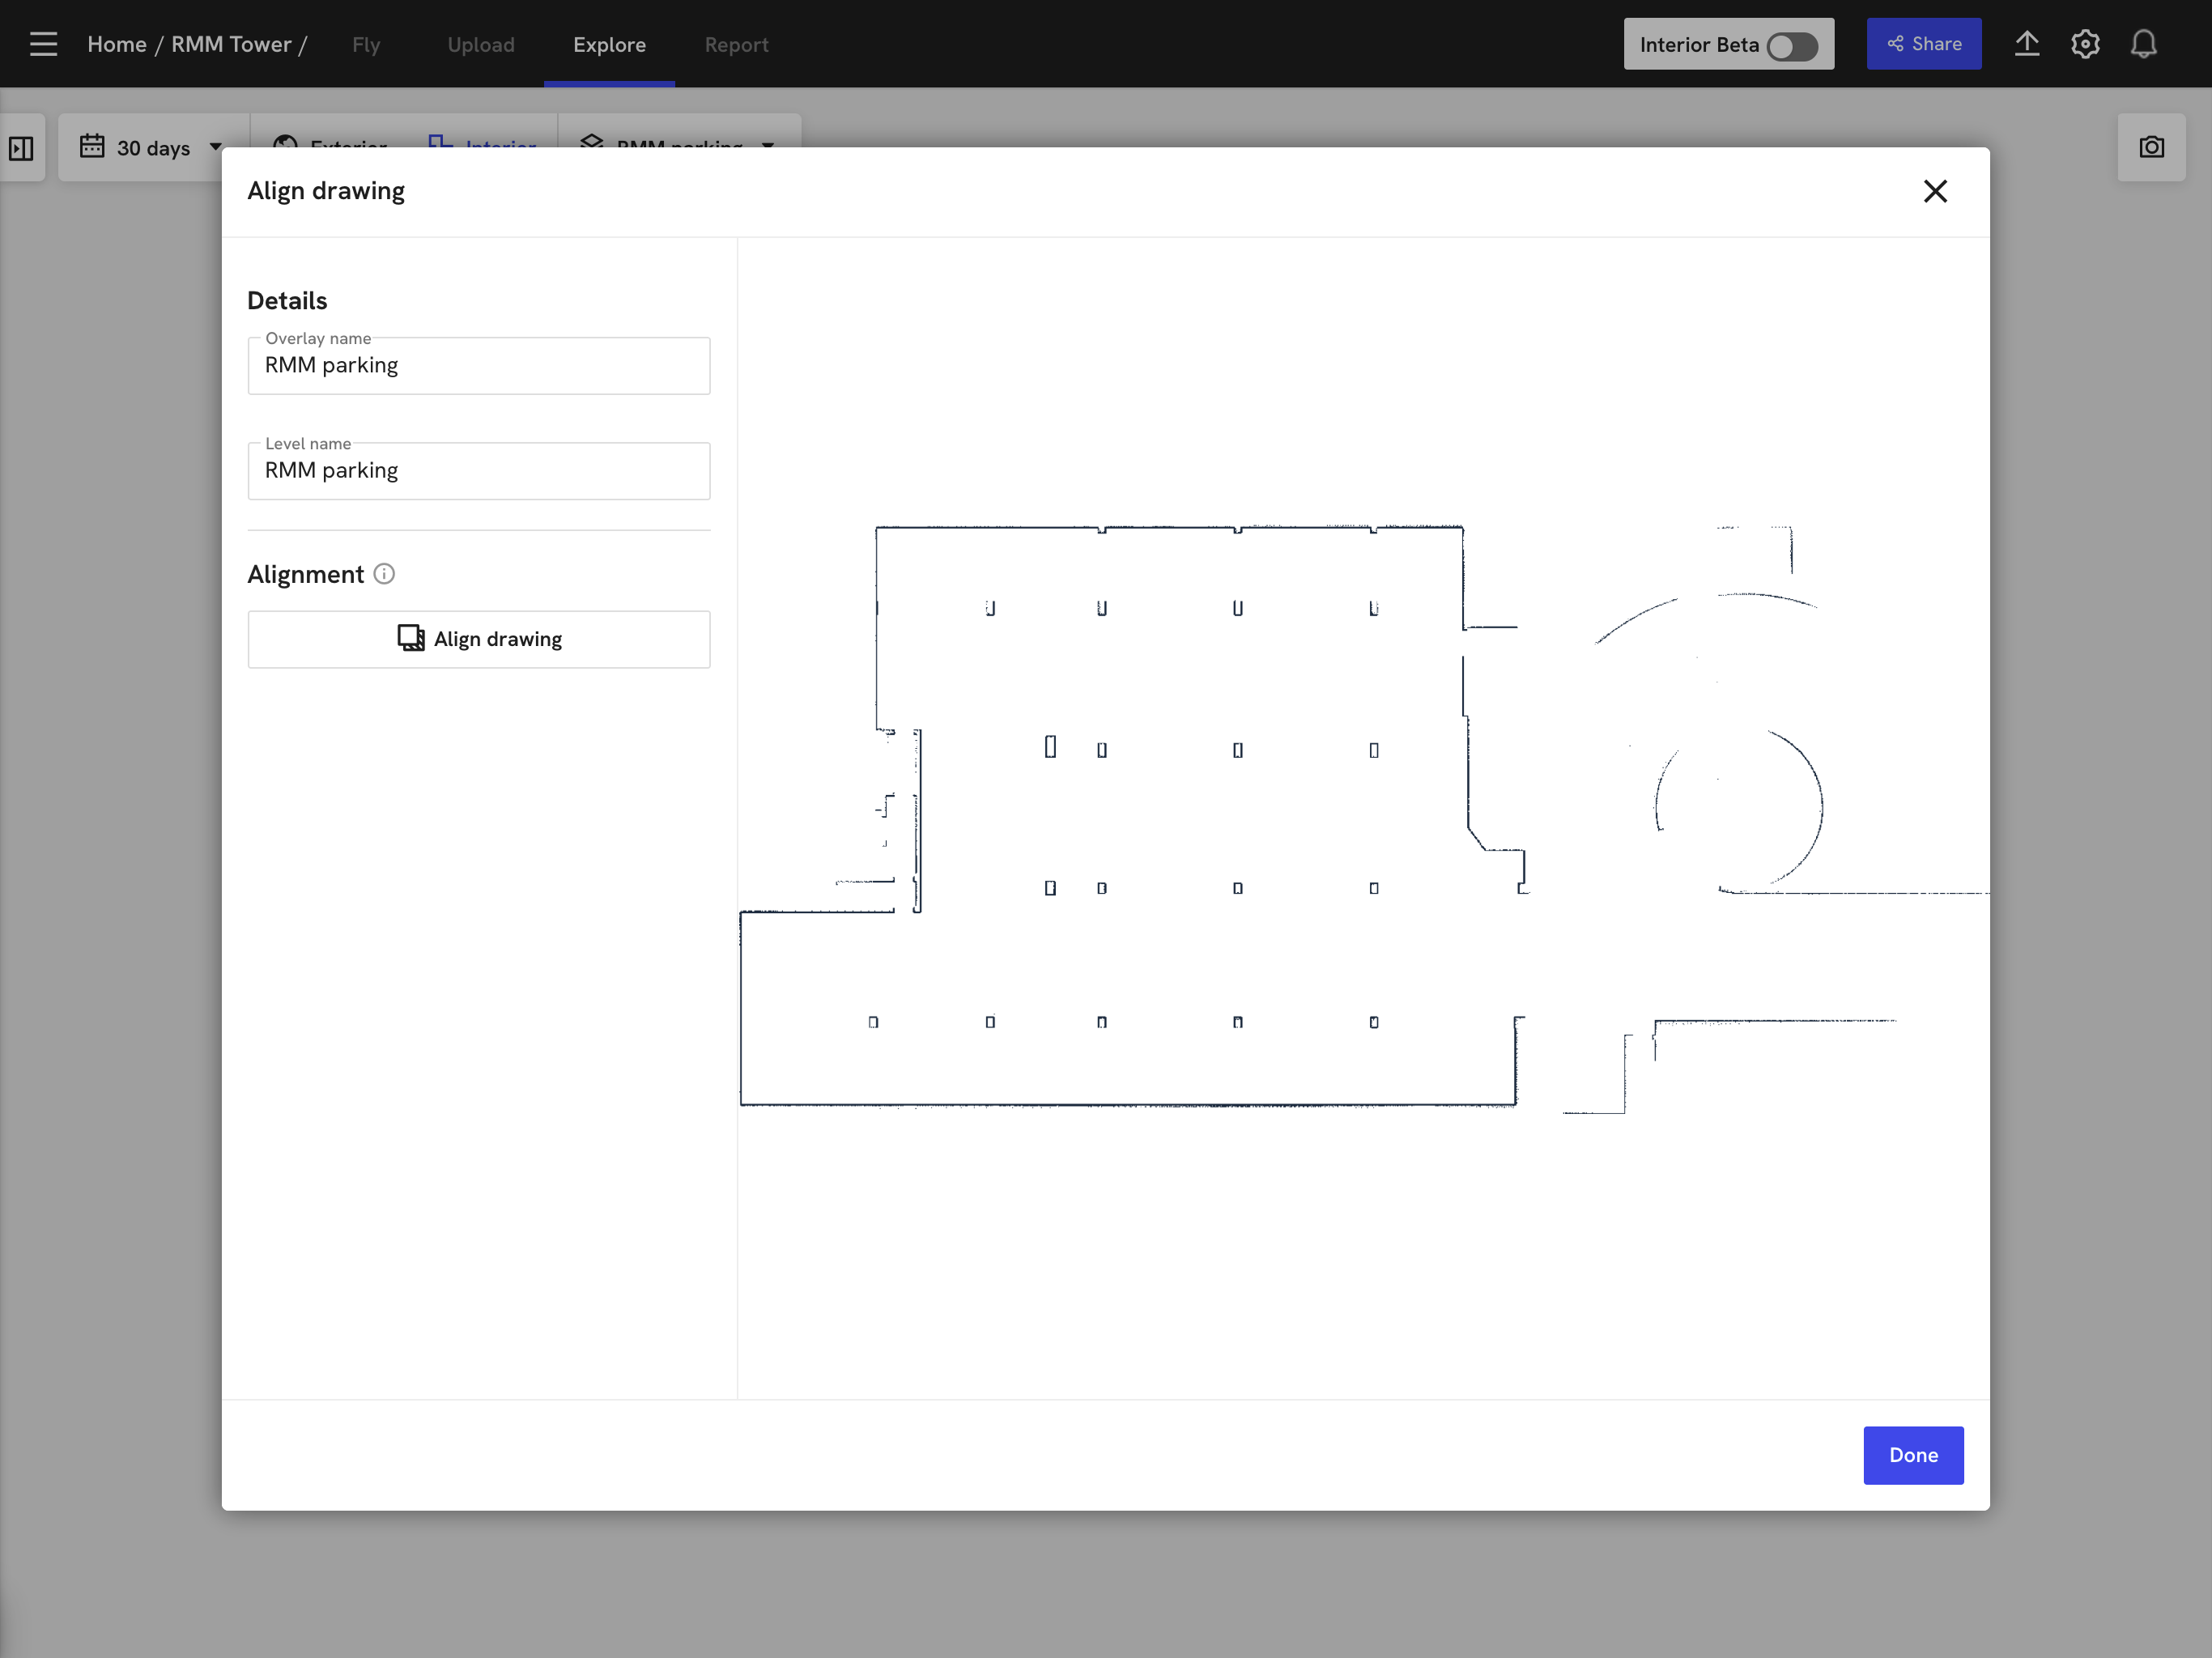
2. Interior mode
-
Add a new layer.
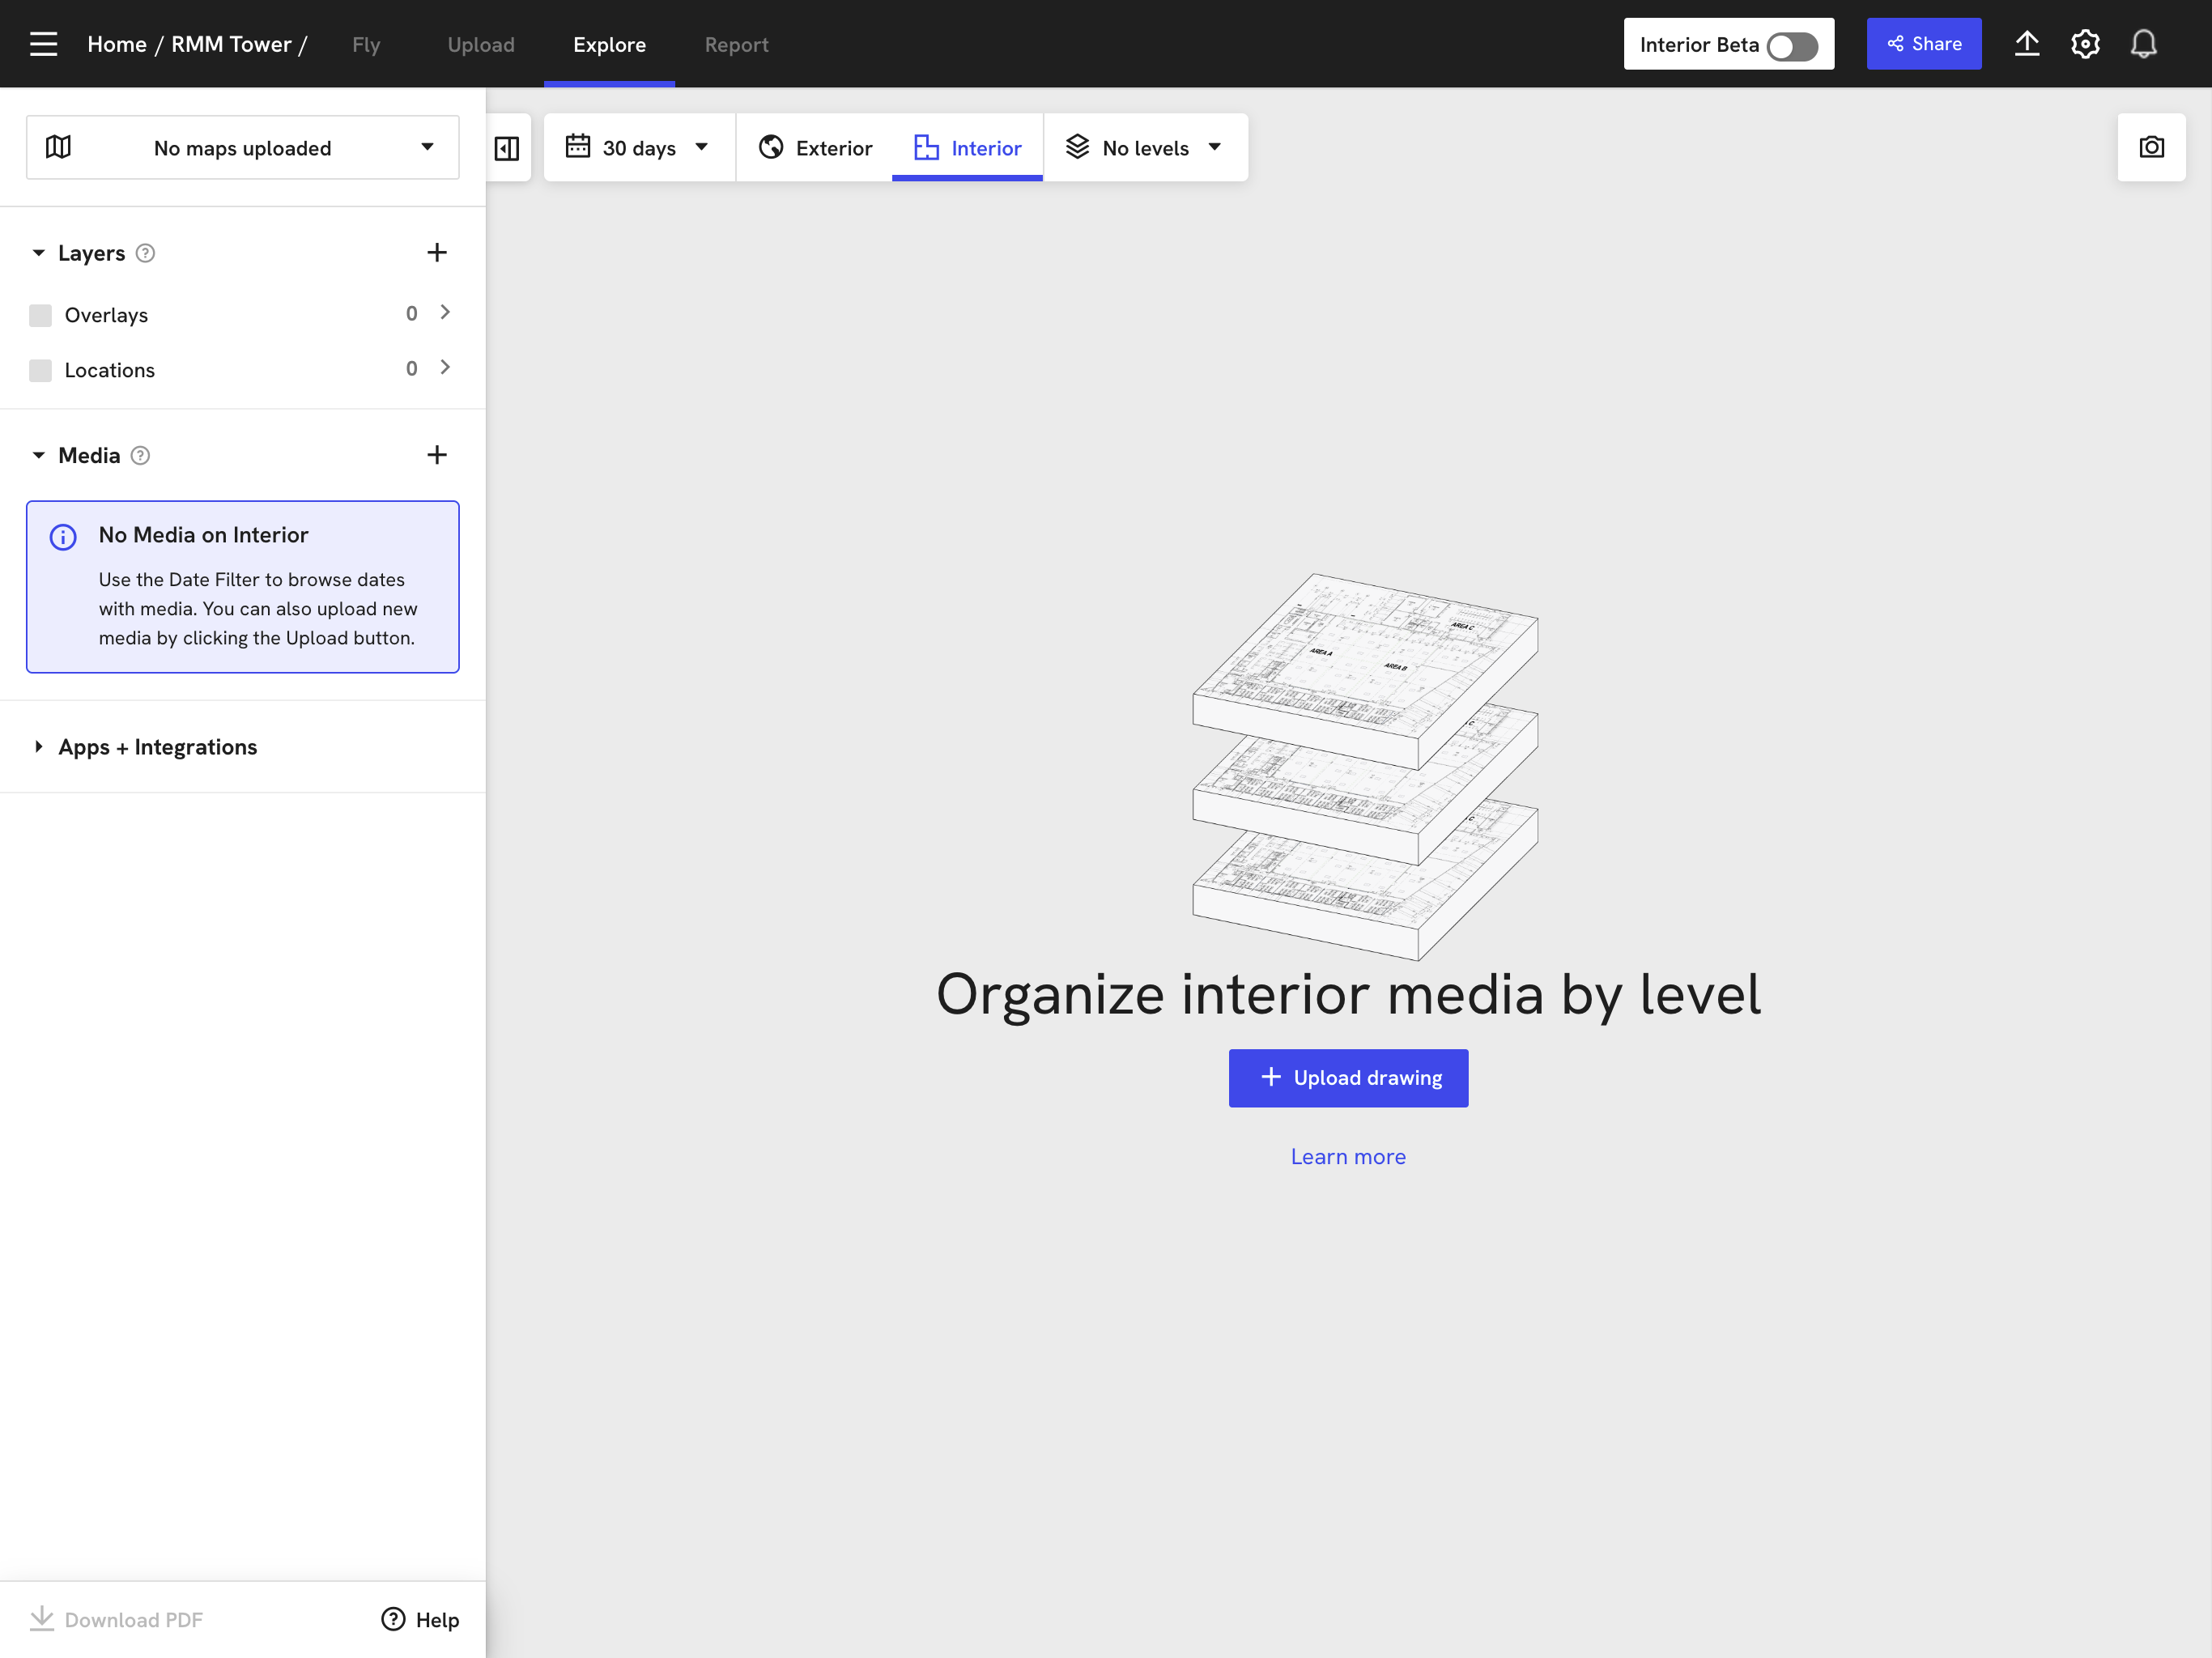
-
Select the map layer in PNG format that you downloaded from Karelics Cloud and follow the instructions.

-
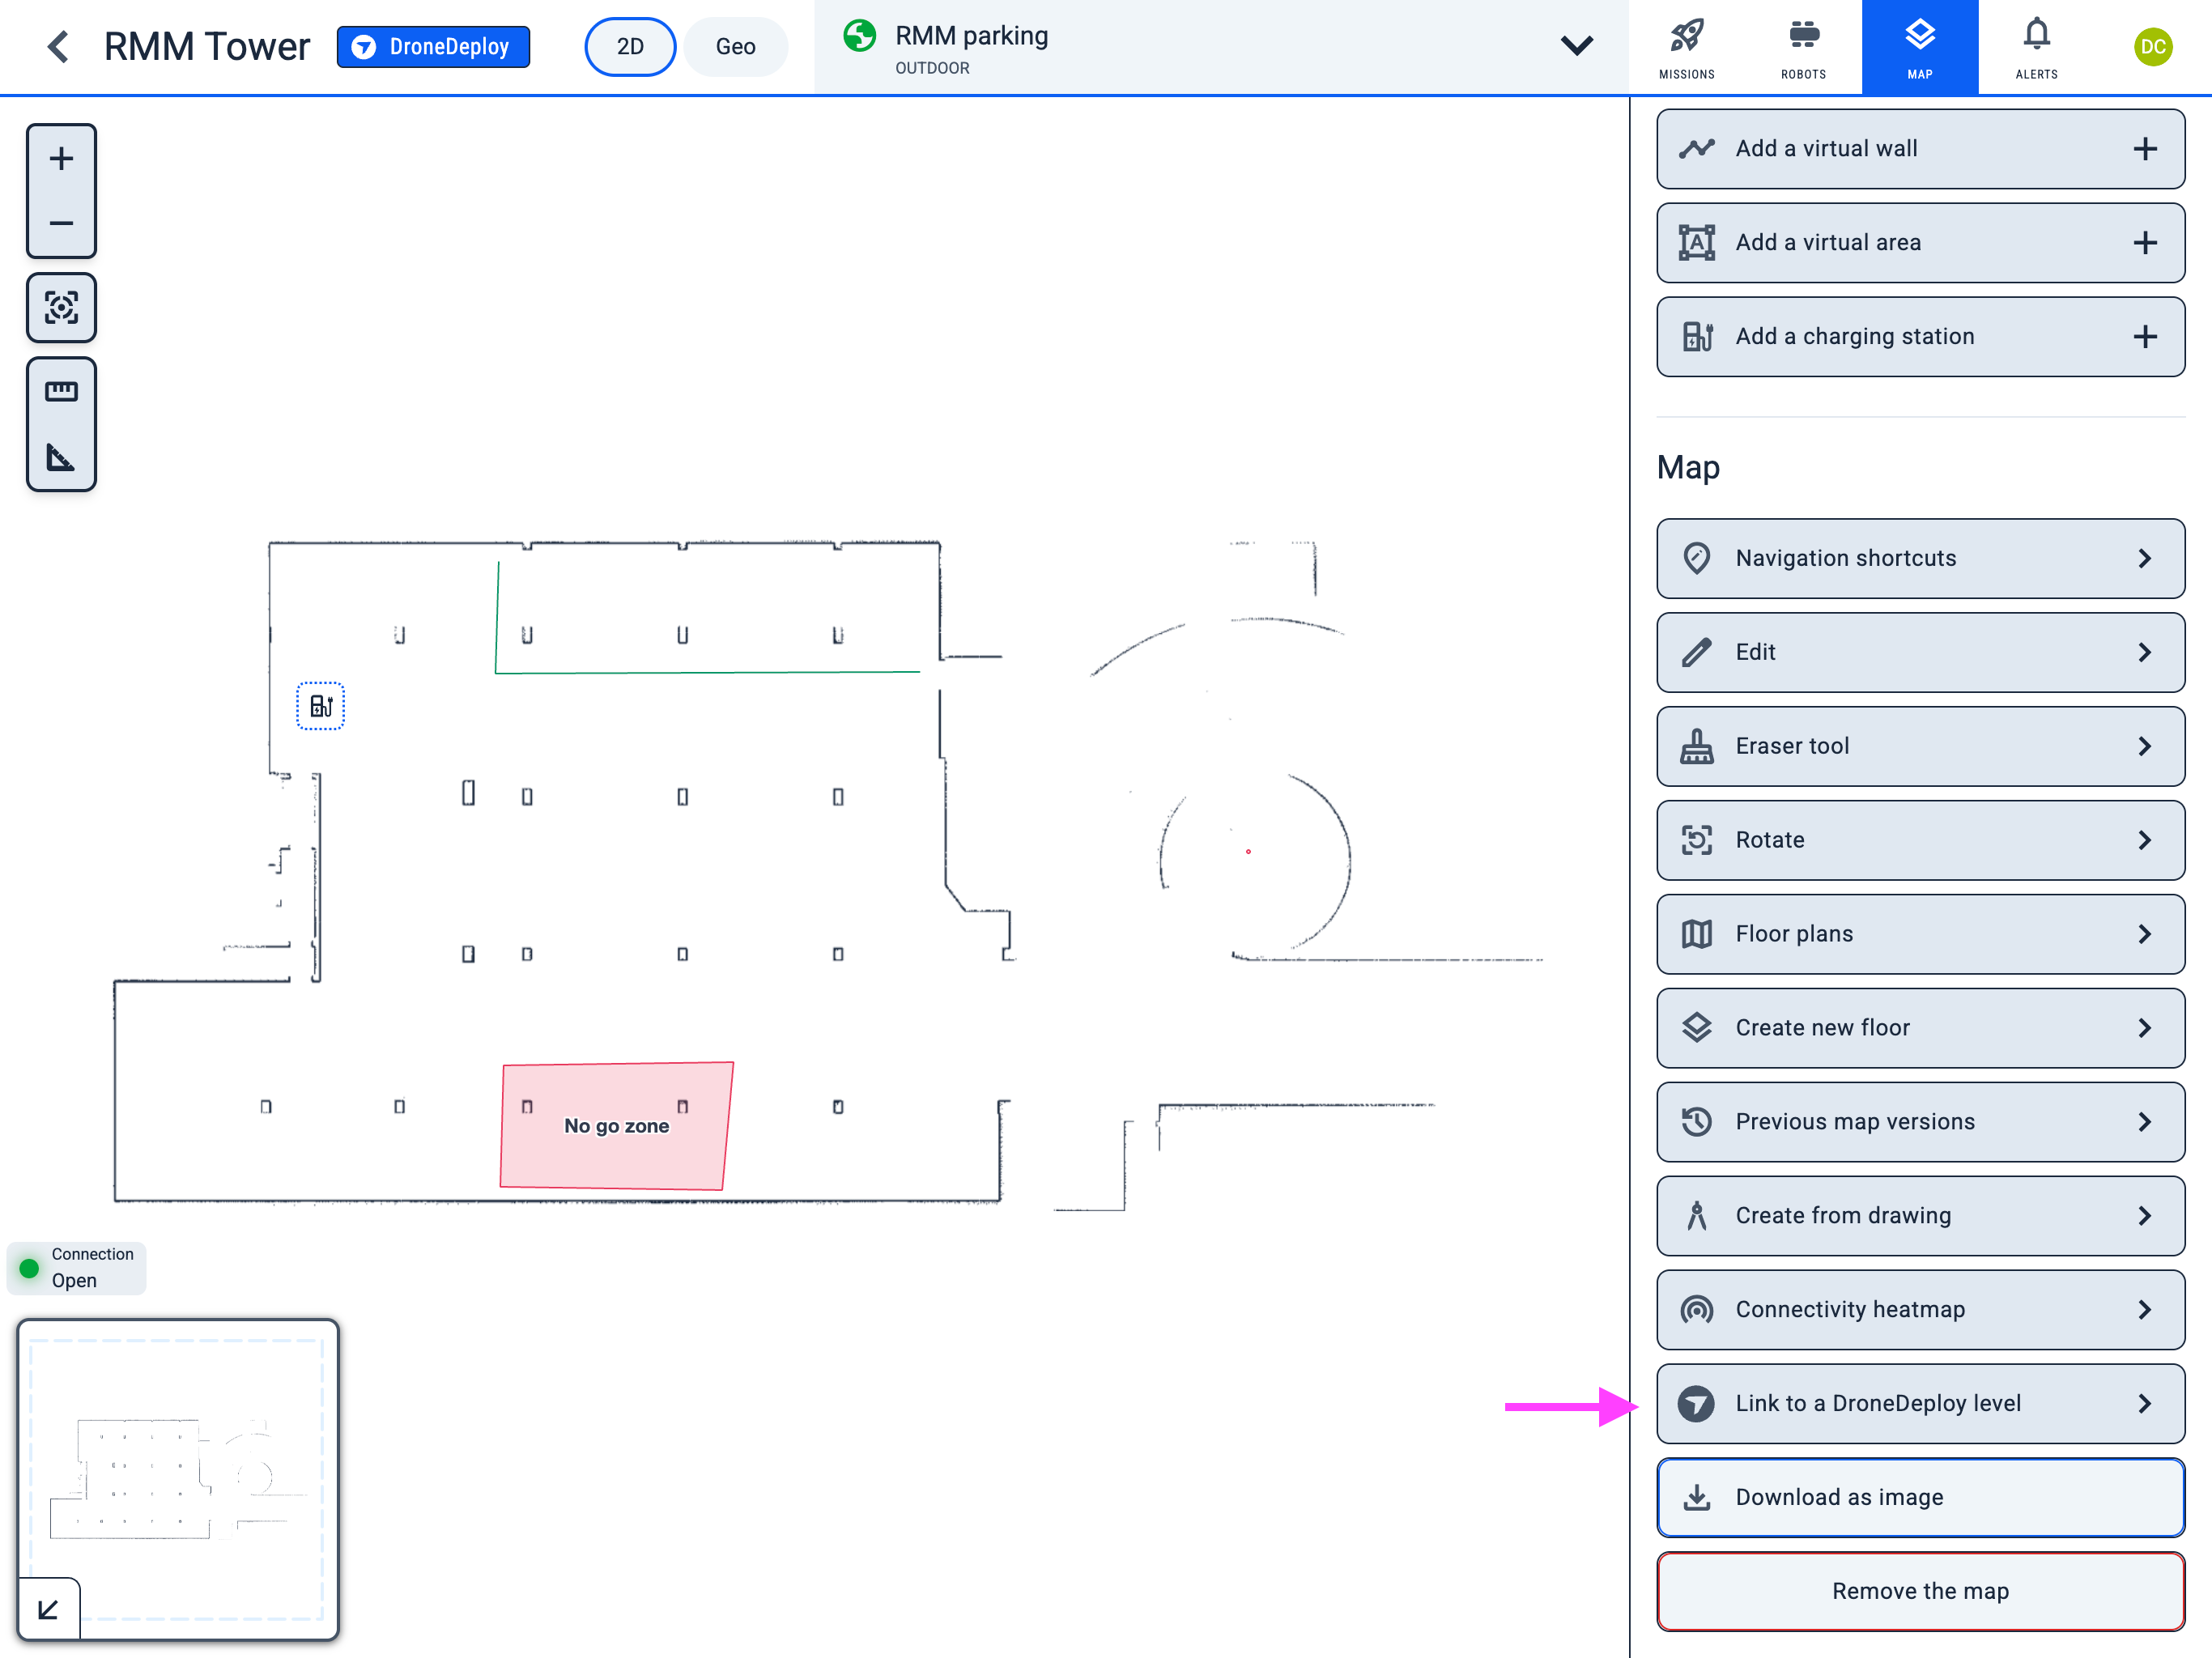
In Karelics сloud Operator hub Add the link to the DroneDeploy level ID.
Navigate to the following path:
Operator Hub → Current Project → Workspace → Map → DroneDeploy
-
Click the "Link to a DroneDeploy level" button to add the link to the DroneDeploy level ID.
-
Add and save the link to the DroneDeploy level ID.
Info: You can find the level ID in the URL on the DroneDeploy in Interior mode:
For example, indronedeploy.com/app2/sites/1234567890abcdef12345678/maps/drawing-view/levels/Level:abcdef1234567890abcdef12, the level ID isabcdef1234567890abcdef12.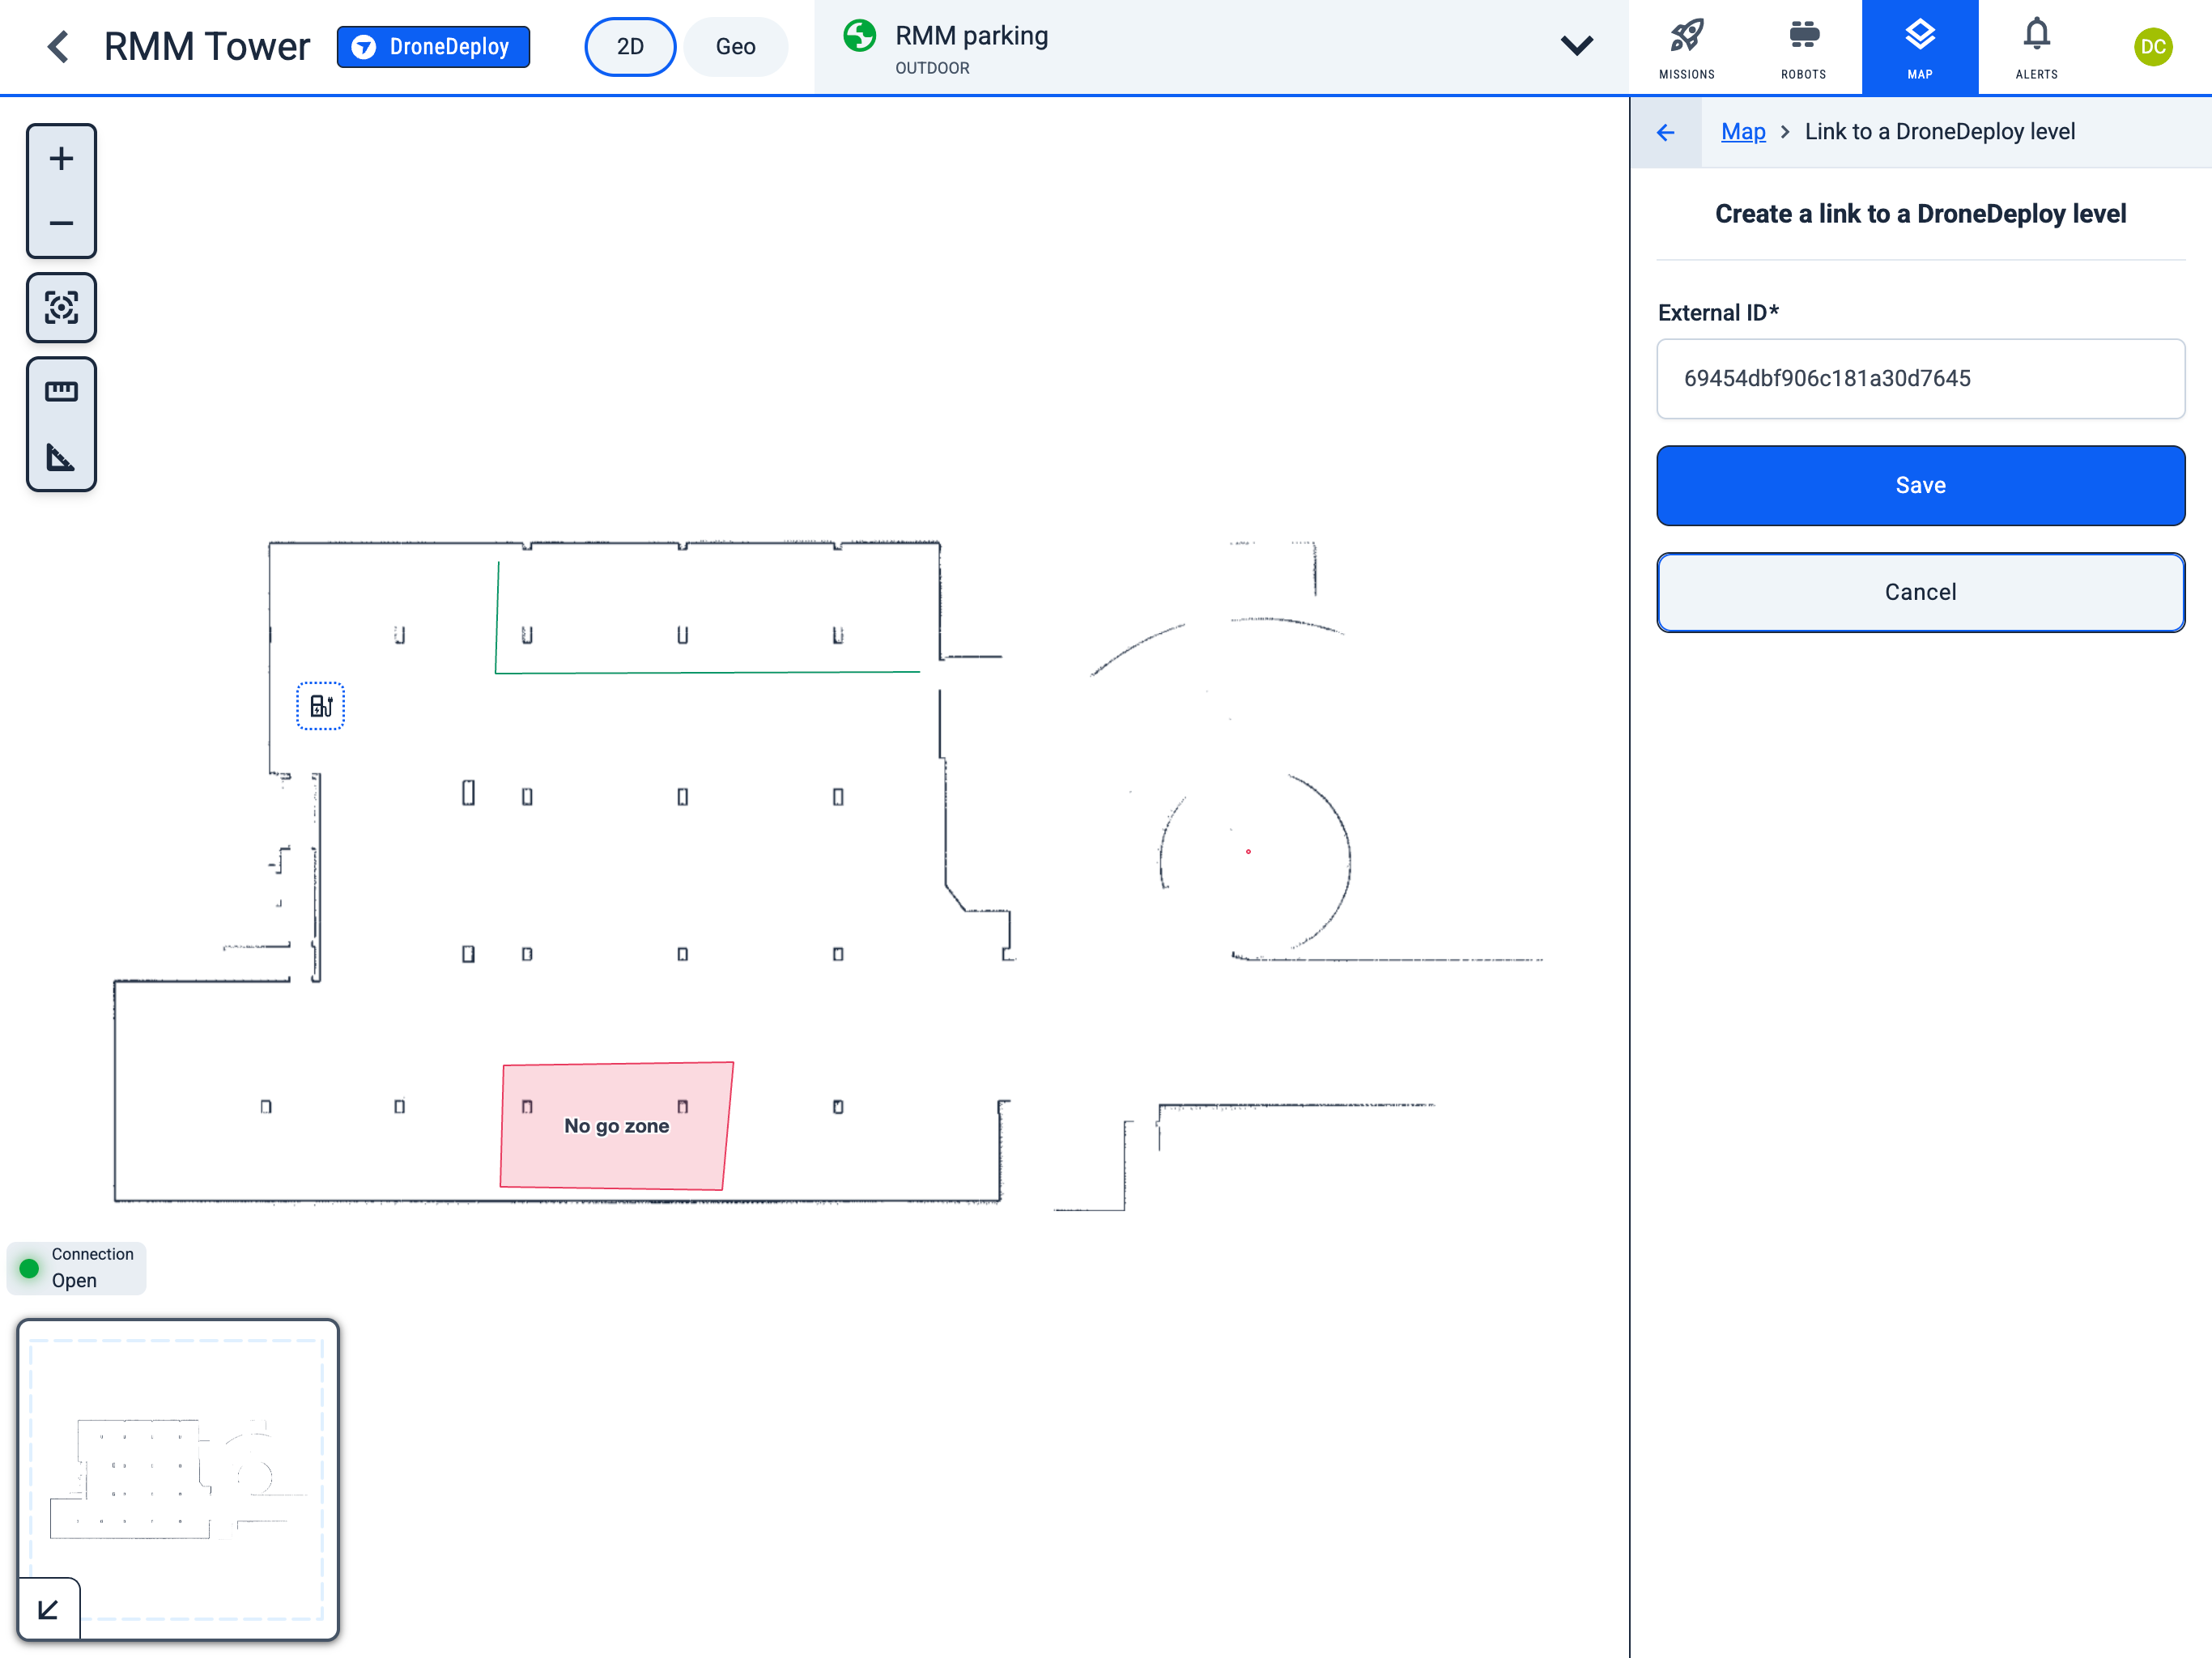
-
Now all photos added in Karelics Cloud will be displayed on the map in DroneDeploy's Interior mode.
