Pipe Video Inspection — Quick Guide
For Cloud operators
Version 1.0 · August 2026
Safety
- Stay outside the pipe during alignment. The robot measures the gap — you do not need to be inside.
- Press STOP on the tablet at any time to stop the robot immediately.
- Do not drive on an empty battery. Swap batteries in time (~2 h runtime).
- Keep clear of the pipe end while the robot drives forward. Do not stand right next to the pipe walls.
1. Getting started
1. Power on the base station
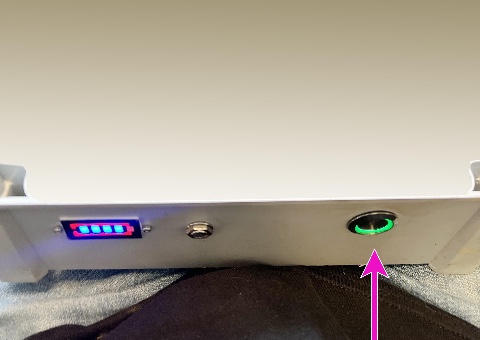
2. Turning on the Robot
-
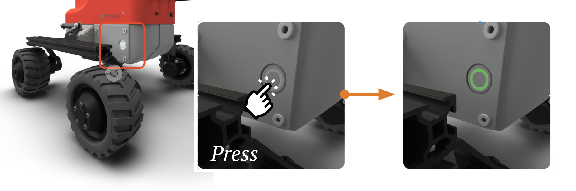
Turn On Robot
-
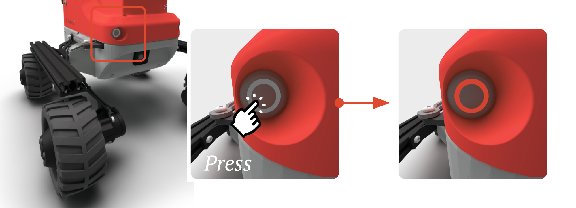
Turn On Payload (you don’t need to switch off the payload)
tip
To turn off the robot, only button on the side is enough.
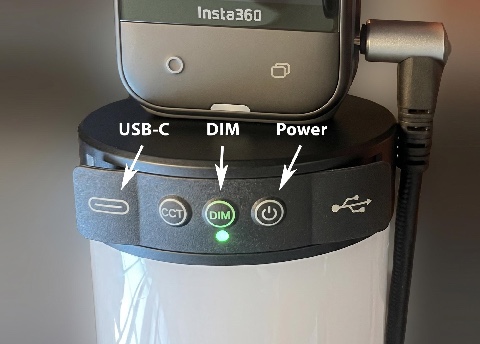
3. Turn on the light
-
Power — press once to turn on; press 2 times to turn off.
-
When on, the green light is steady.
-
DIM — brightness; click three times for the recommended level.
4. Verify 360 Camera Power
-
Check that the camera is turned on; the indicator should be blue
-
If the camera appears to be off, press the power button on the side
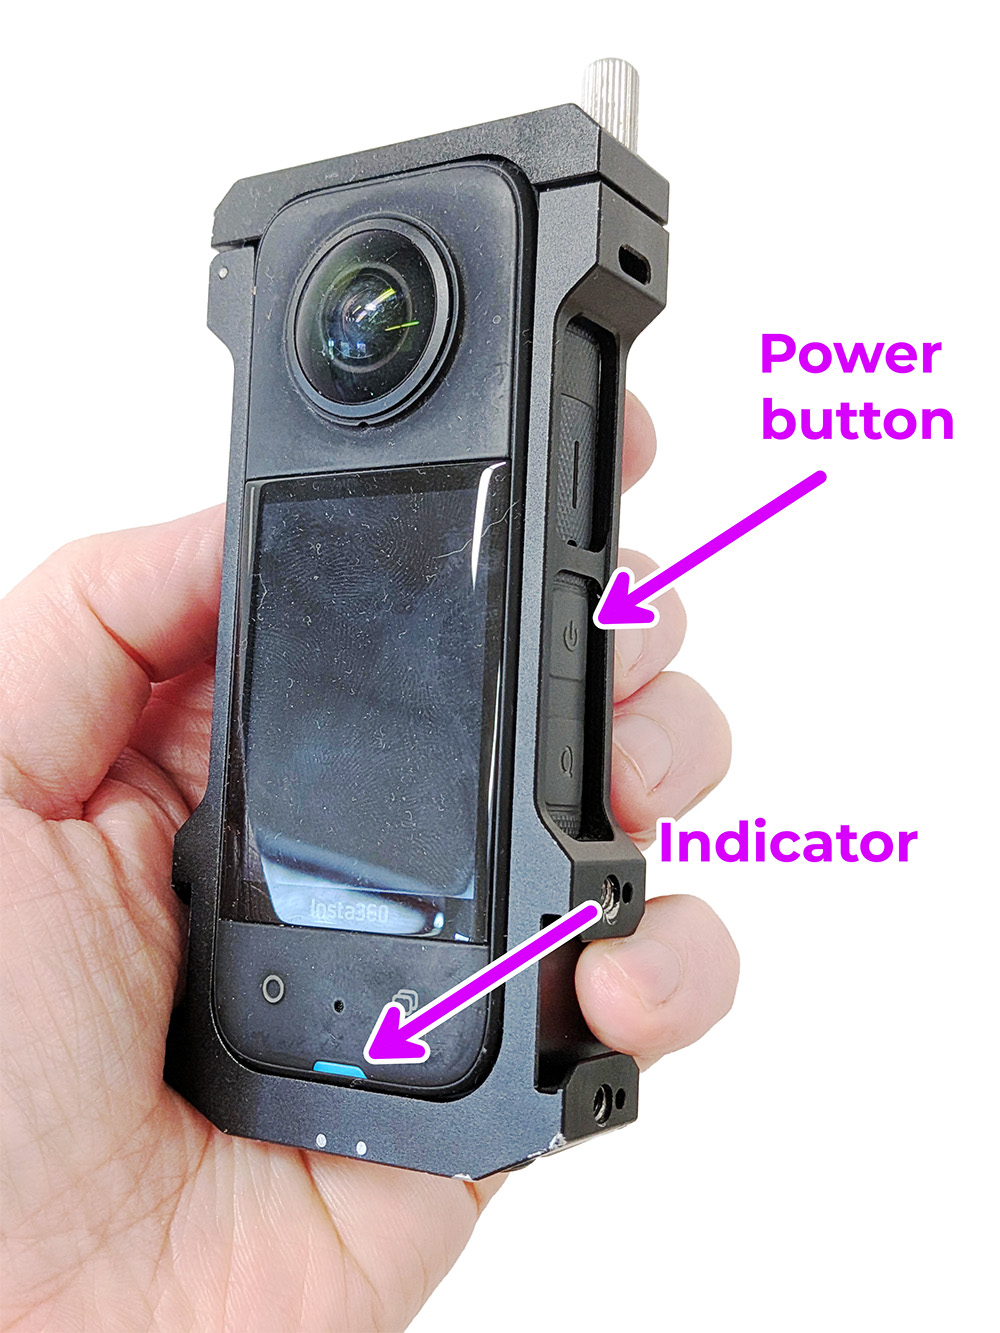
5. Place the robot in the pipe, facing the pipe entrance
2. Create the pipe map
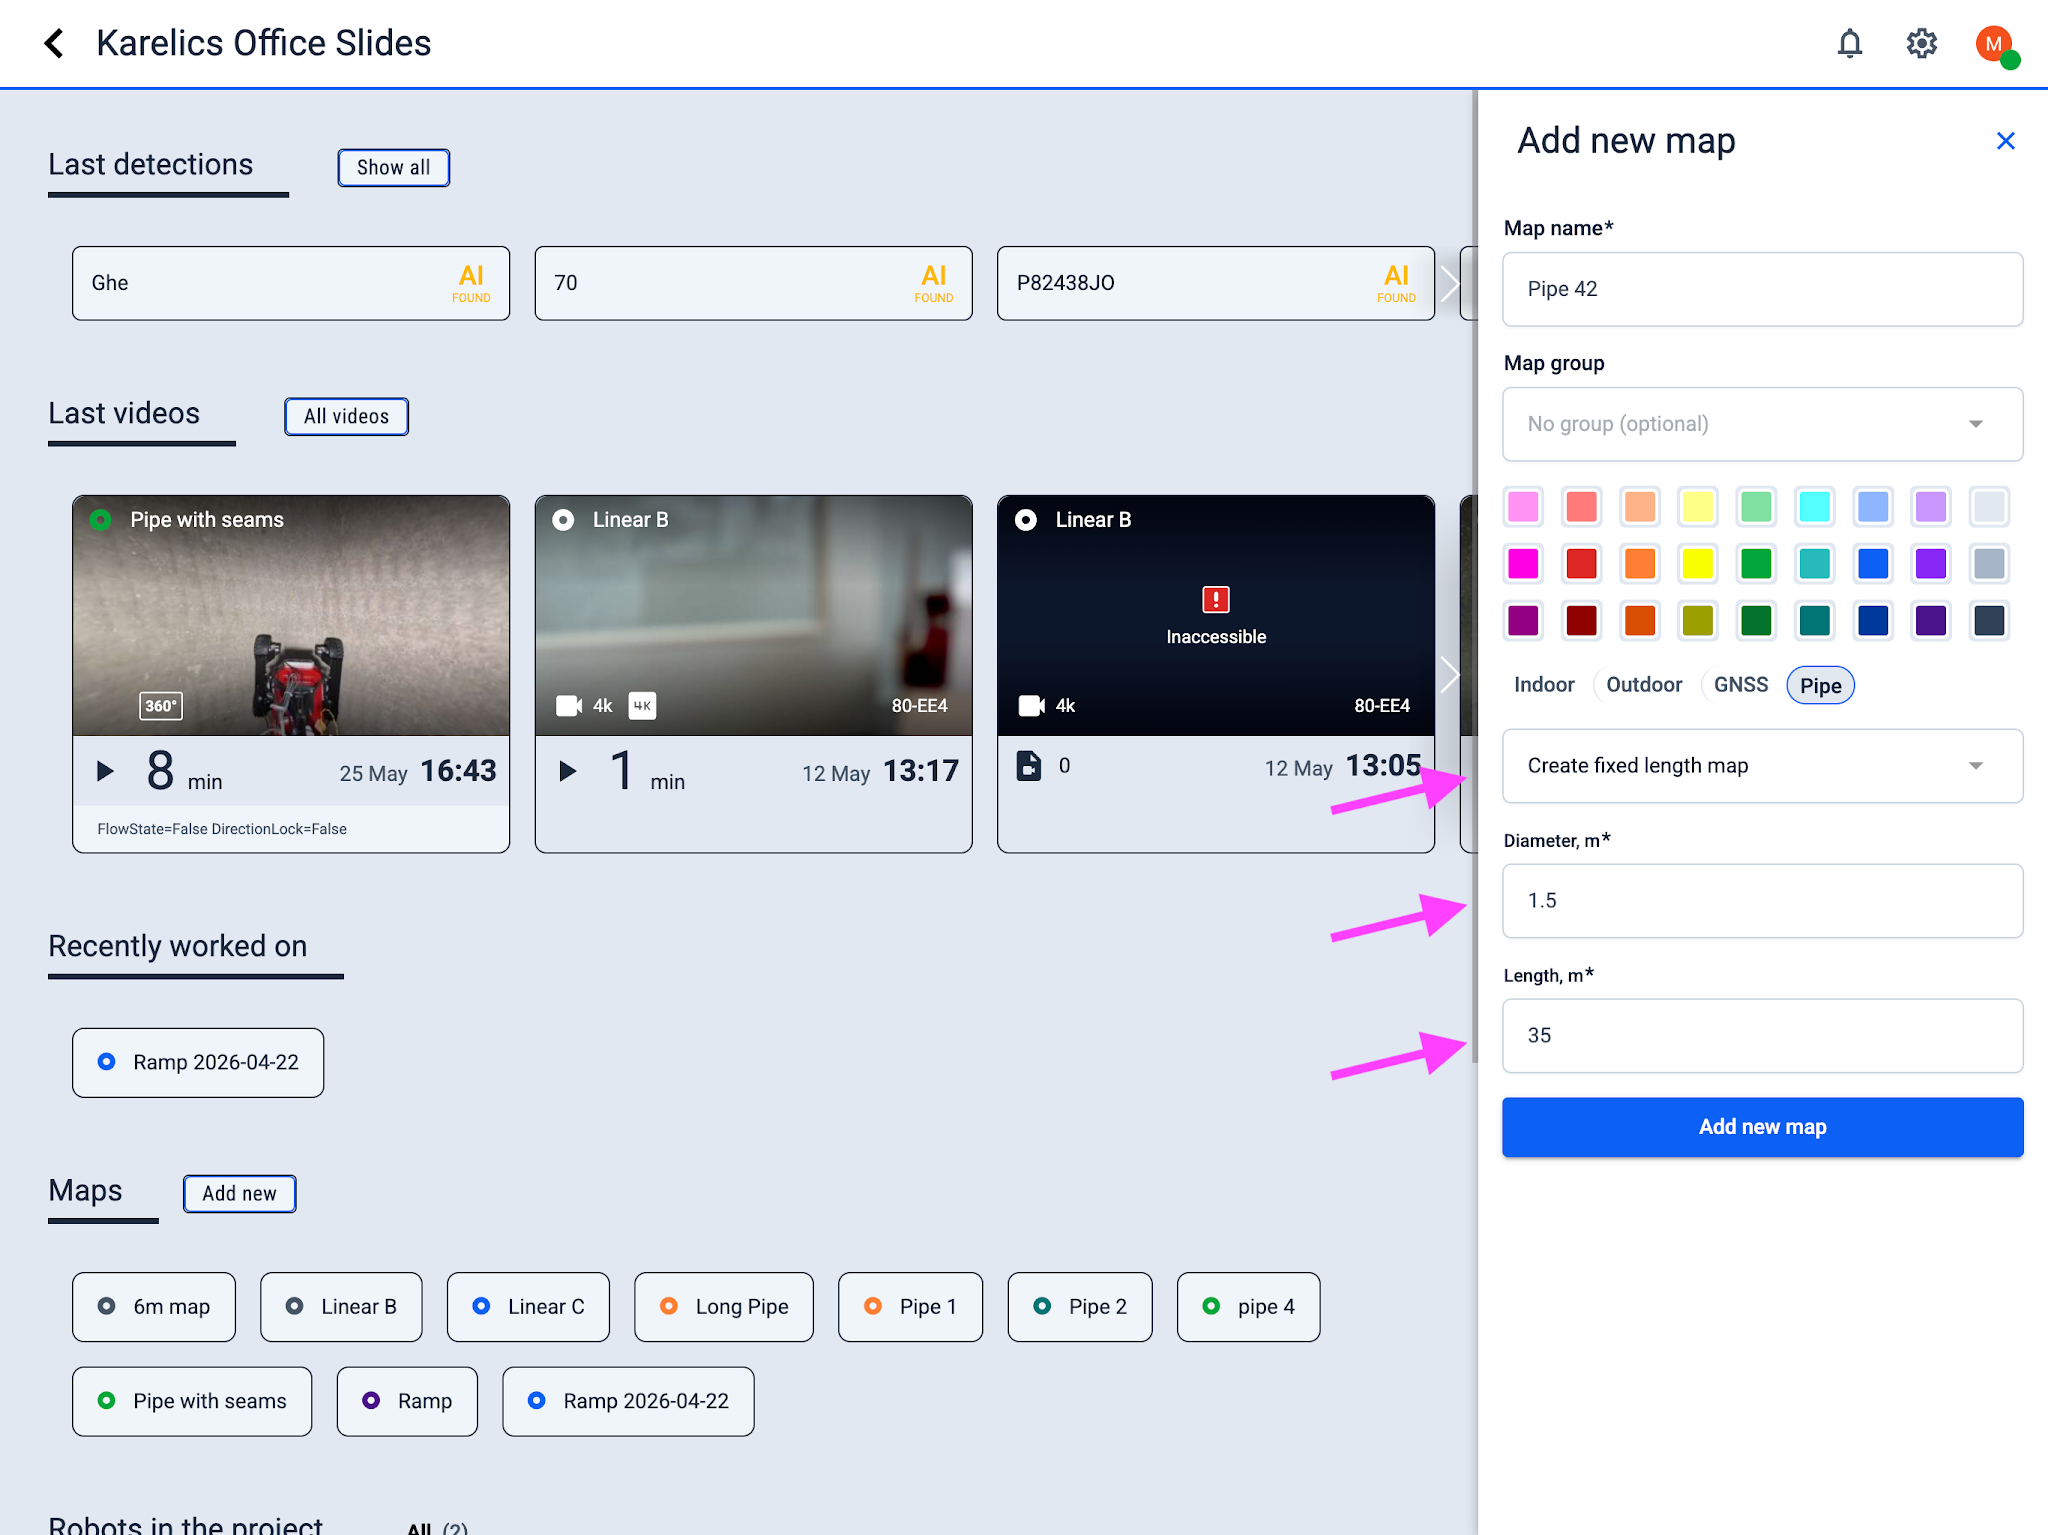
- In Current Project click Add new (Maps).
- Name the map → select Pipe.
- Choose Create fixed length map.
- Enter real Diameter, m and Length, m (e.g.
1.5/35). - Click Add new map.
3. Set robot position
-
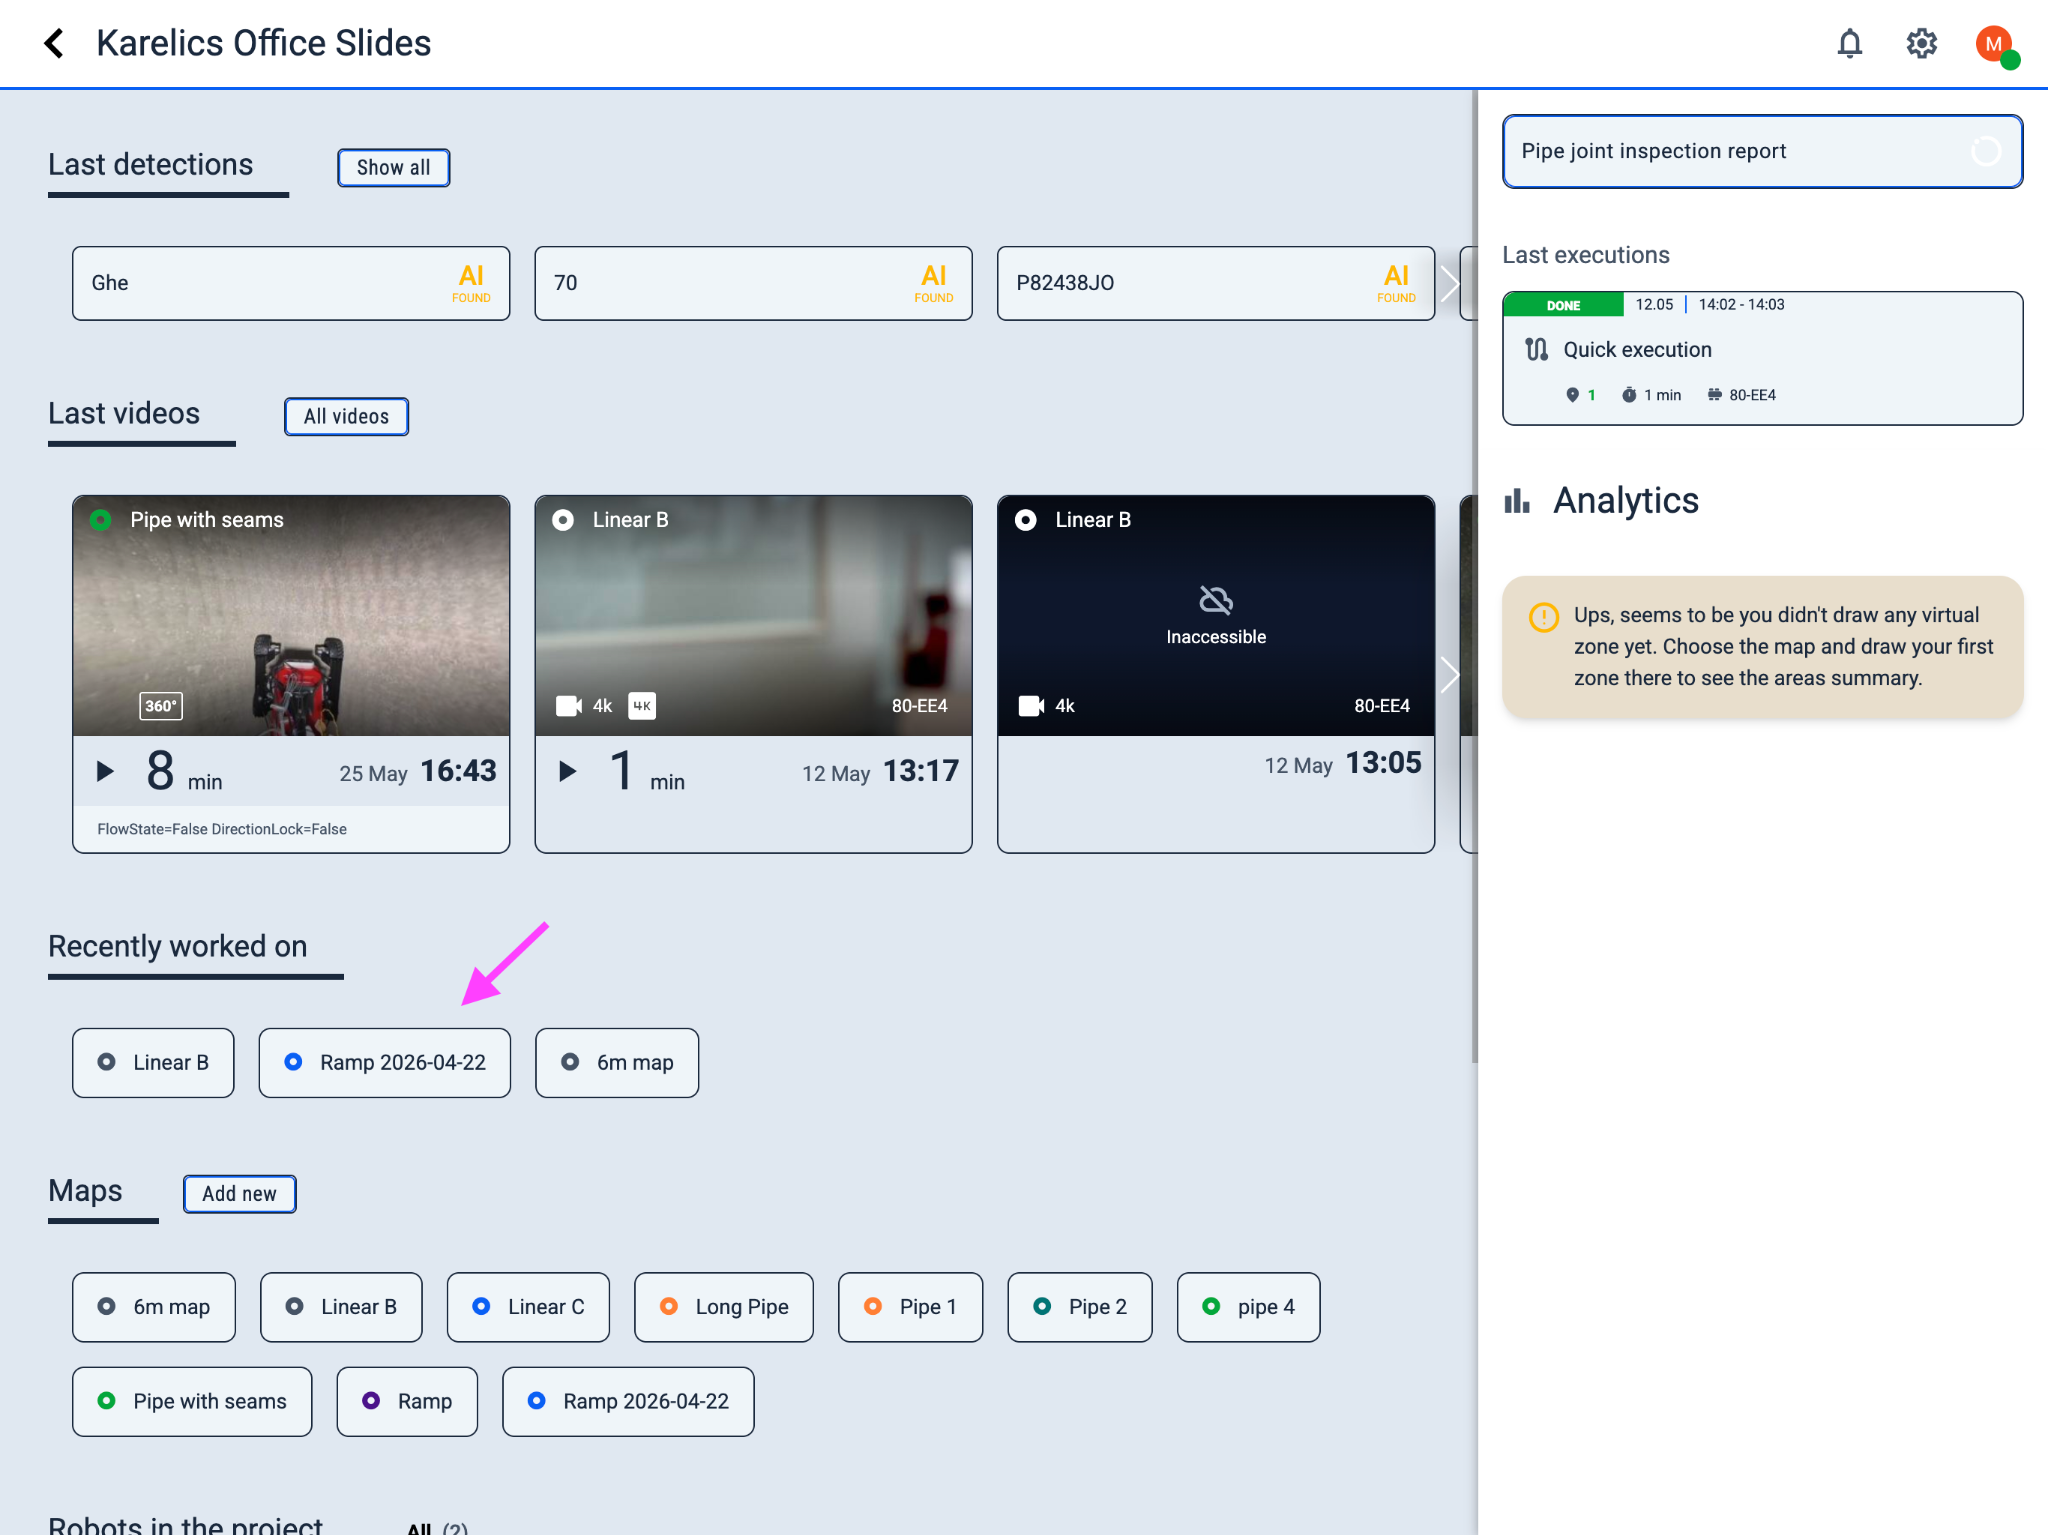
Open the pipe map
-
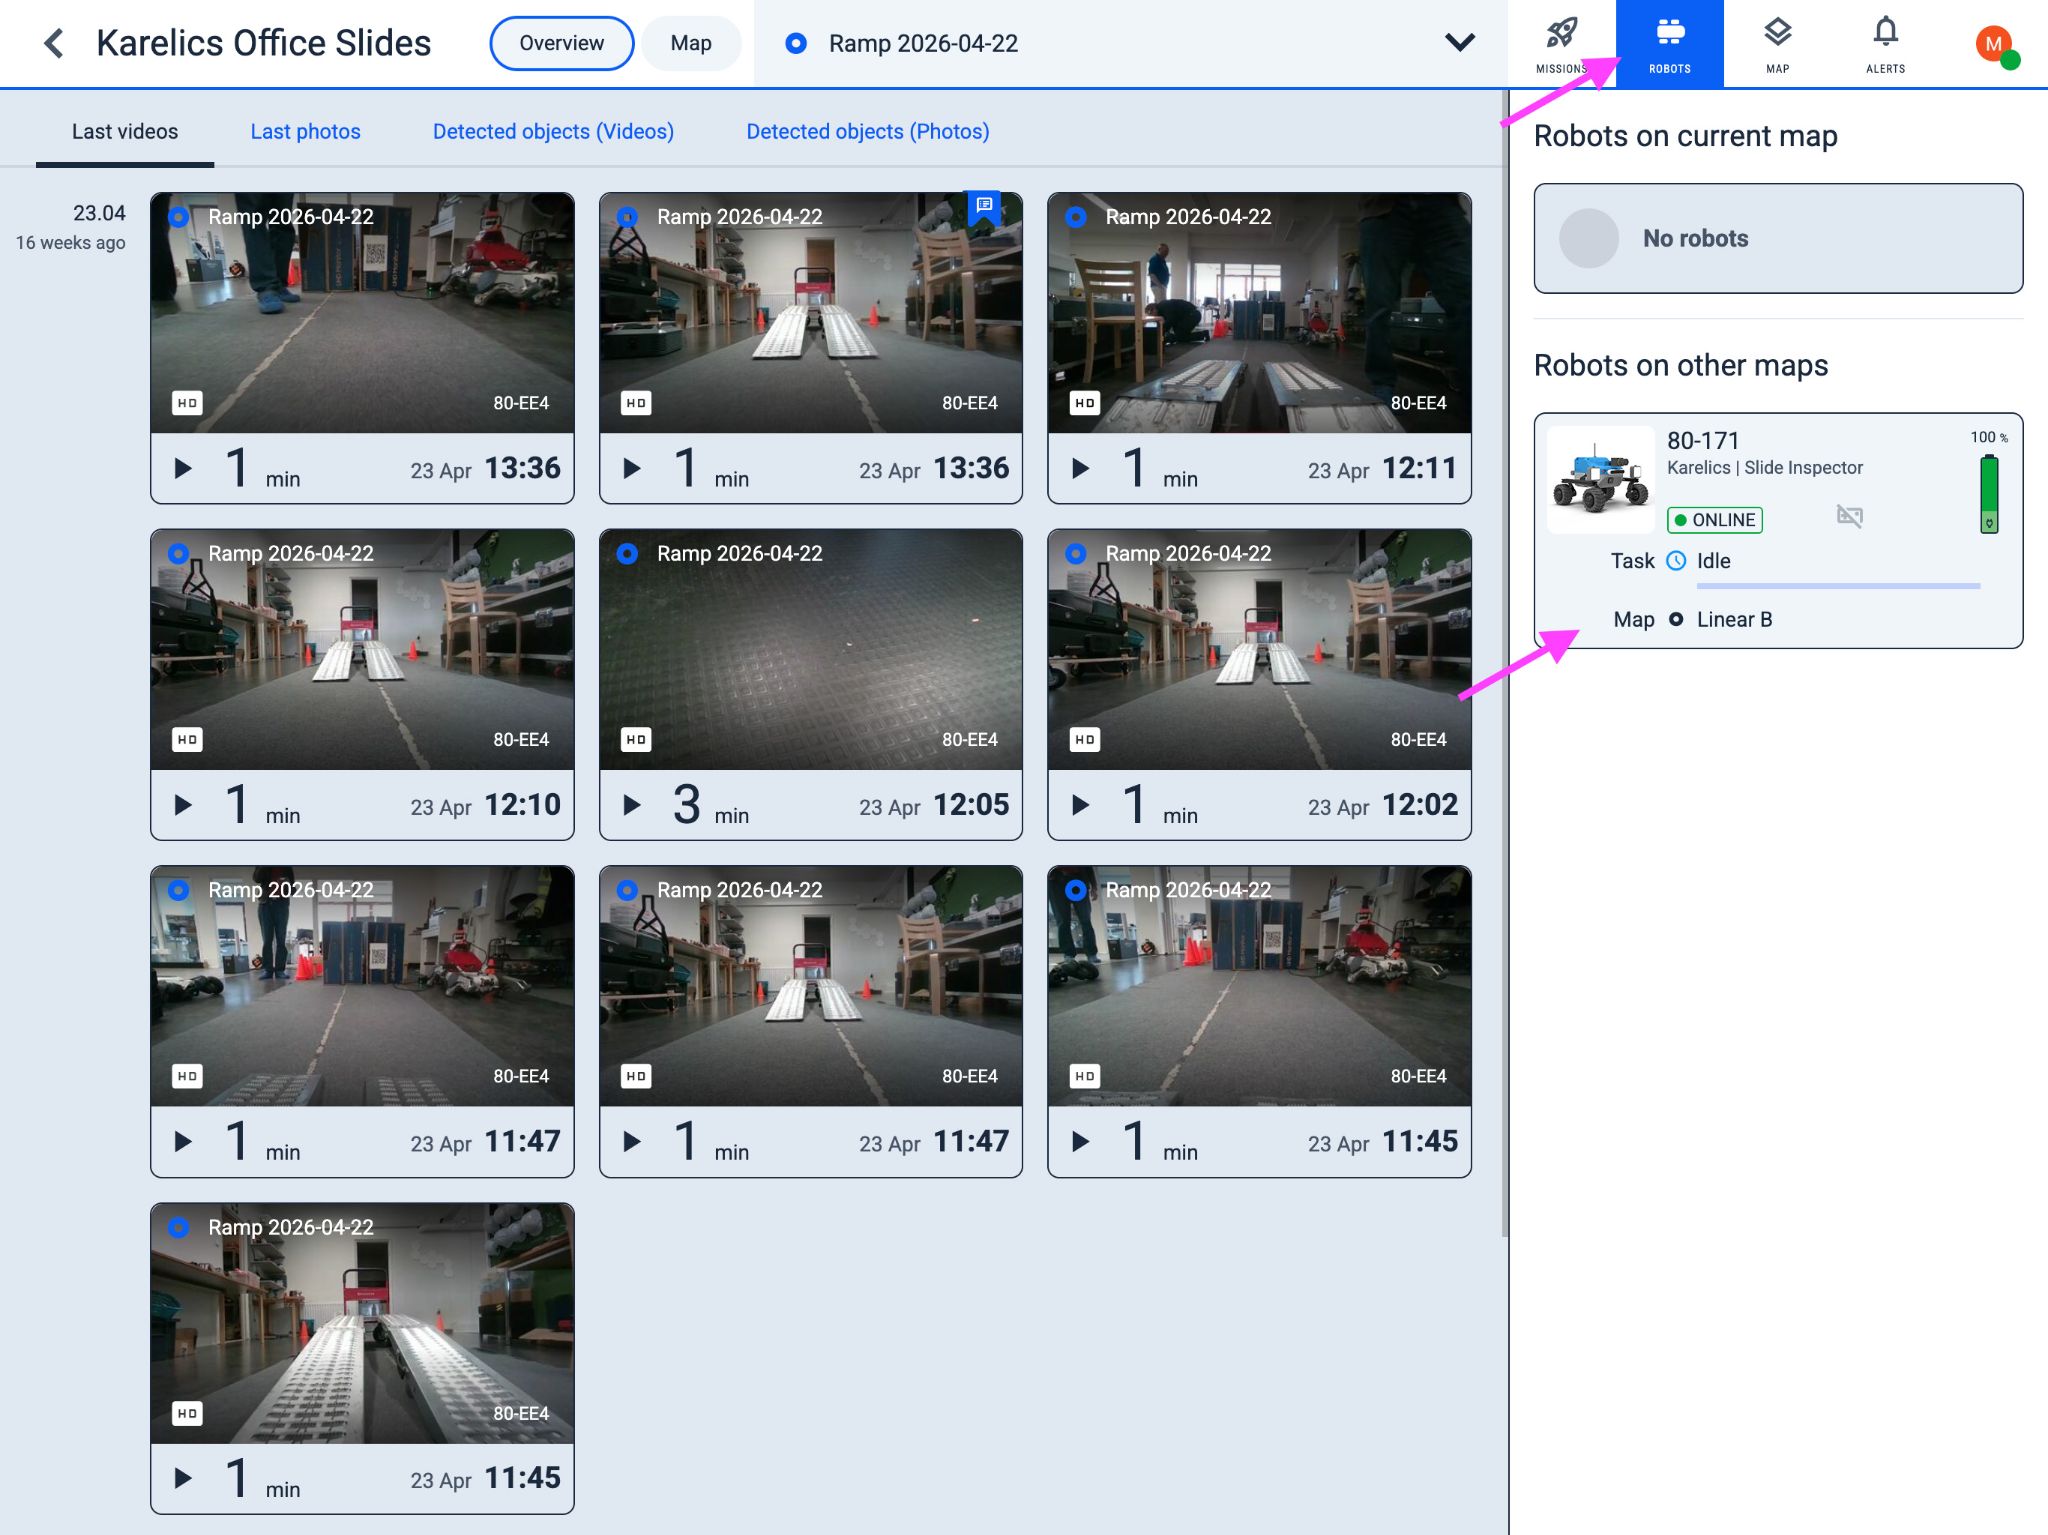
Choose a robot that is online
-
Click Switch to current map if needed.
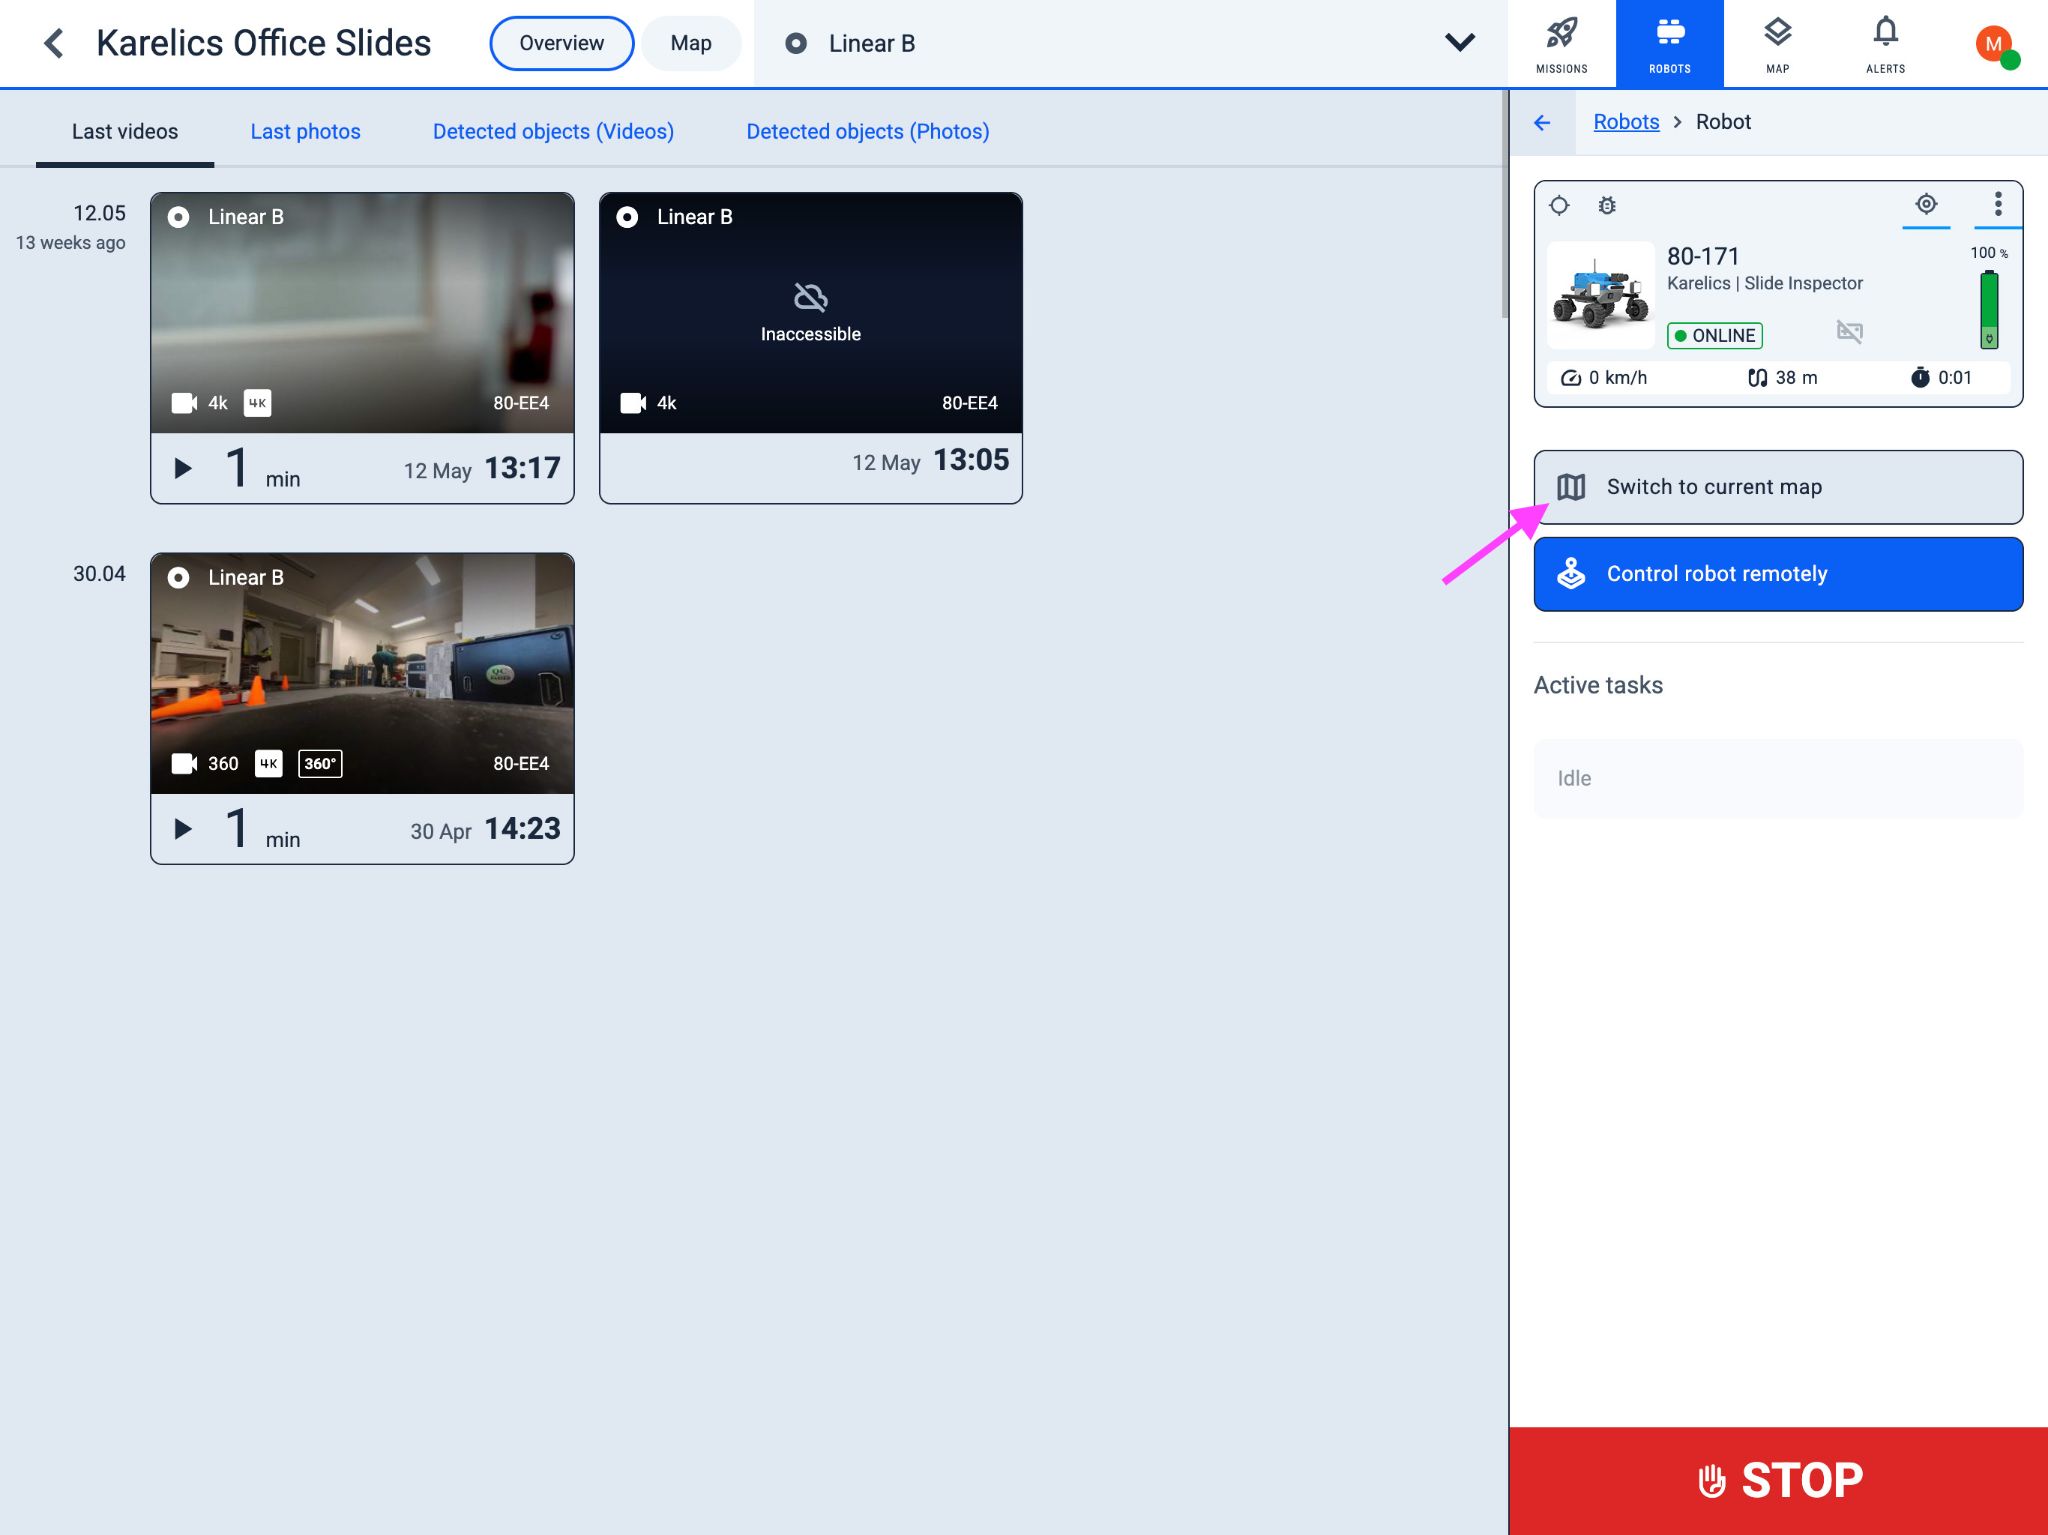
-
Set position → Start point / End point / point on map → Accept position.
Start from the end where the robot actually begins — seam distances count from there.
4. Open Pipe seam inspection
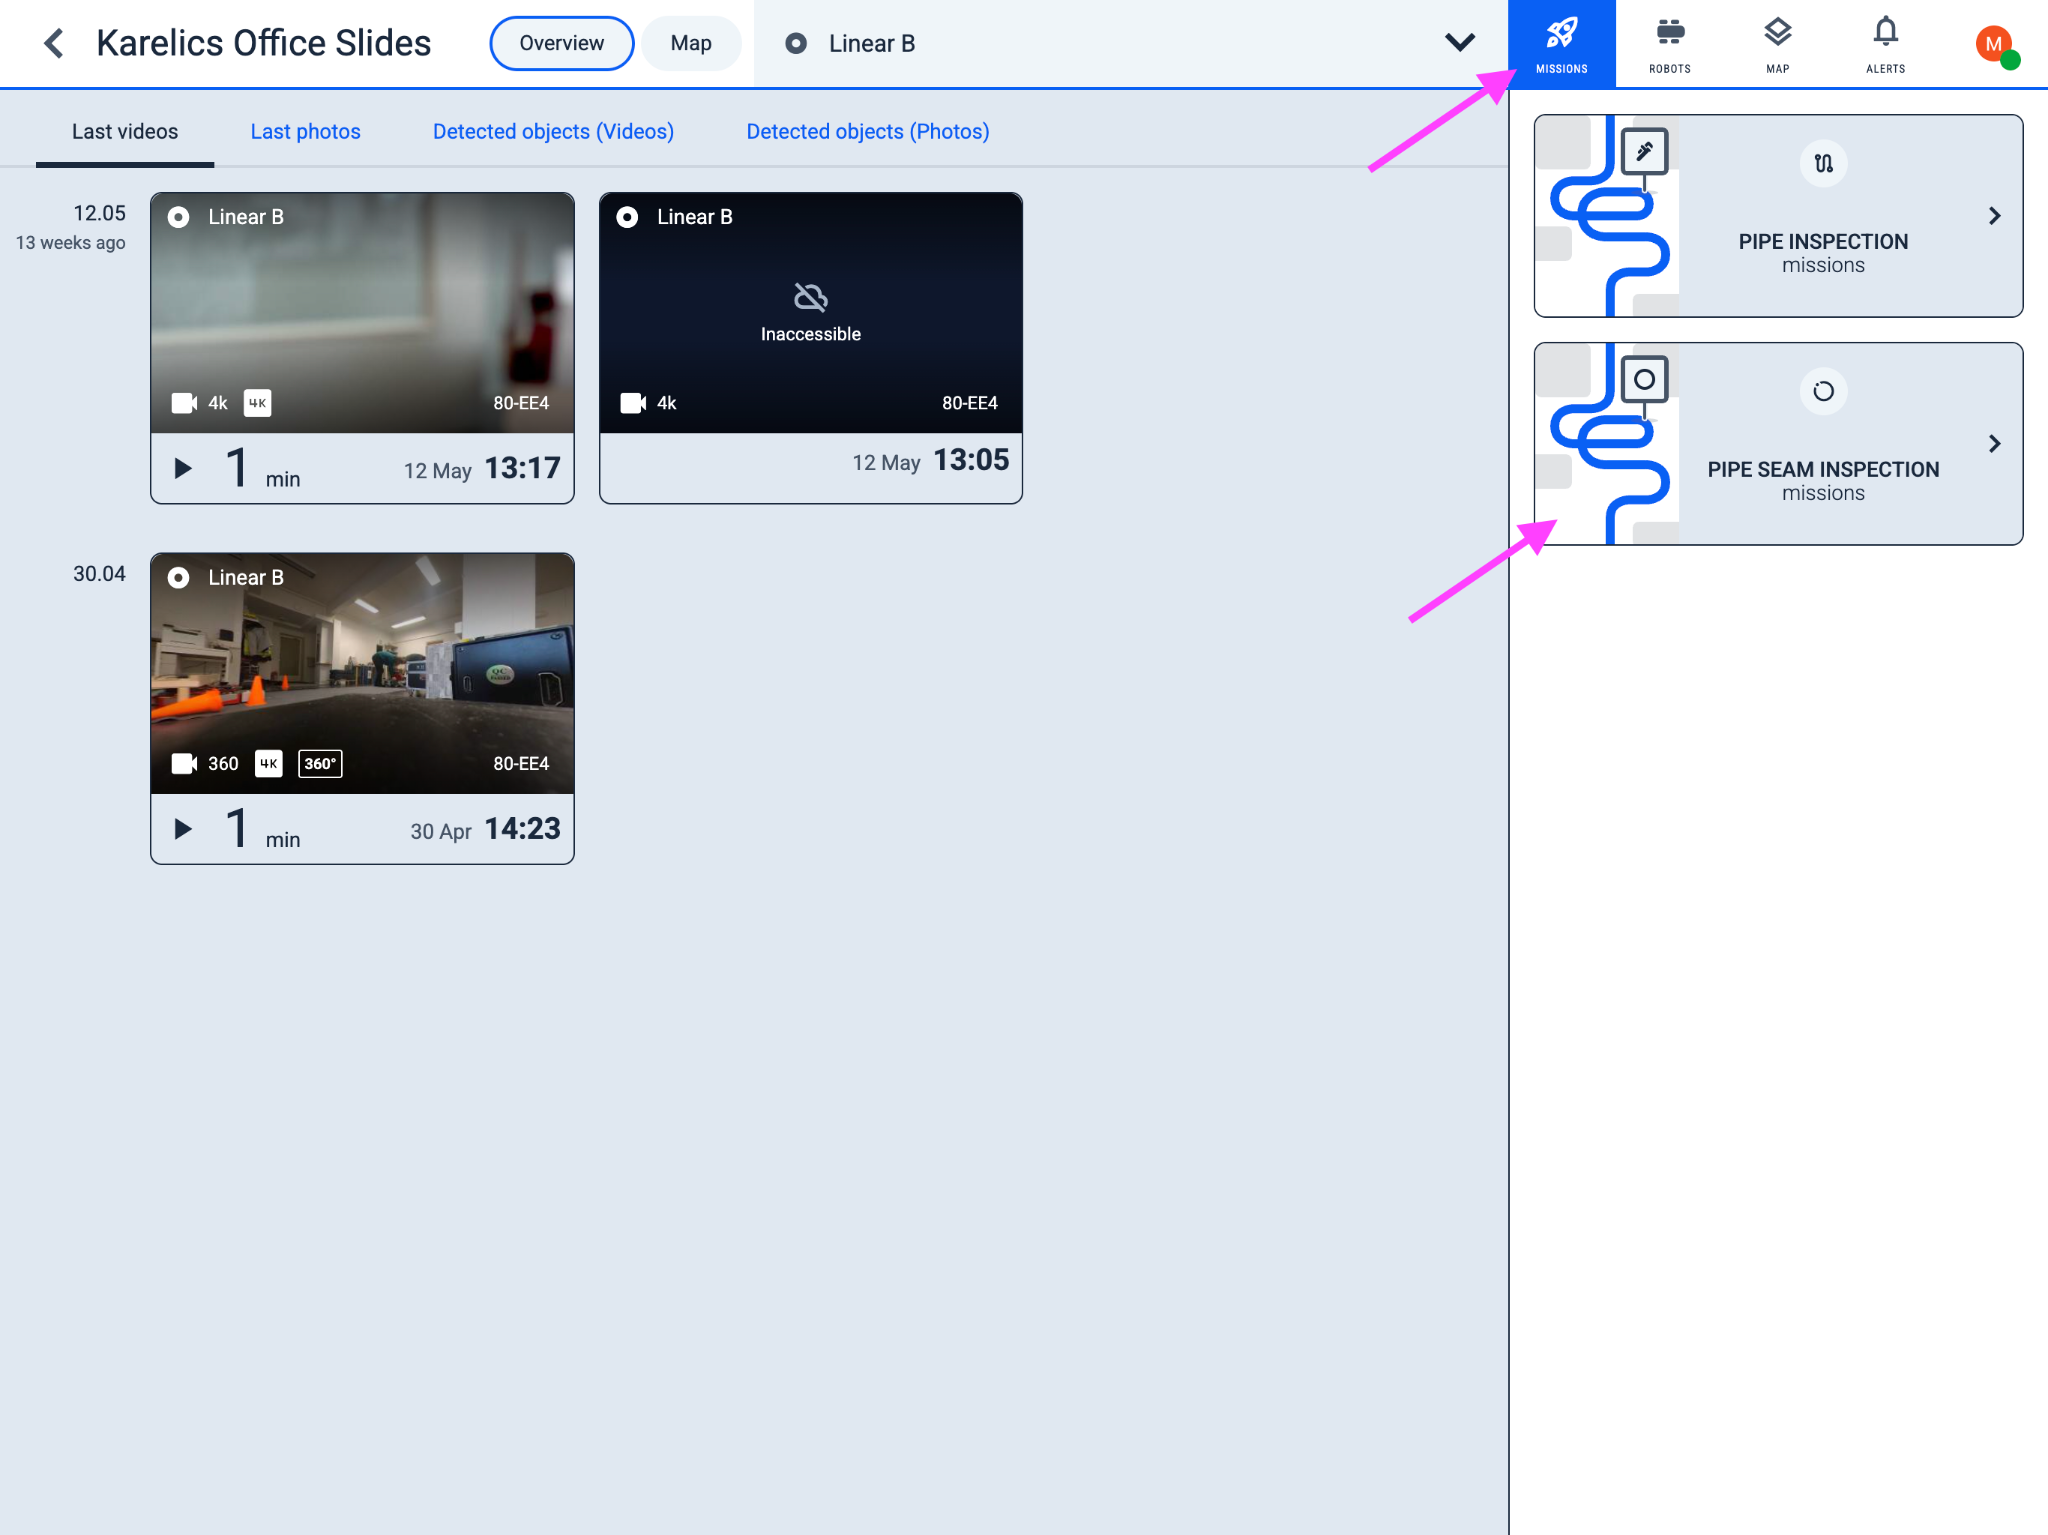
- Open the map workspace → Missions.
- Open Pipe seam inspection.
5. Launch the mission
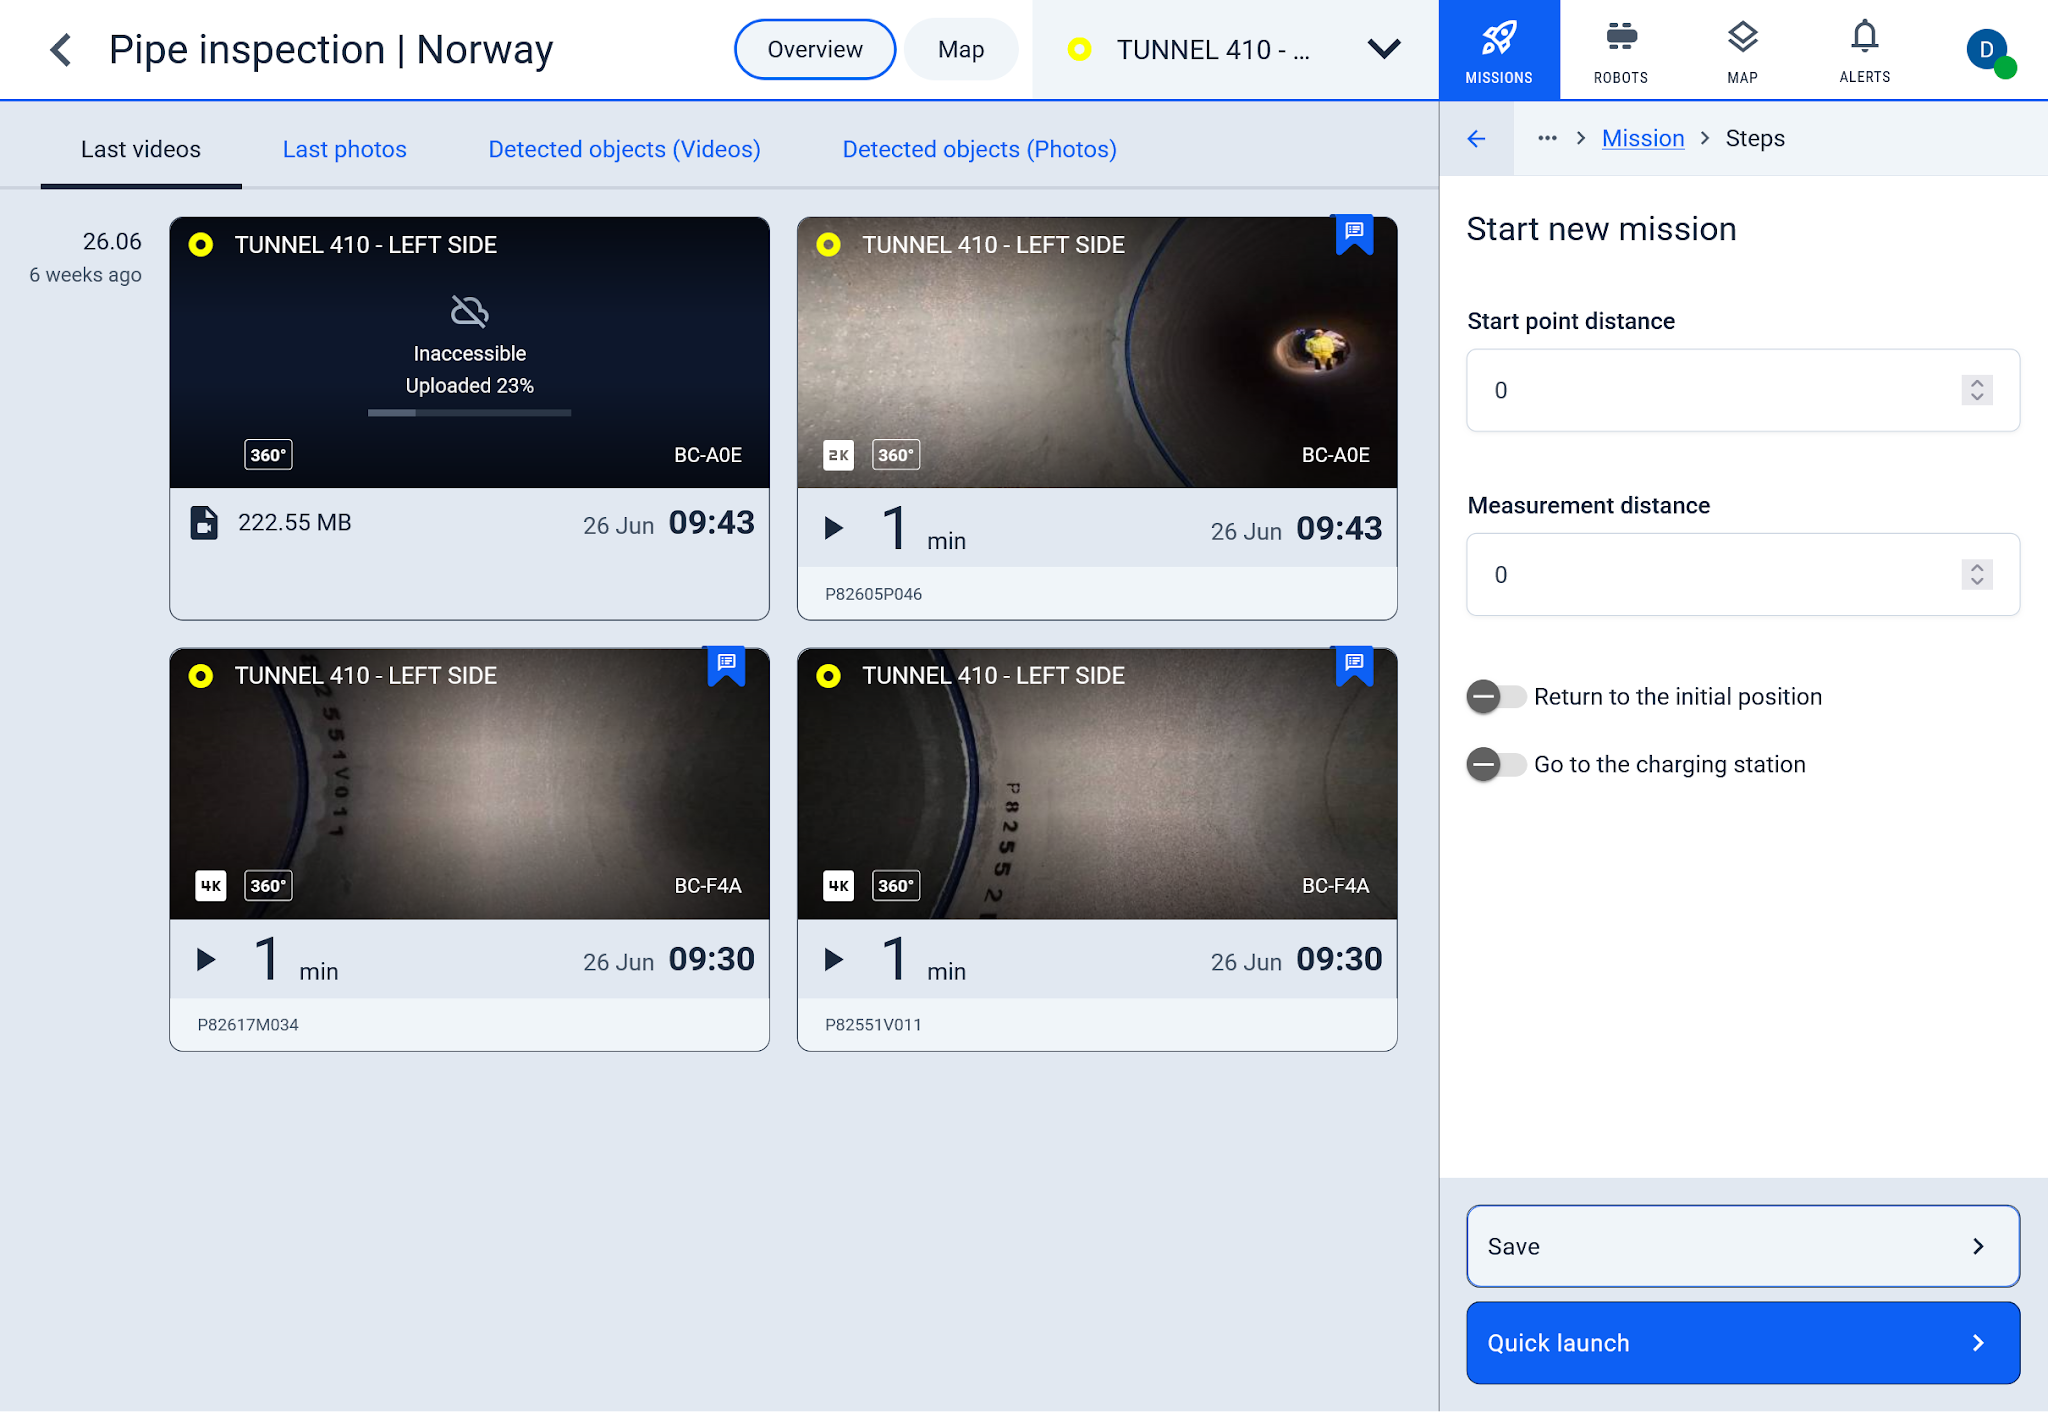
- Click Start new mission.
- Set:
- Start point distance (default
0) — in meters, it will start recording after reaching this amount of meters - Measurement distance (length to inspect in meters) — how many meters to record
- Return to the initial position — on if the robot must come back
- Start point distance (default
- Leave Go to the charging station off.
- Quick launch (or Save / Save & Launch for repeats).
- Select the robot → Launch.
6. Review the recording
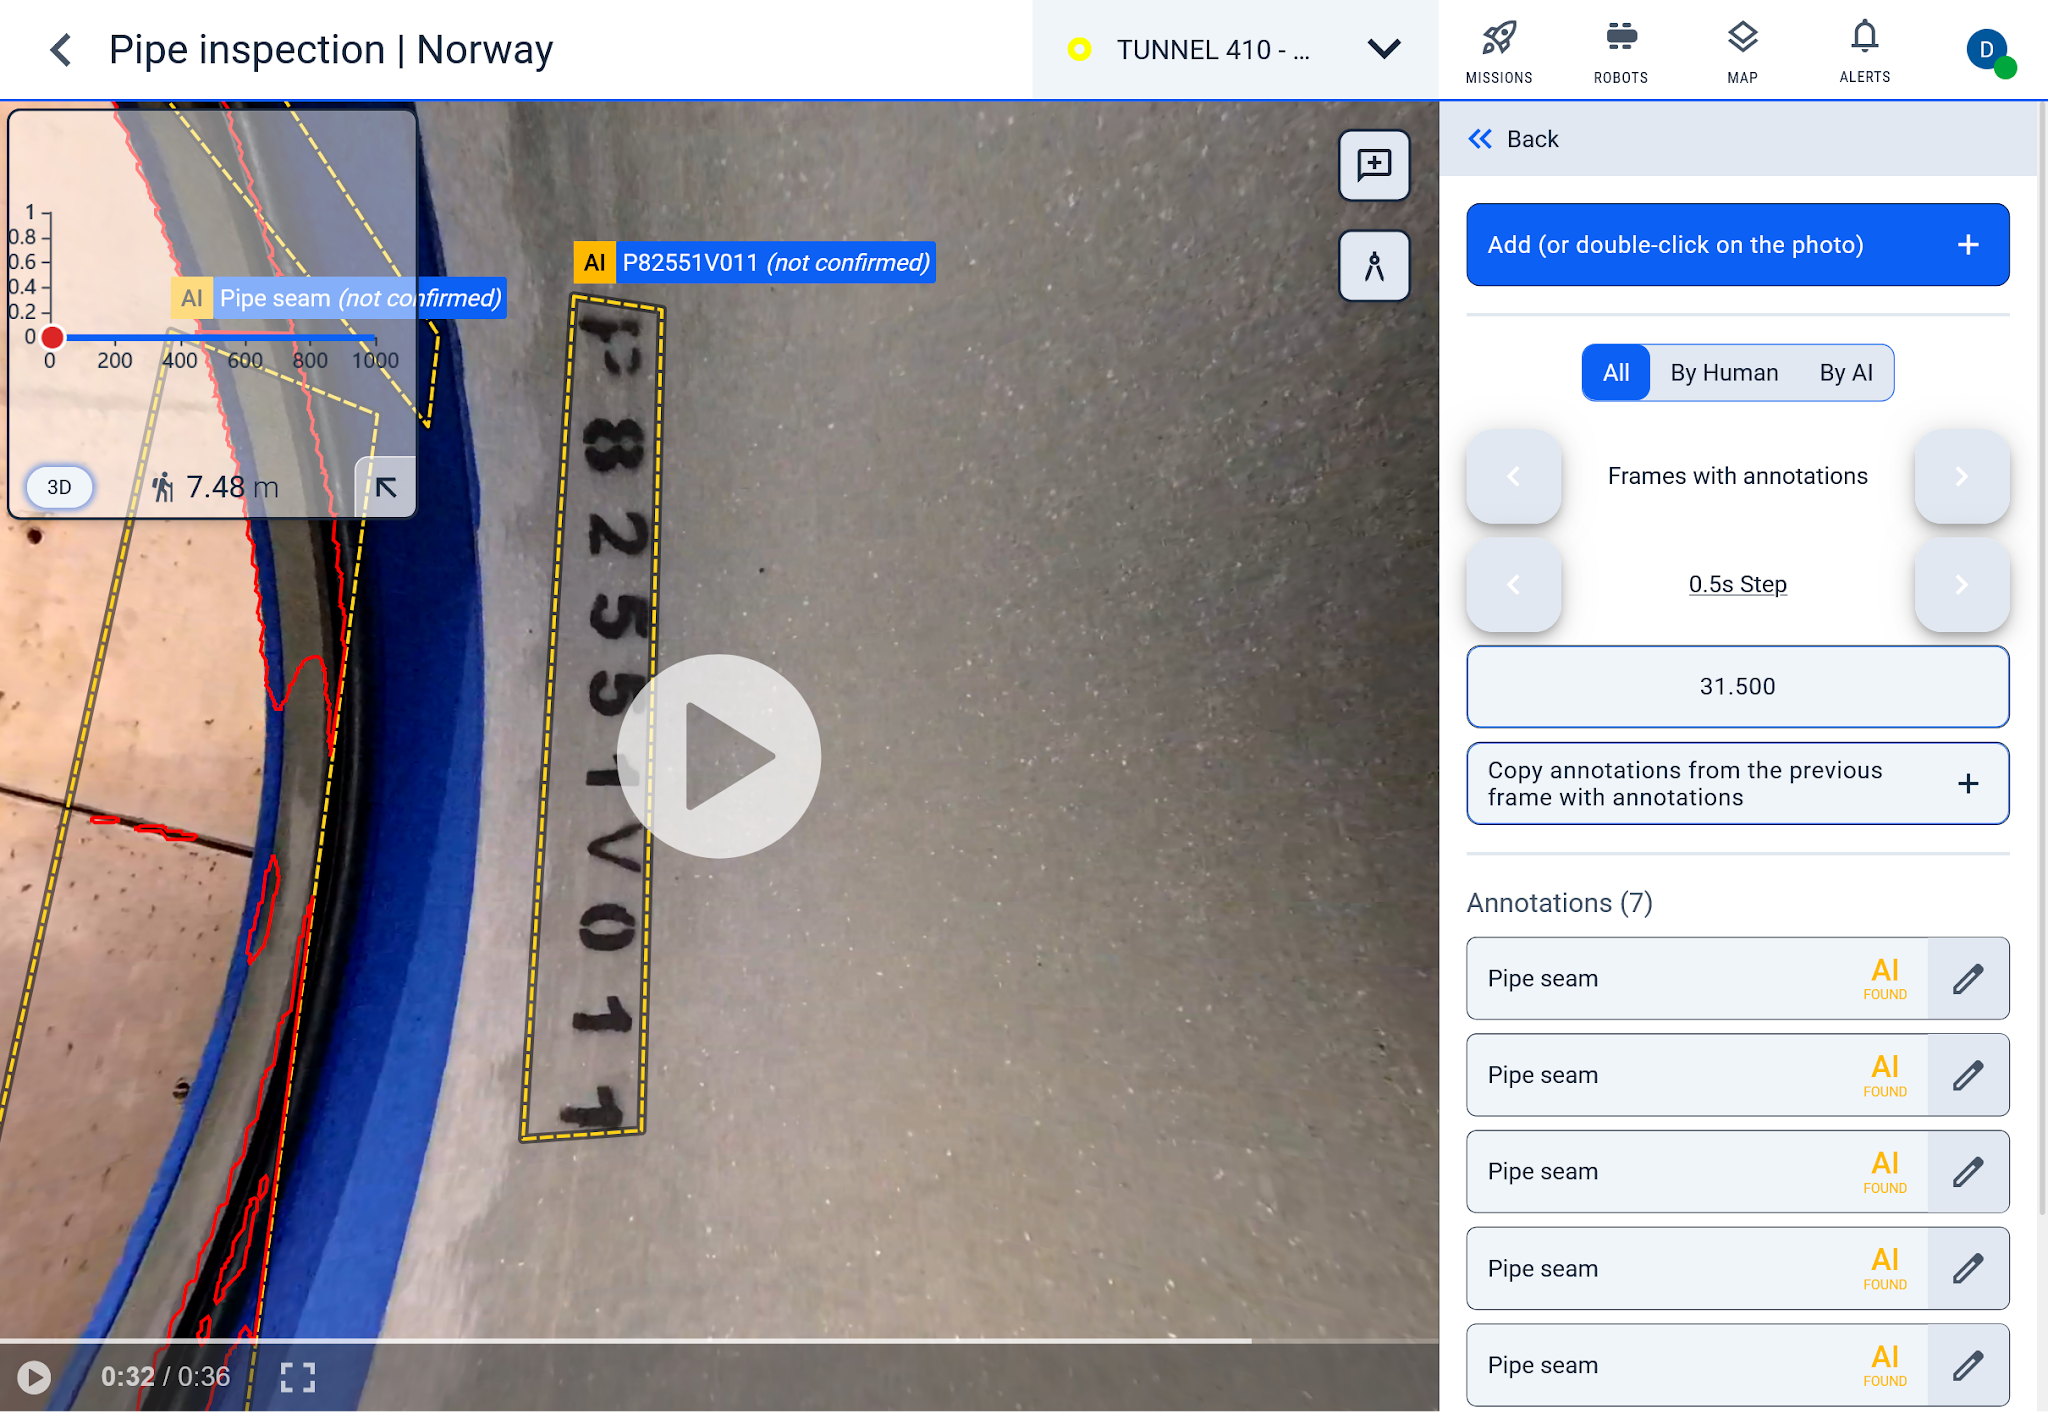
- Open Overview → Last videos.
- Open the recording → Annotations to confirm seams (AI FOUND until confirmed).
- Use Cylinder ruler to measure seam width (diameter must be correct on the map).
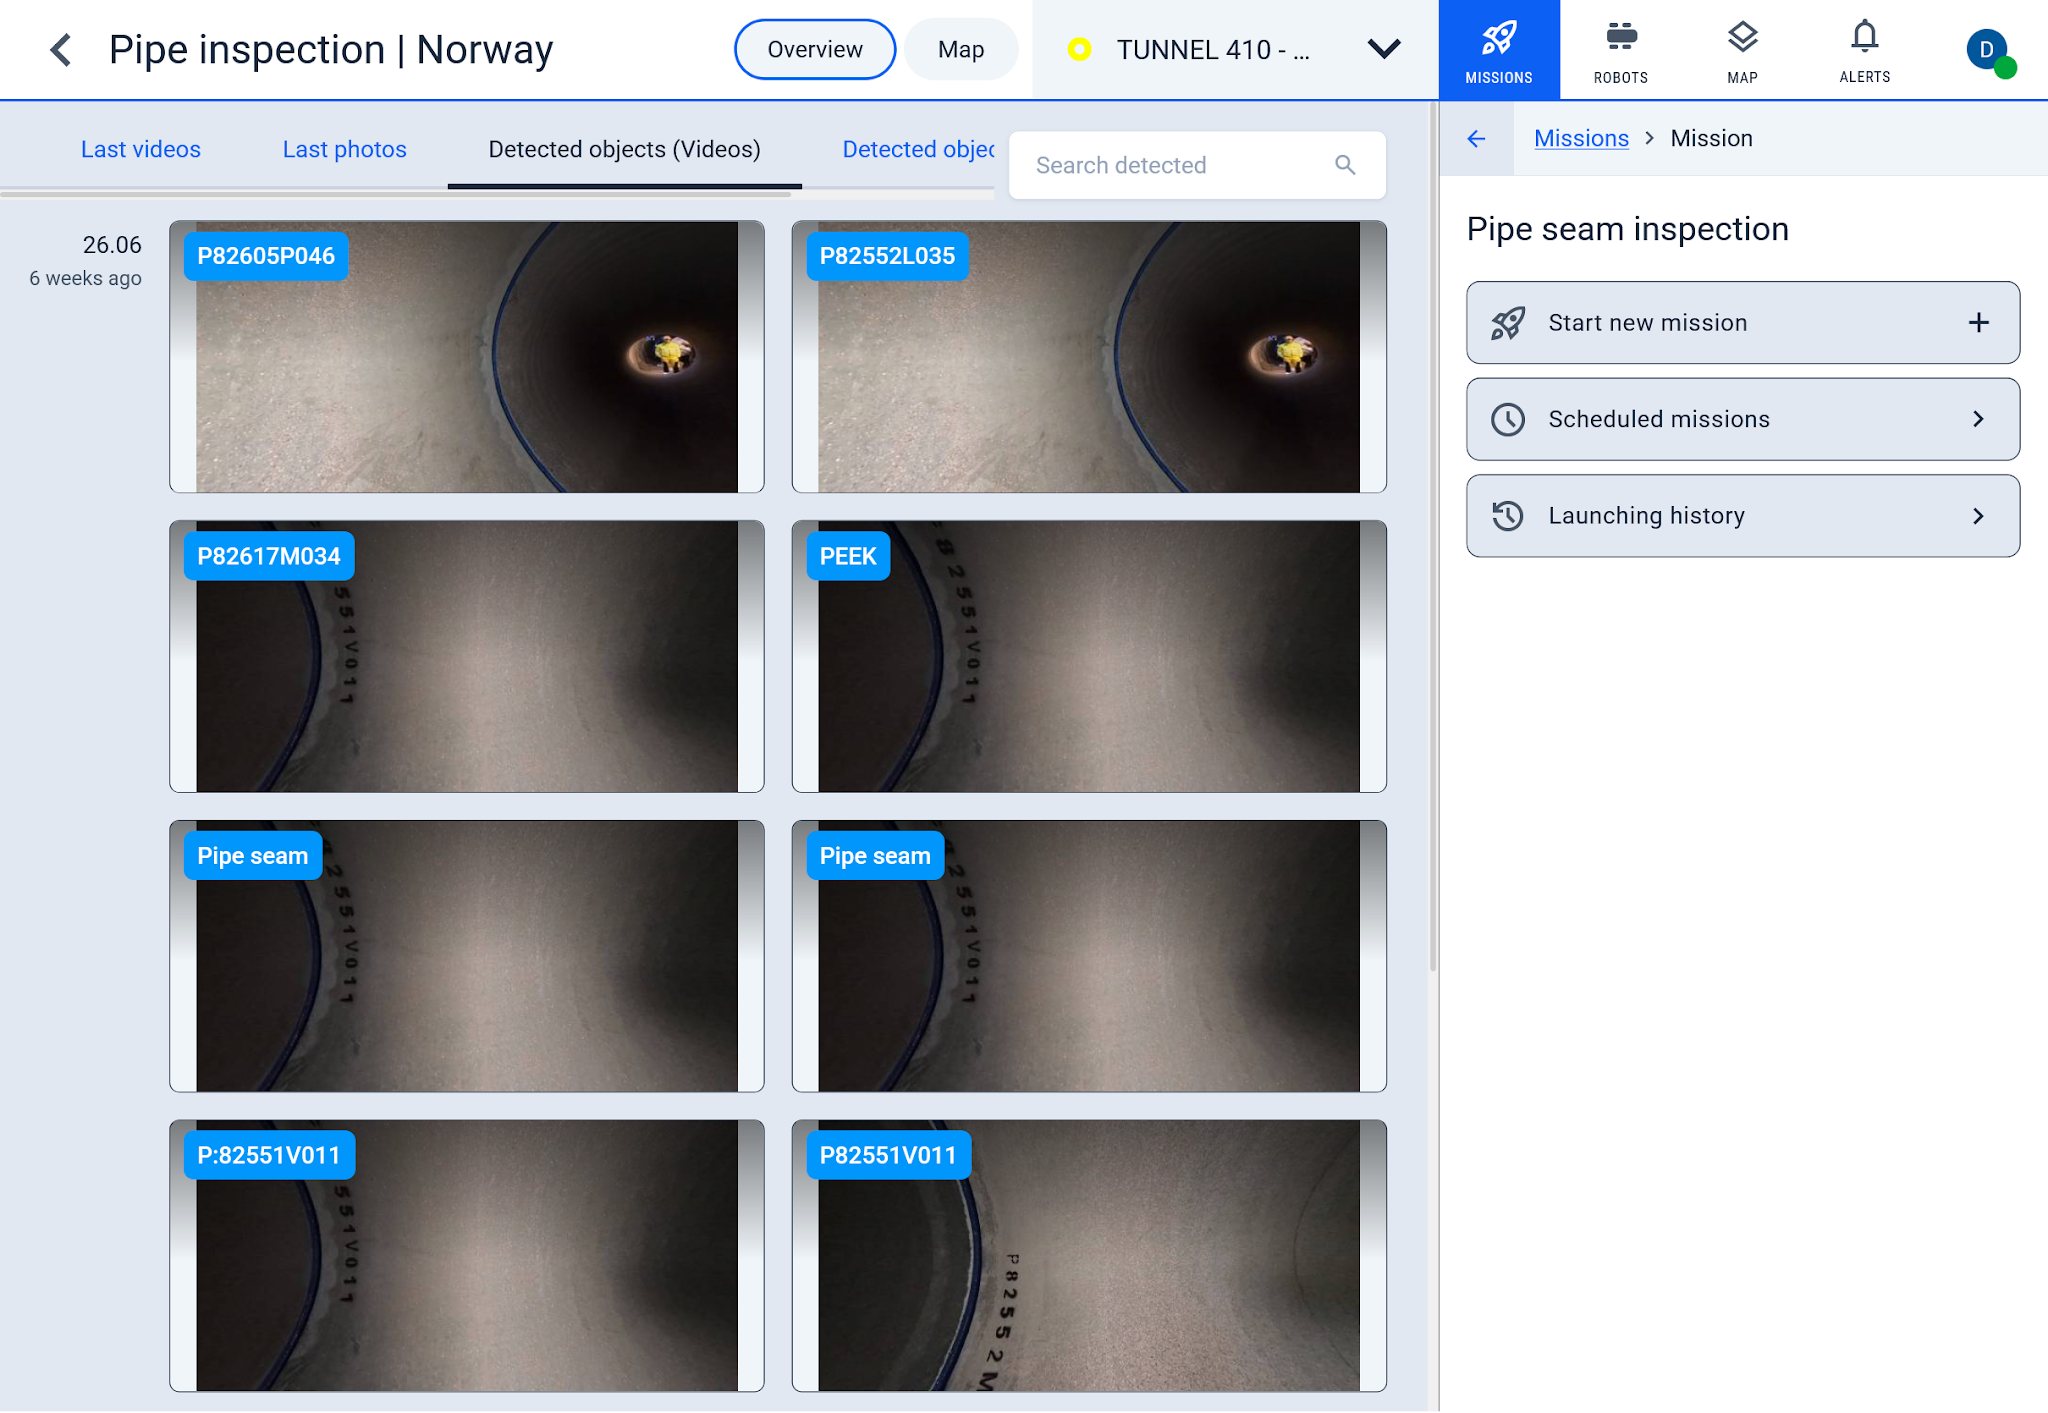
7. Find a seam by segment name
- Overview → Detected objects (Videos).
- Type the segment name in Search detected.
- Open the card to jump to that seam in the recording.
Support
Support: support@karelics.fi