FlightHub Integration
DJI FlightHub 2 is a one-stop cloud-based platform for drone operations management. It offers remote control, intelligent flight scheduling, versatile flight route management, and seamless third-party integration. Powered by advanced AI and a Multimodal Large Language Model (LLM), the platform delivers an air-ground integrated automated operations system with comprehensive visual oversight and control across public safety, emergency response, geospatial mapping, and inspections.
The integration of FlightHub 2 with Karelics Cloud connects aerial drone operations with your Karelics project in a single workflow. It allows you to:
- Synchronise missions from FlightHub to Karelics Cloud.
- Instantly synchronise photos and videos captured during FlightHub missions to Karelics Cloud.
- Launch FlightHub missions directly from Karelics Cloud.
In Karelics Cloud Admin Hub
1. Connecting
Navigate to the following path:
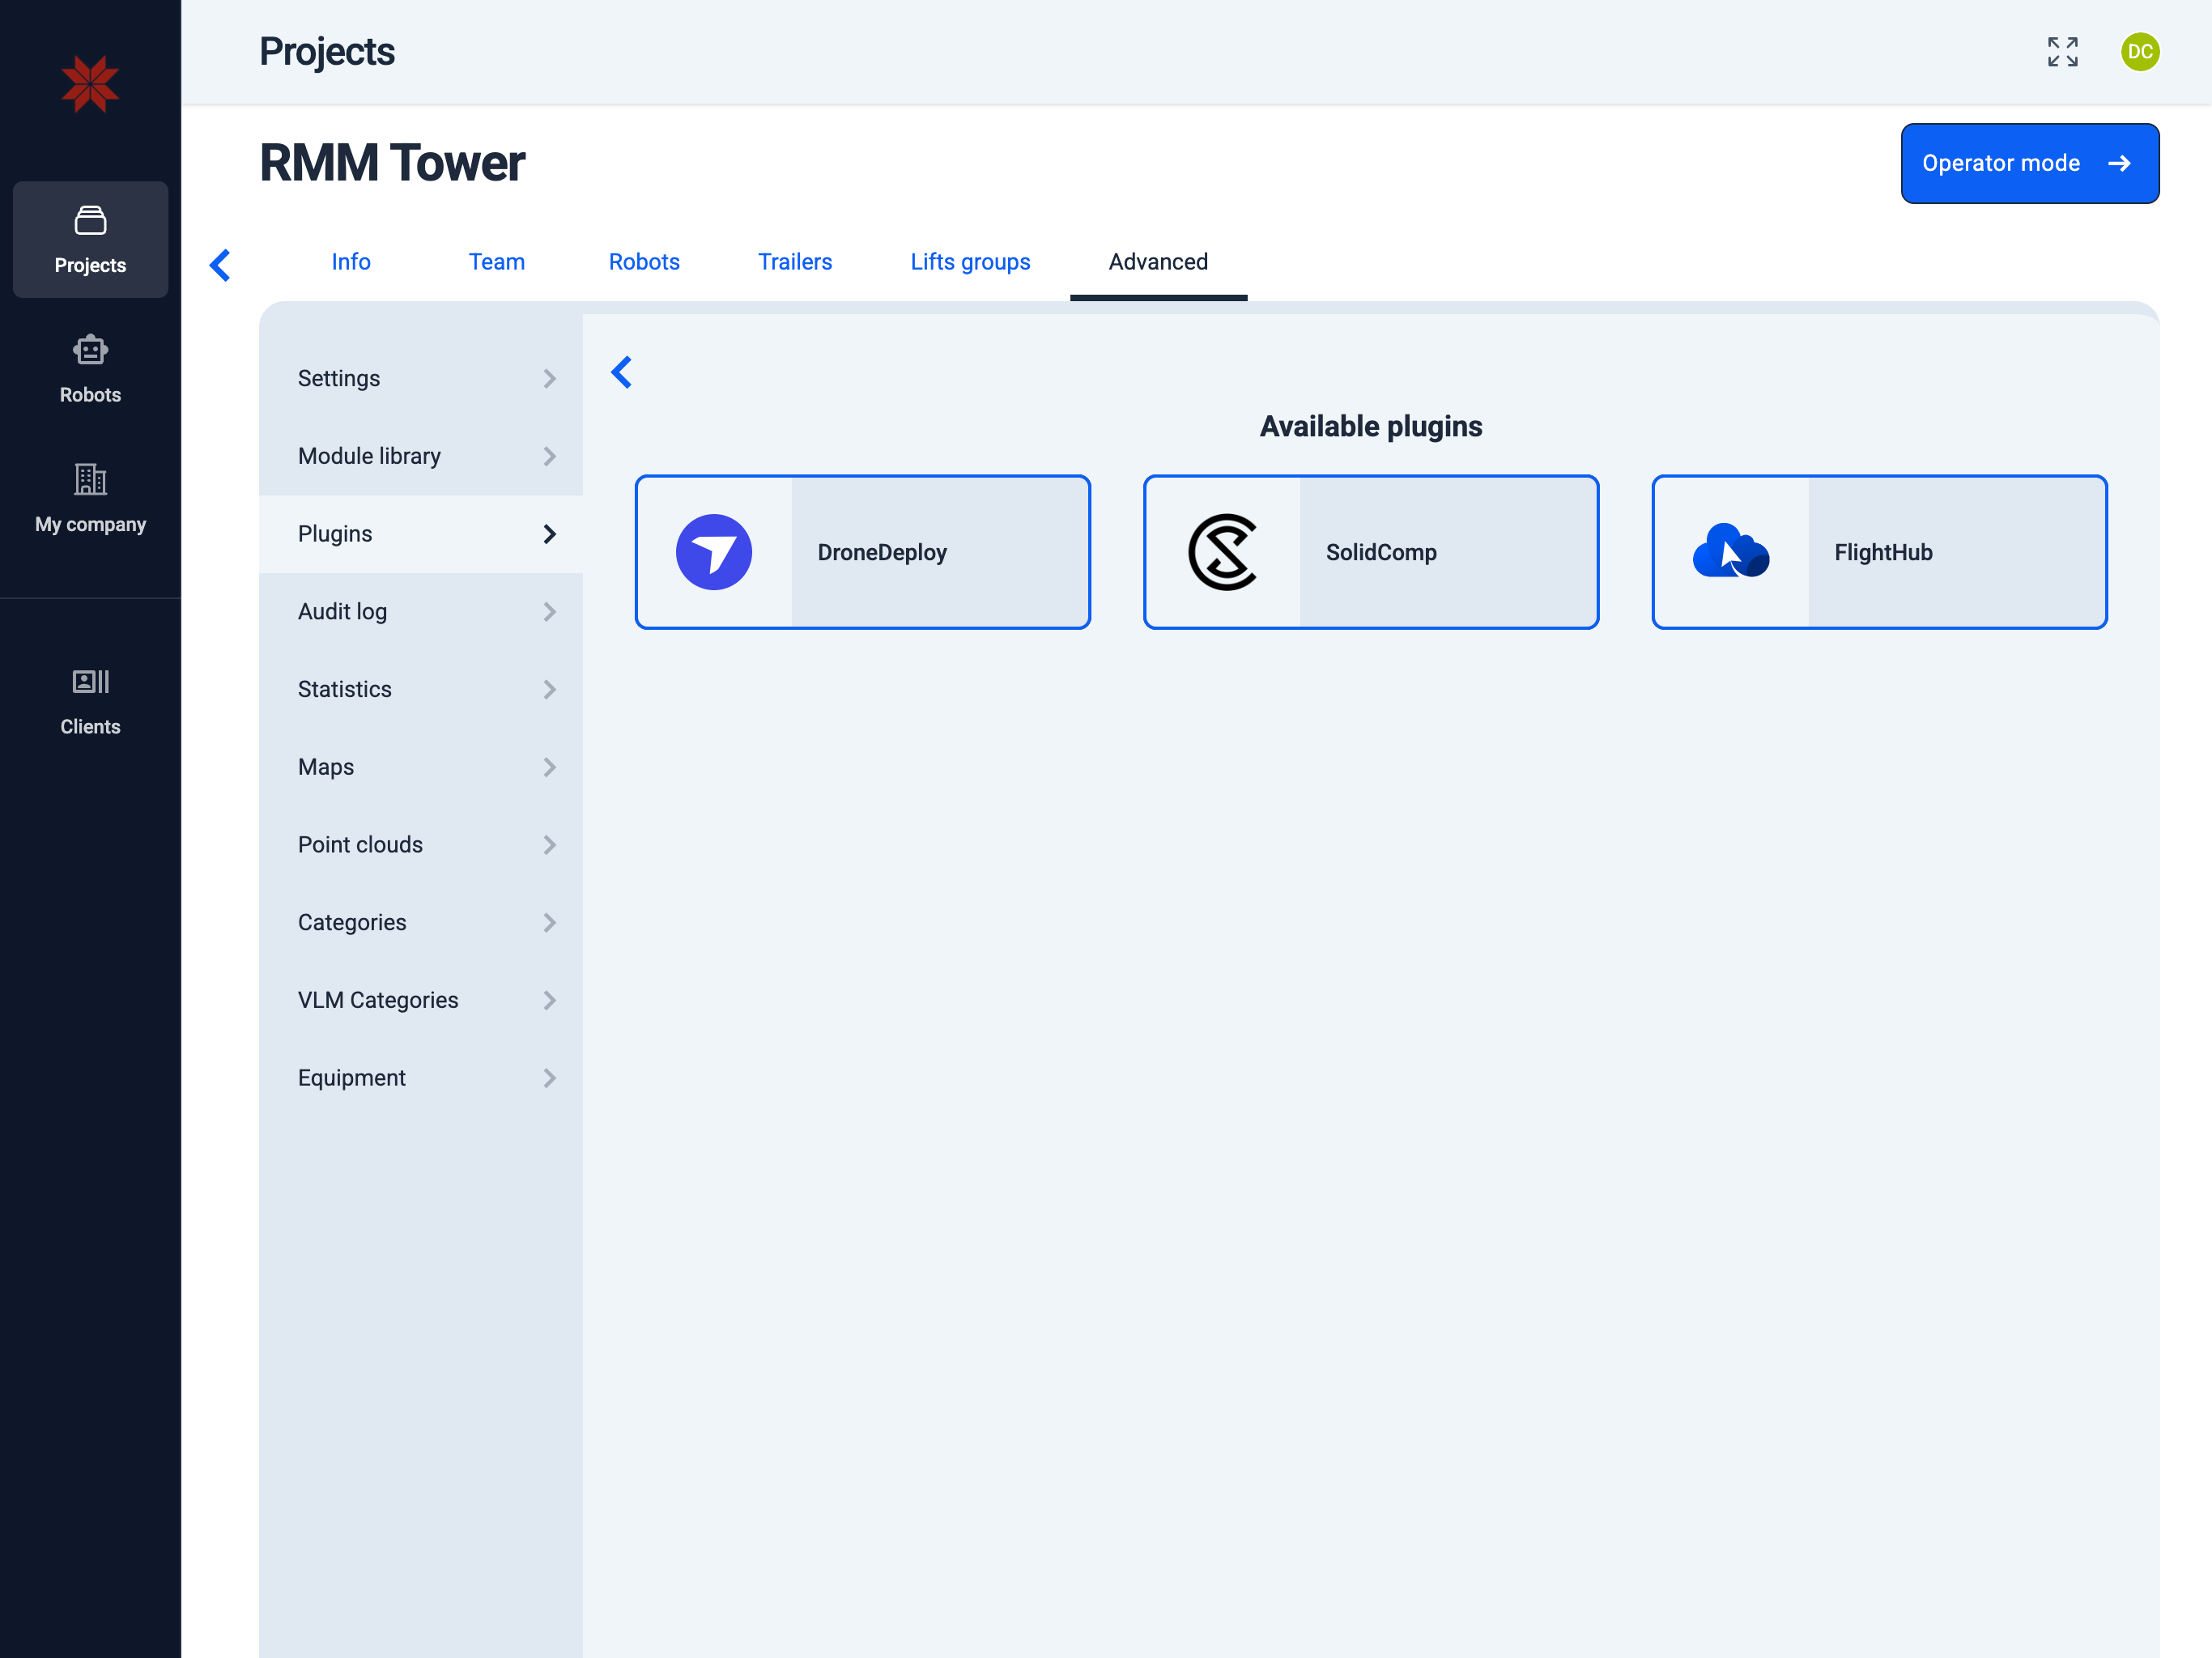
Admin Hub → Projects → Current Project → Advanced → Plugins
-
To connect a plugin, click the "Add plugins" button.

-
Select a plugin.
Setup the plugins:
📄️ DroneDeploy

📄️ Digital Twin
📄️ FlightHub
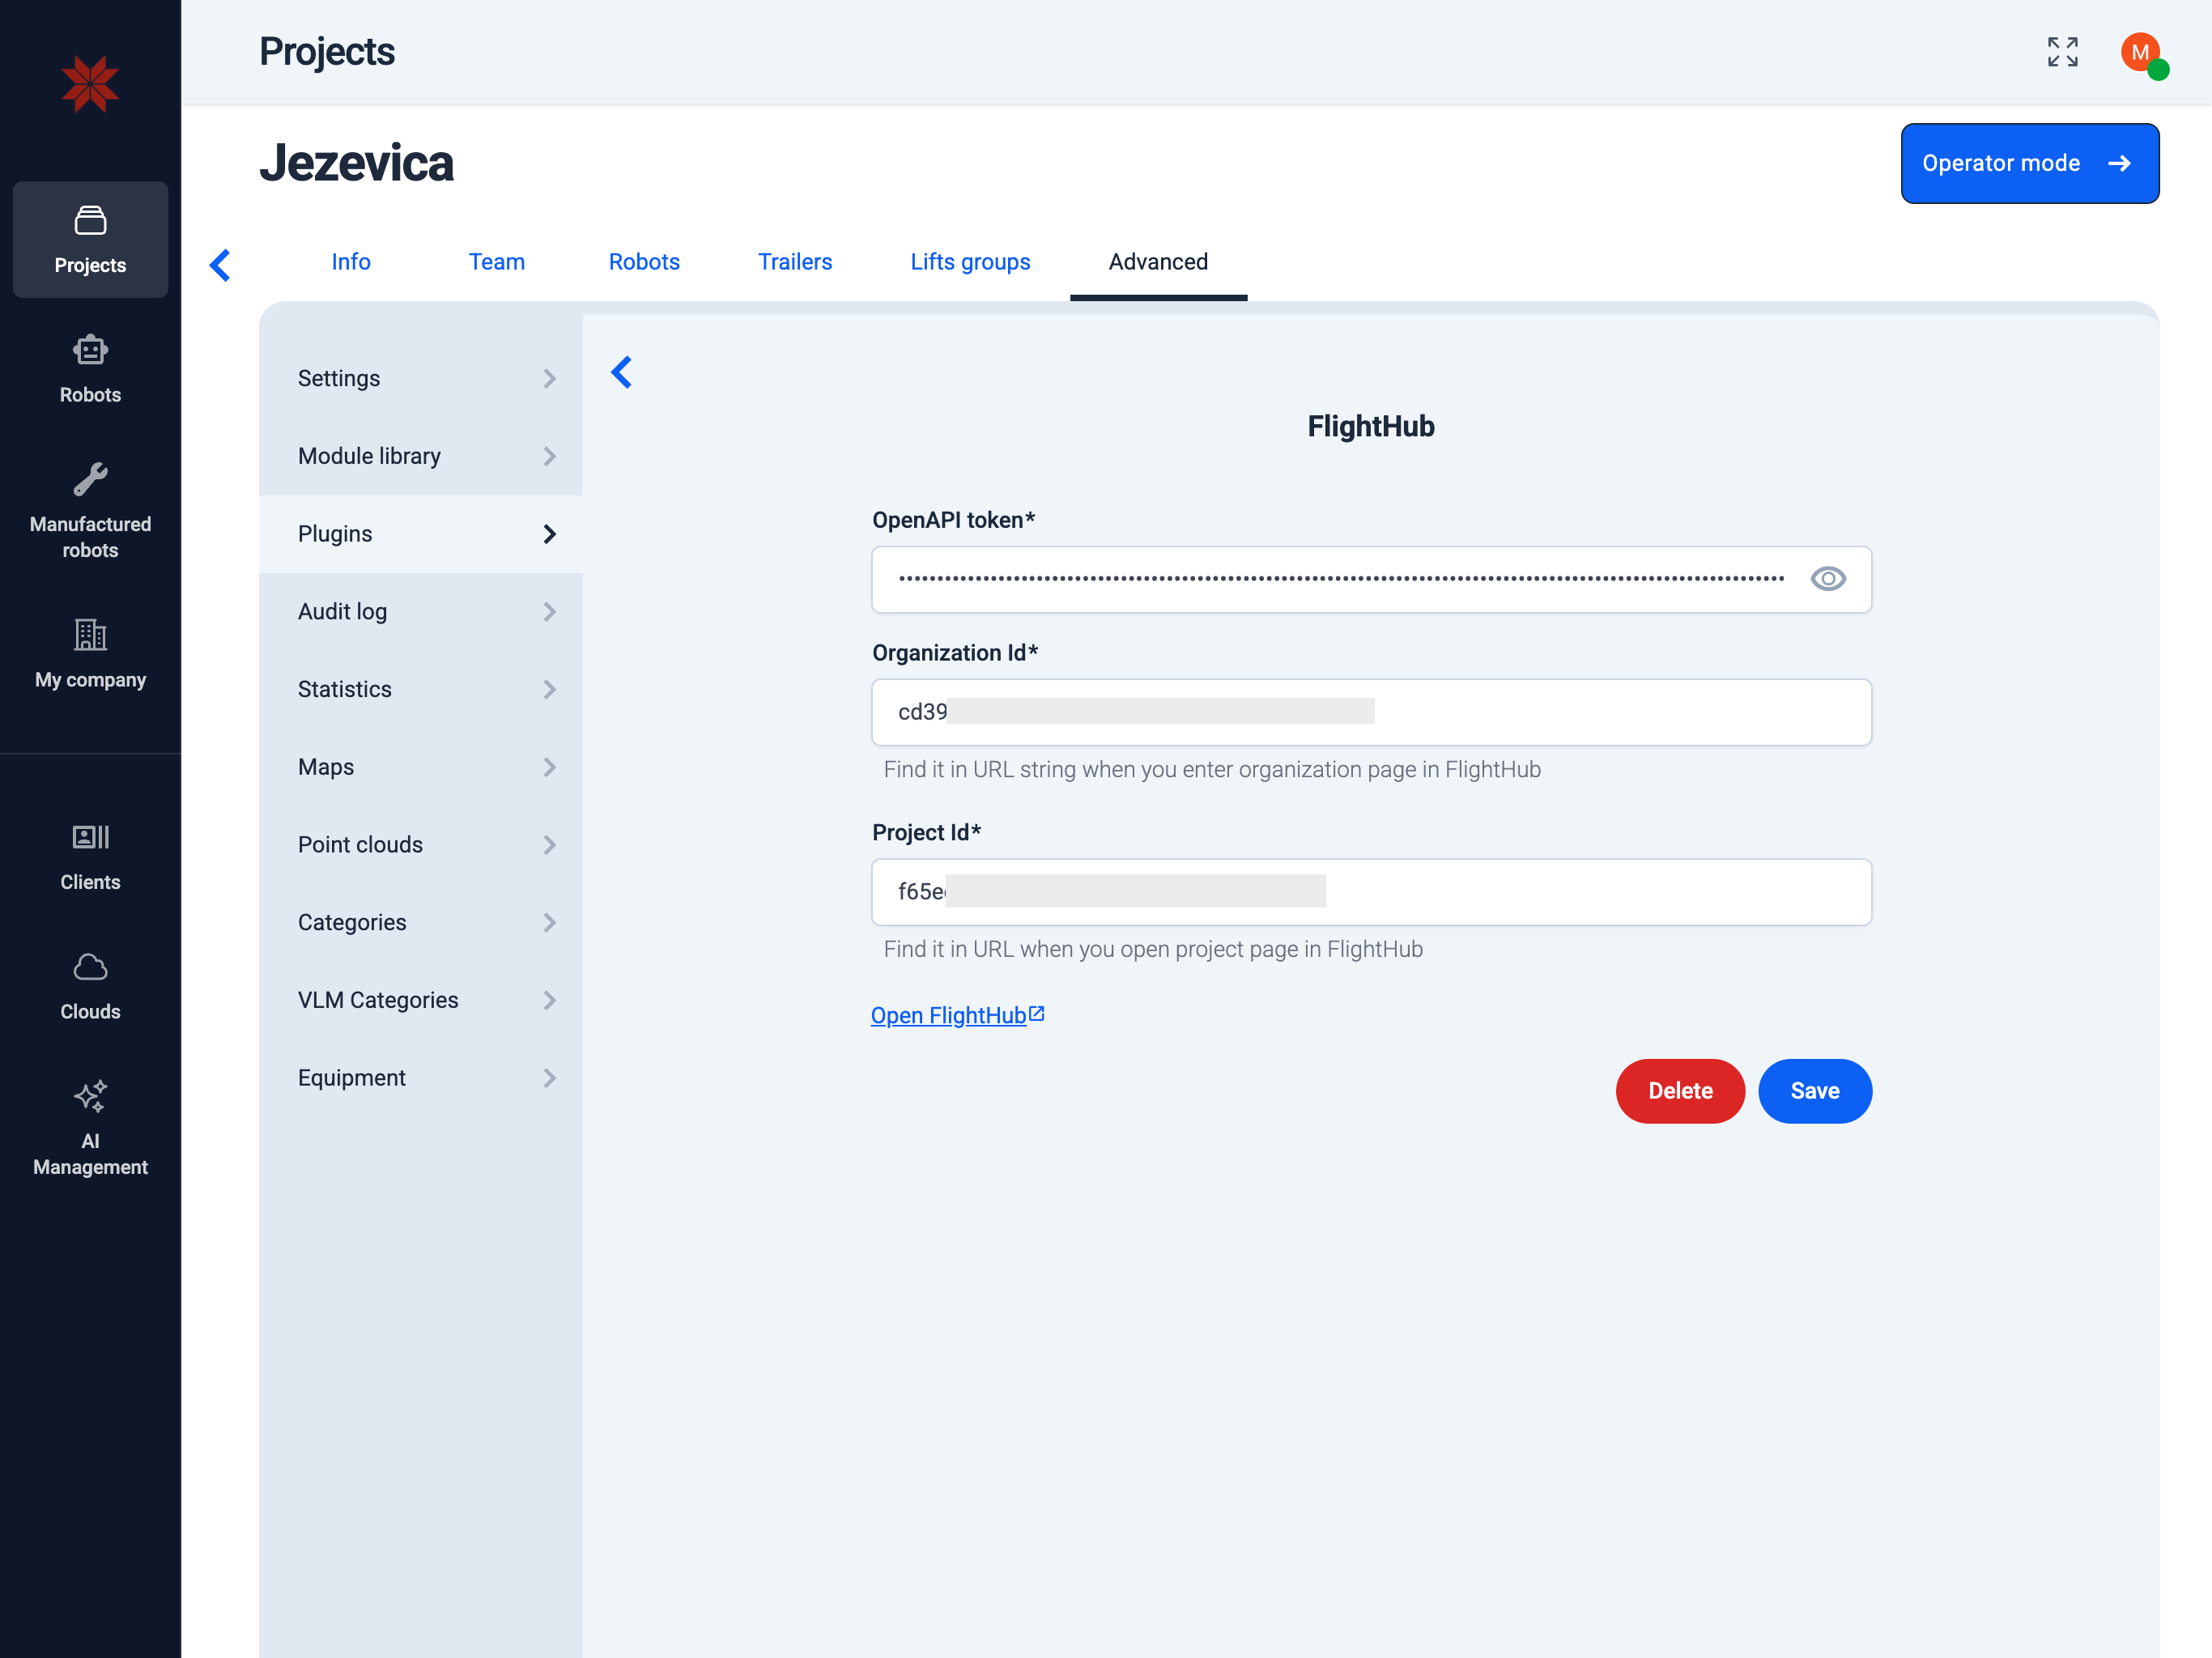
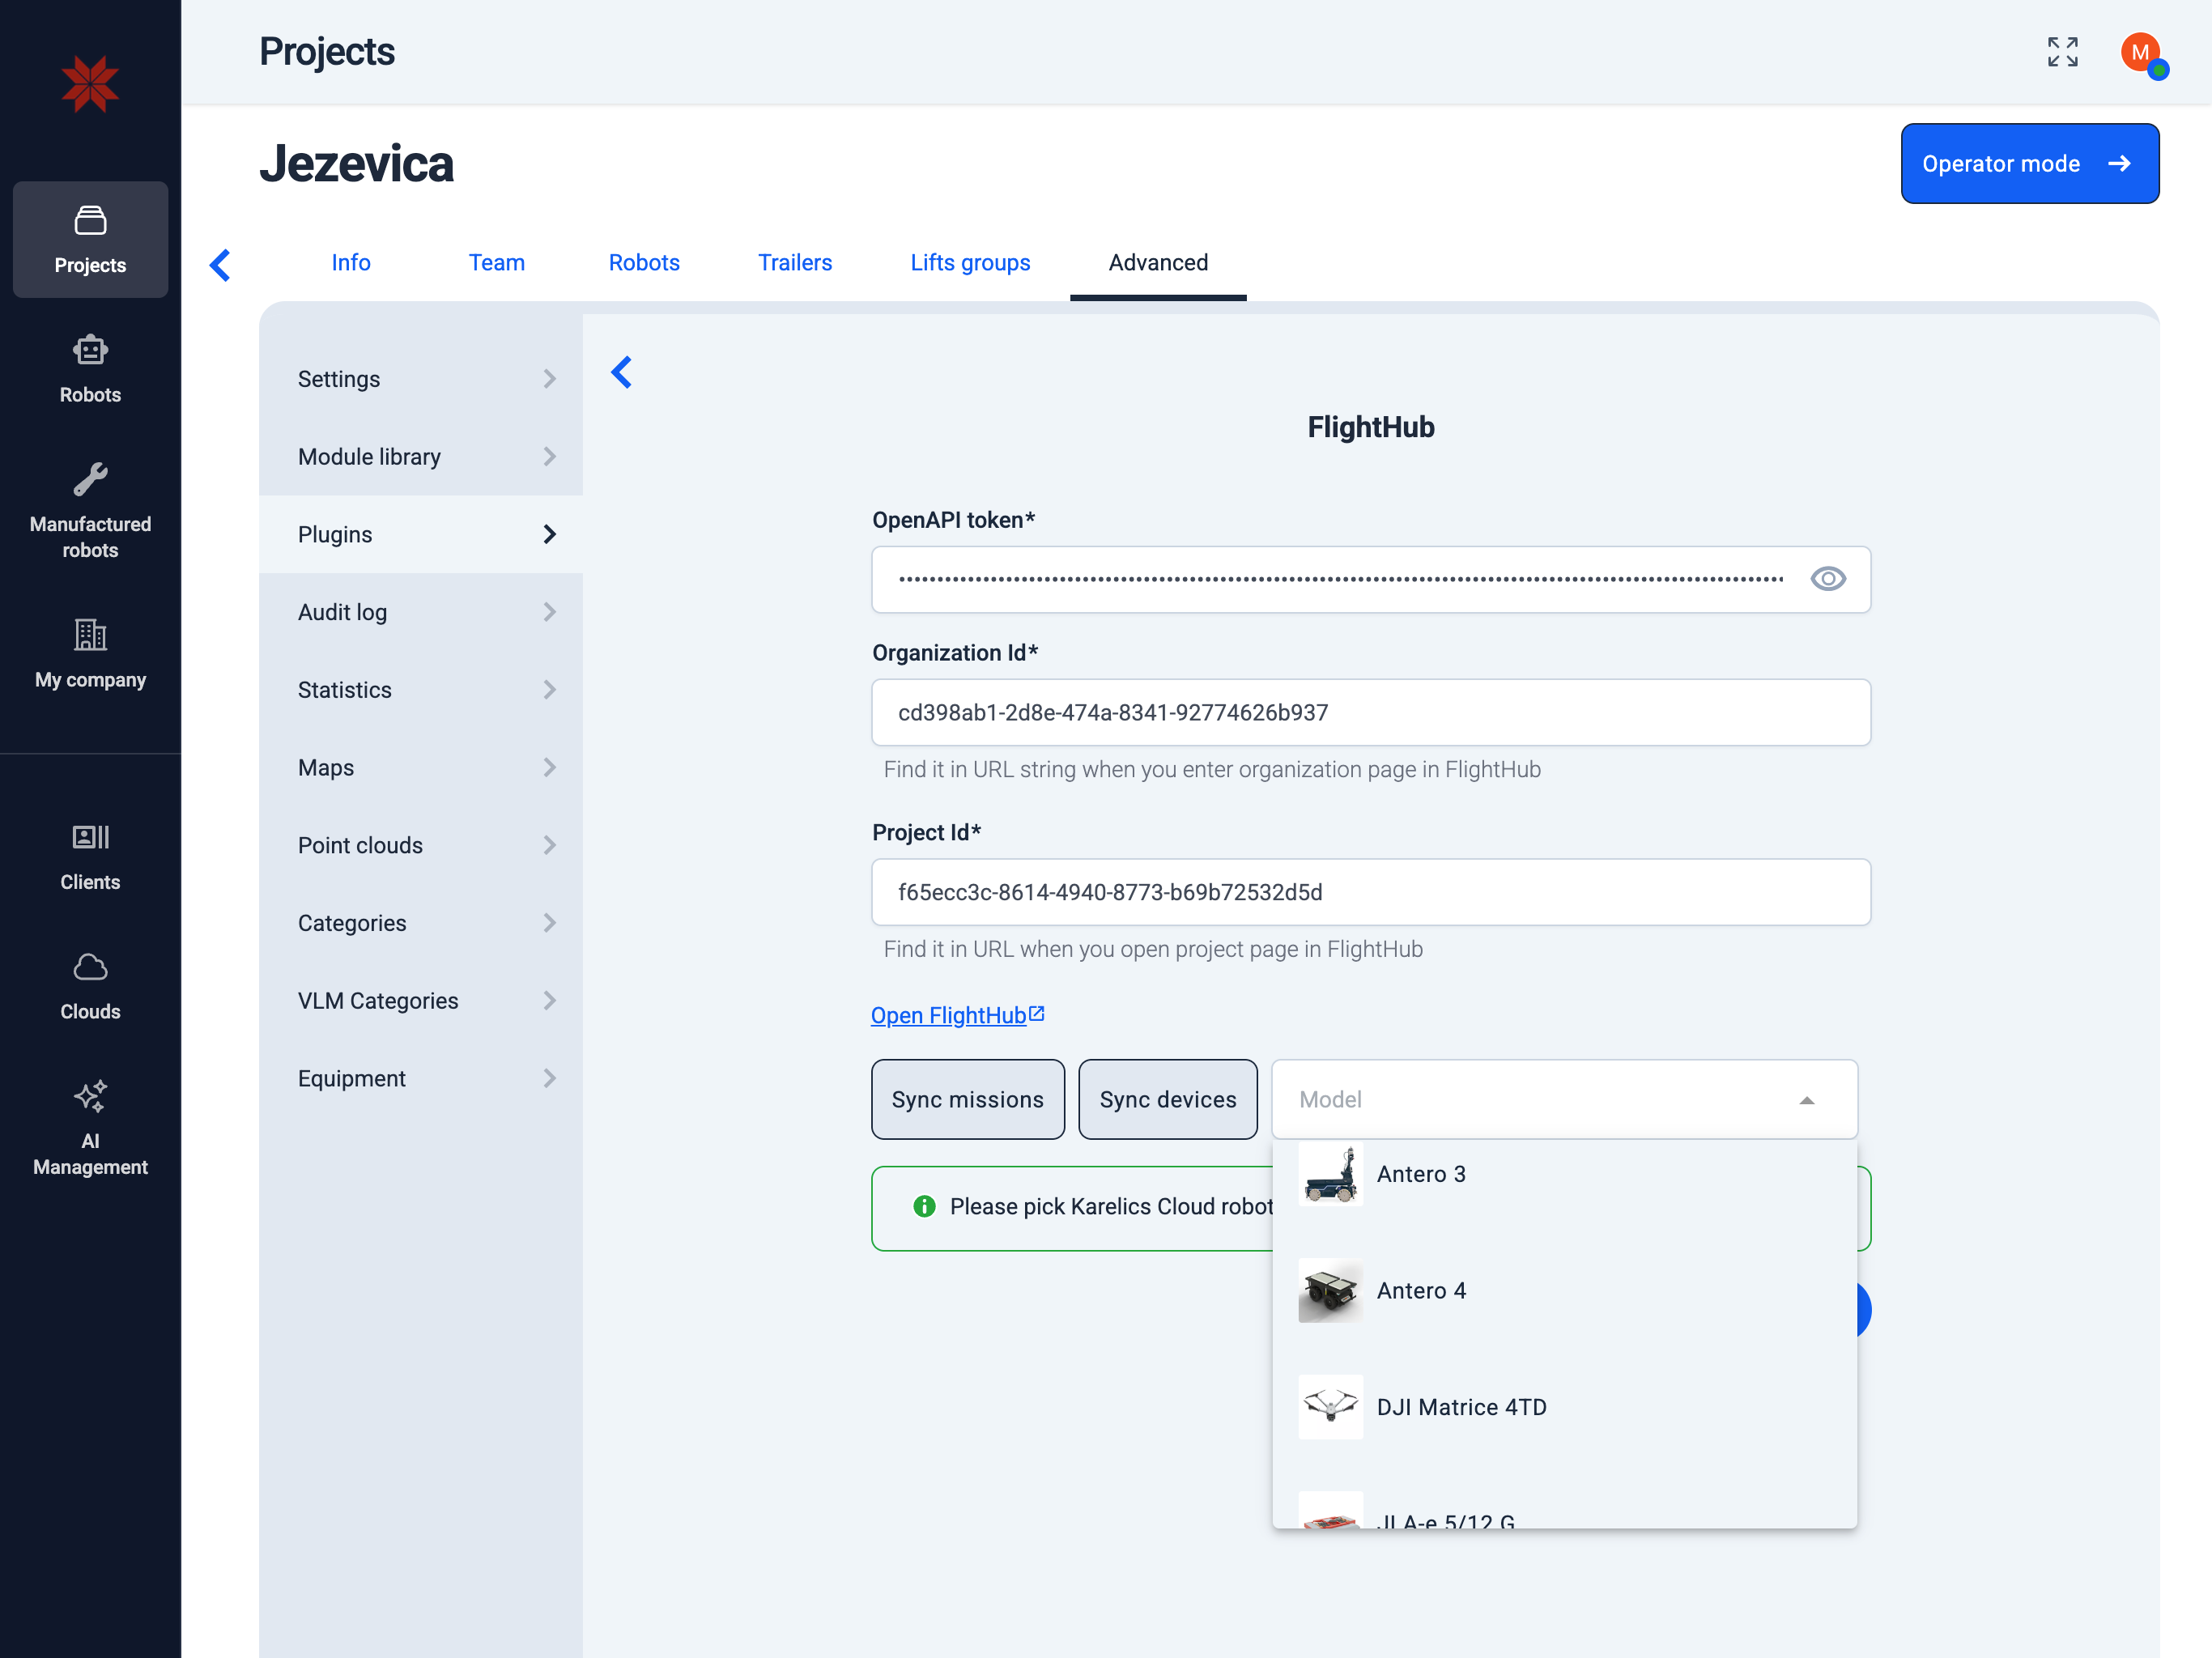
2. Add OpenAPI token, organization ID, and project ID
Admin Hub → Projects → Current Project → Advanced → Plugins → FlightHub Plugin
-
Enter the OpenAPI token.
Info: Open My Organization in FlightHub 2, select Organization Settings for the target organization, and copy the OpenAPI token from the dialog.
-
Enter the Organization ID.
Info: You can find the organization ID in the URL on the FlightHub website: For example, in
fh.dji.com/organization/a1b2c3d4-e5f6-7890-abcd-ef1234567890/project-list#/, the organization ID isa1b2c3d4-e5f6-7890-abcd-ef1234567890. -
Enter the Project ID.
Info: You can find the project ID in the URL on the FlightHub website: For example, in
fh.dji.com/organization/a1b2c3d4-e5f6-7890-abcd-ef1234567890/project/f1e2d3c4-b5a6-9870-fedc-ba0987654321/..., the project ID isf1e2d3c4-b5a6-9870-fedc-ba0987654321. -
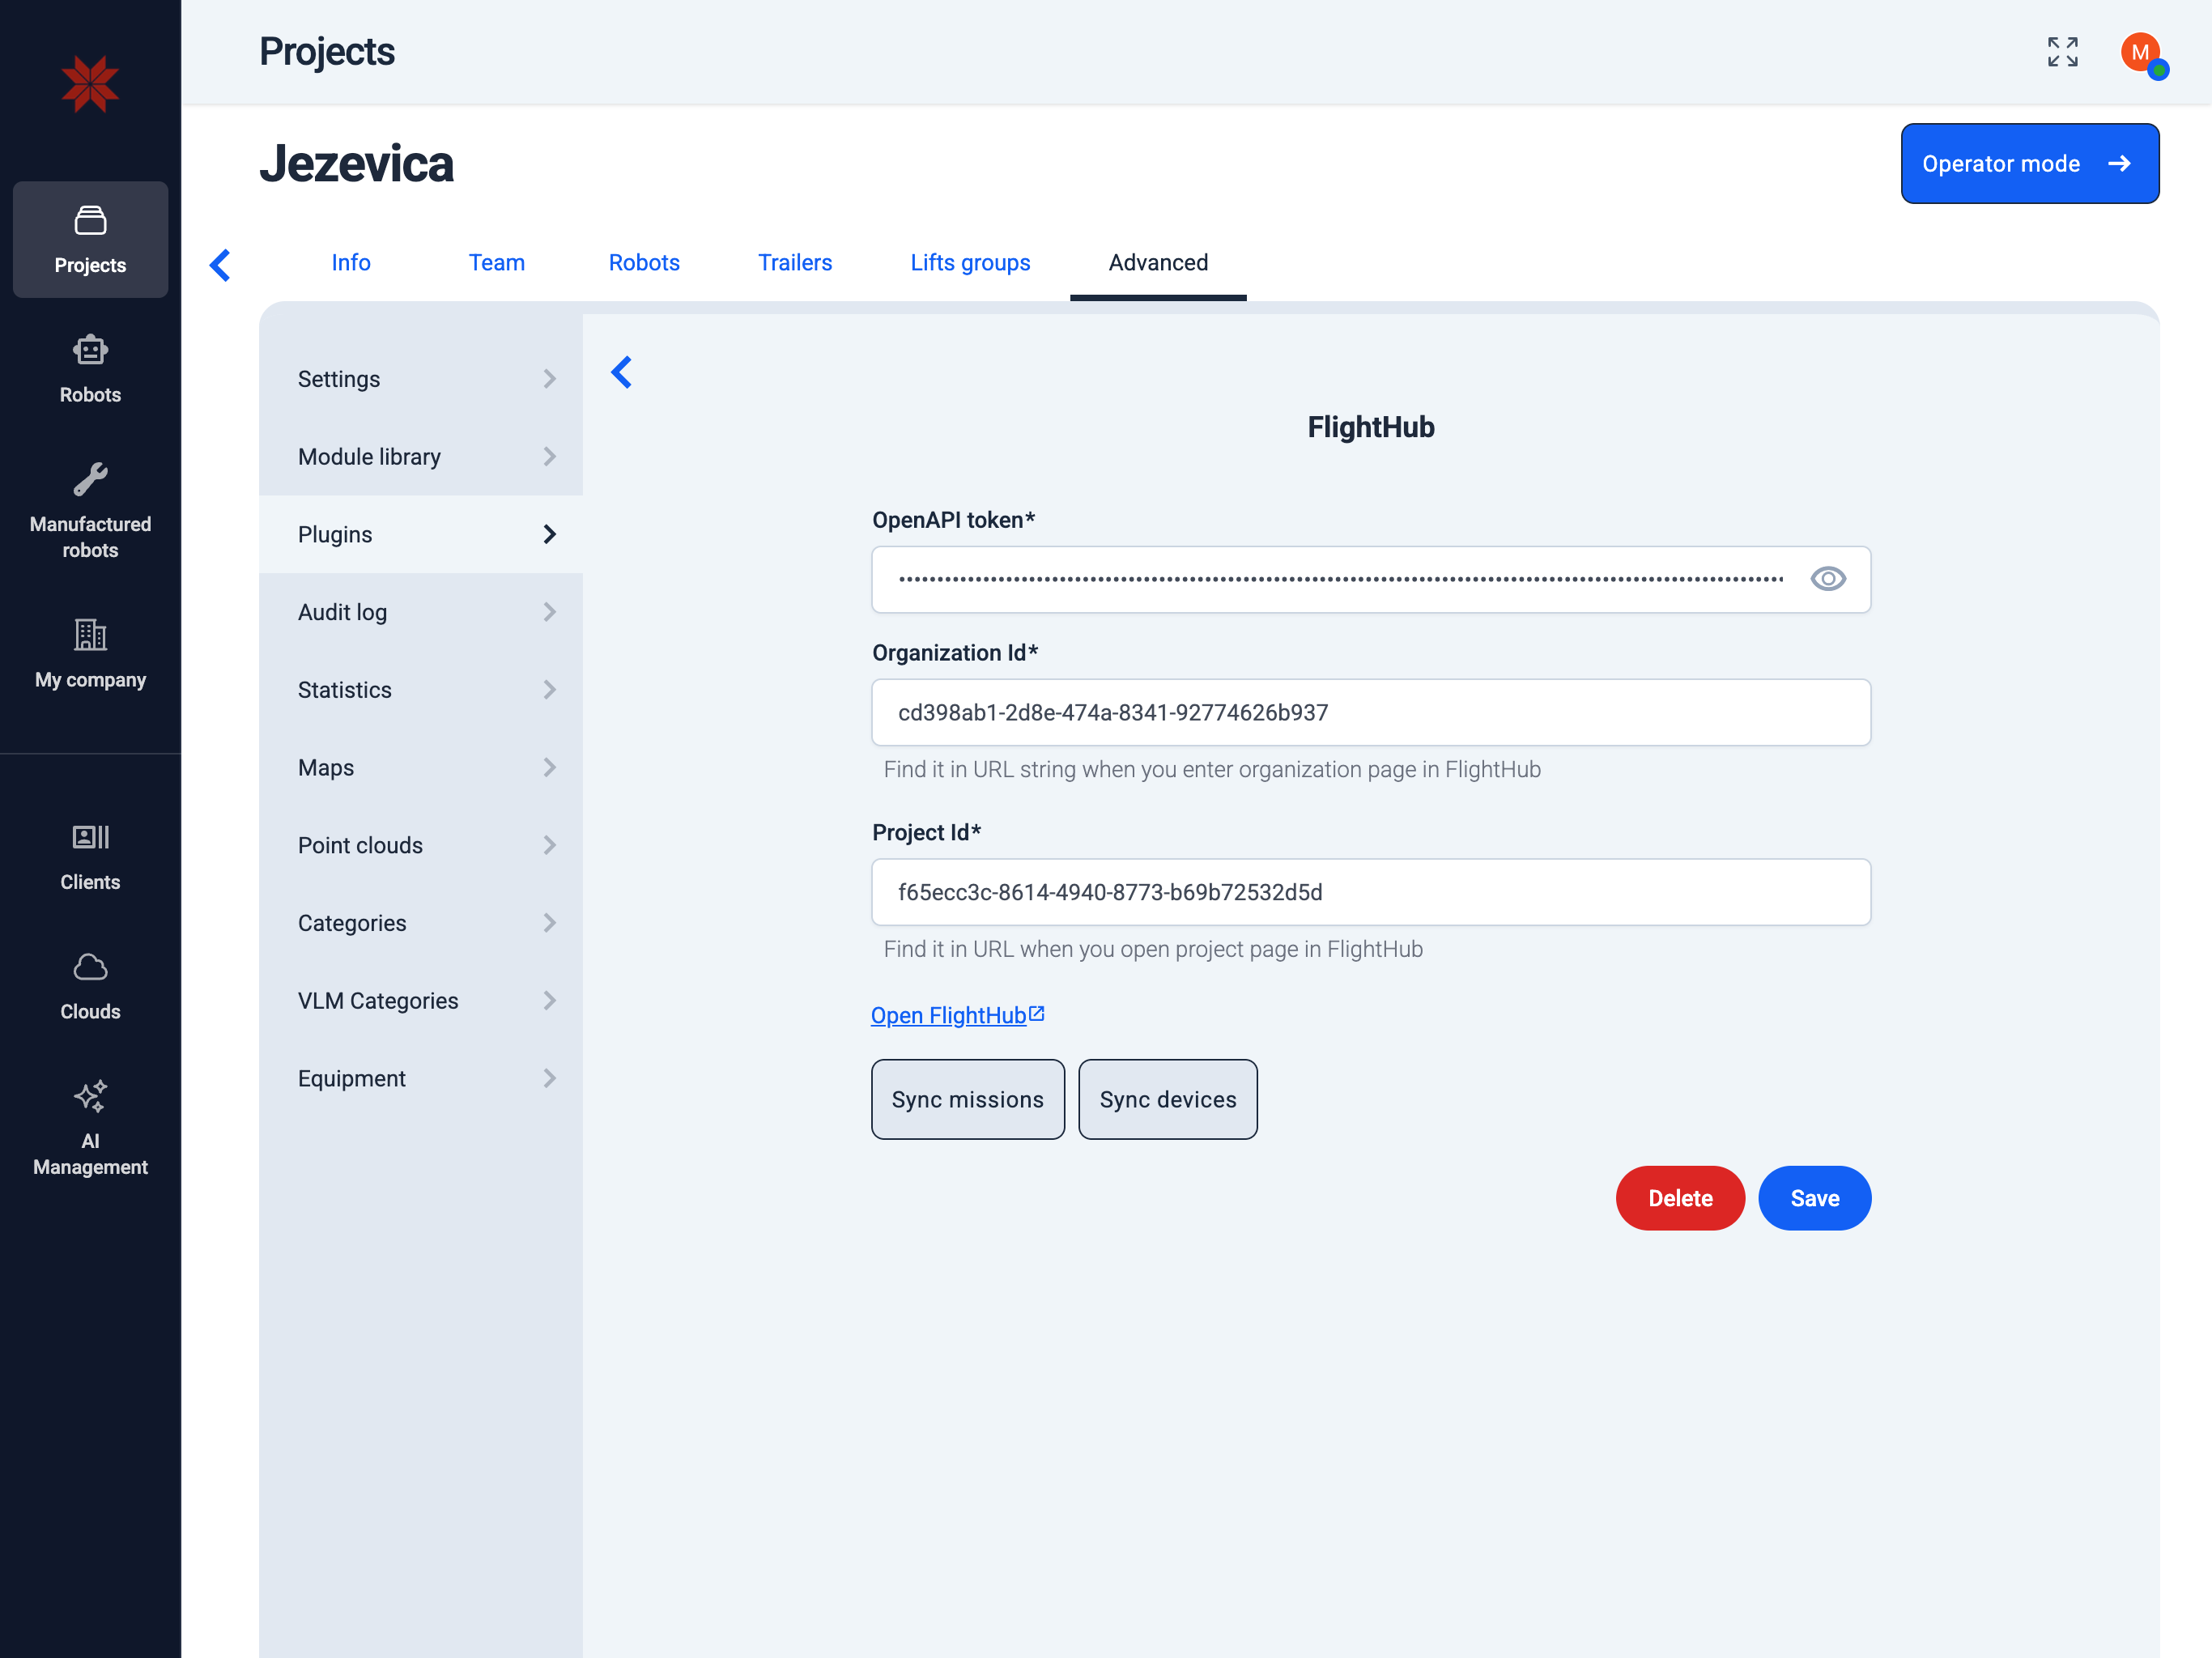
Click the Save button.
-
Synk missions from FlightHub to Karelics Cloud by clicking the Sync missions button.
-
Synk robots from FlightHub to Karelics Cloud by clicking the Sync robots button and select model of the robot.
-
Click the Save button.
For complete instructions on how to fully integrate with FlightHub, see FlightHub Integration.
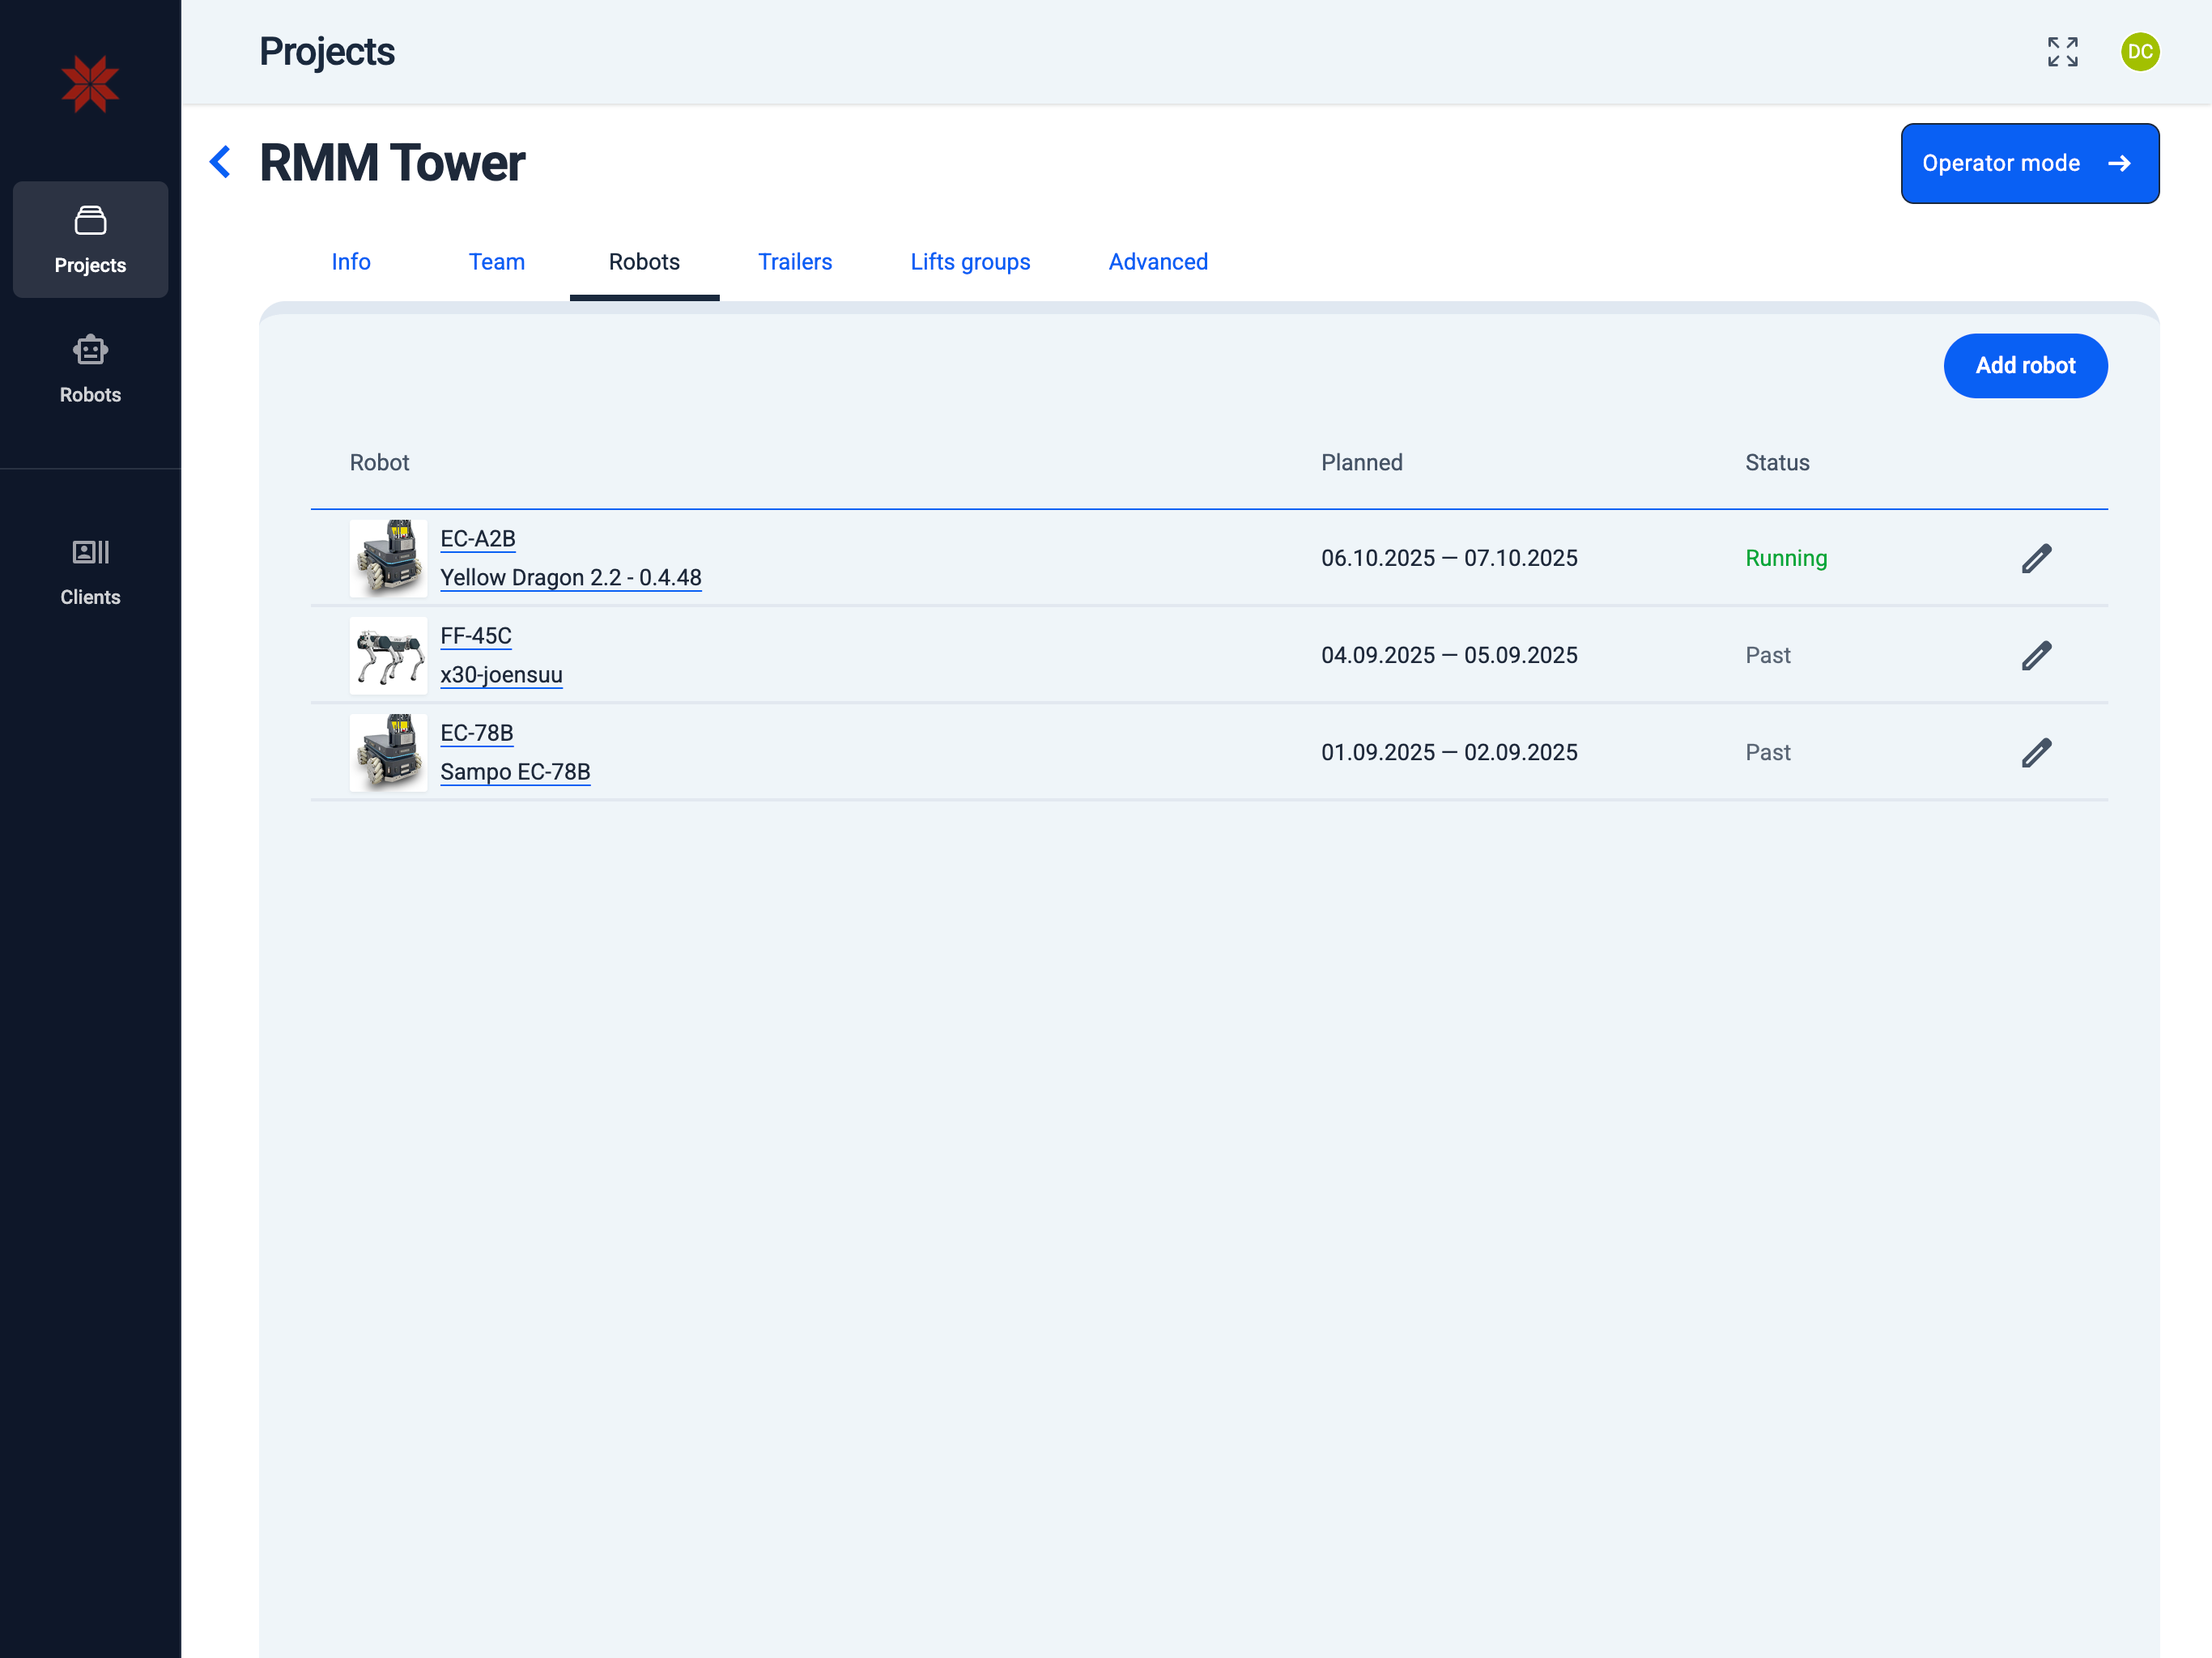
3. Add a new robot to the project
Navigate to the following path:
Admin Hub → Projects → Current Project → Robots
Use this tab to plan and supervise every robot scheduled for the current project. It provides quick access for both internally owned and leased units.
Key elements:
- Add Robot — add a new robot to this project and set up its work schedule.
- Robot name — open robot configuration to edit settings or check status.
- Pencil icon — edit the robot's schedule in this project (same flow as Schedule Robot).
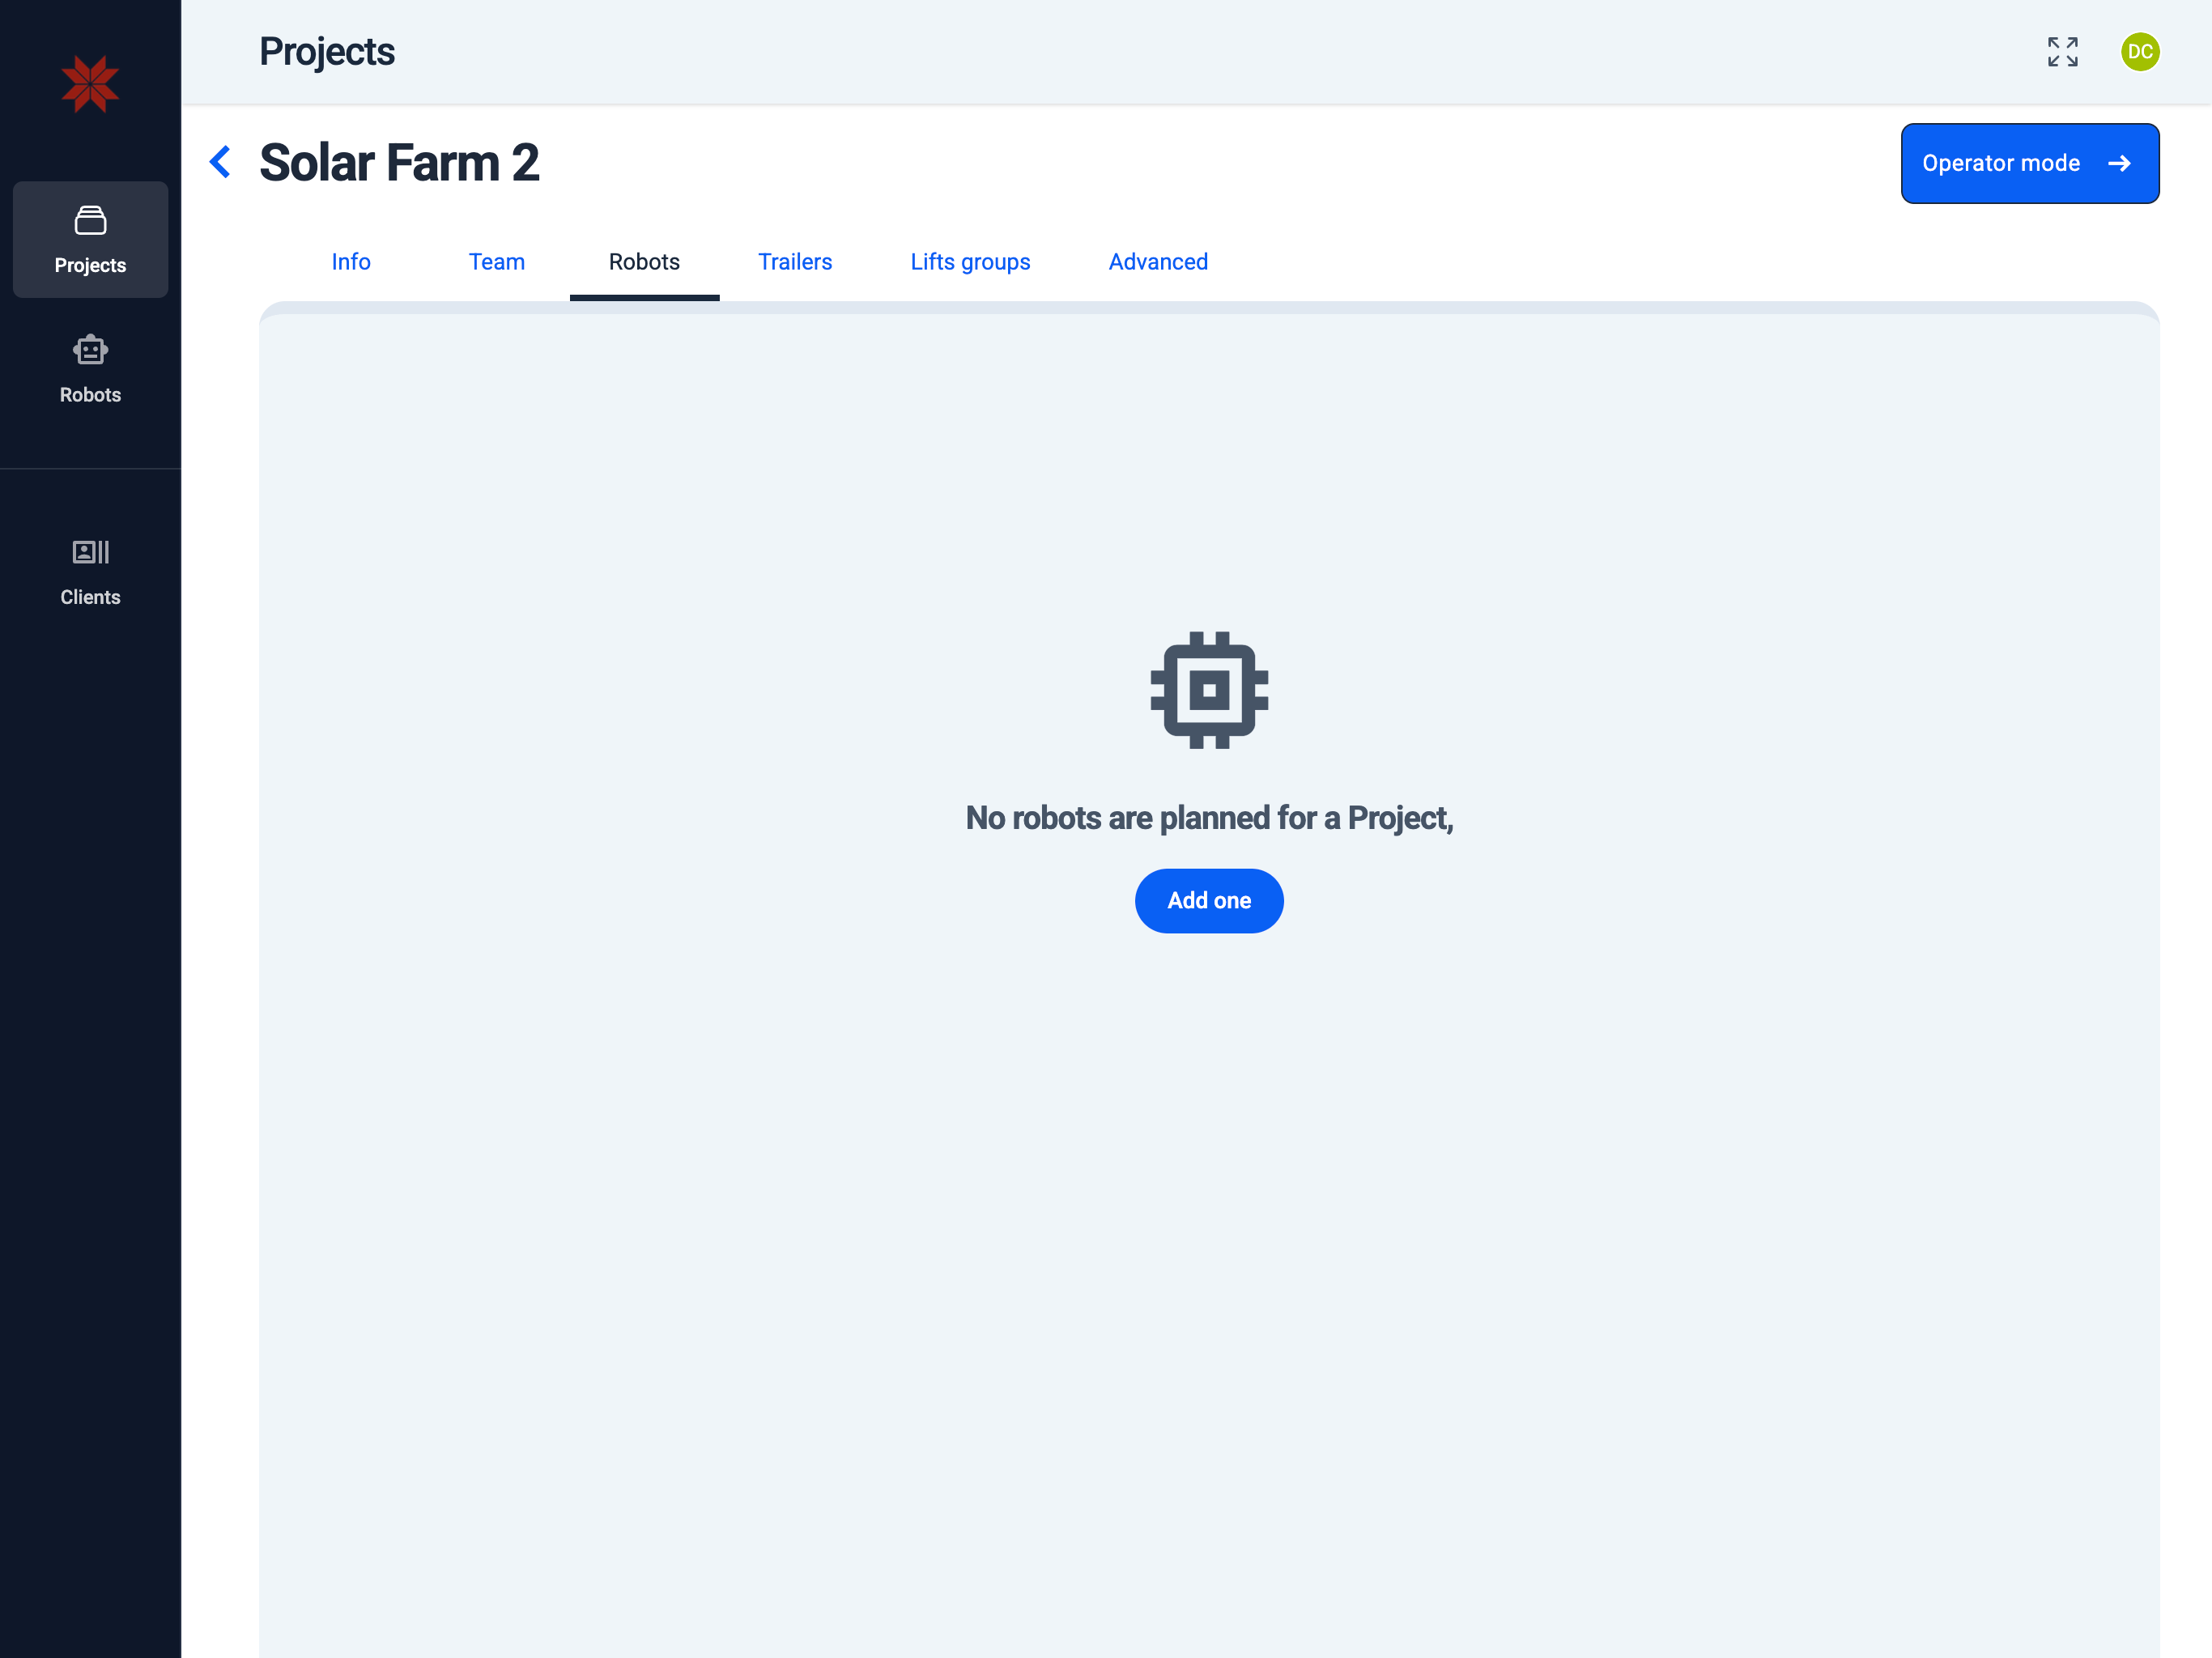
- Add one (empty list) — create and schedule your first robot entry. See Schedule Robot.
- List of Robots
- Empty List of Robots
You can manage robot settings only if the robot is either owned by your organization or leased to you.
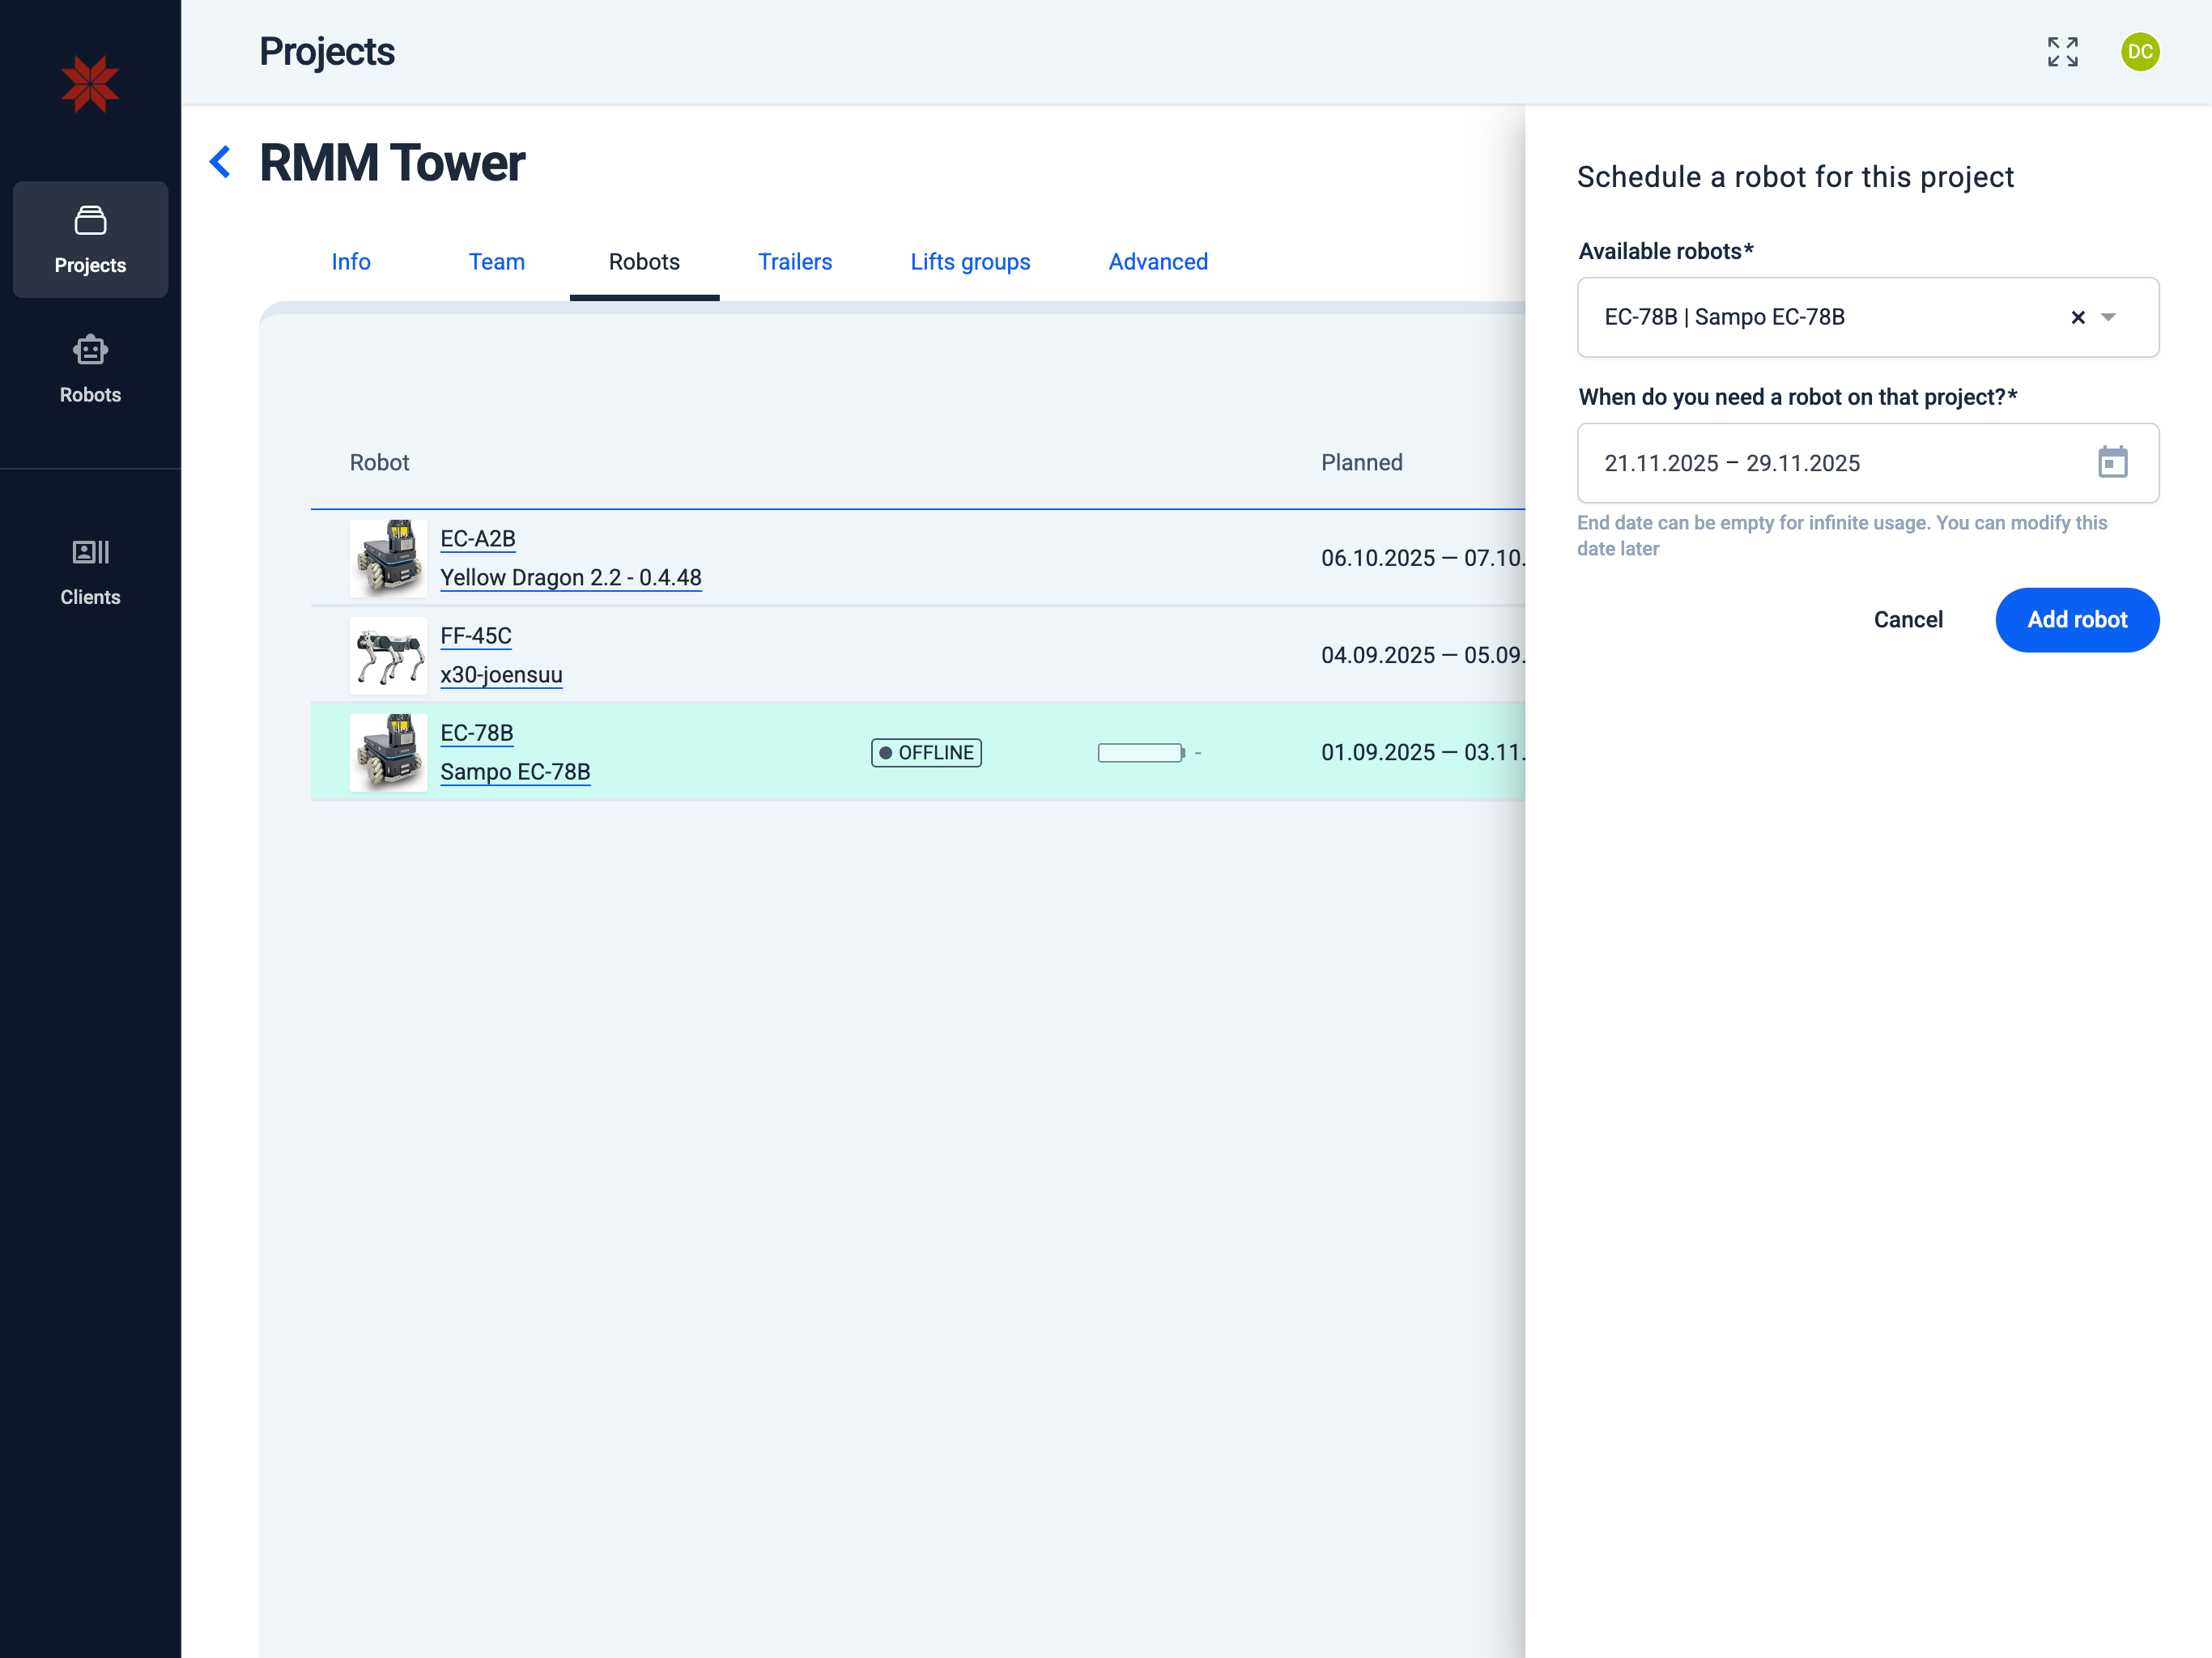
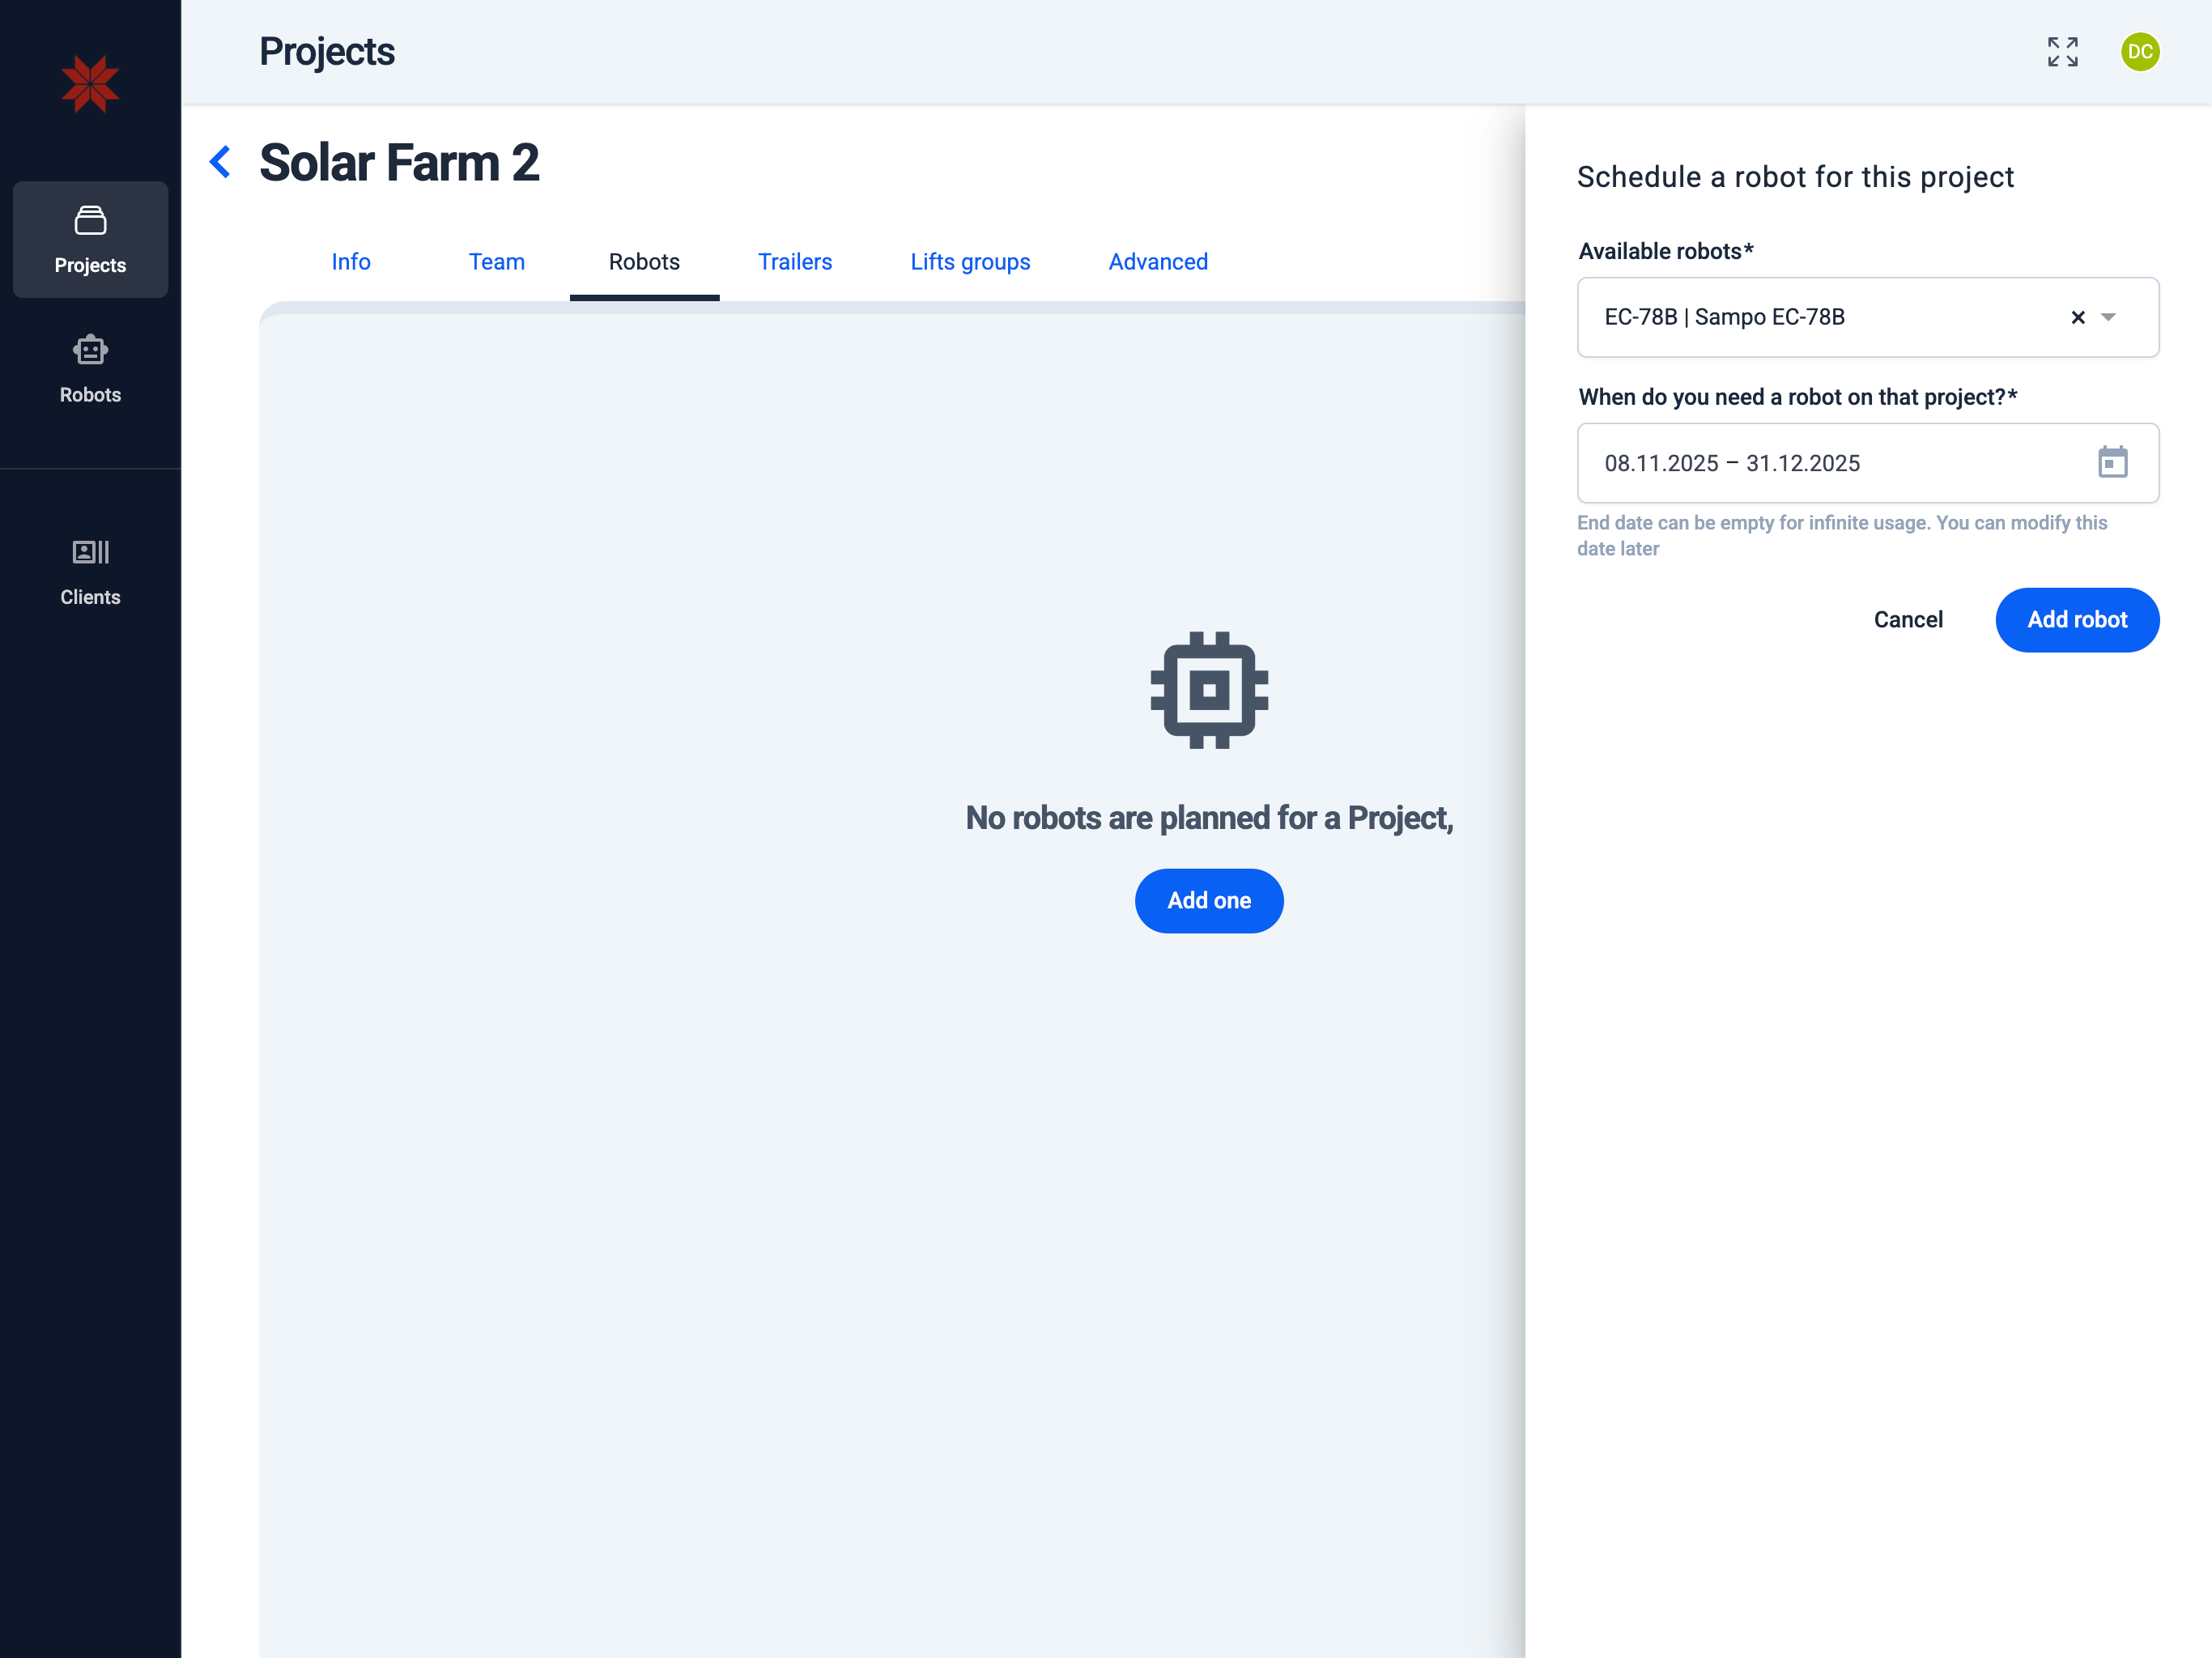
4. Schedule the robot for the project
Navigate to the following path:
Admin Hub → Projects → Current Project → Robots → Schedule Robot
Creating a new schedule for a robot in the current project.
- Create a new robot or select a robot from the list of robots available to you
- Select the desired start and (optionally) end date and time for its operation.
- Click the Add Robot button to complete the scheduling process.
- Robots are in the list
- No robots in the list
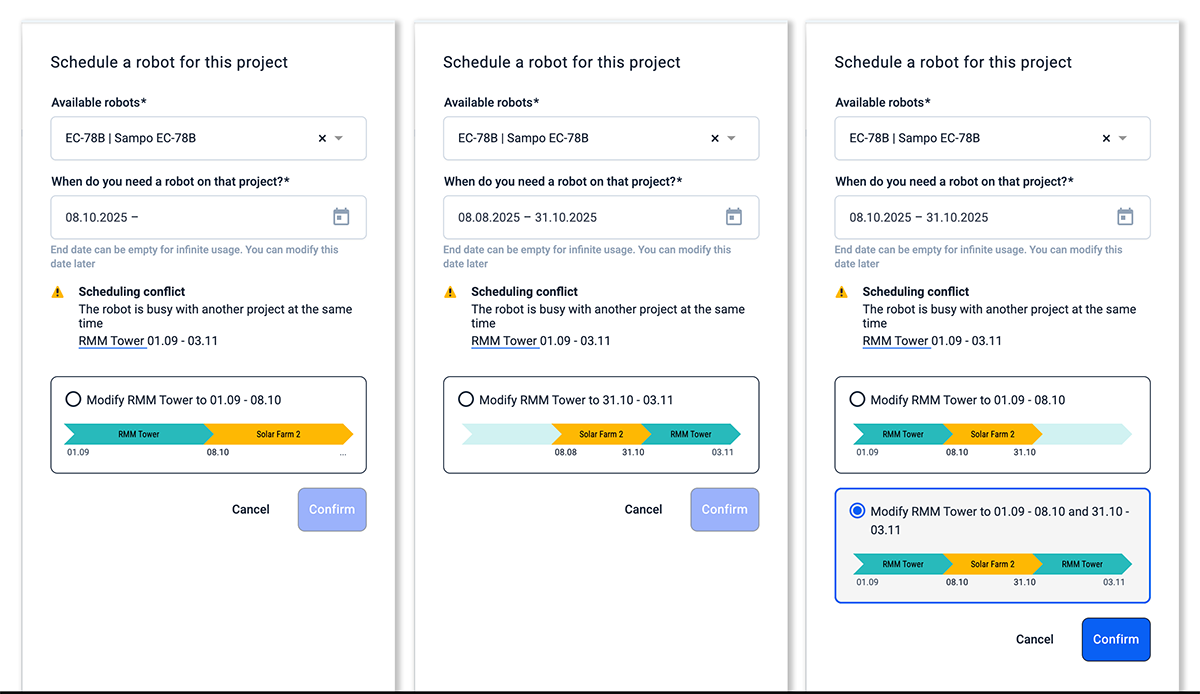
Overlapping Schedules:
If the new schedule overlaps with existing schedules for this robot, you will be offered options to resolve the conflict.
End date can be empty for infinite usage. You can modify this date later.
In Karelics Cloud Operator hub
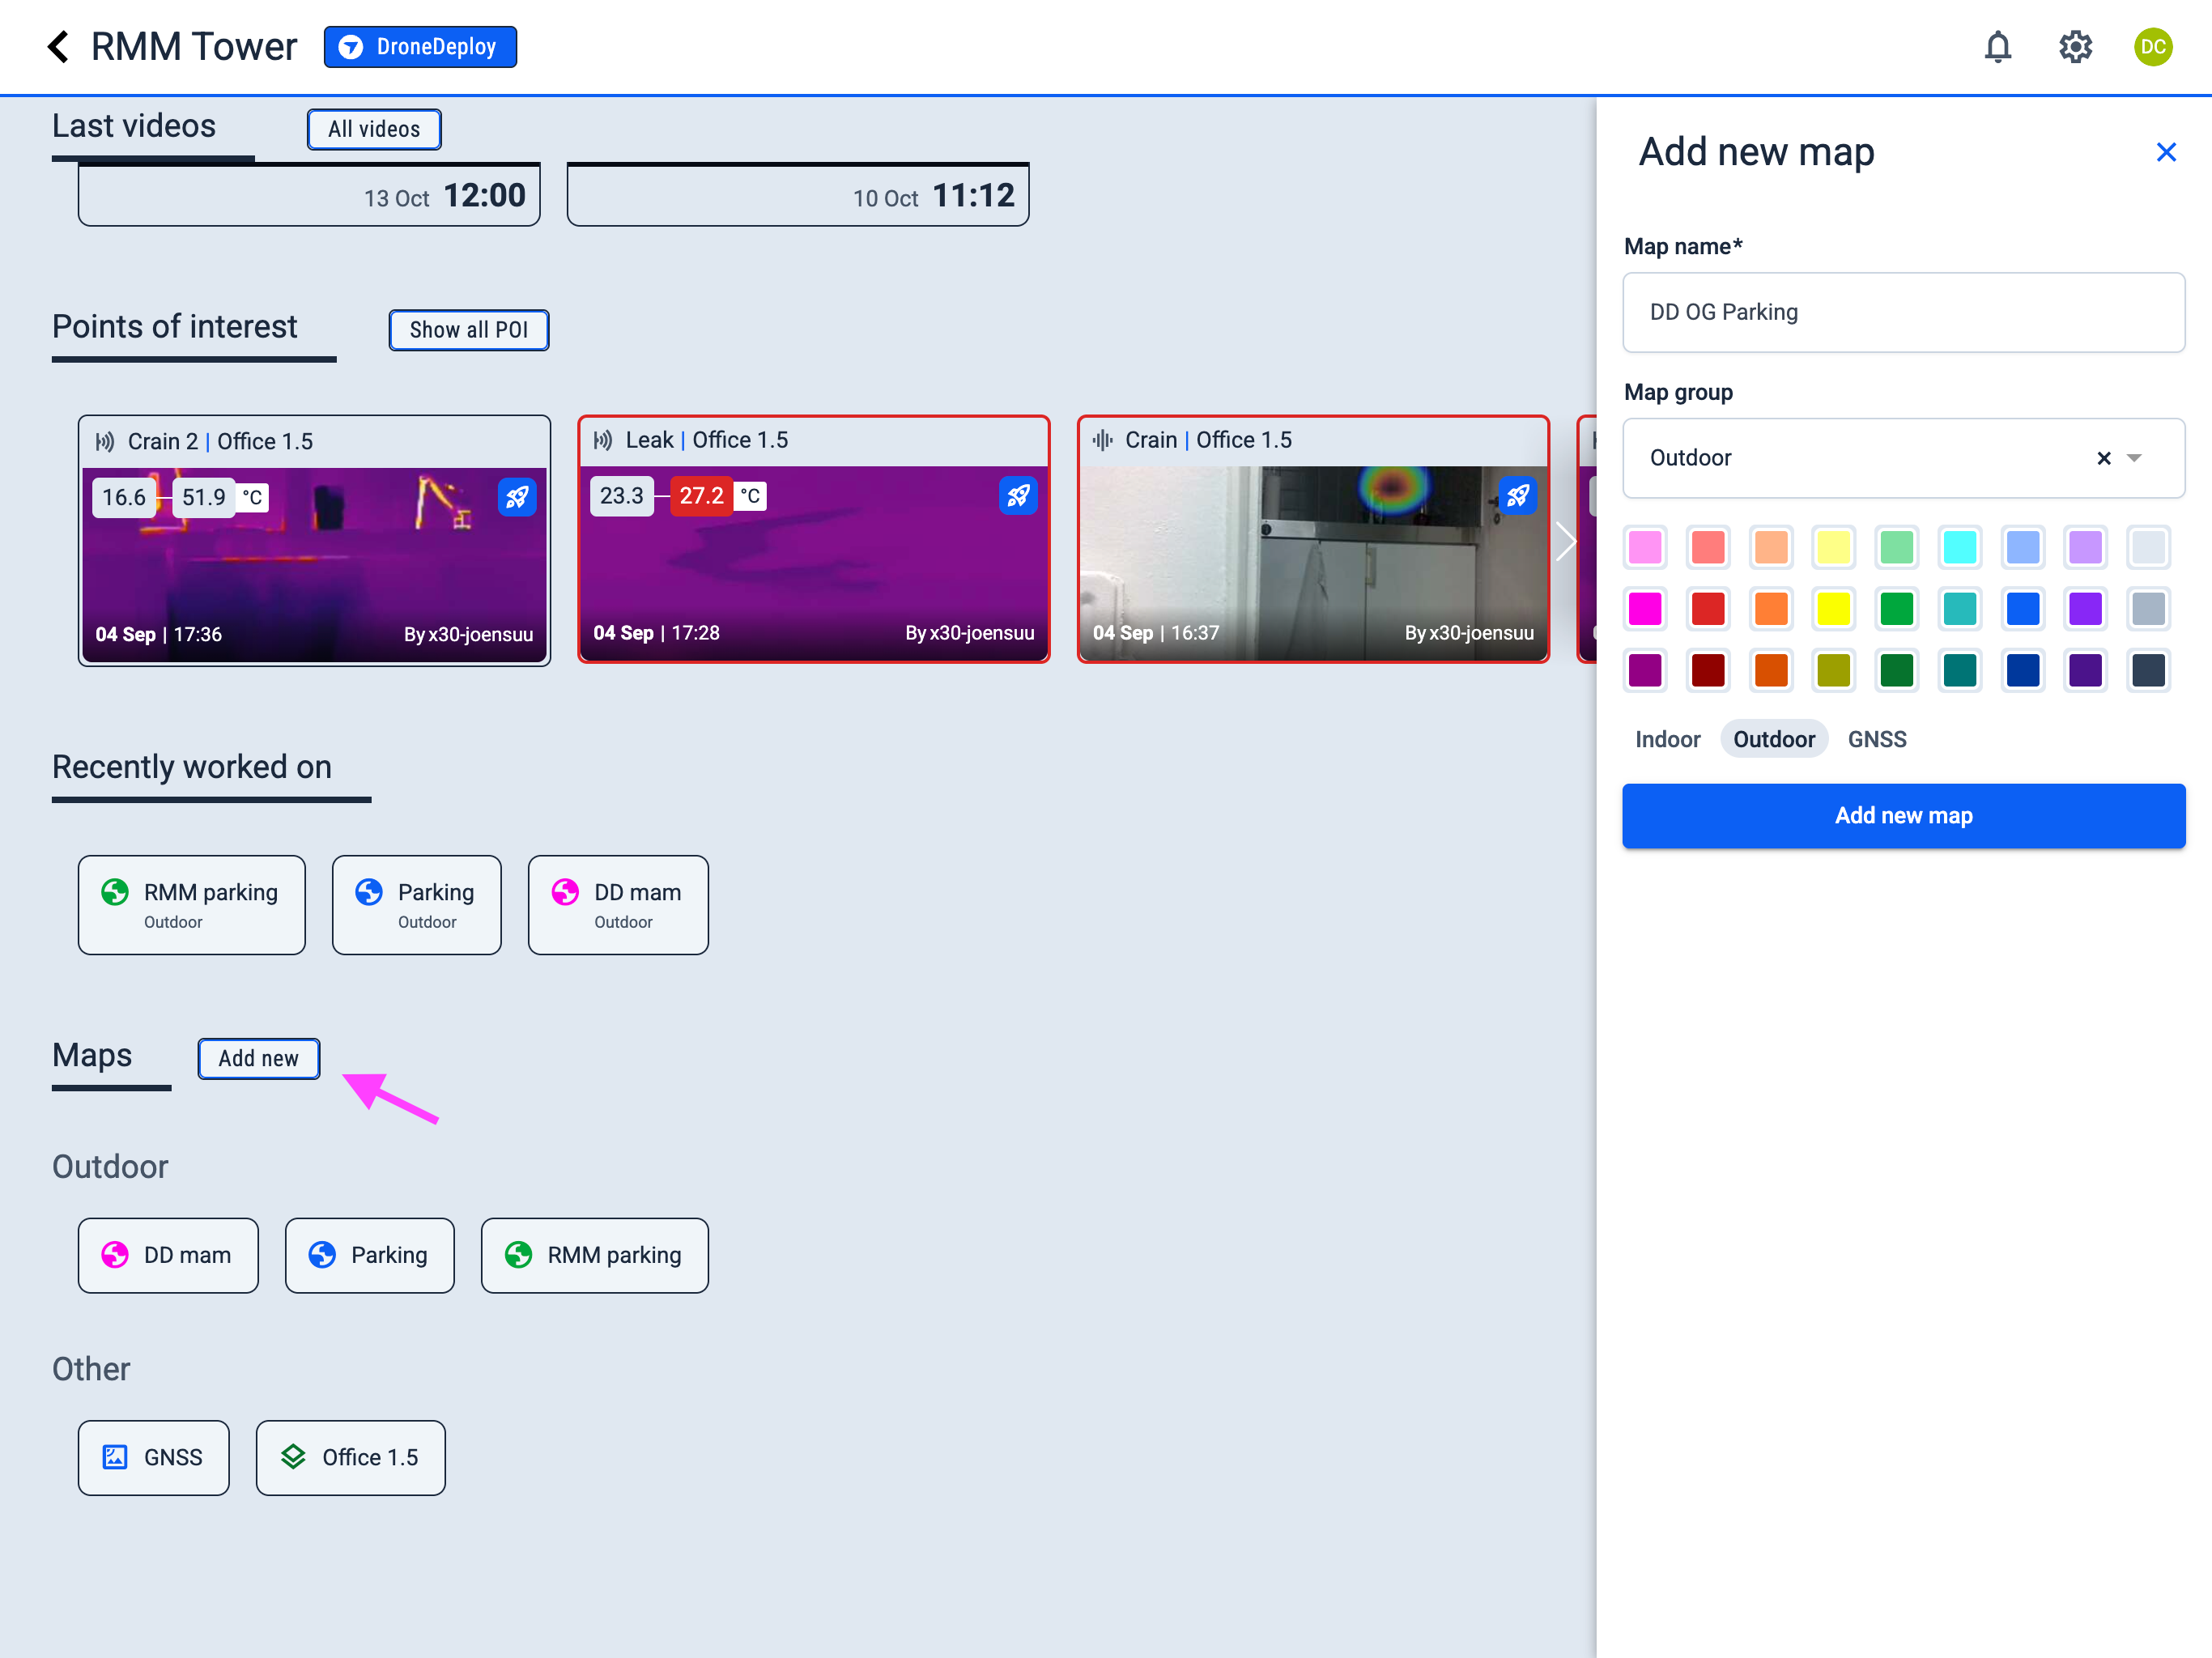
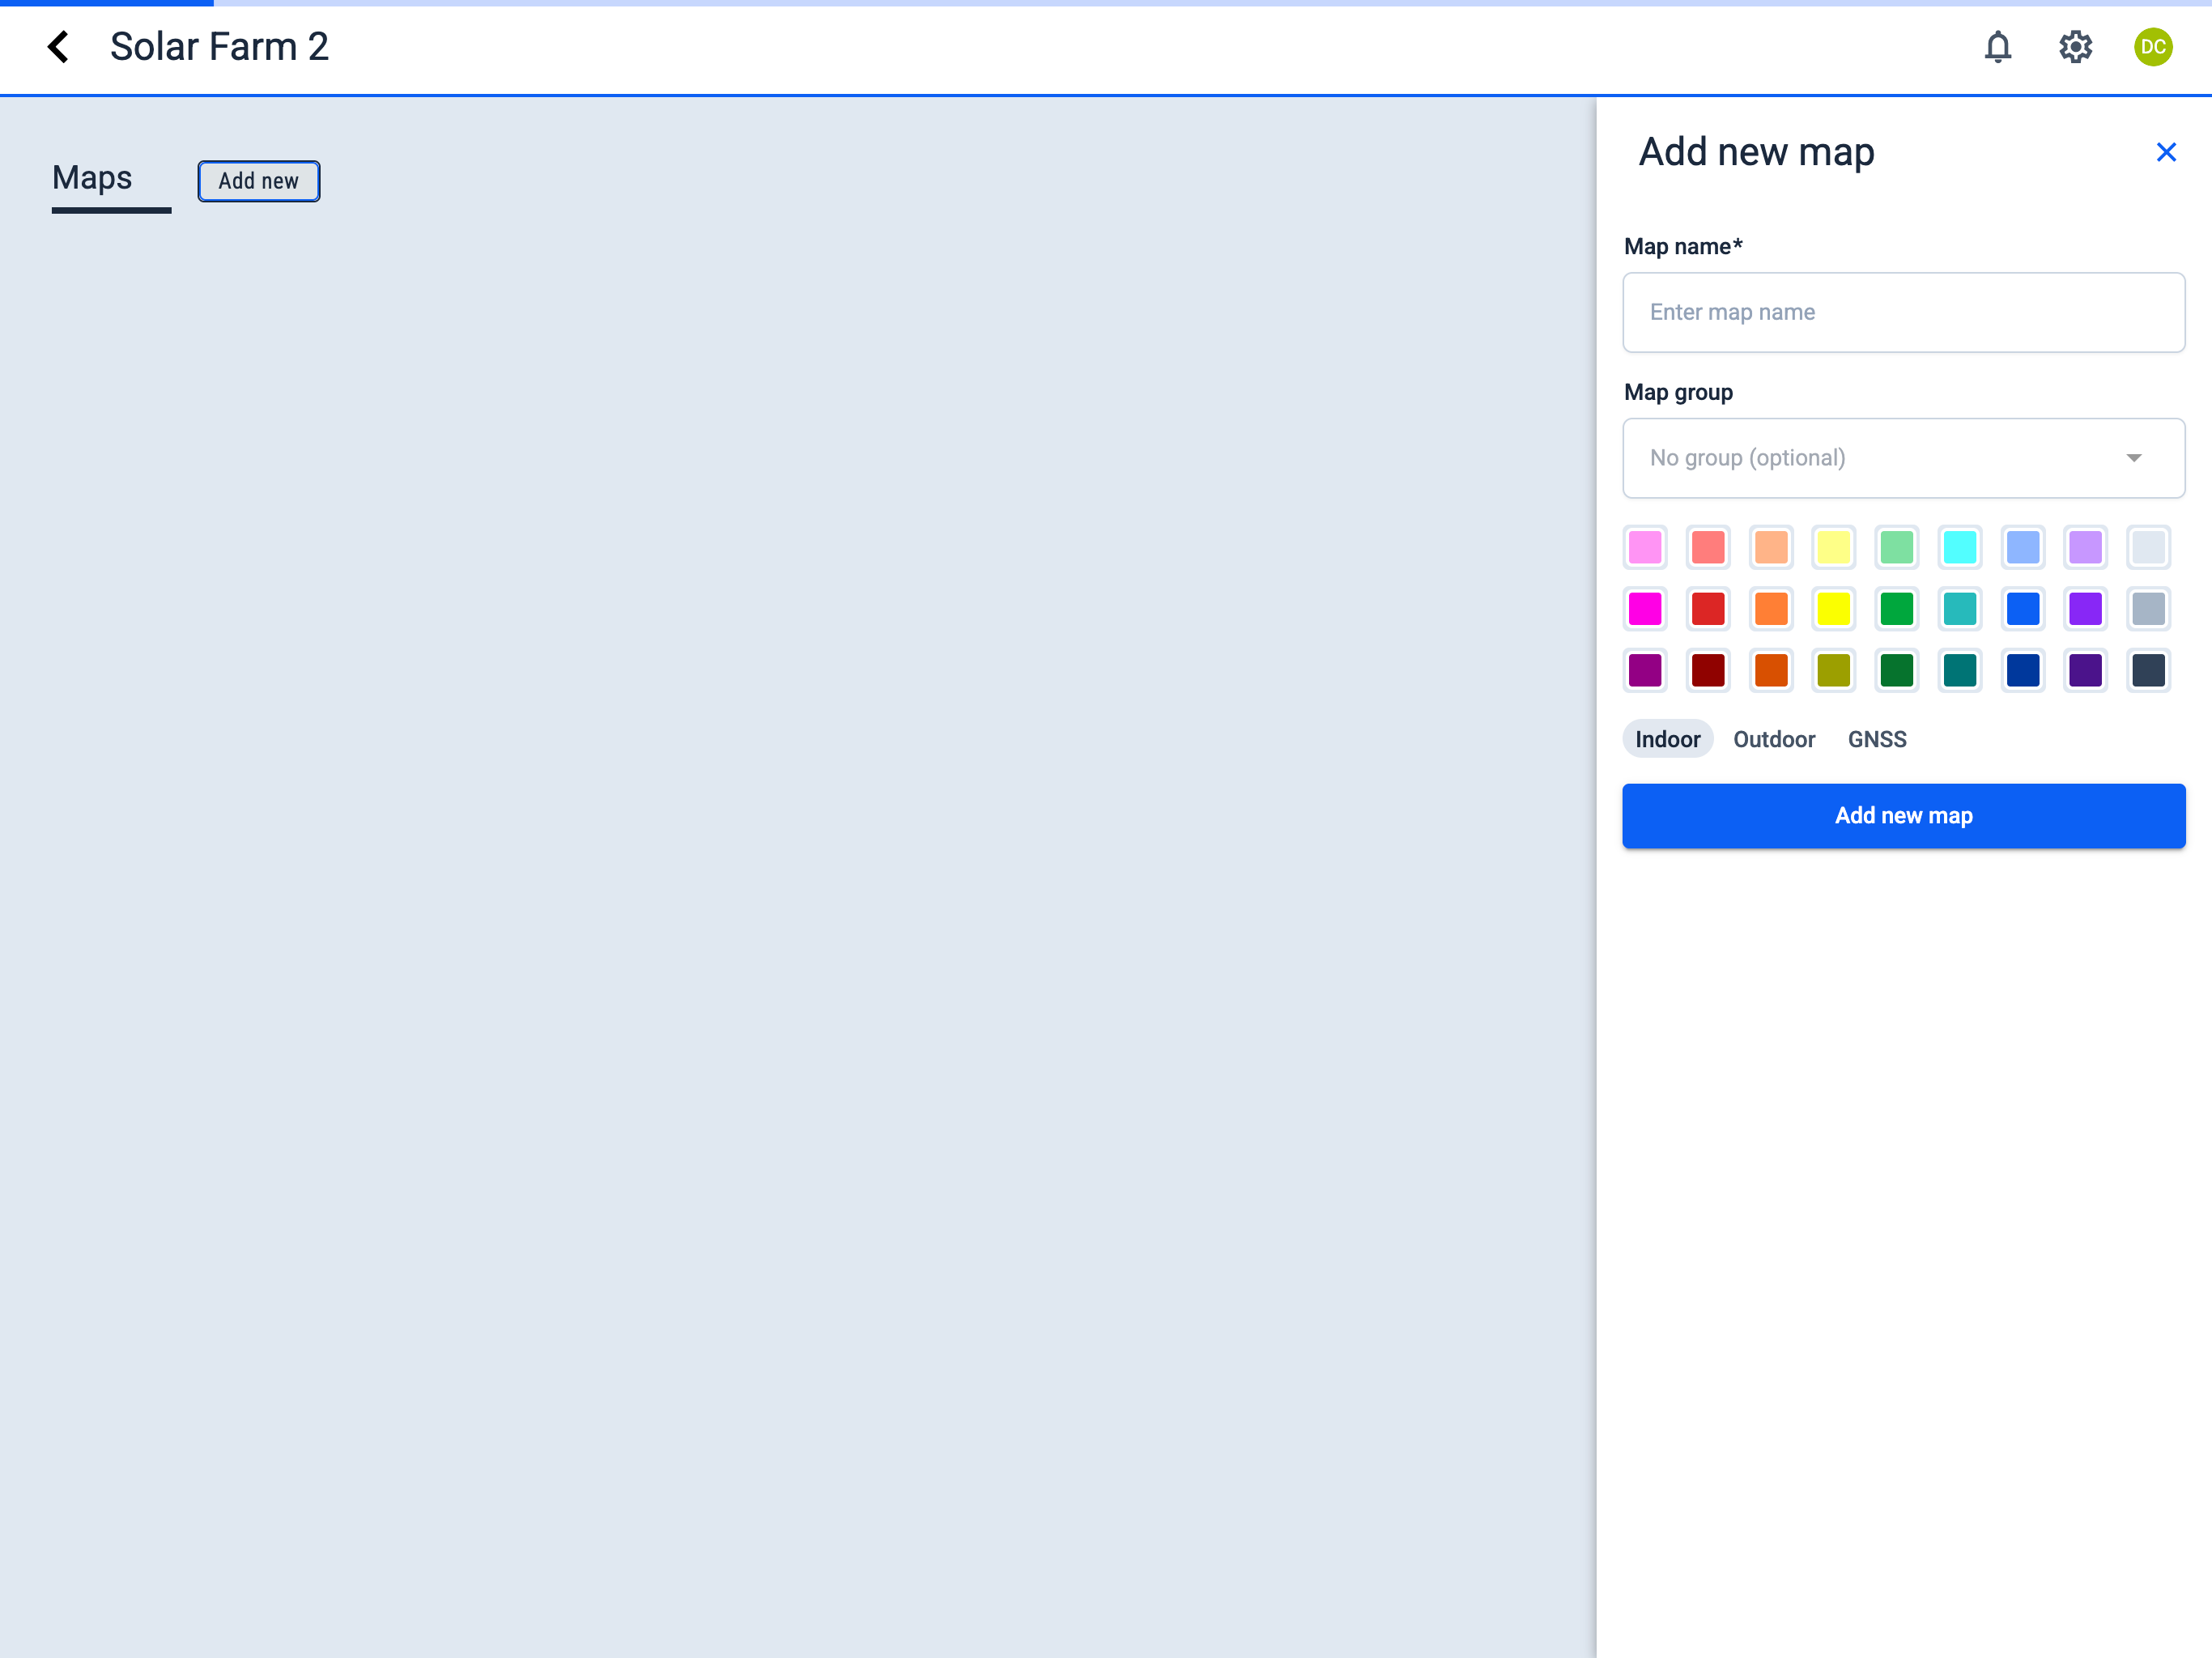
1. In the project, add a new GNSS map.
Navigate to the following path:
Operator Hub → Current Project → Add new map
- Click the Add new button next to the Maps section.
- In the sidebar, fill in the required fields:
- Map name
- Map group (optional) — To create a new group, simply type its name in this field. When you save the map, the new group will be created and the map will appear within it.
- Select color for the map icon (to help distinguish maps)
- Select map type:
layers Indoor
globe Outdoor
satellite GNSS
circle Pipe
- Click the Add new map button.
- Active Project
- New Project
2. Now you can open FlightHub from Operator Hub
Navigate to the following path:
Operator Hub → Current Project
Once the plugin is configured, a FlightHub button appears in the project sidebar in Operator Hub. Click it to open the linked FlightHub 2 project in a new browser tab.

3. Select Drone Inspection missions
Navigate to the following path:
Operator Hub → Current Project → Workspace → Missions
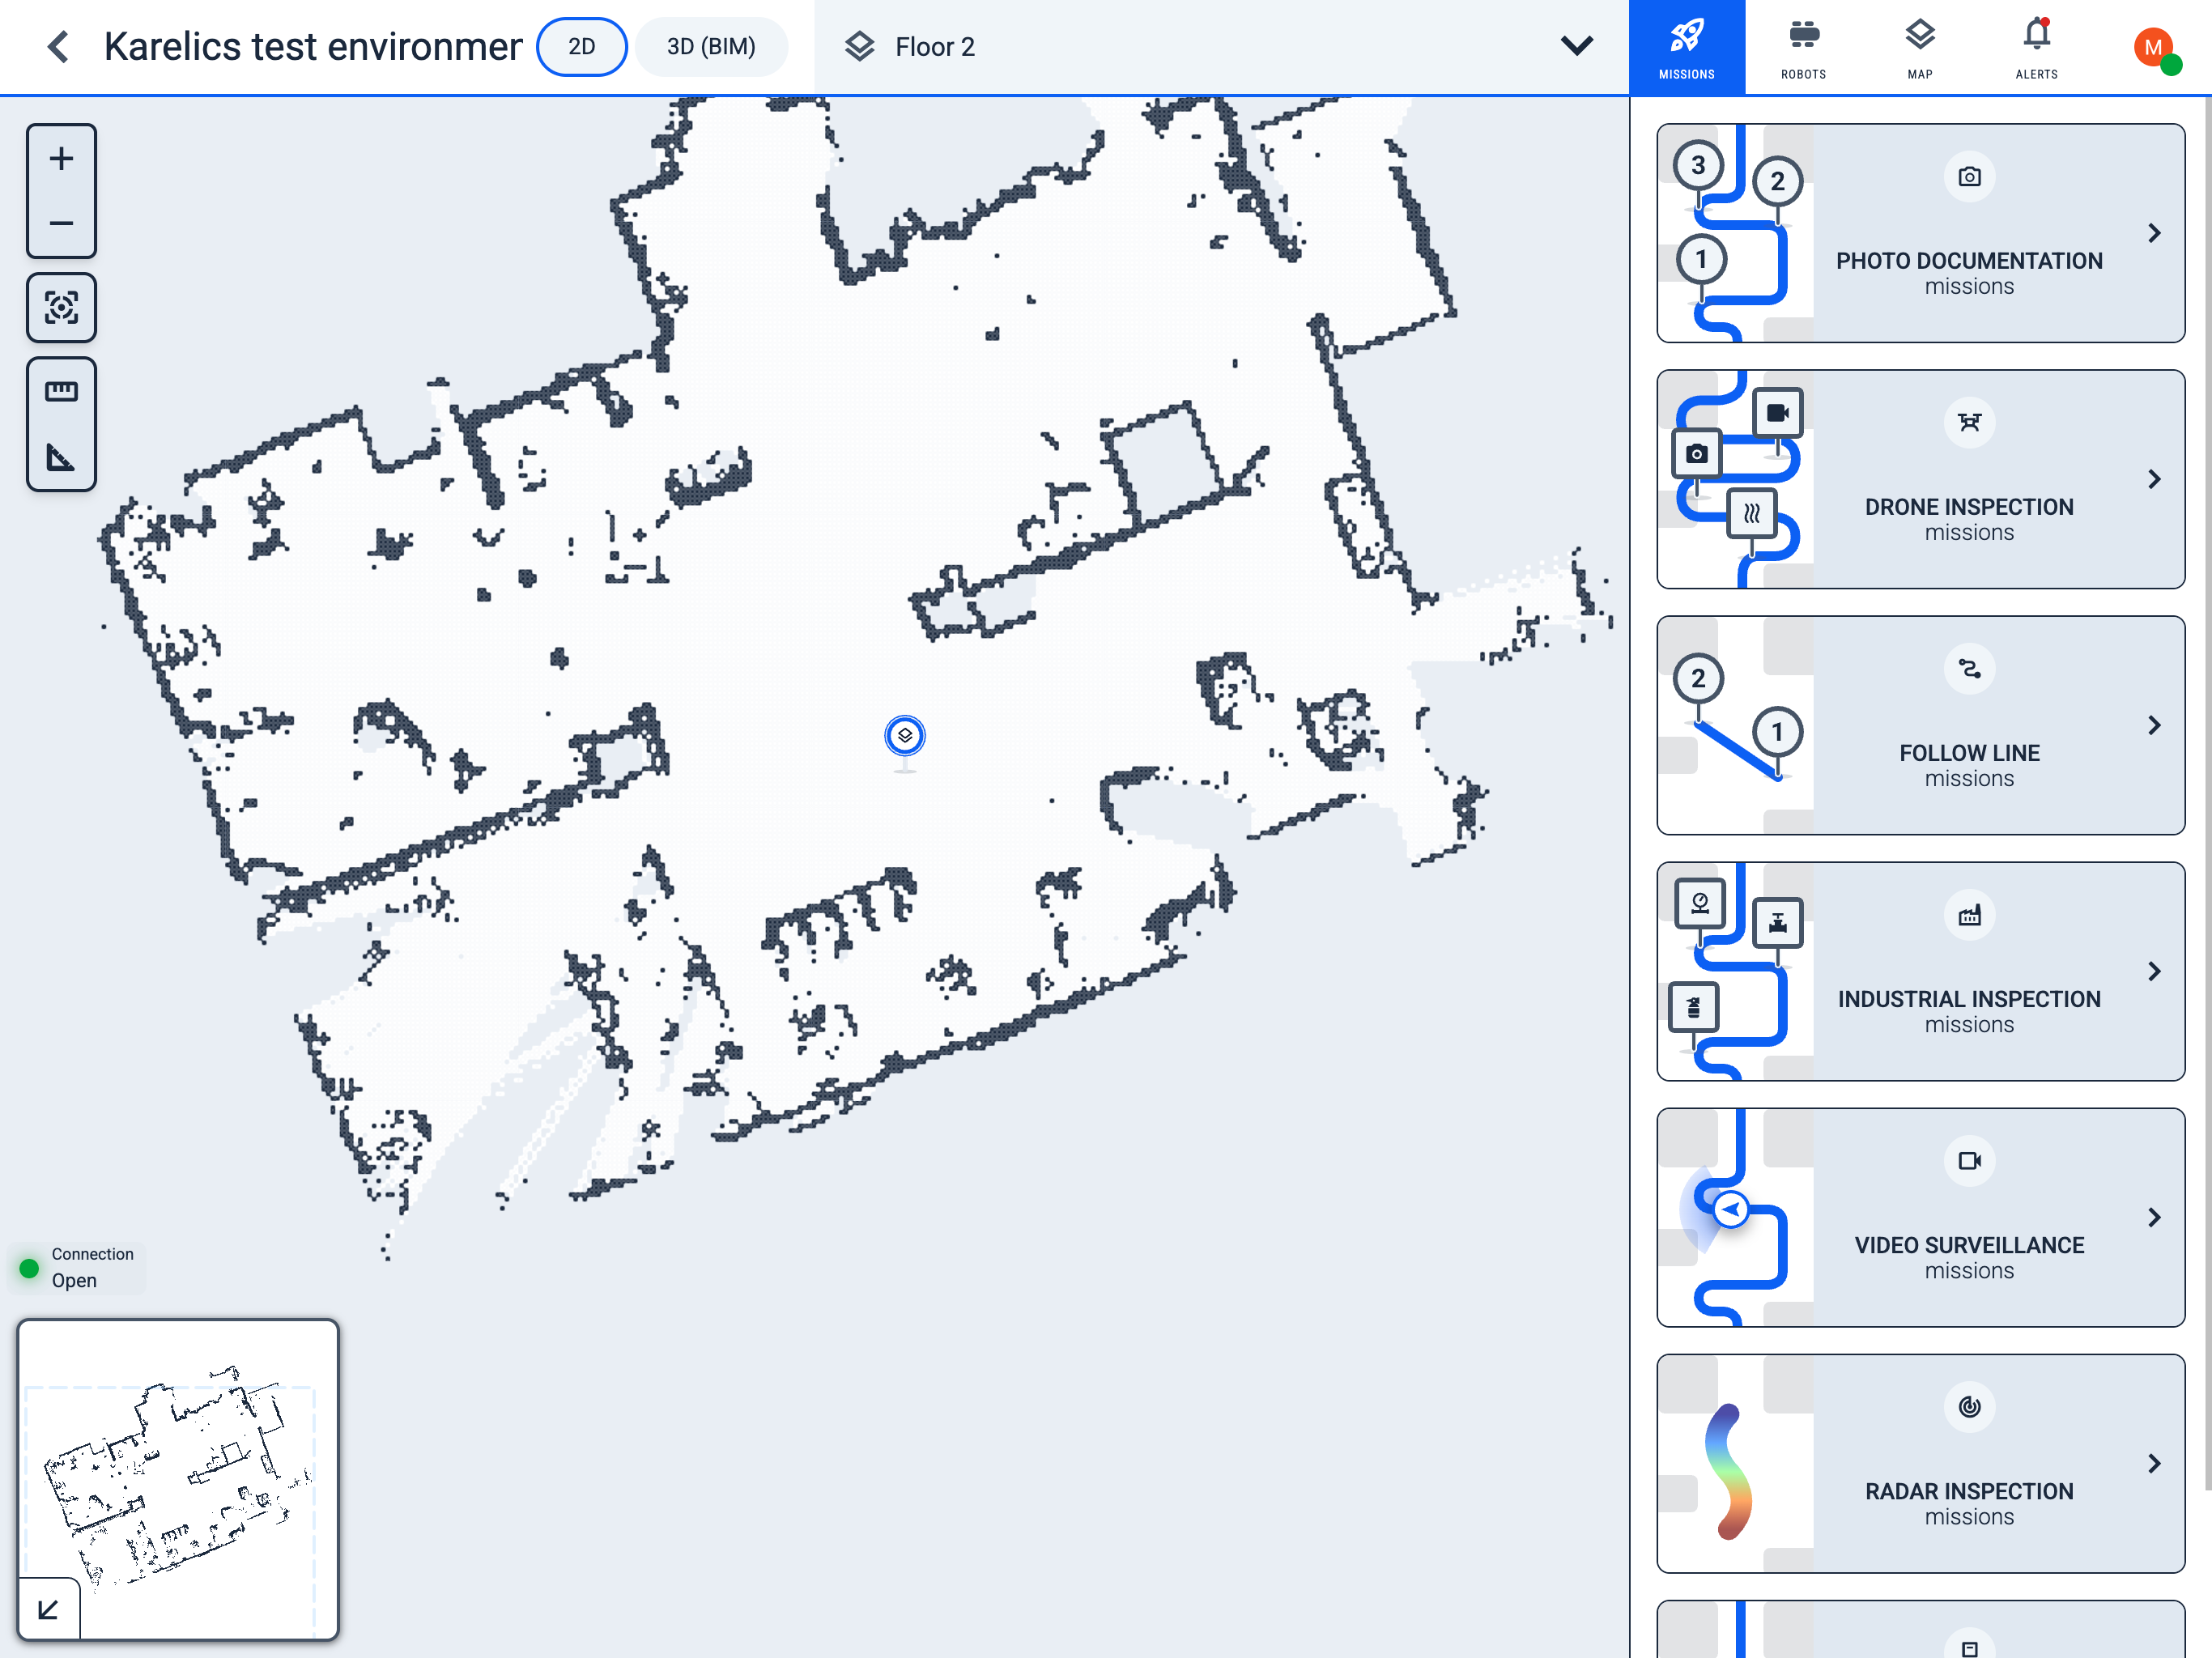
The Missions section lets operators plan, launch, and monitor missions for robots and drones assigned to the current project.
Mission types
The following mission types are available in the project:
photo_camera Photo Documentation missions
factory Industrial Inspection missions
route Pipe Inspection missions
flag Survey Inspection missions
conversion_path Follow Line missions
track_changes Radar Inspection missions
pallet Logistics missions
videocam Video Surveillance missions
motion_photos_on Pipe Seam Inspection missions
drone Drone Inspection missions
4. Managing Drone Inspection missions
Navigate to the following path:
Operator Hub → Current Project → Workspace → Missions → Drone inspection missions
After the FlightHub integration is configured, missions synchronised from FlightHub appear here for review, scheduling, and launch.
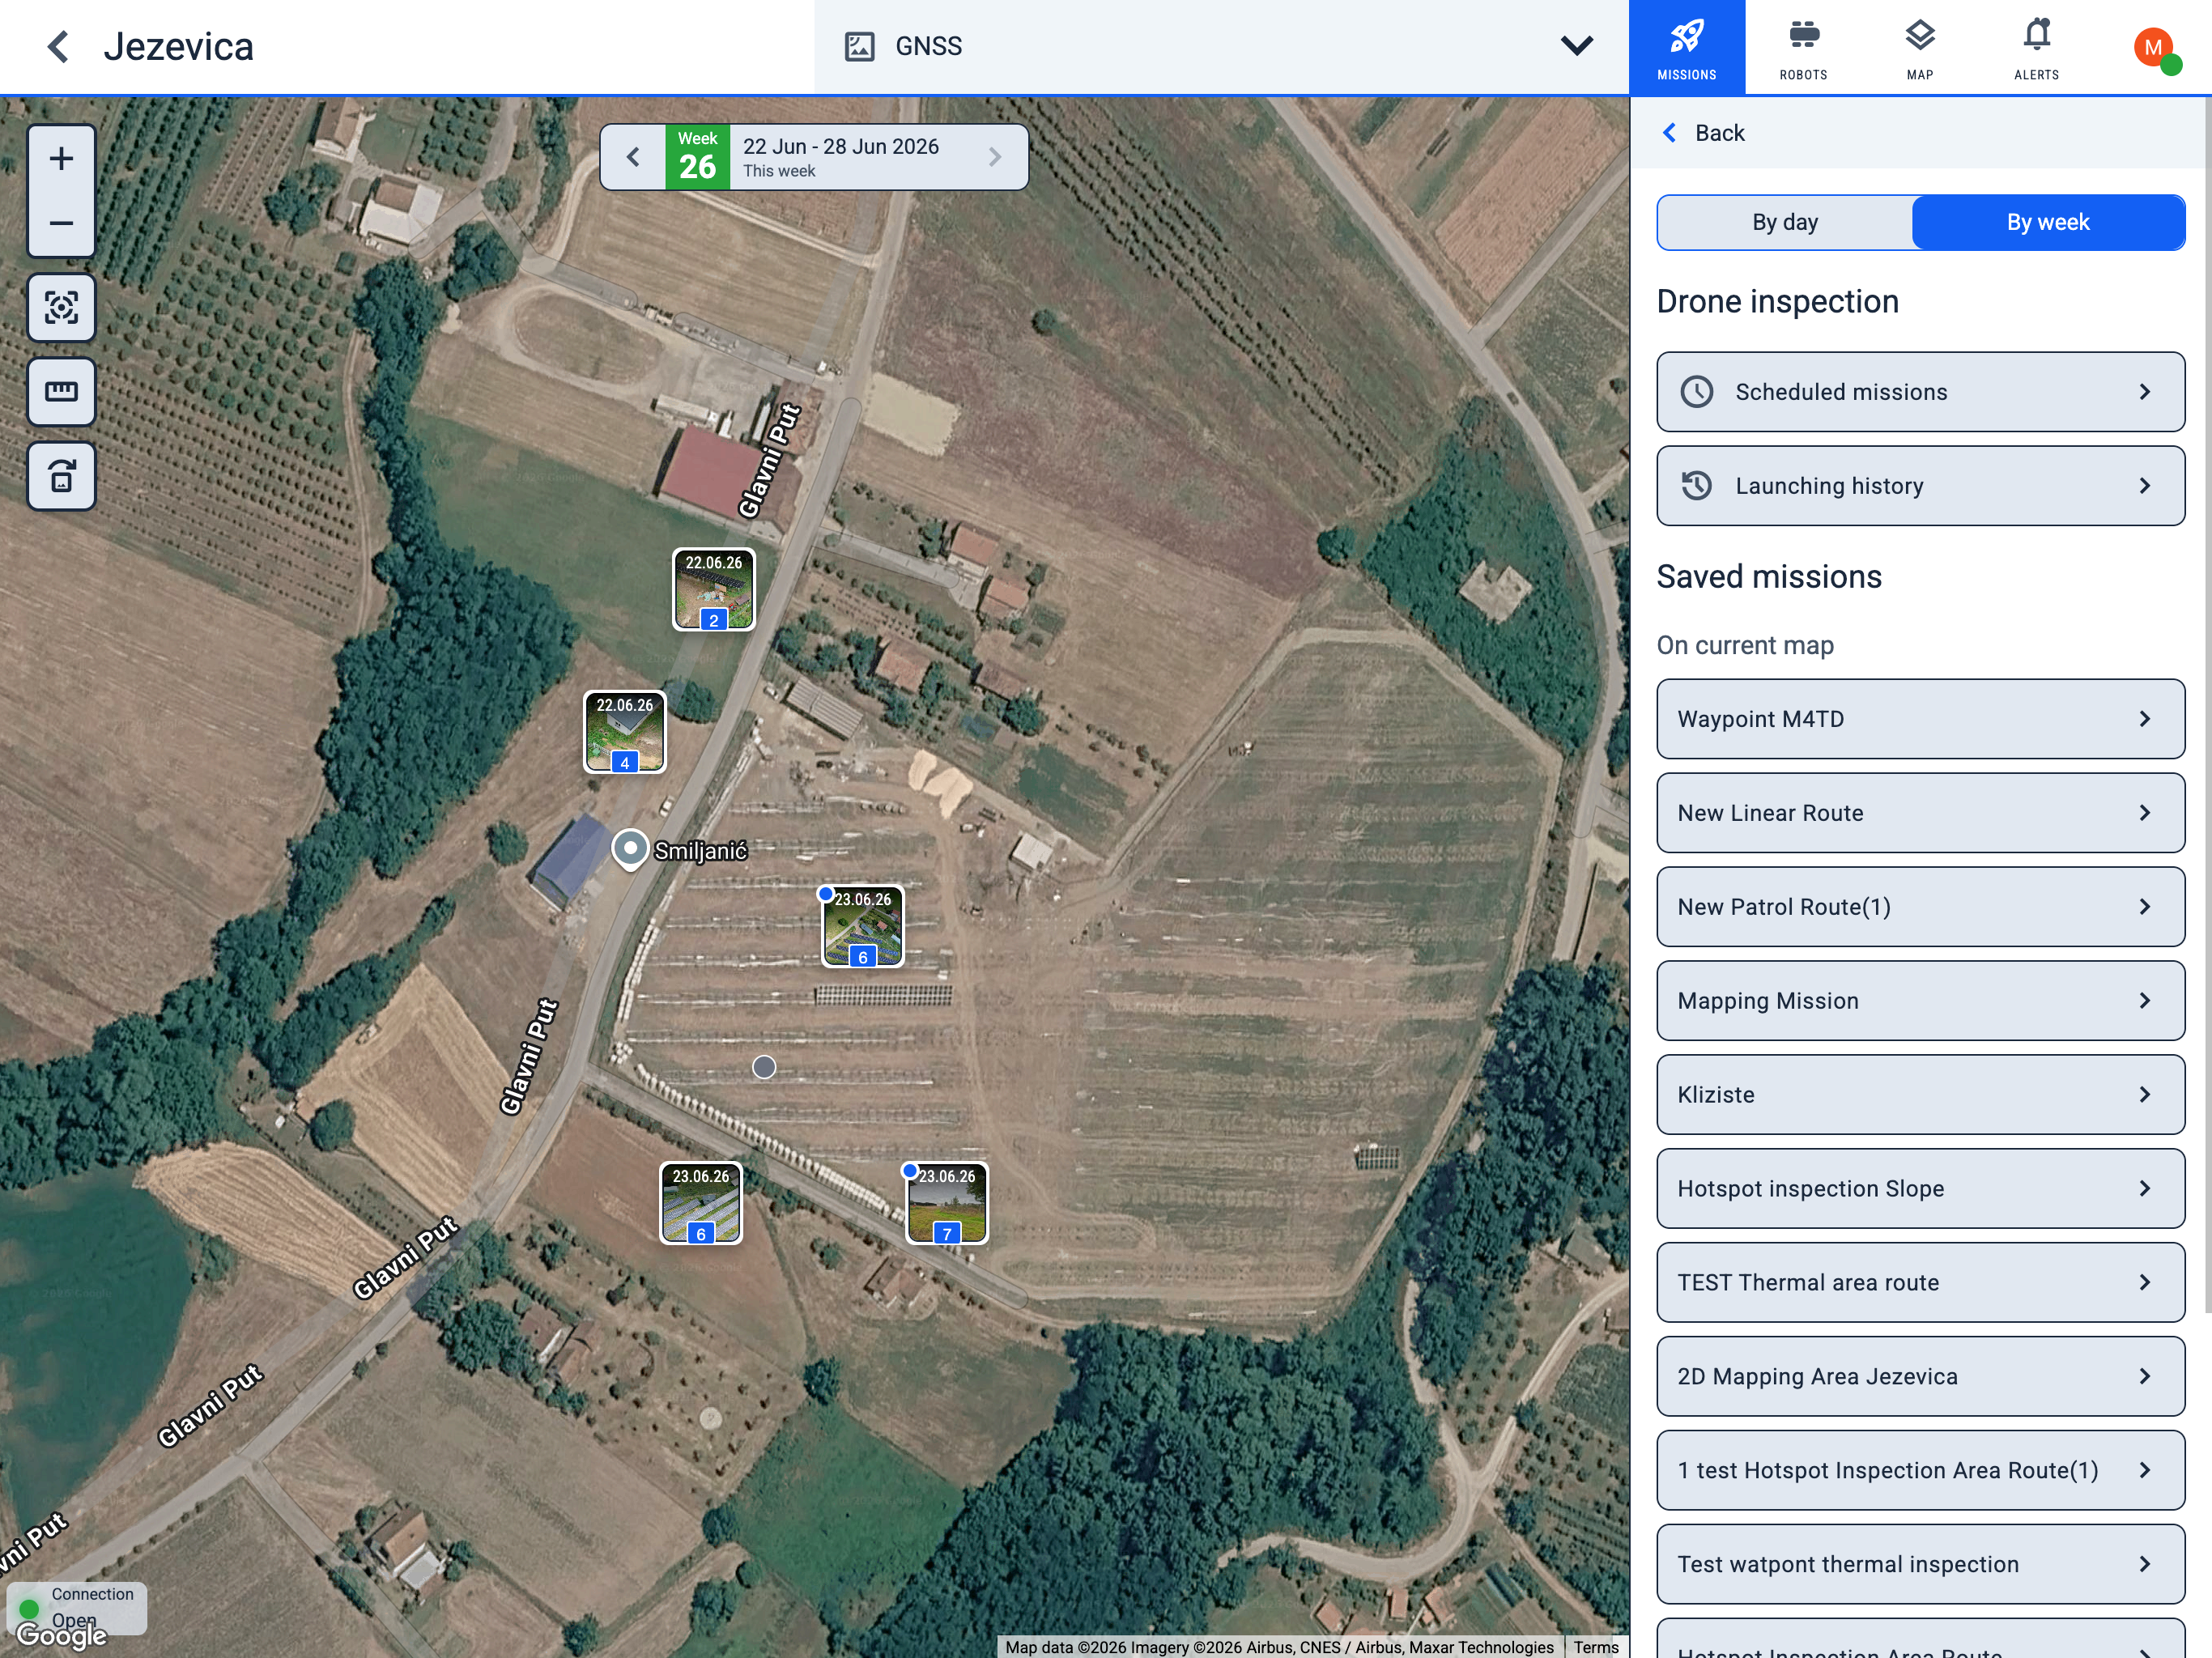
Map
Date selector (top centre) — shows the day or week for photo previews on the map. Navigate with chevron_left and chevron_right.
Toolbar (left):
- zoom_in Zoom in
- zoom_out Zoom out
- motion_sensor_active Fit map to screen
- straighten Ruler
- replace_image Move photo previews — drag thumbnails to reposition them on the map
Sidebar
View mode — By day or By week; also controls how the map date selector steps through time.
- schedule Scheduled missions — create and manage schedules
- history Launching history — past launches and results
Saved missions — mission templates on the current map. Open any entry to launch or schedule it.
Launch from saved missions
Saved missions are mission templates synchronised from FlightHub. Open any entry from the Saved missions list to review its waypoints on the map, manage schedules, or launch it on demand.
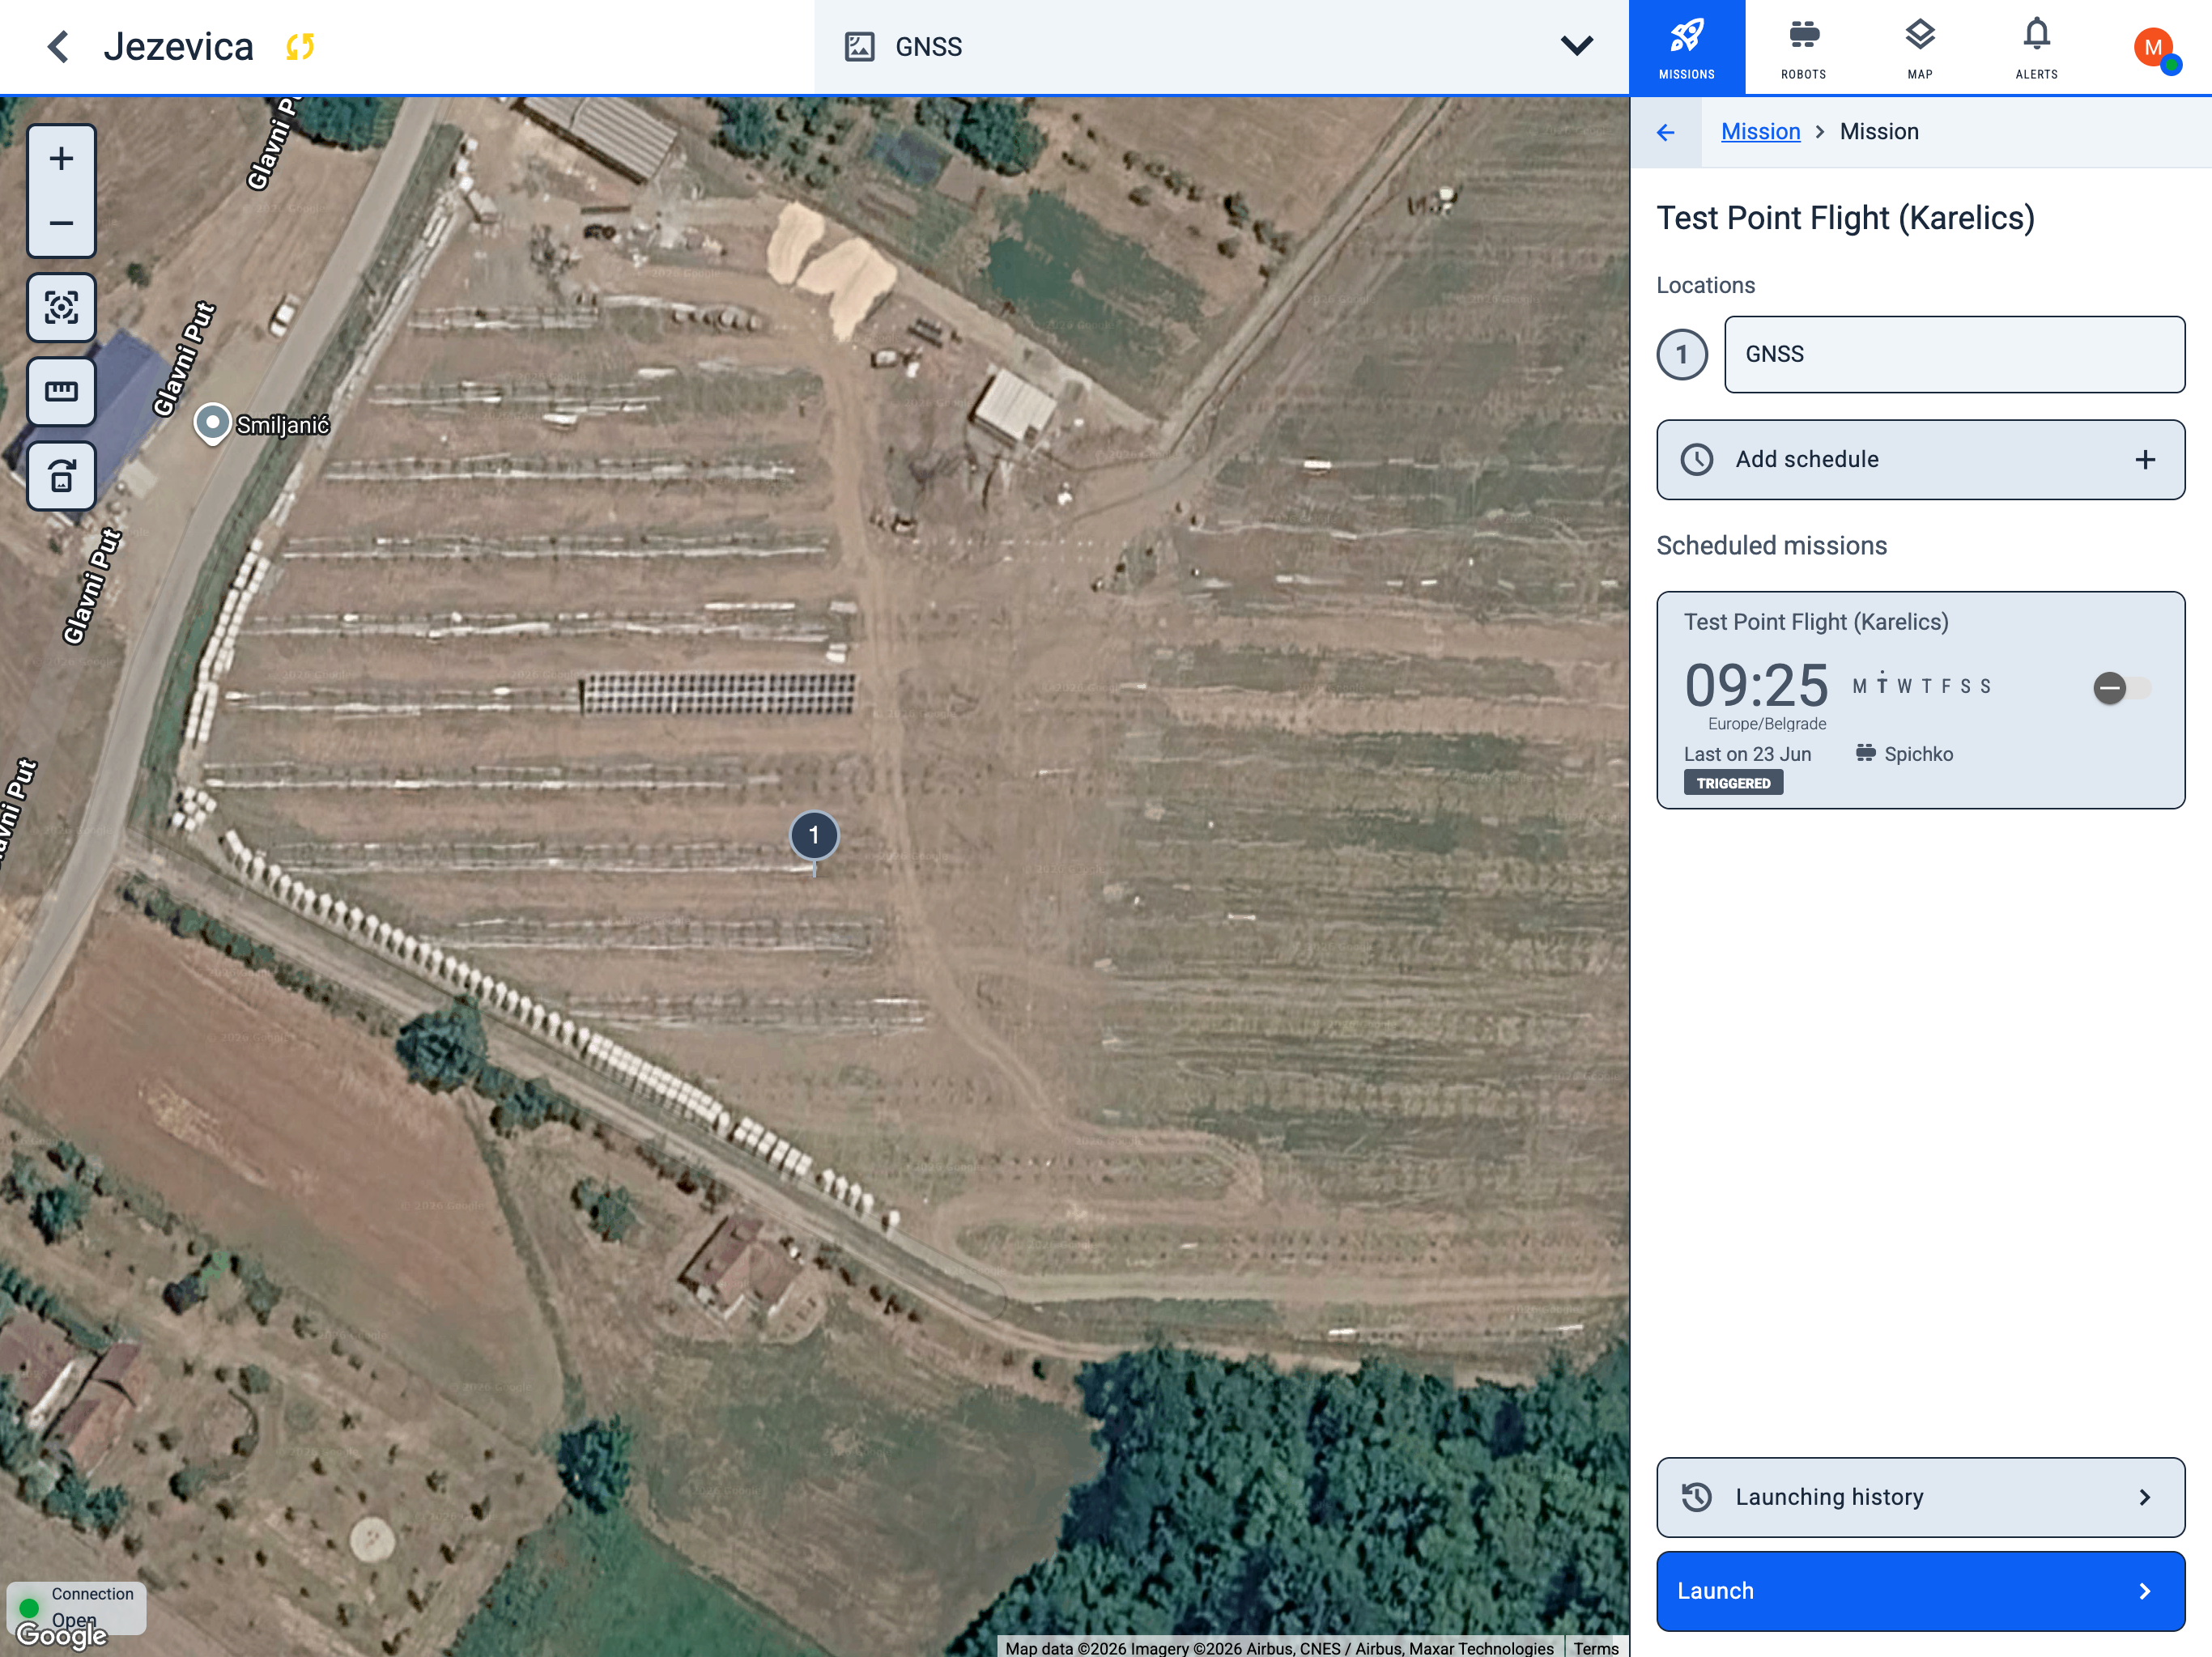
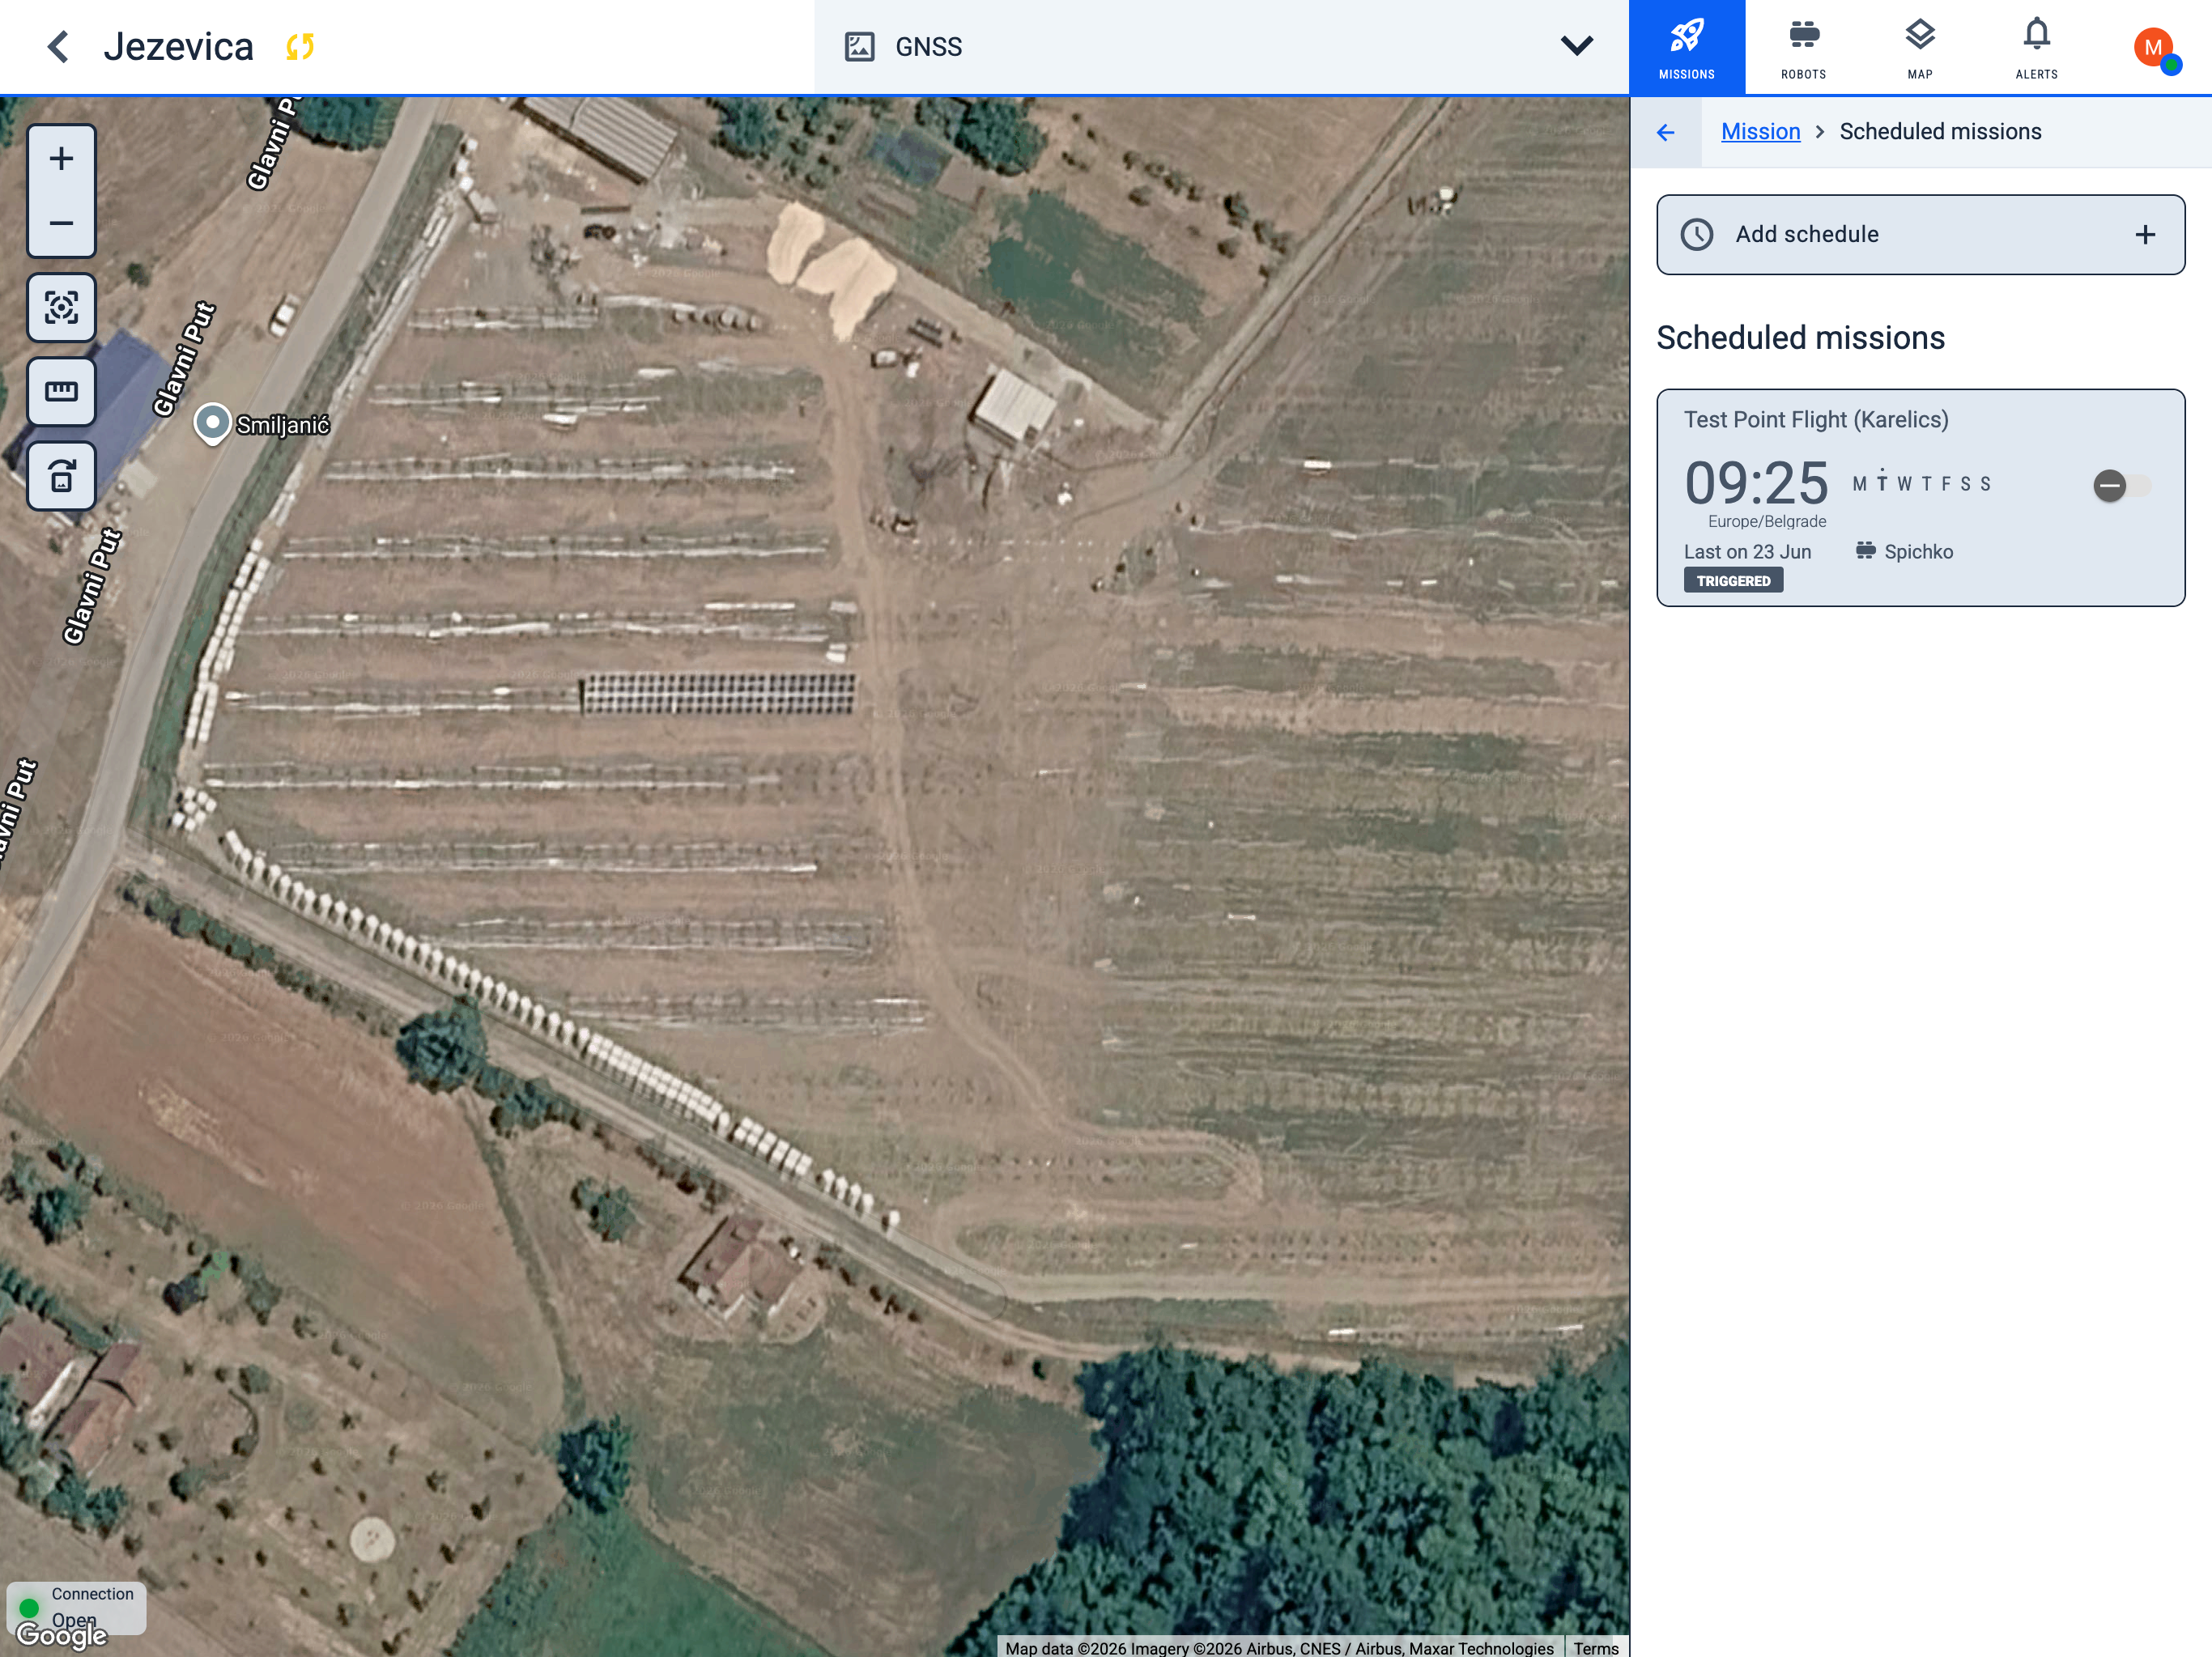
Mission detail
When you open a saved mission, the map centres on its waypoints and the detail panel shows:
- Locations — numbered waypoints in the mission route (for example, GNSS).
- Add schedule — create a recurring schedule for this mission.
- Scheduled missions — existing schedules linked to this mission, with time, weekdays, and last execution status.
- Launching history — opens the launch history filtered to this mission, so you can review past runs, statuses, and execution details.
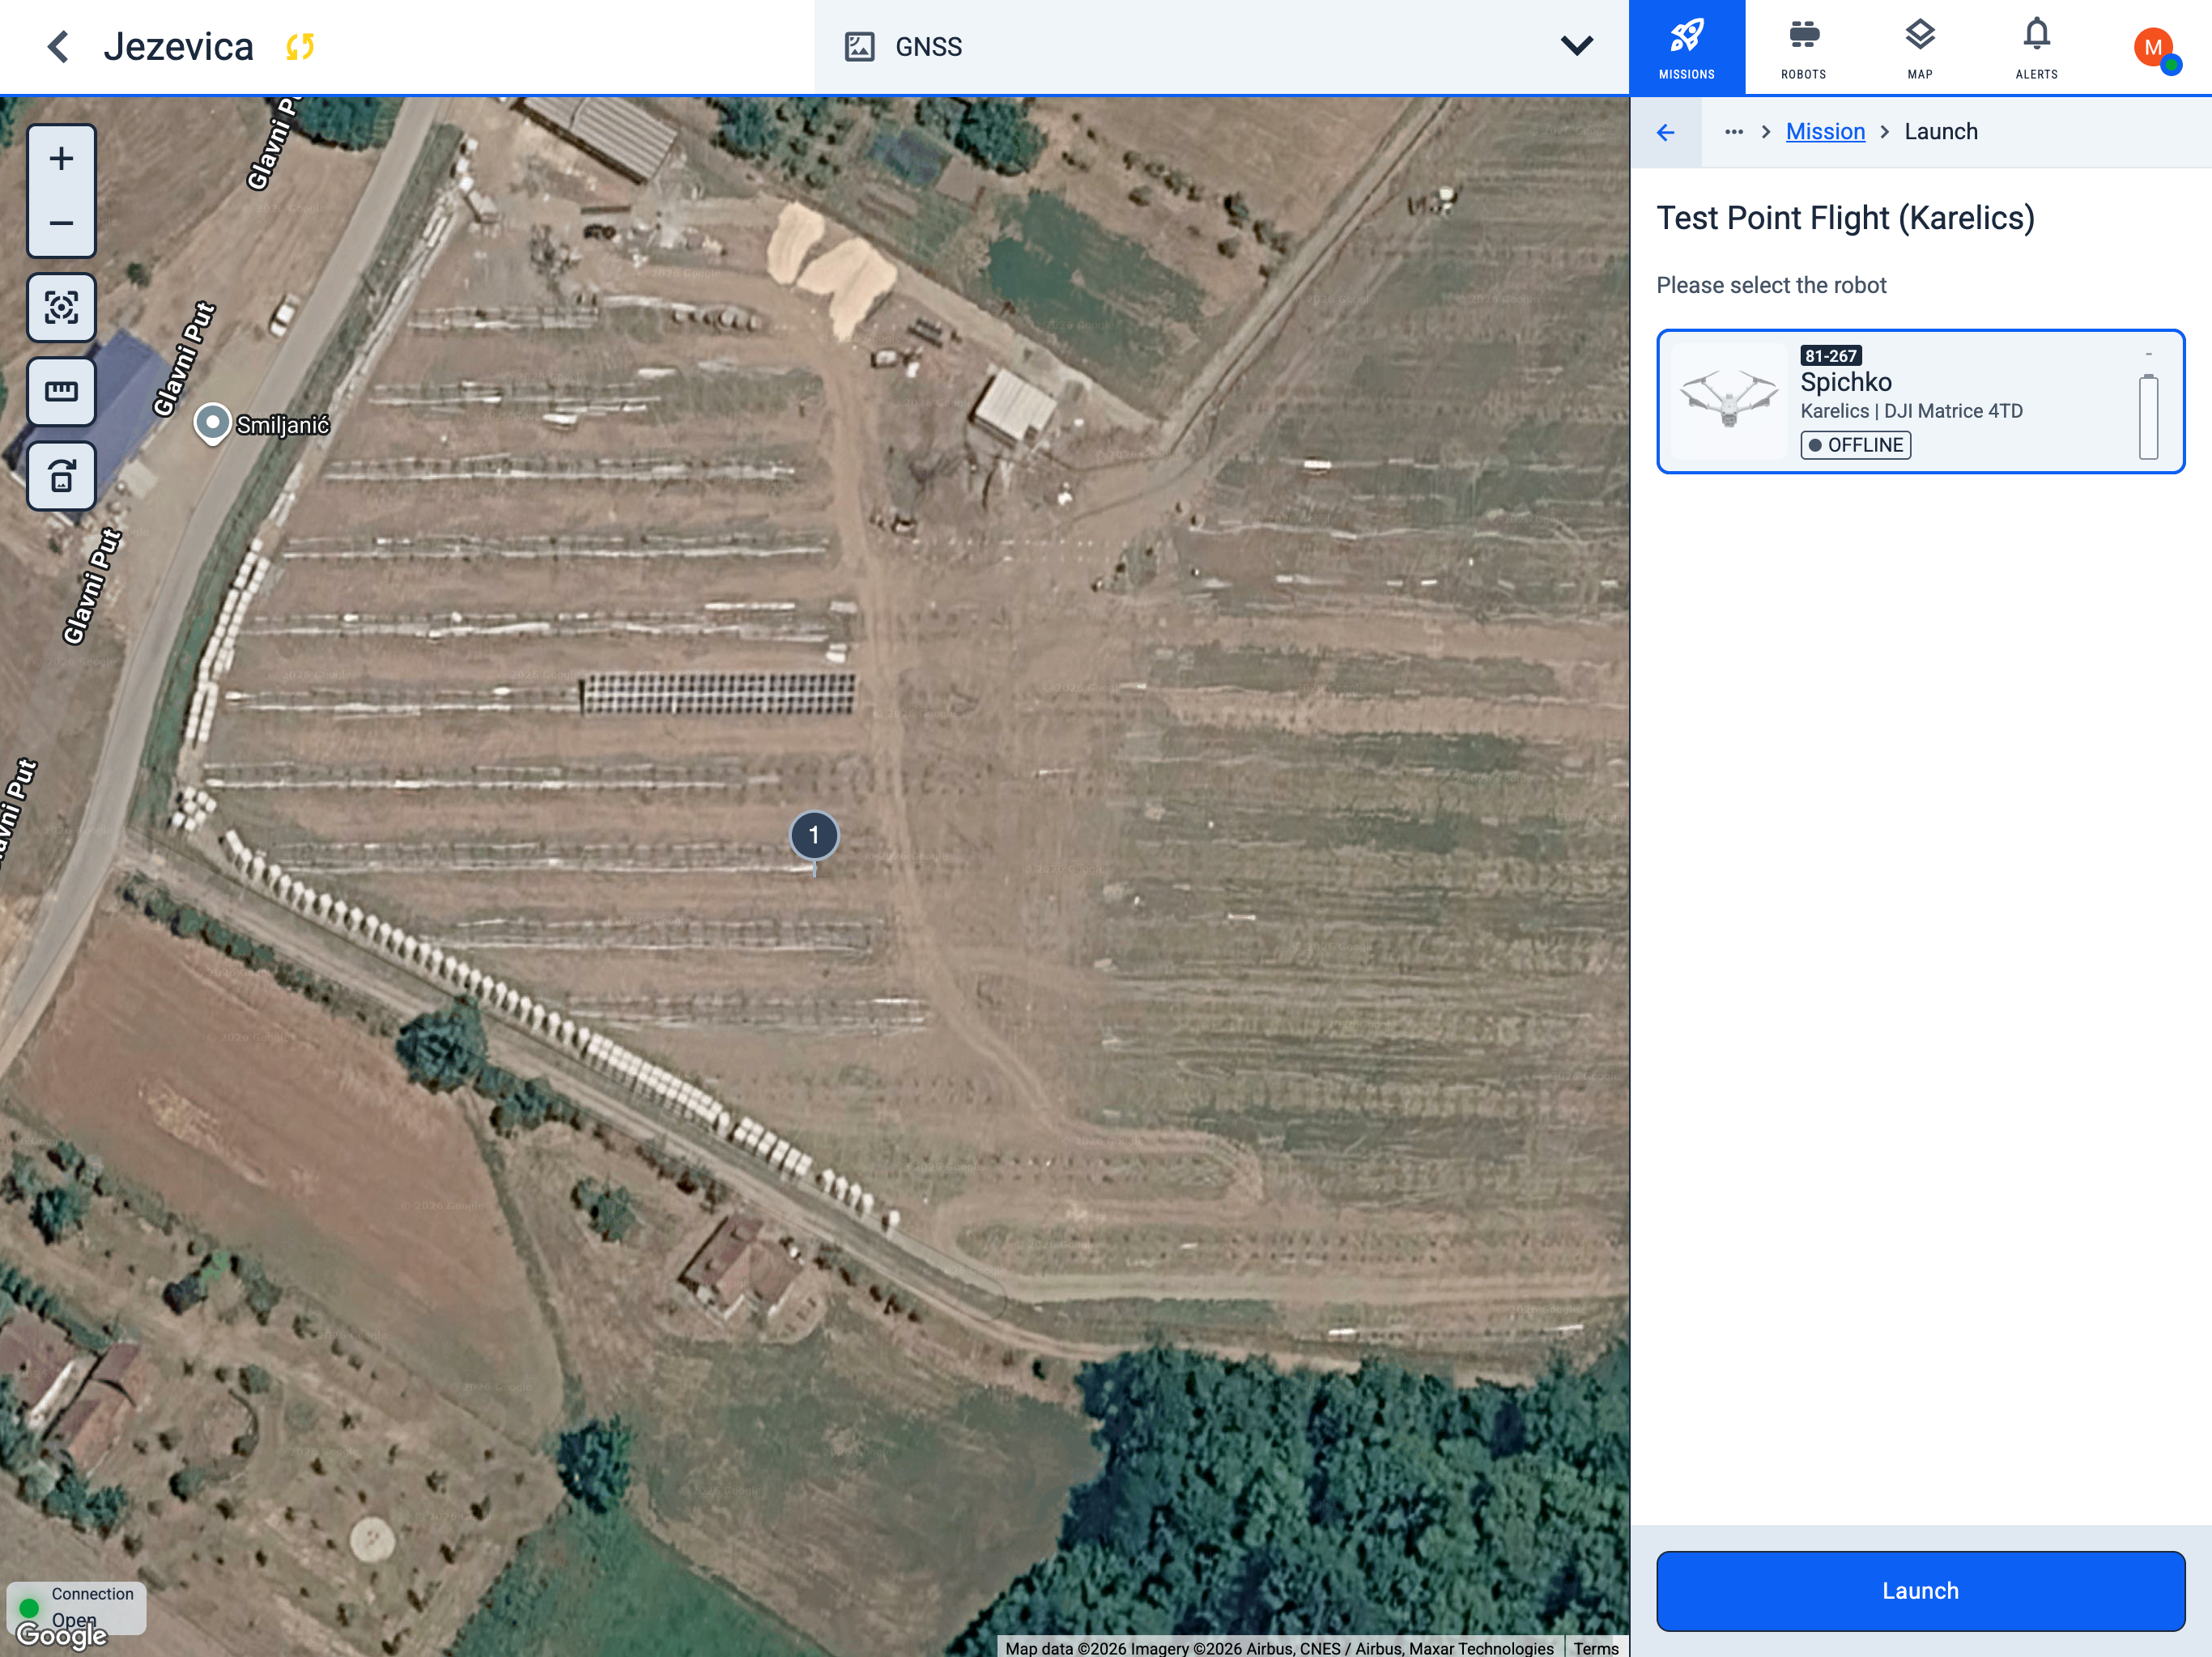
Launch a saved mission
- Open the mission from Saved missions in the sidebar.
- Click Launch at the bottom of the detail panel.
- Select the robot that will execute the mission. Only drones configured for the project are shown.
- Click Launch again to send the mission.
After launch, track progress from the global Launching history sidebar or from the mission's Launching history button.
Scheduled missions
The list shows all schedules for this map. Each card displays the mission name, run time, selected weekdays, assigned robot, and last execution status.
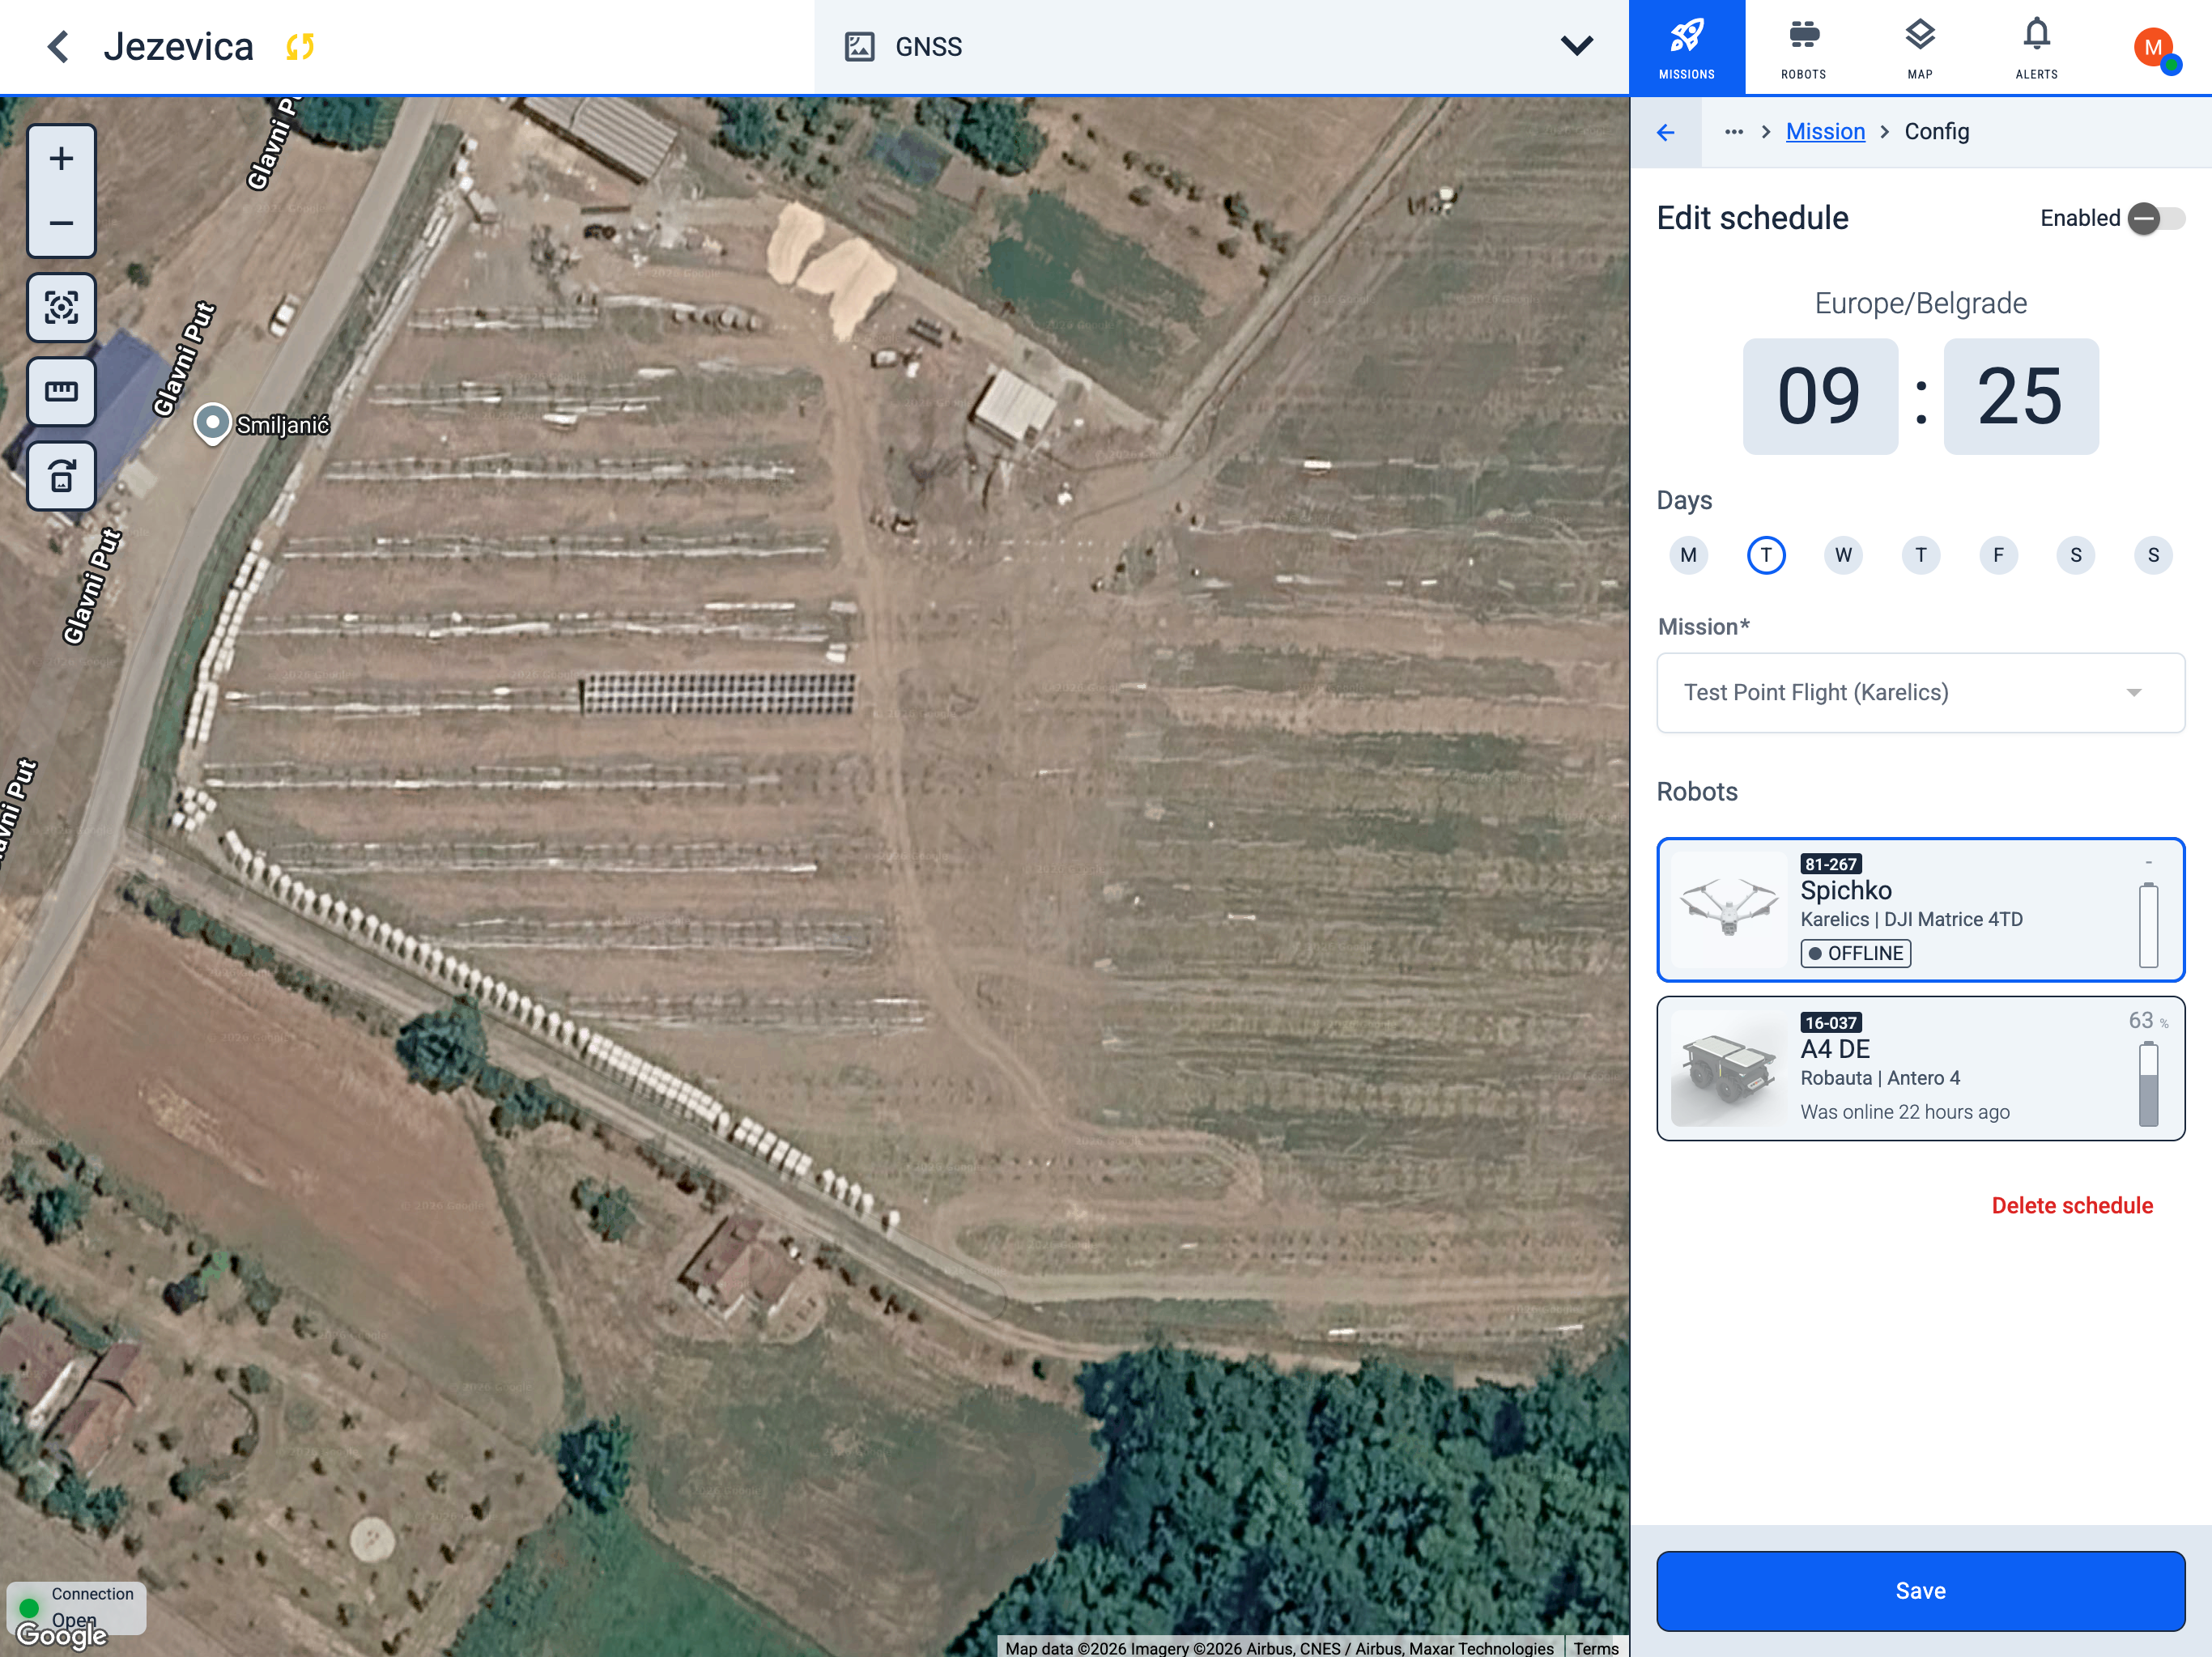
Create a schedule
- Click + Add schedule.
- Set Enabled if the schedule should run immediately after saving.
- Choose the time and confirm the timezone.
- Select the days of the week when the mission should run.
- Pick a Mission from the dropdown.
- Select one or more Robots that will execute the mission.
- Click Save.

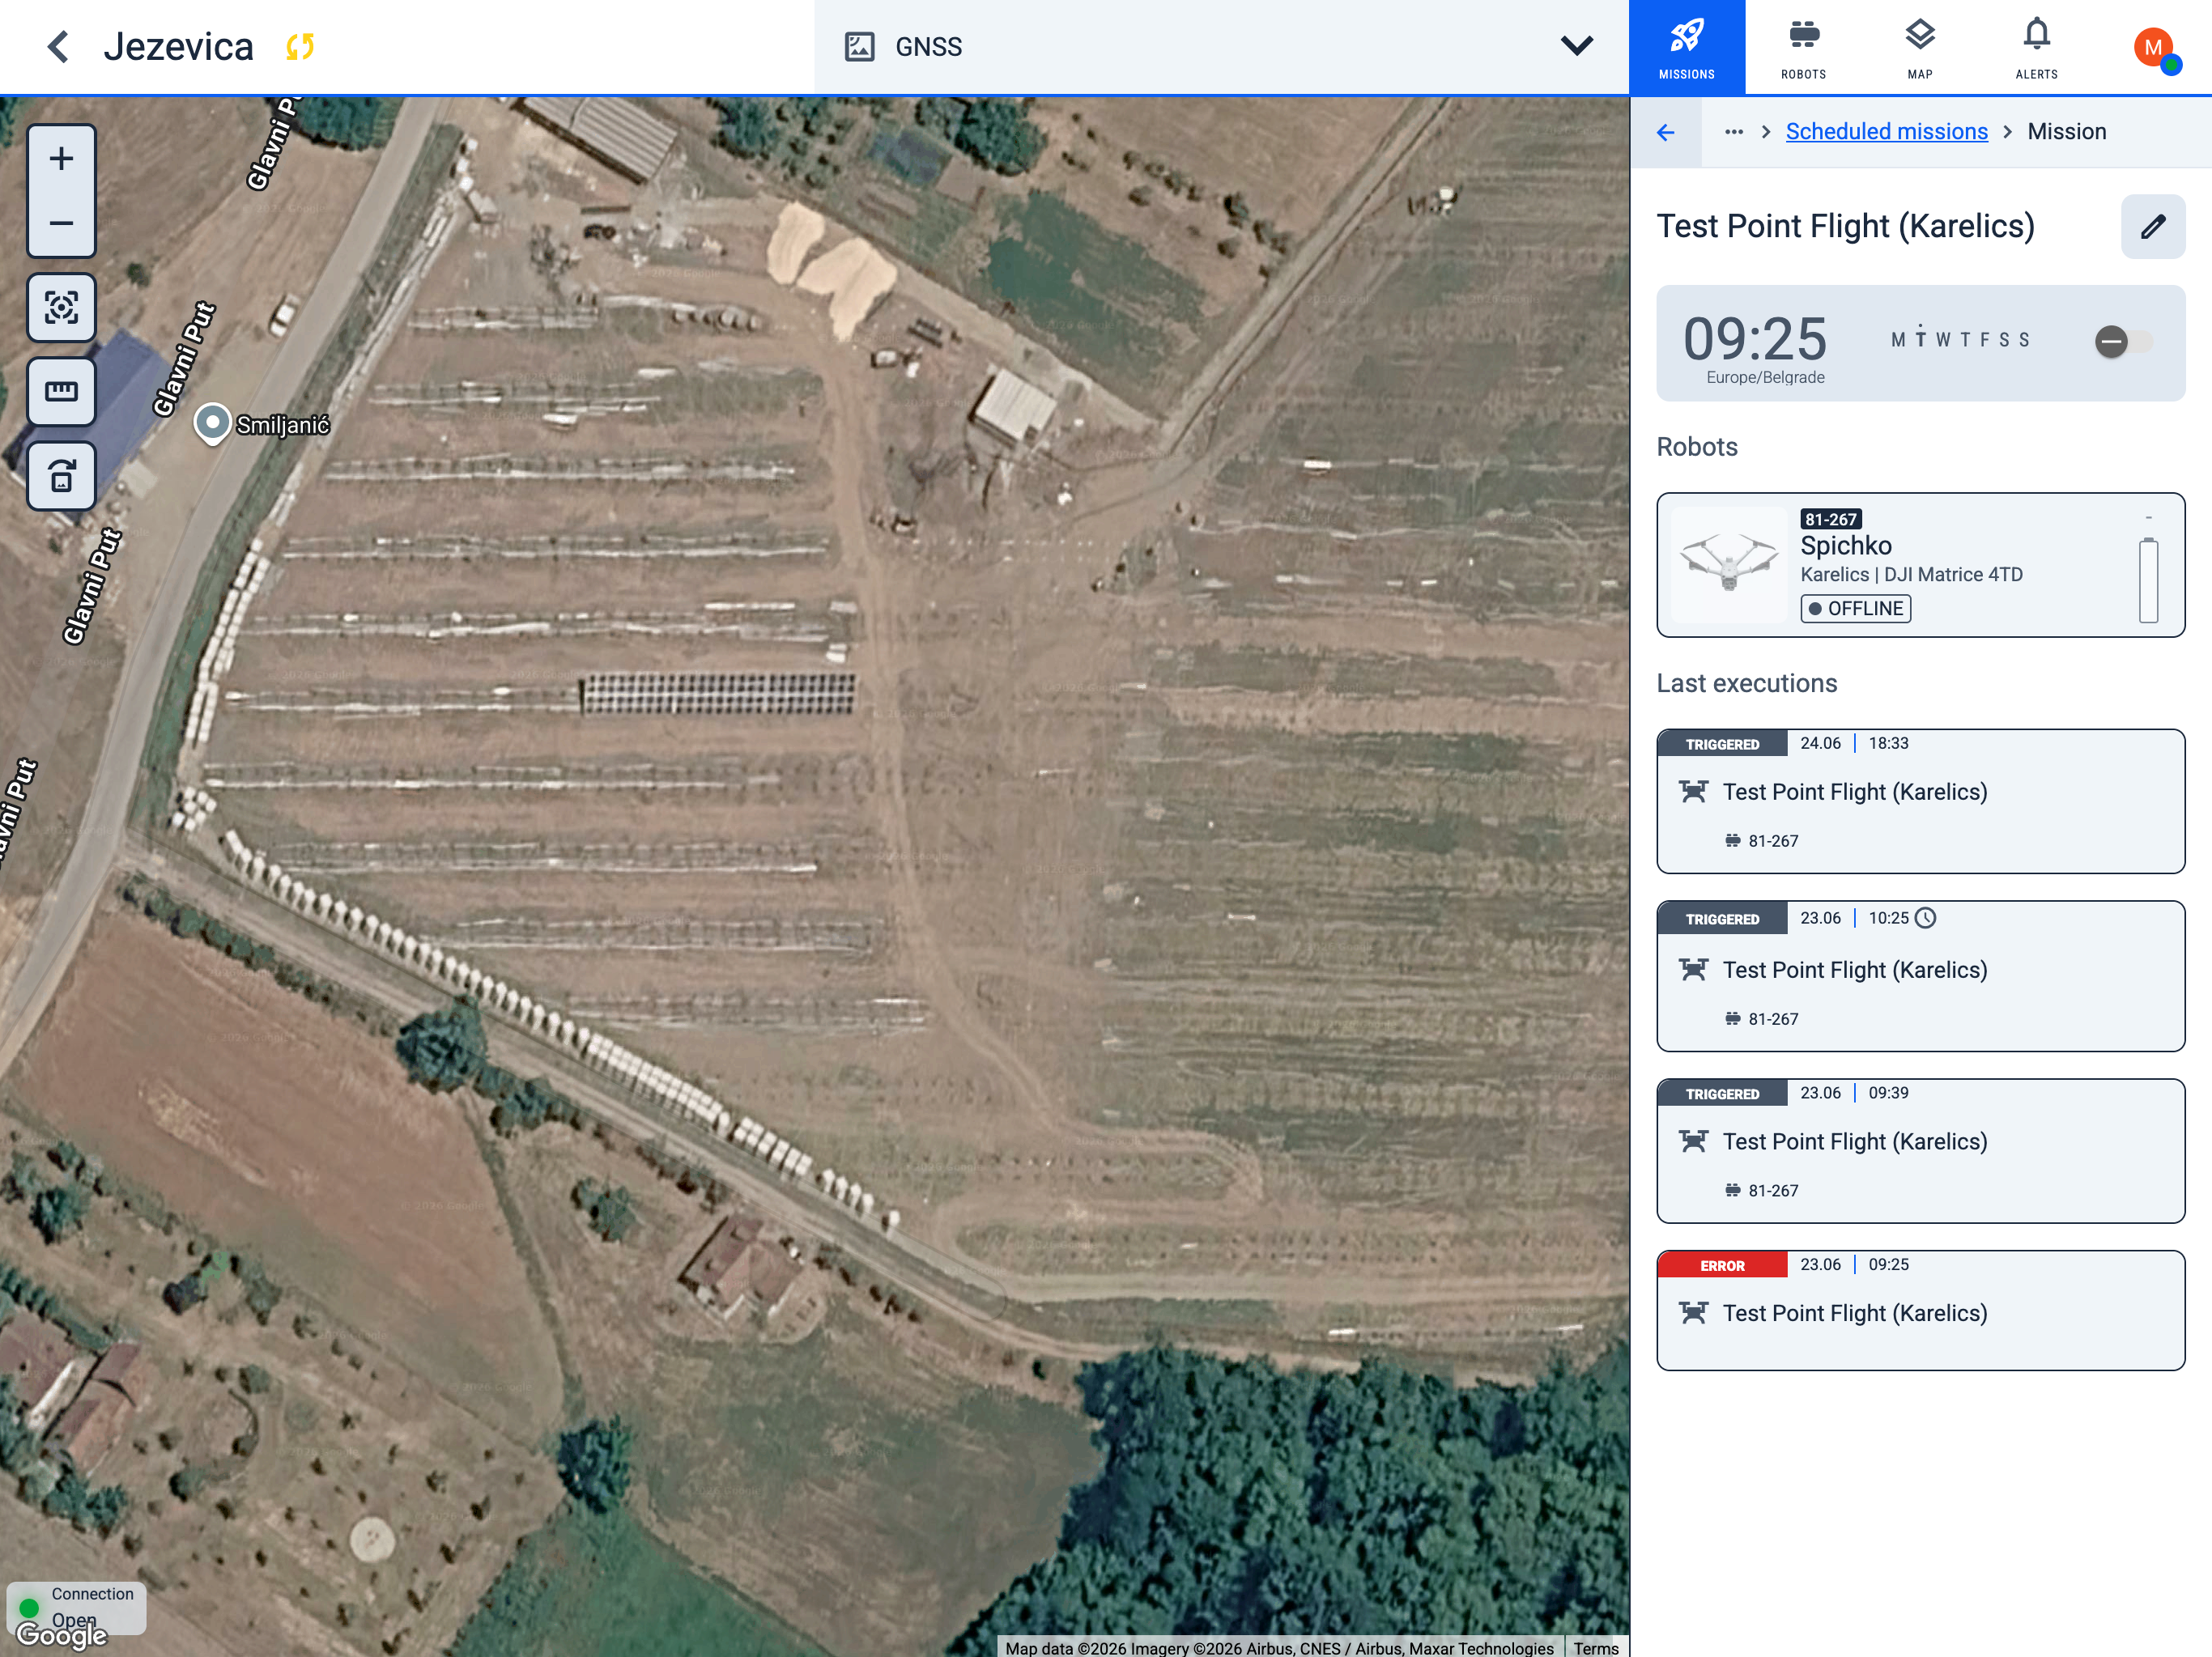
View schedule details
Click a schedule in the list to open its details:
- Time and recurrence — when the mission runs and on which days.
- Robots — which robot is assigned.
- Last executions — recent trigger results (TRIGGERED, ERROR, and other statuses).
Edit or delete a schedule
- Open the schedule from the list.
- Click the Edit icon (pencil) next to the mission name.
- Update time, days, mission, or robot assignment.
- Toggle Enabled to pause or resume the schedule.
- Click Save, or Delete schedule to remove it permanently.
Launching history
Launching history shows every mission launch for the current map — manual runs, scheduled triggers, and retries — grouped by date with the latest status of each attempt.
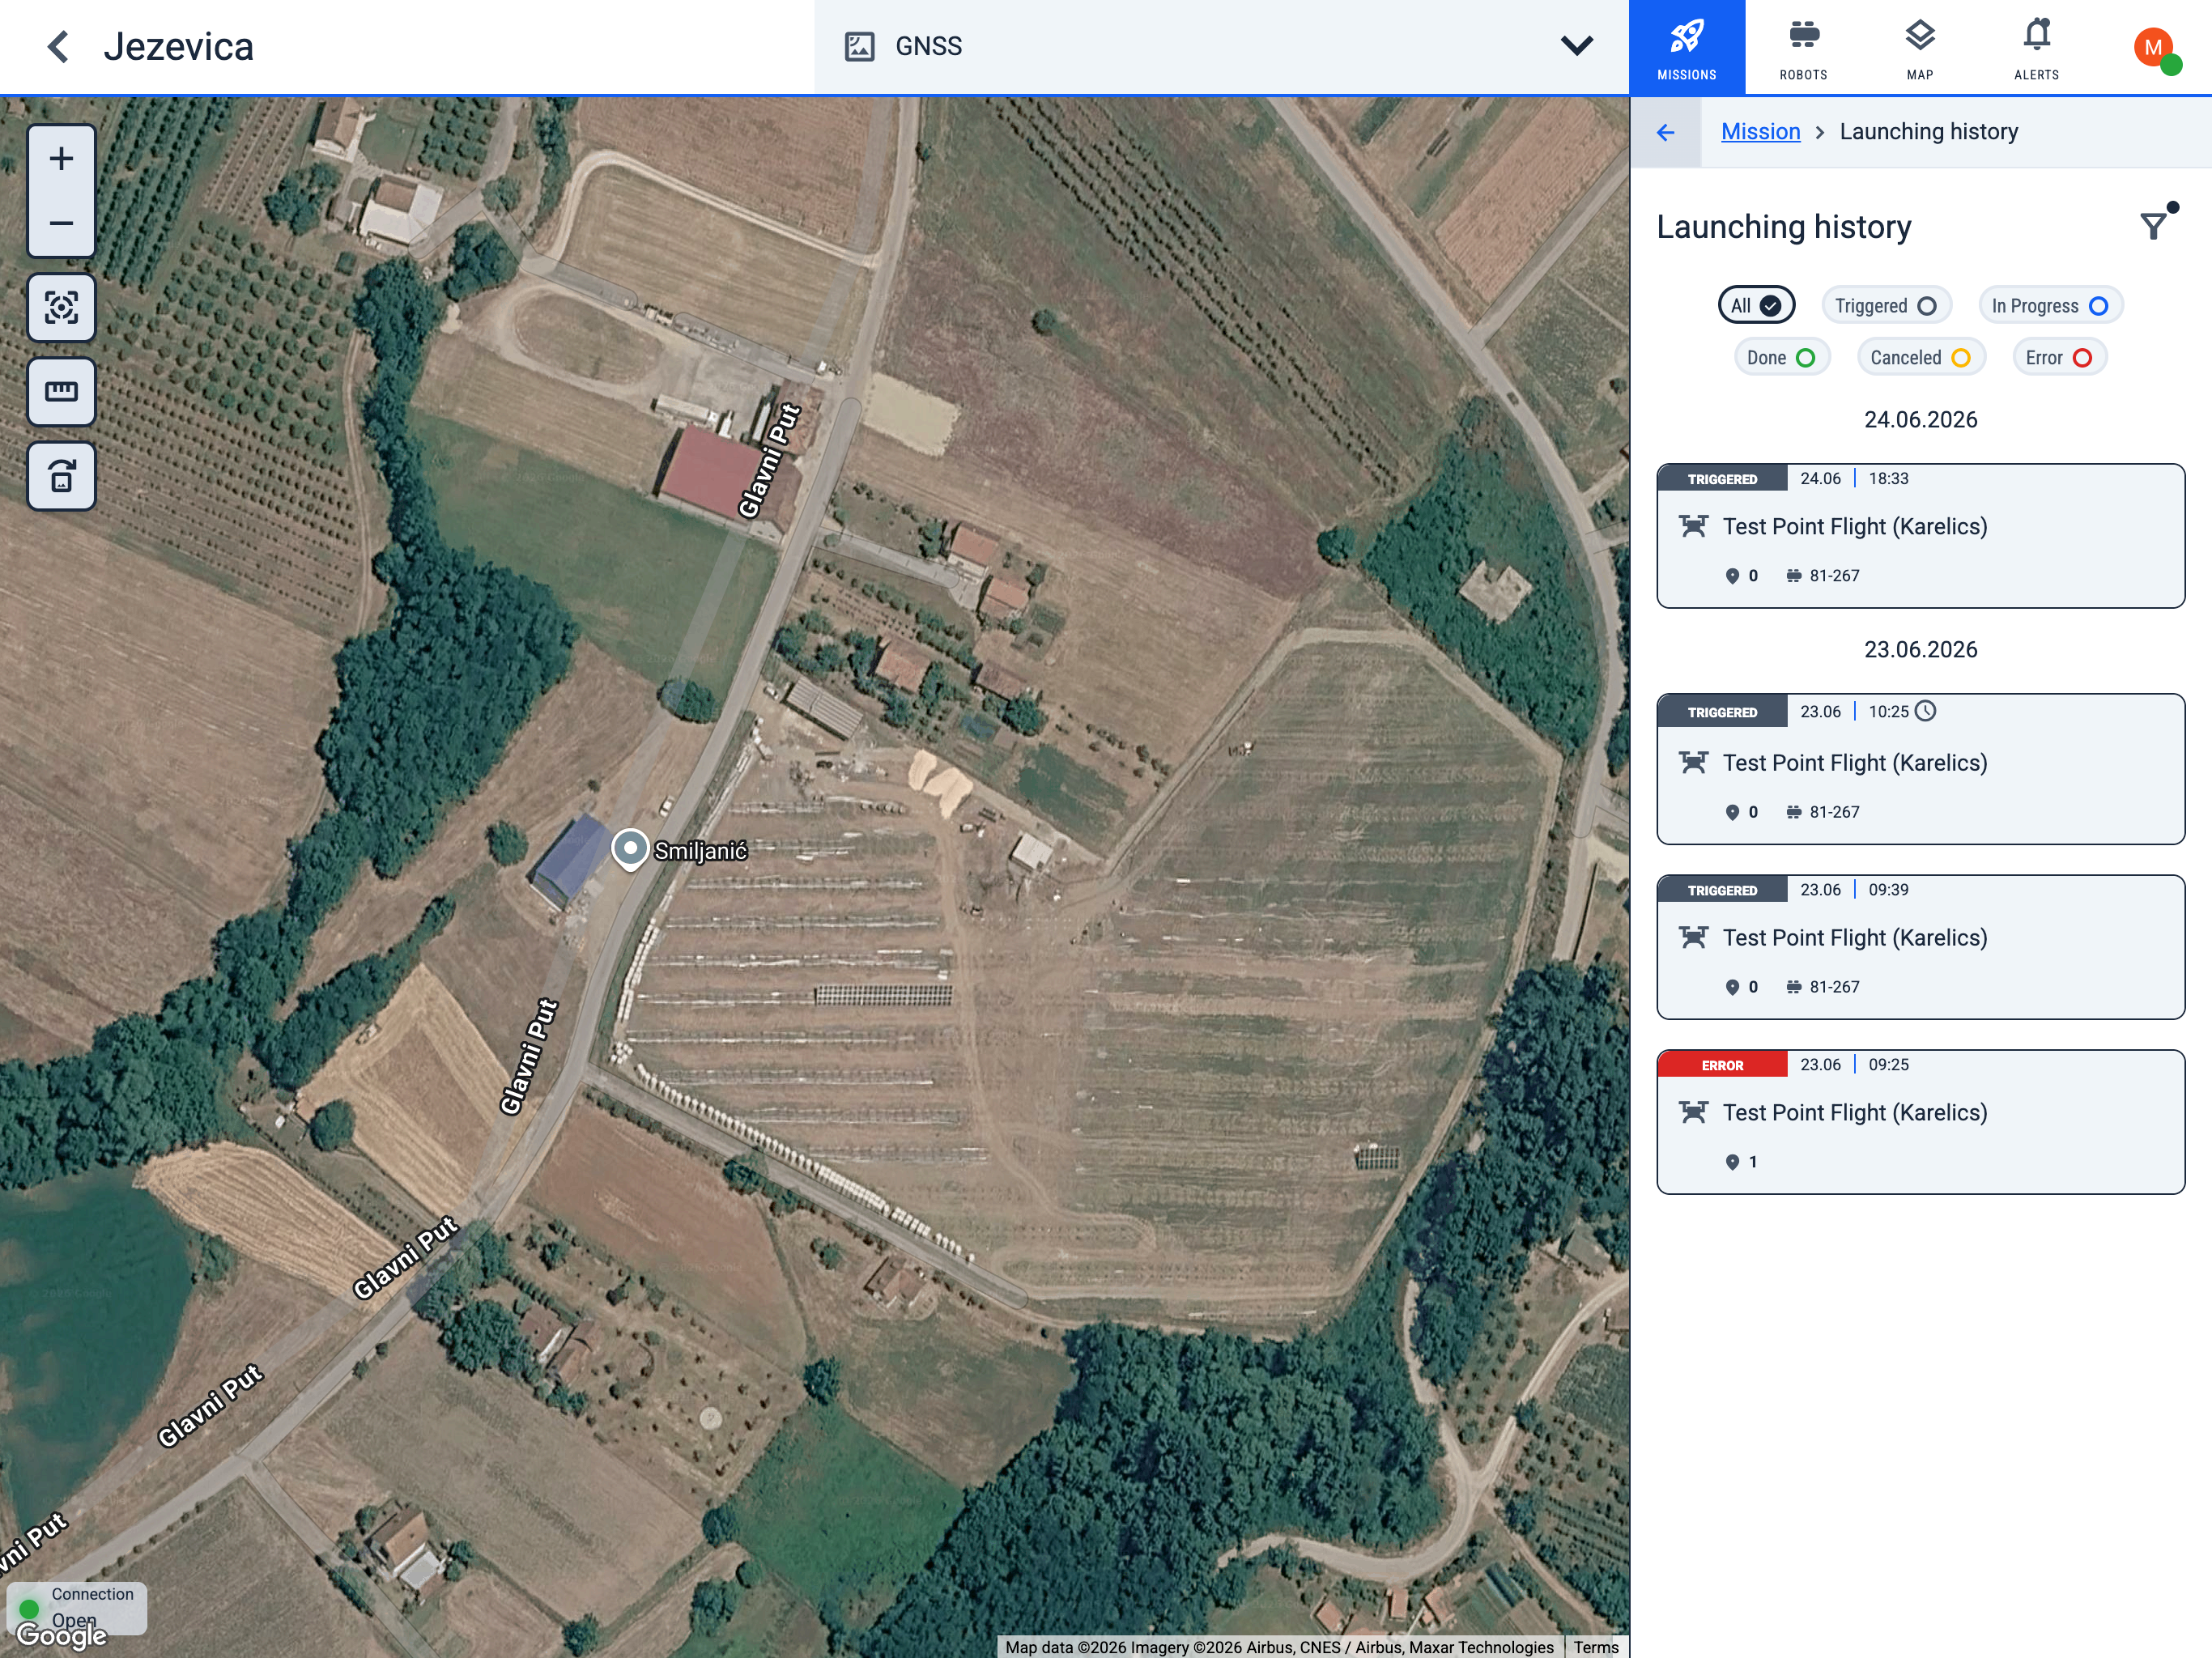
Filter by status
Use the status chips at the top of the list to narrow results:
- All — every launch (default).
- Triggered — the mission was sent to the robot or drone and is waiting to start.
- In Progress — the mission is currently running.
- Done — the mission finished successfully.
- Canceled — the mission was stopped before completion.
- Error — the launch or execution failed.
Additional filters
Click the filter icon filter_alt in the top-right corner of the sidebar to open the filter menu. A blue dot on the icon indicates that at least one filter is active.
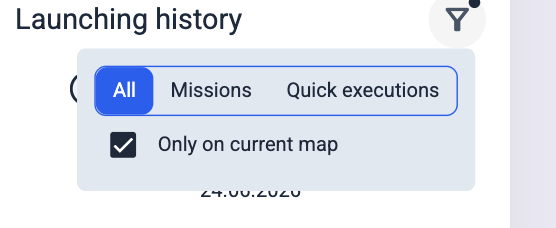
- Launch type — choose which launches to show:
- All — saved missions and quick executions.
- Missions — launches from saved mission templates only.
- Quick executions — ad-hoc launches created directly on the map.
- Only on current map — when enabled, the list includes only launches tied to the map you are viewing. Disable to see launches across all maps in the project.
History entries
Launches are grouped under date headers (for example, 24.06.2026). Each card shows:
- Status badge — the current state of the launch (TRIGGERED, ERROR, and other statuses).
- Timestamp — date and time the launch was created or last updated.
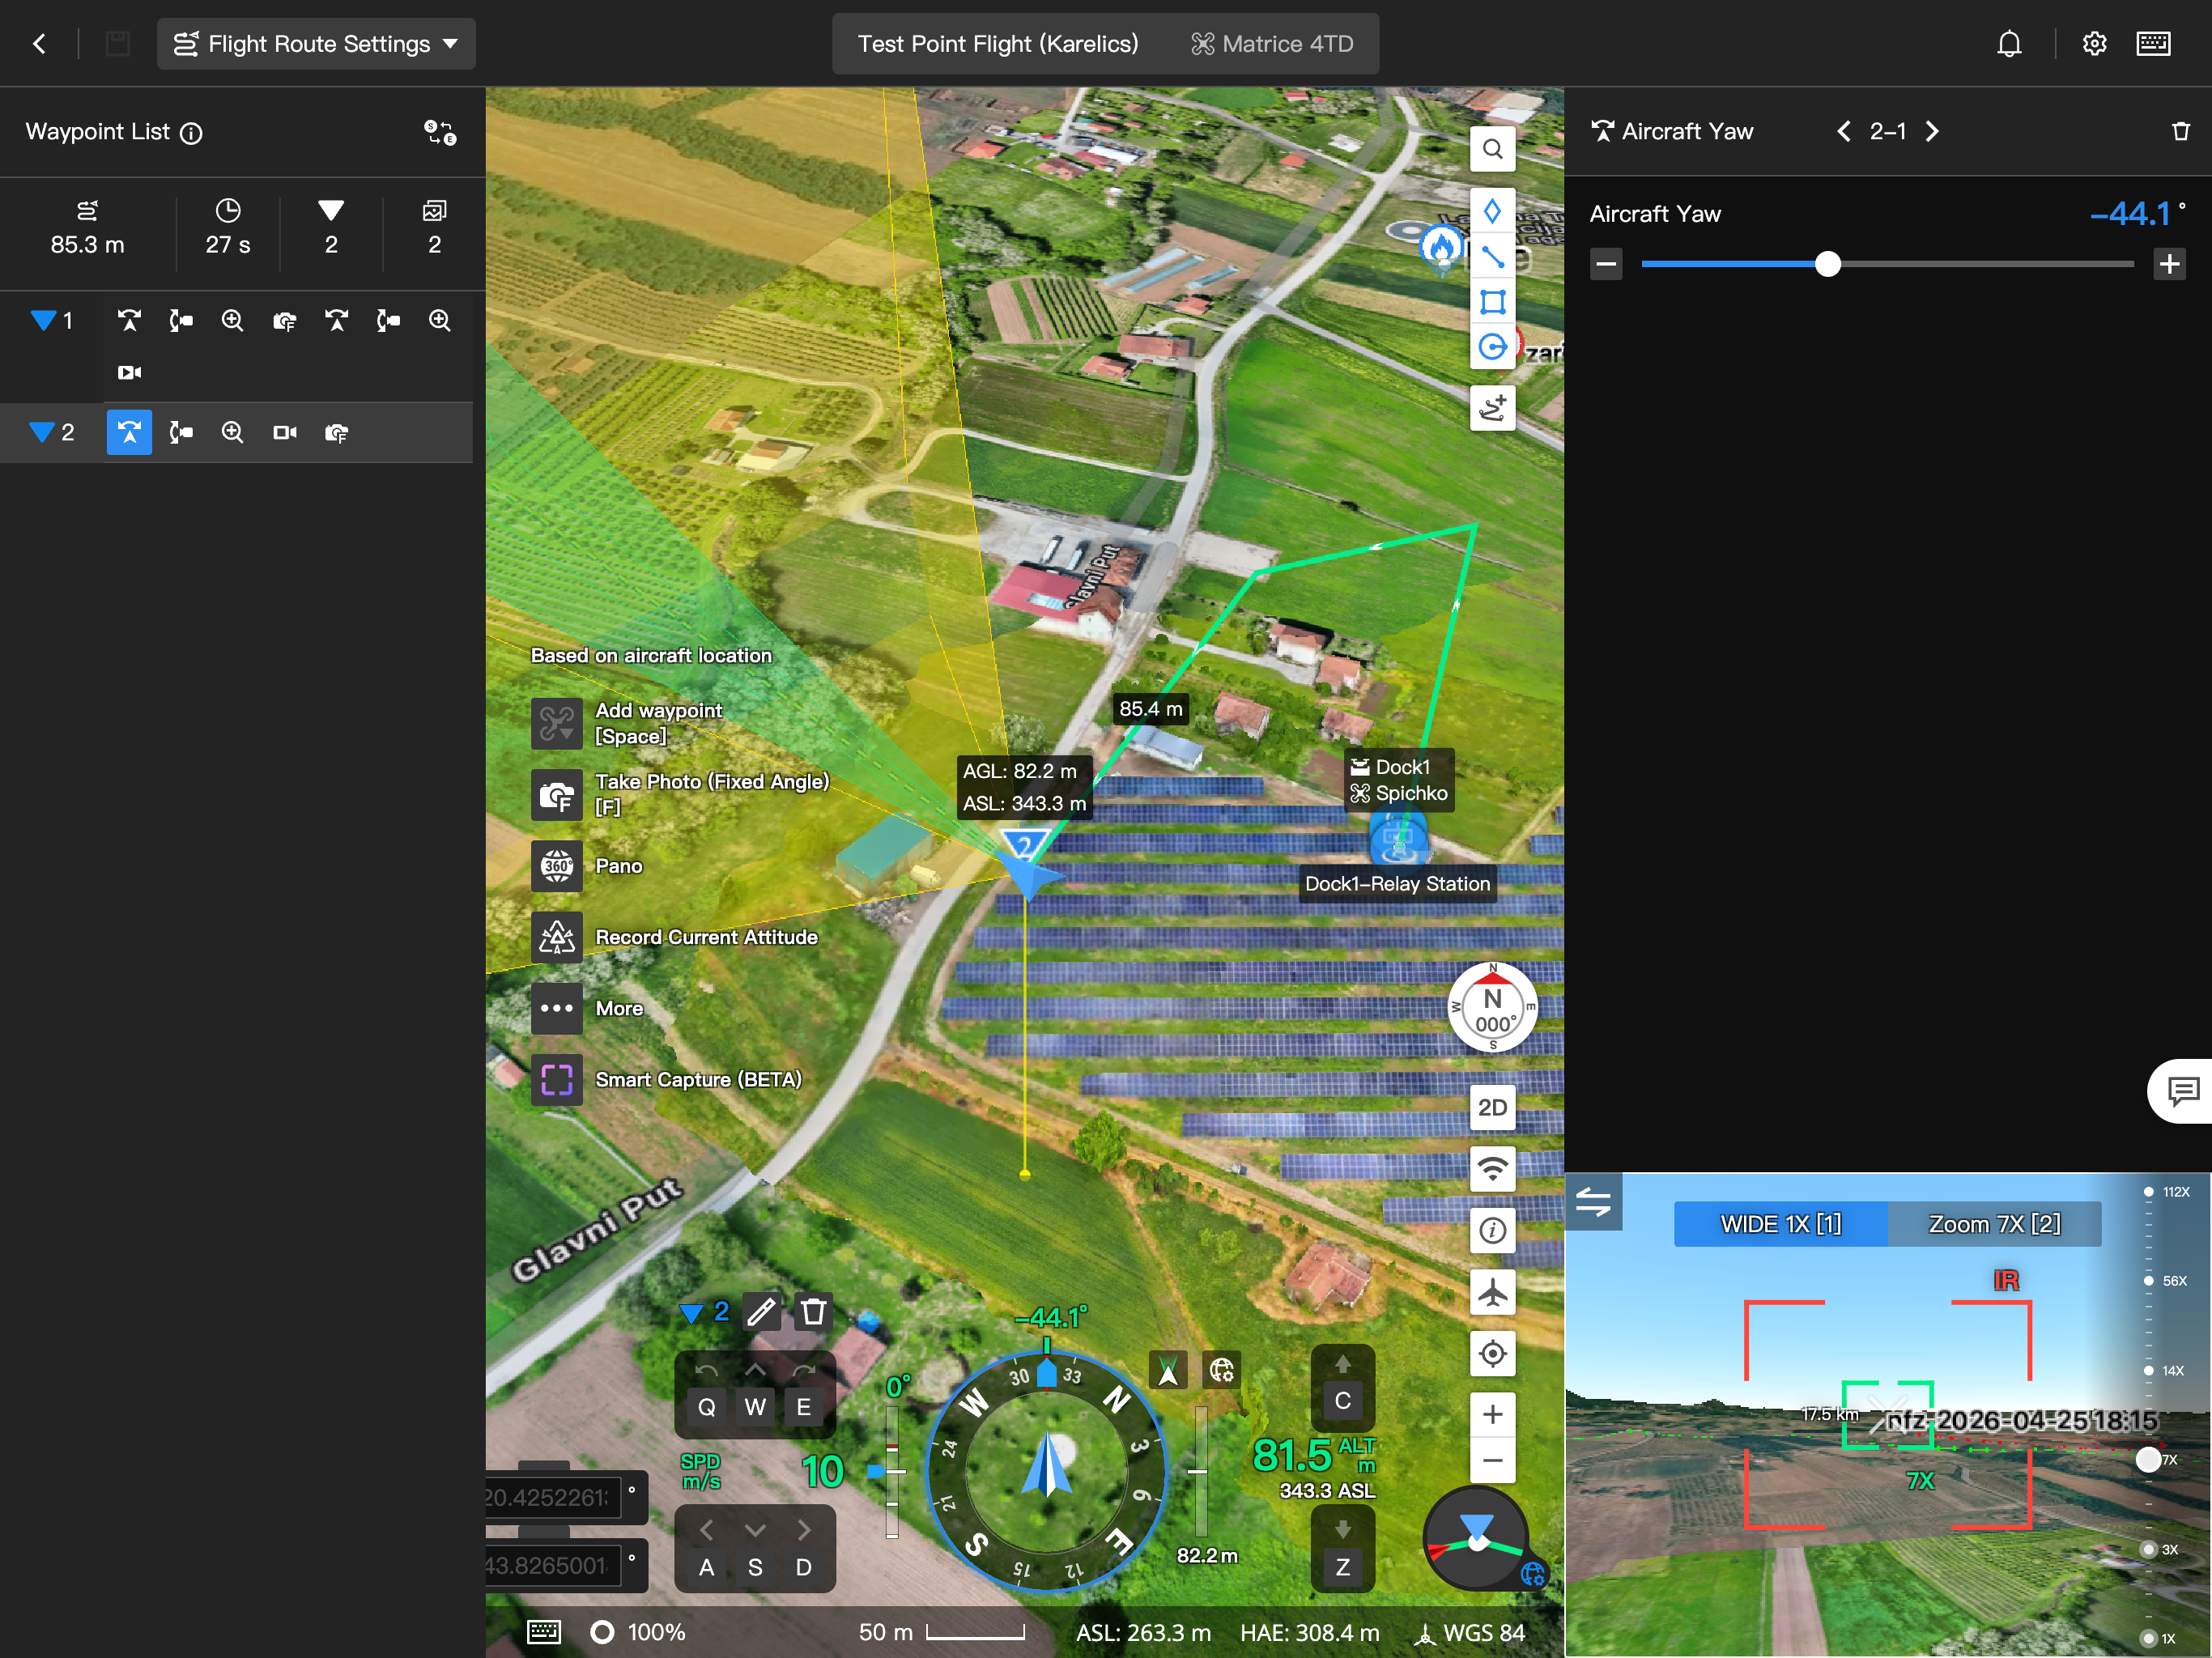
- Mission name — the saved mission that was launched (for example, Test Point Flight (Karelics)).
- Waypoint count — number of waypoints in the mission route.
- Robot — the robot or drone assigned to the launch (for example, 81-267).
Click a card to open launch details and review execution progress or error information.