Map creation and editing
This guide explains how to create a new floor map and edit or extend it later.
1. Create a new floor map
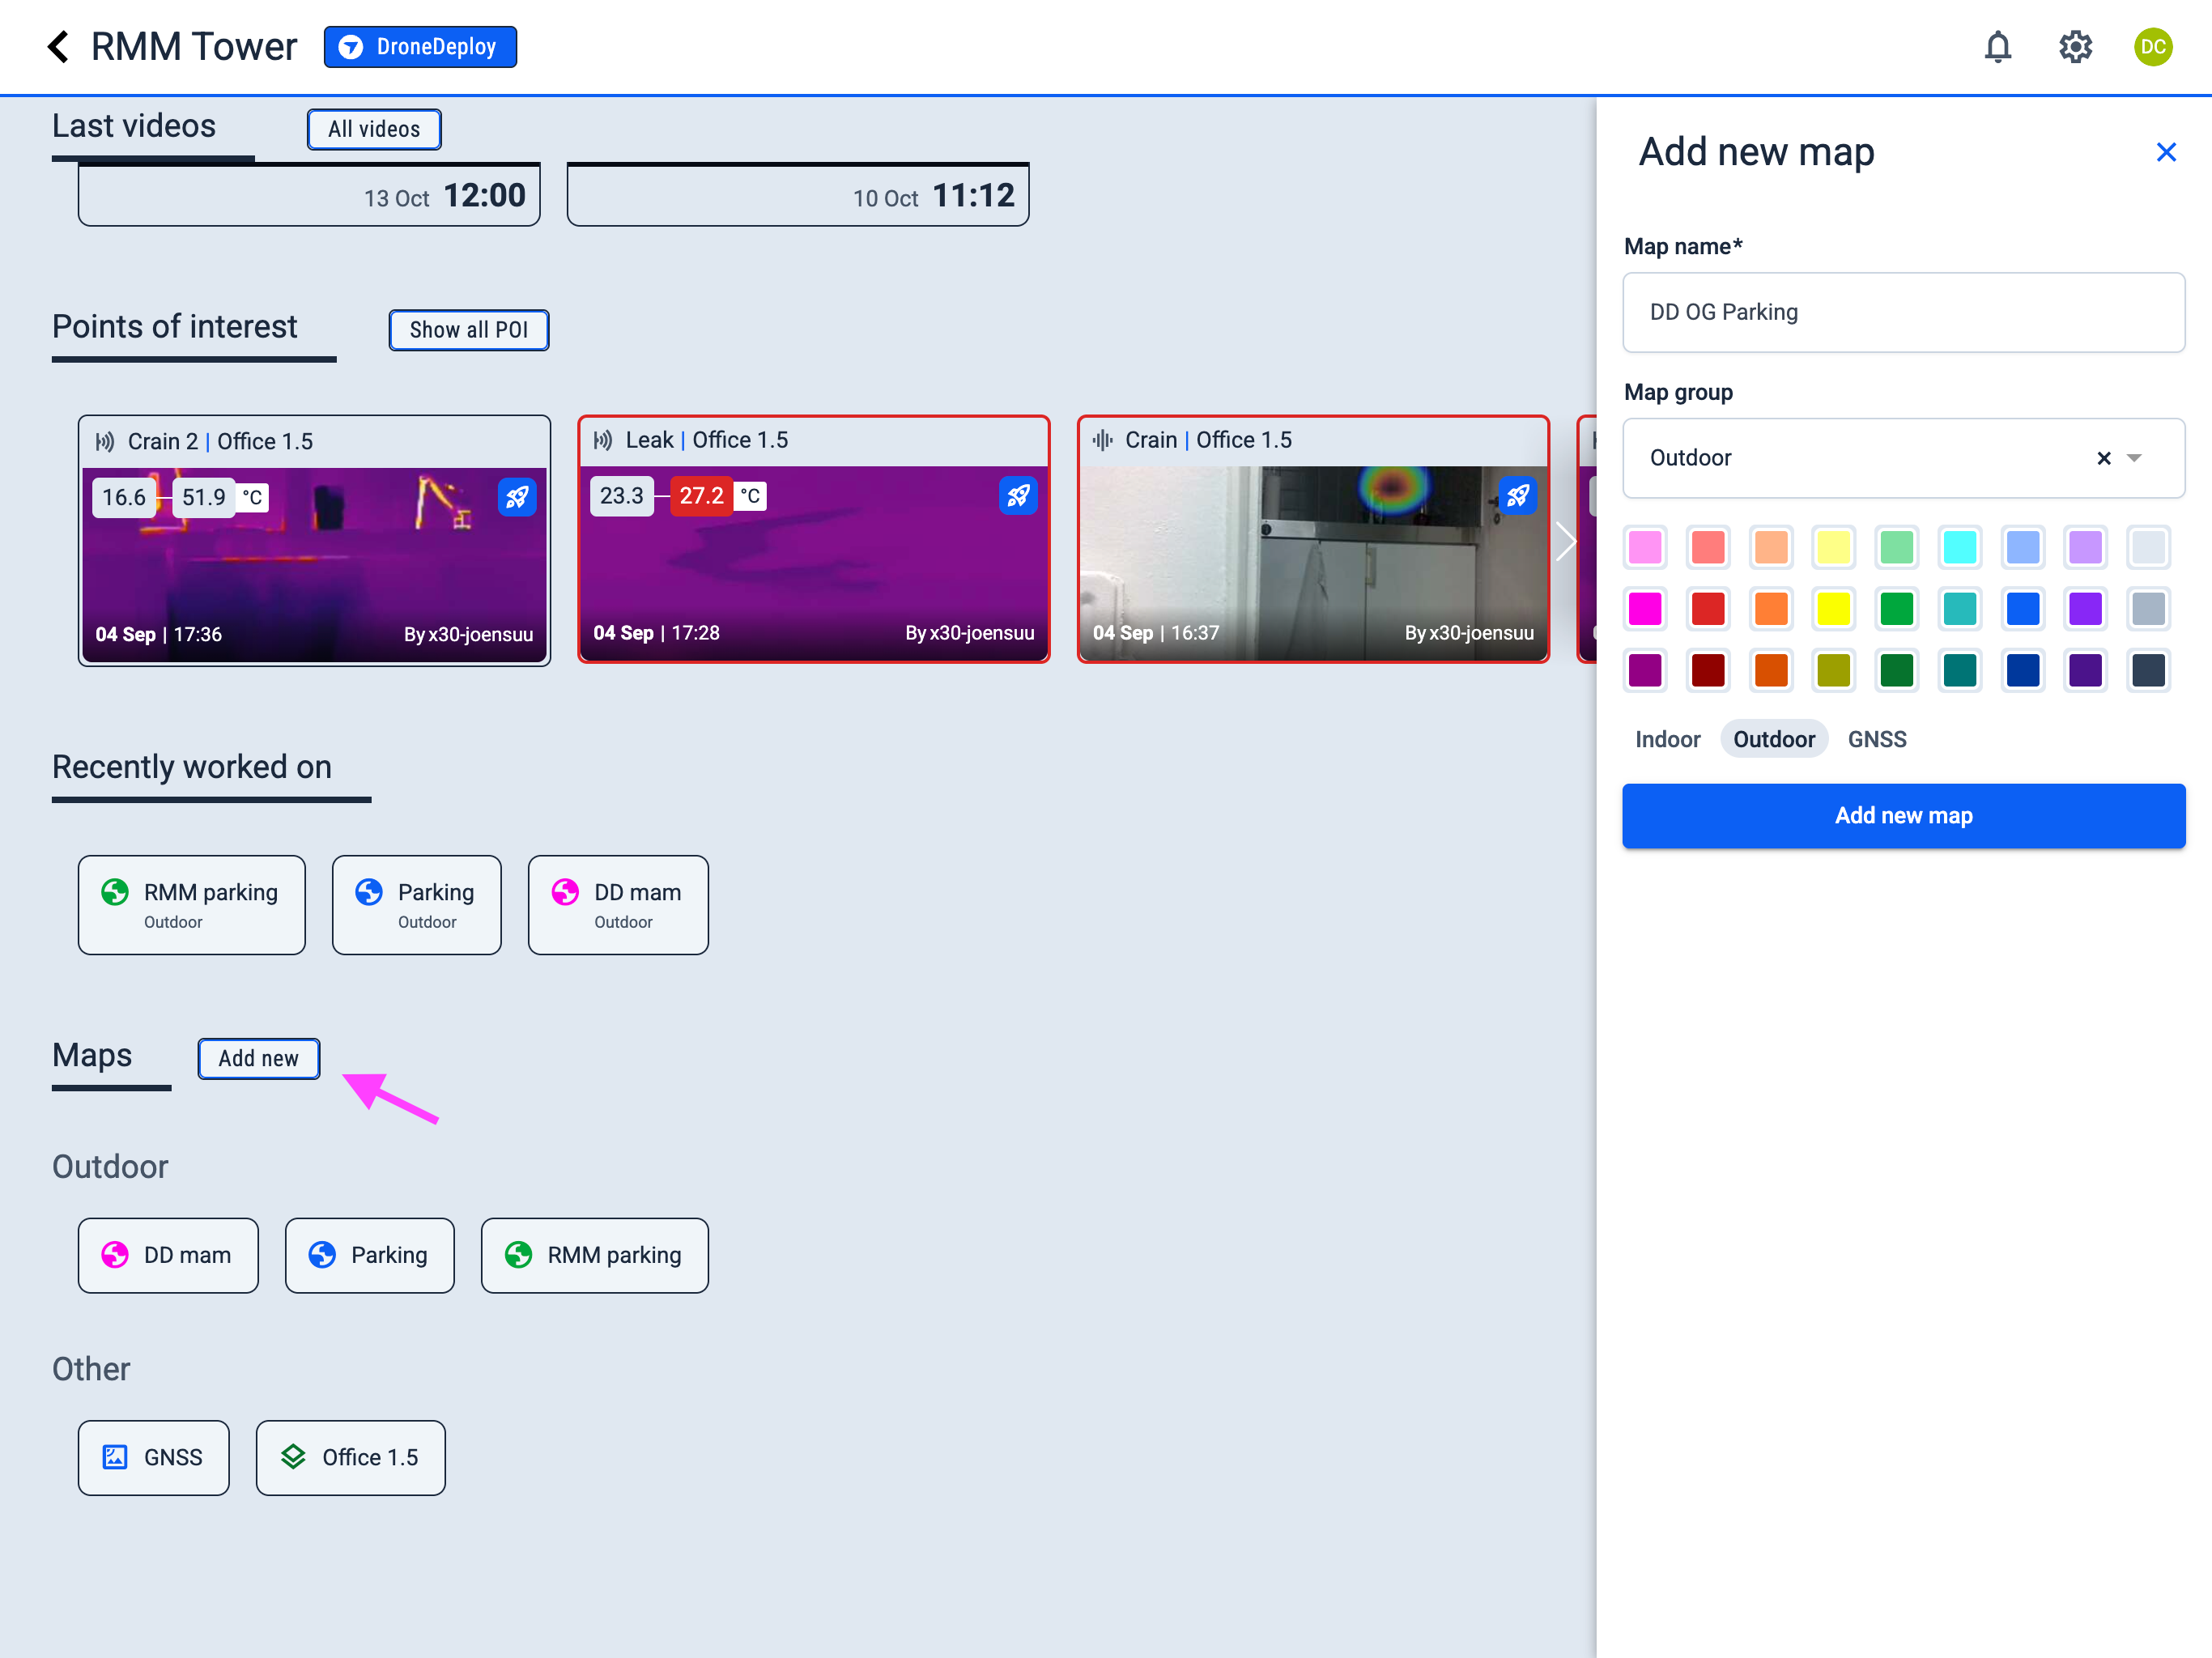
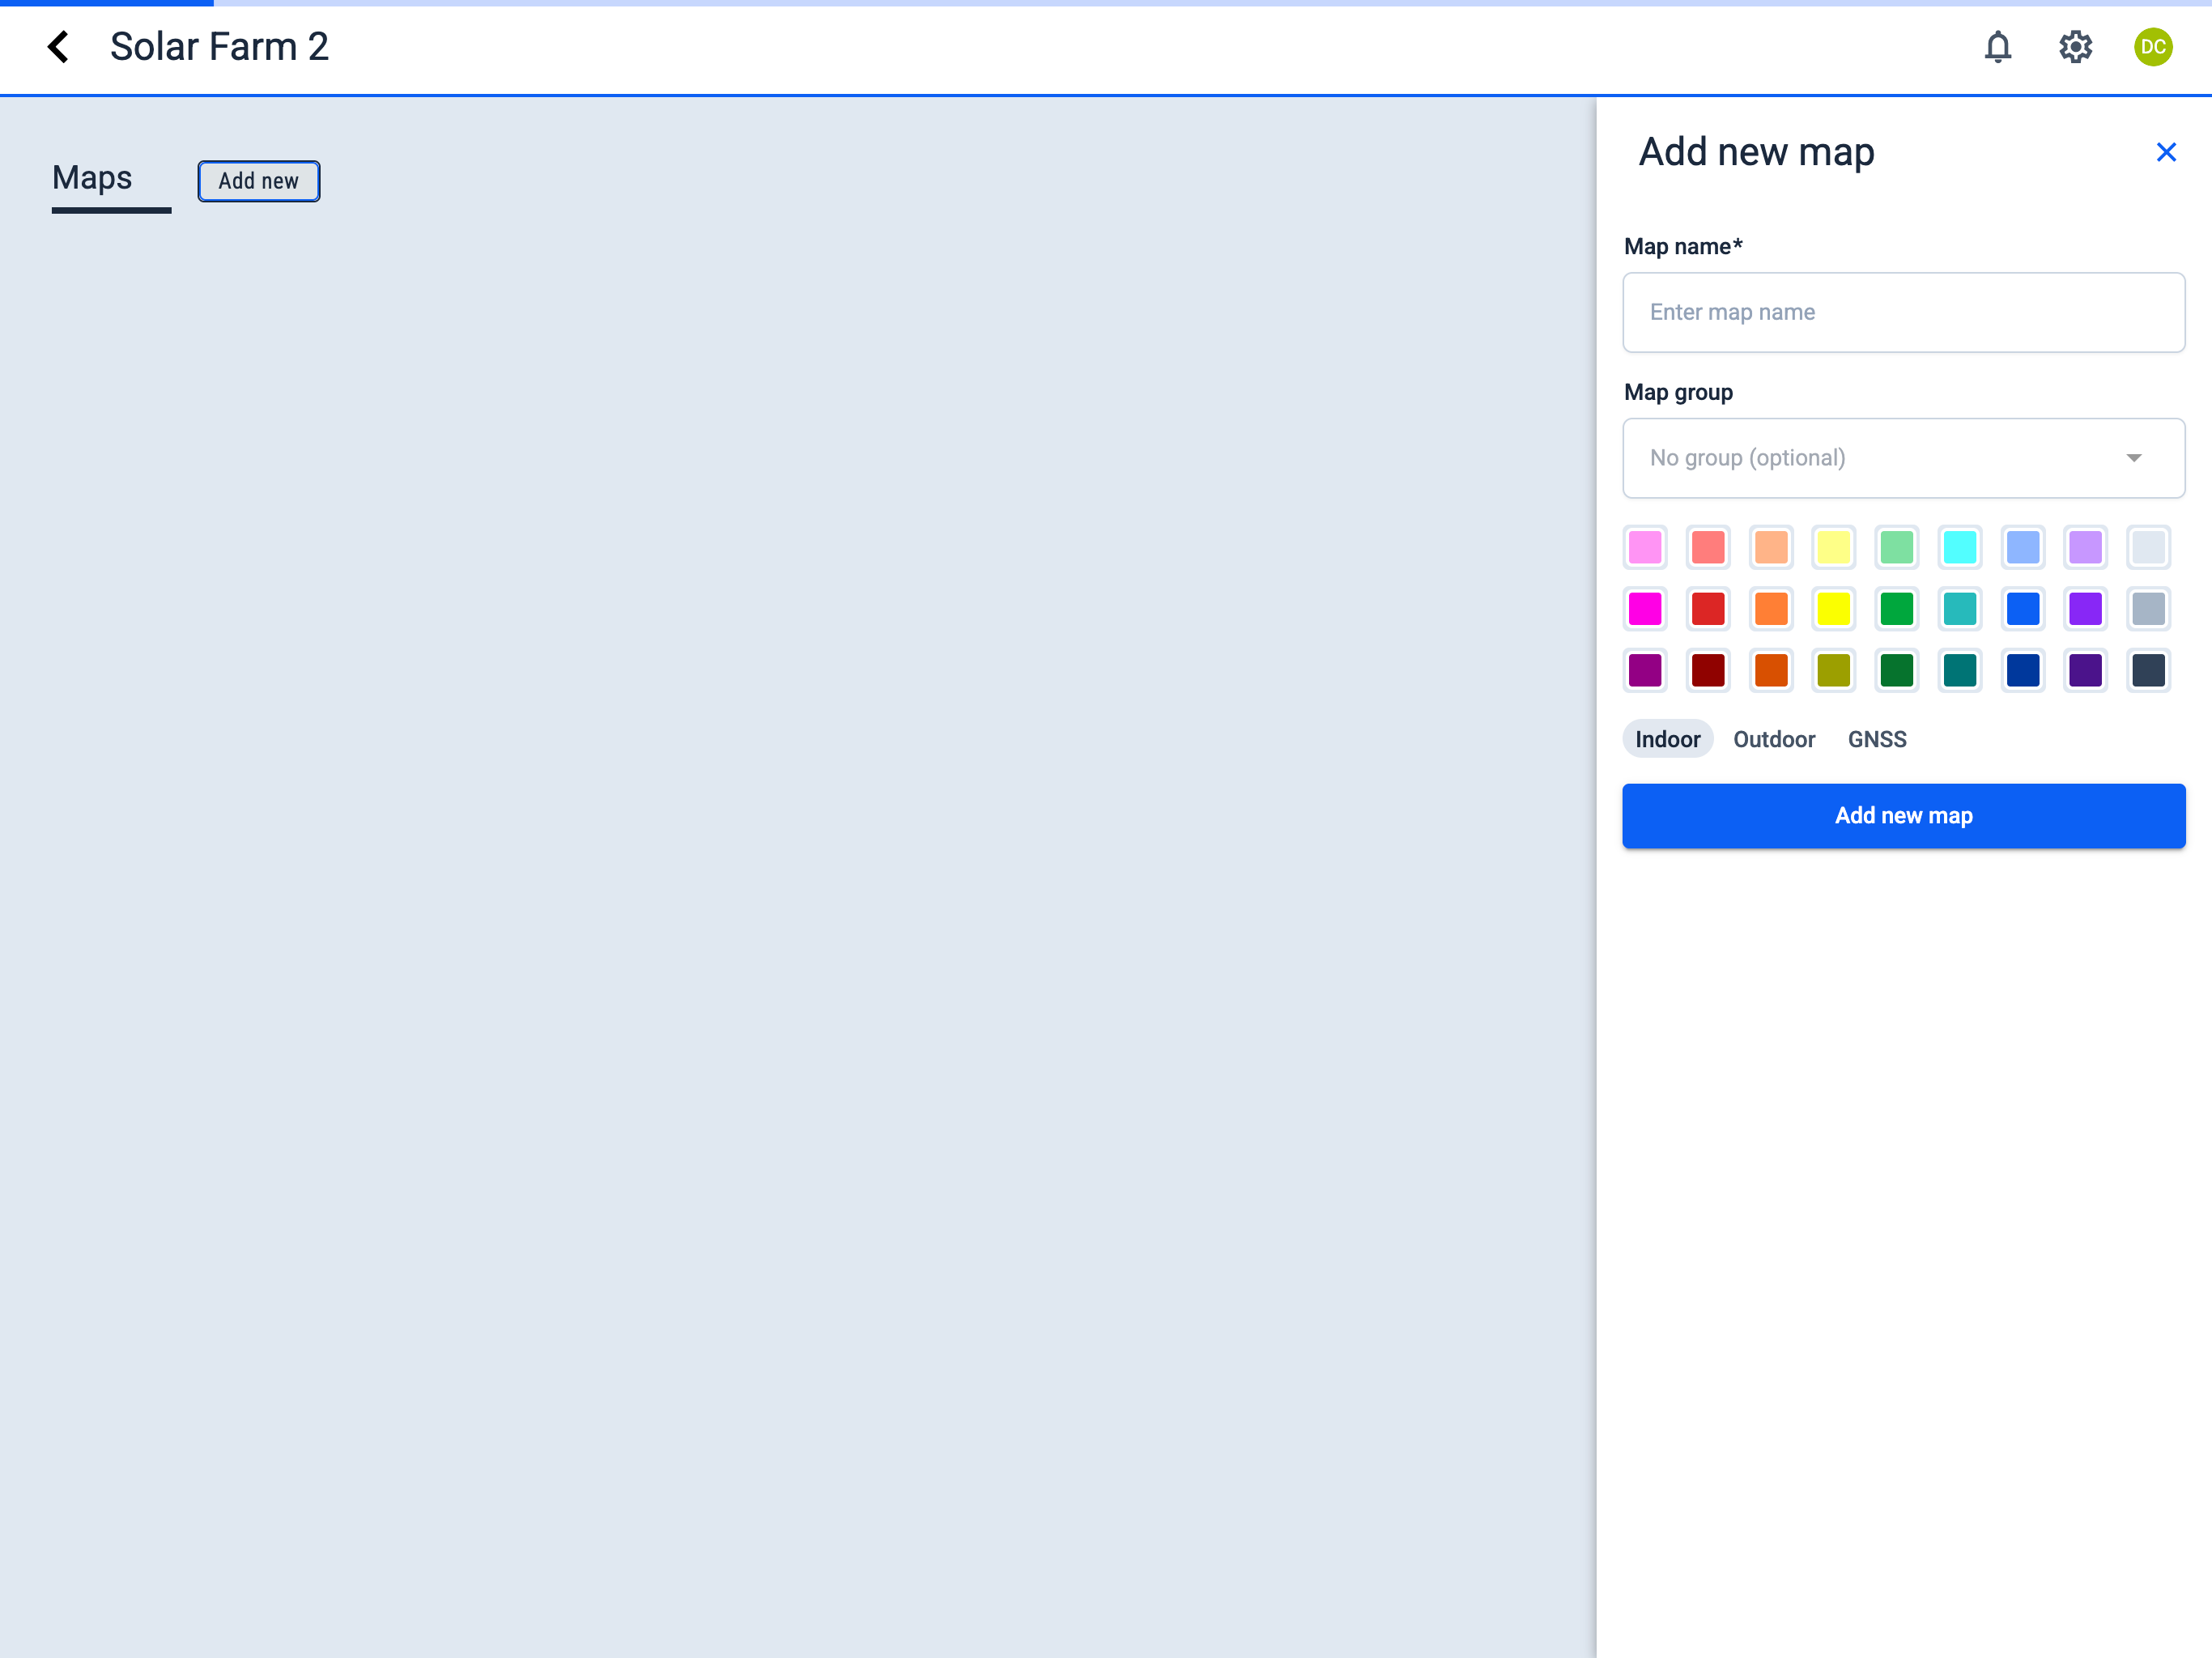
Dashboard interface
Operator Hub → Current Project → Add new map
- Click the Add new button next to the Maps section.
- In the sidebar, fill in the required fields:
- Map name
- Map group (optional) — To create a new group, simply type its name in this field. When you save the map, the new group will be created and the map will appear within it.
- Select color for the map icon (to help distinguish maps)
- Select map type:
layers Indoor
globe Outdoor
satellite GNSS
circle Pipe
- Click the Add new map button.
- Active Project
- New Project
Linking a robot to the map
Operator Hub → Current Project → Workspace → Robots → Linking a robot to the map
- Open the map by clicking on it.
- Select the enabled robot.
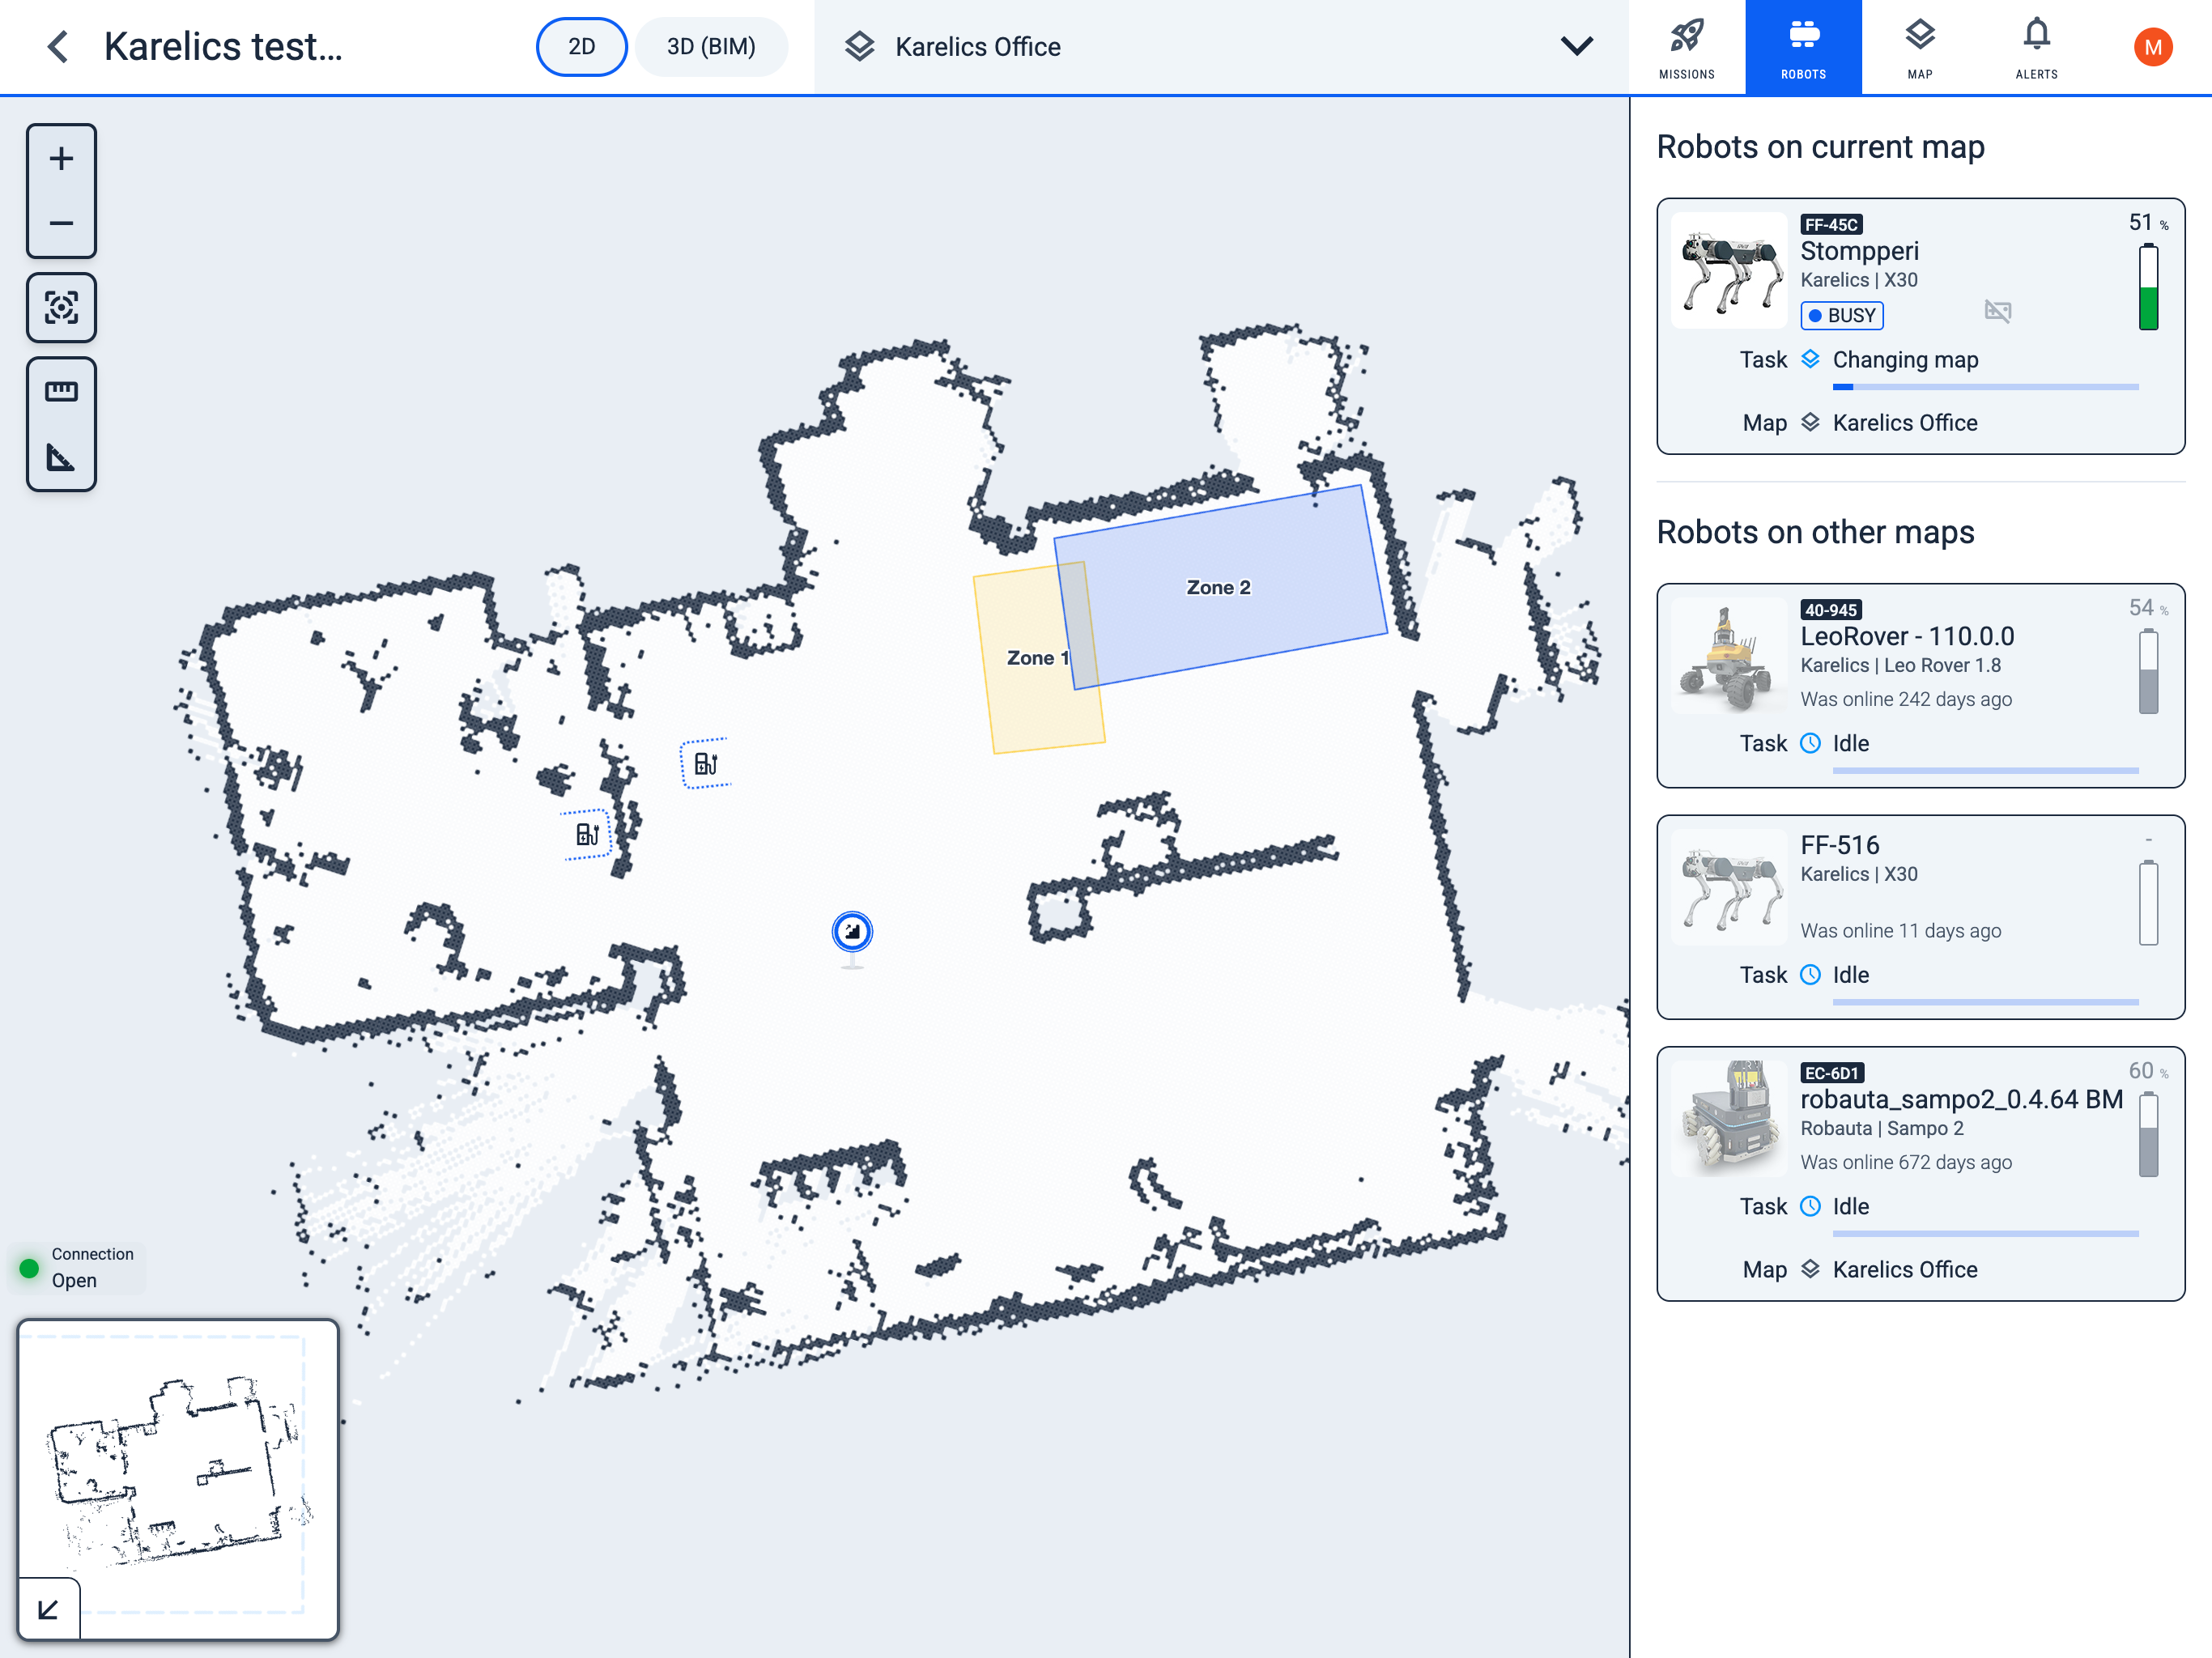
- Click the Switch to corrent map button.
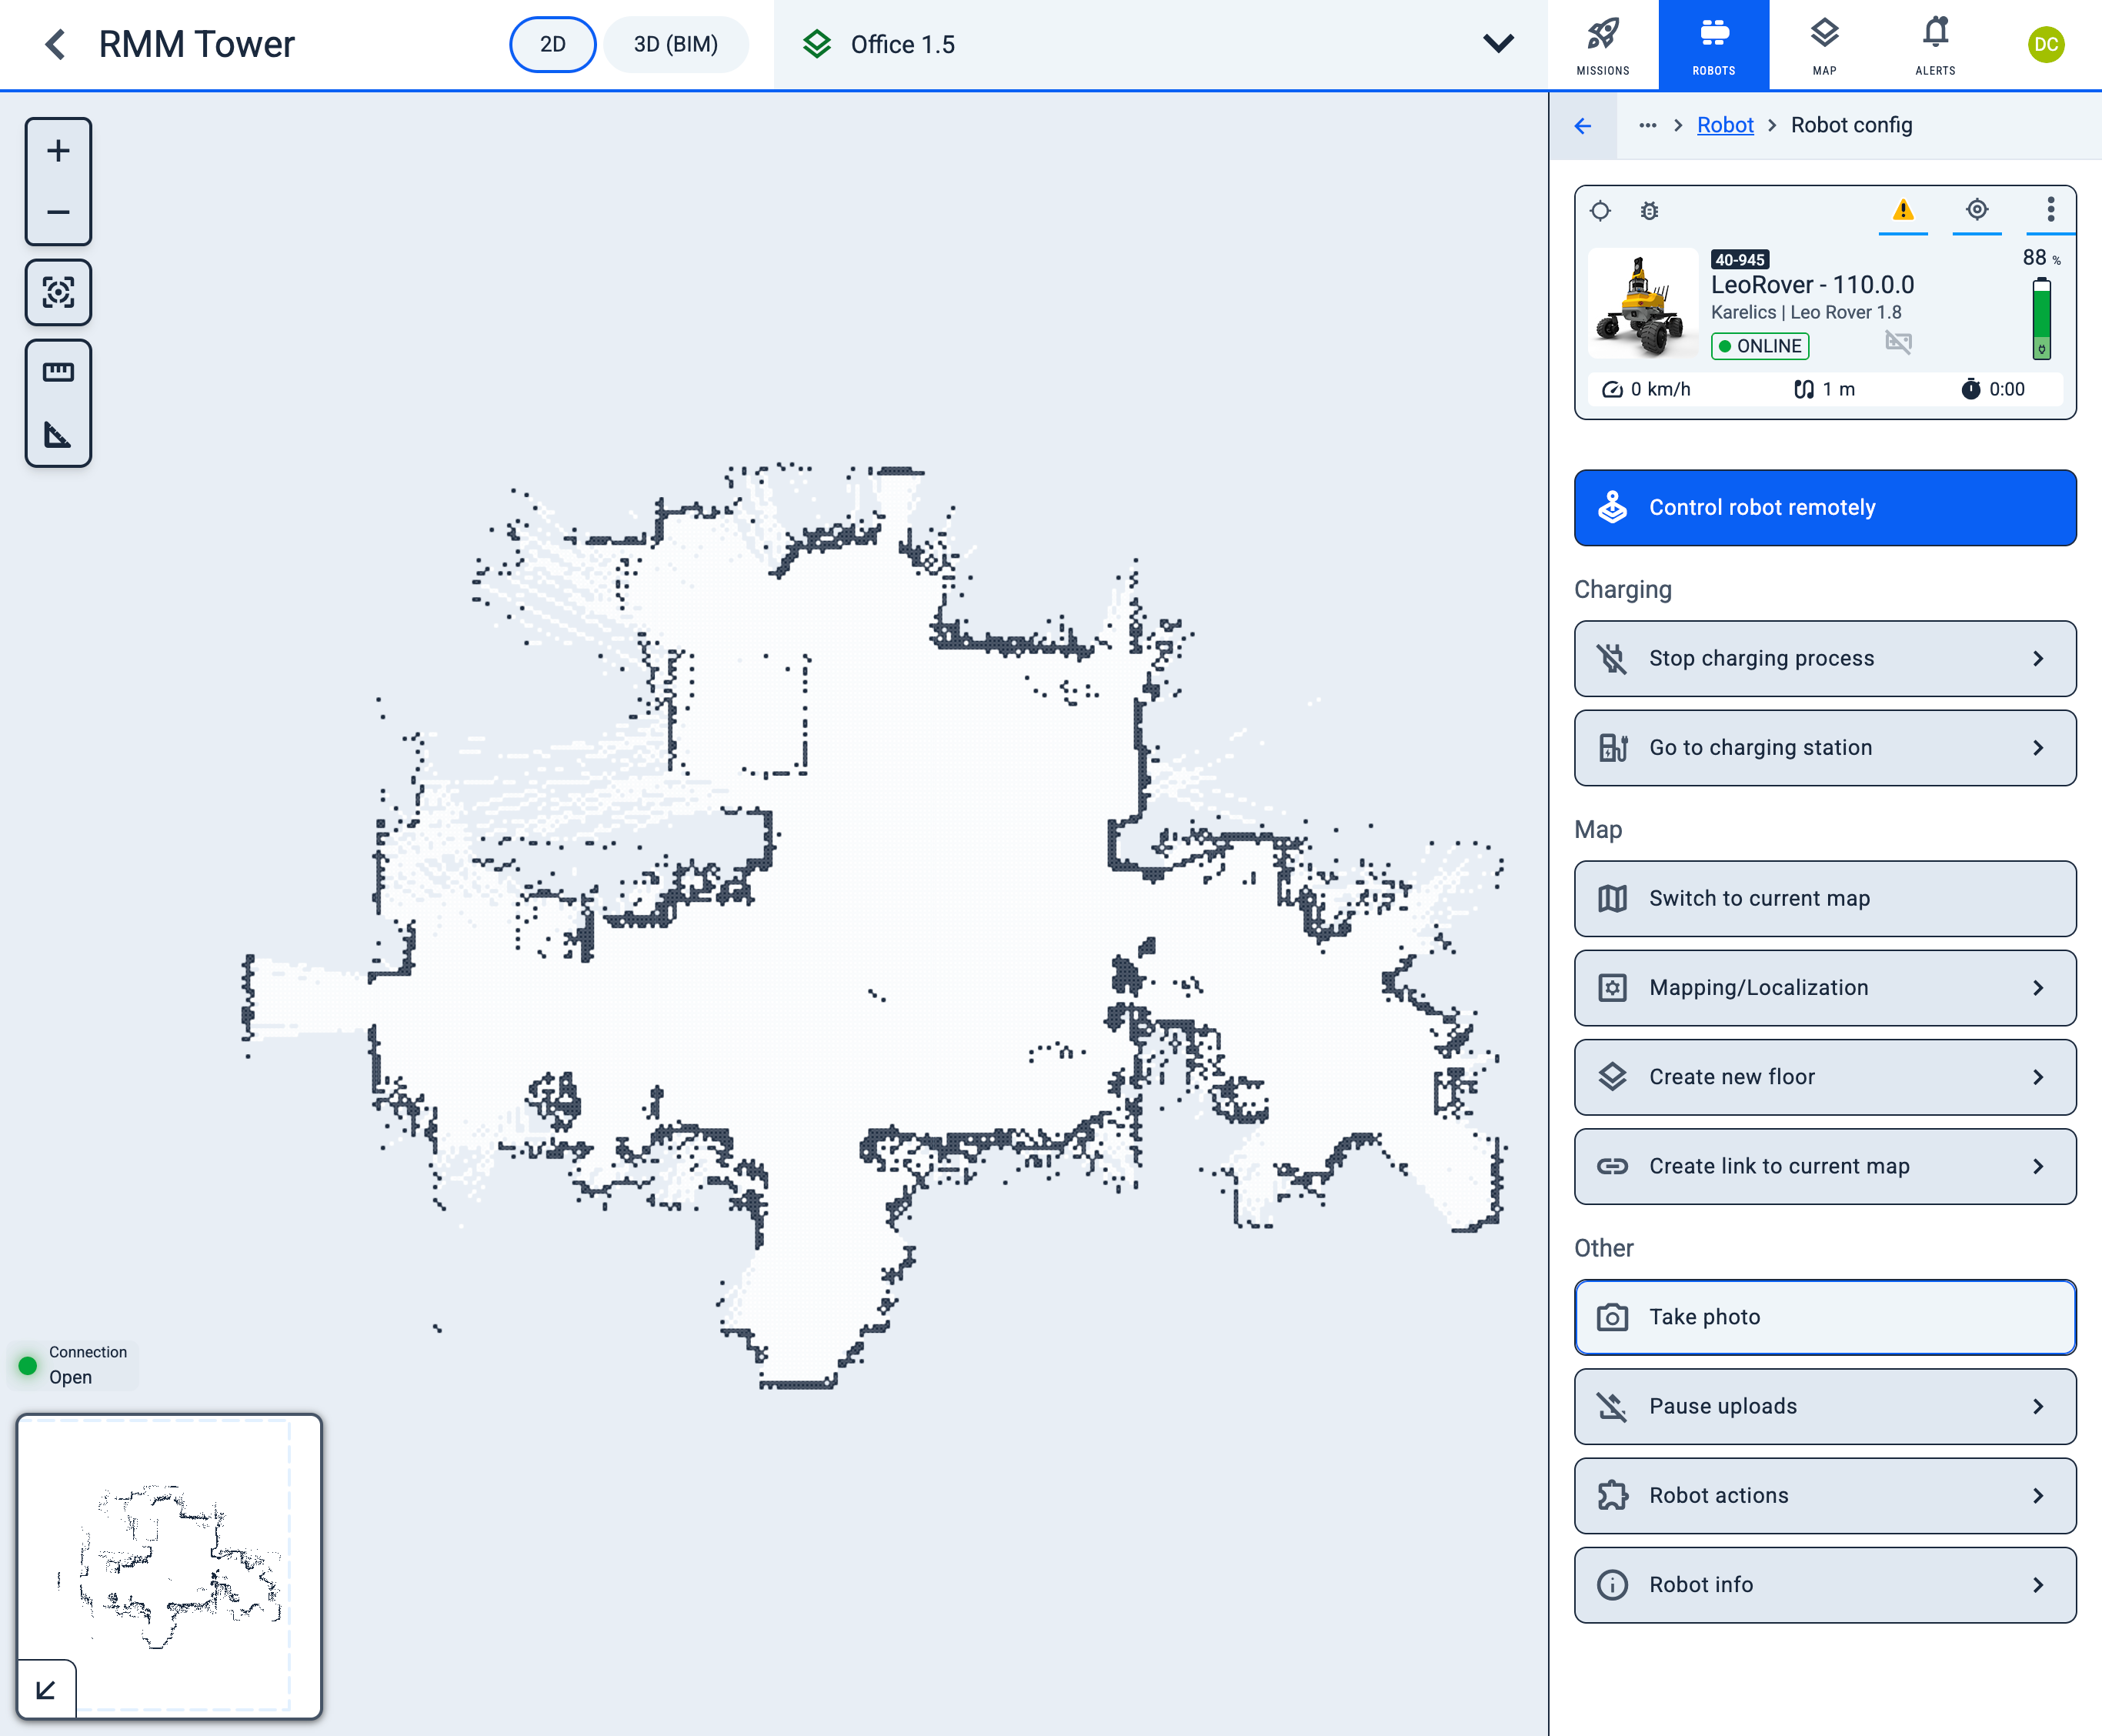
Robot workspace
Operator Hub → Current Project → Workspace → Robots → Current Robot → Configuration
Click the 'Create new floor' button
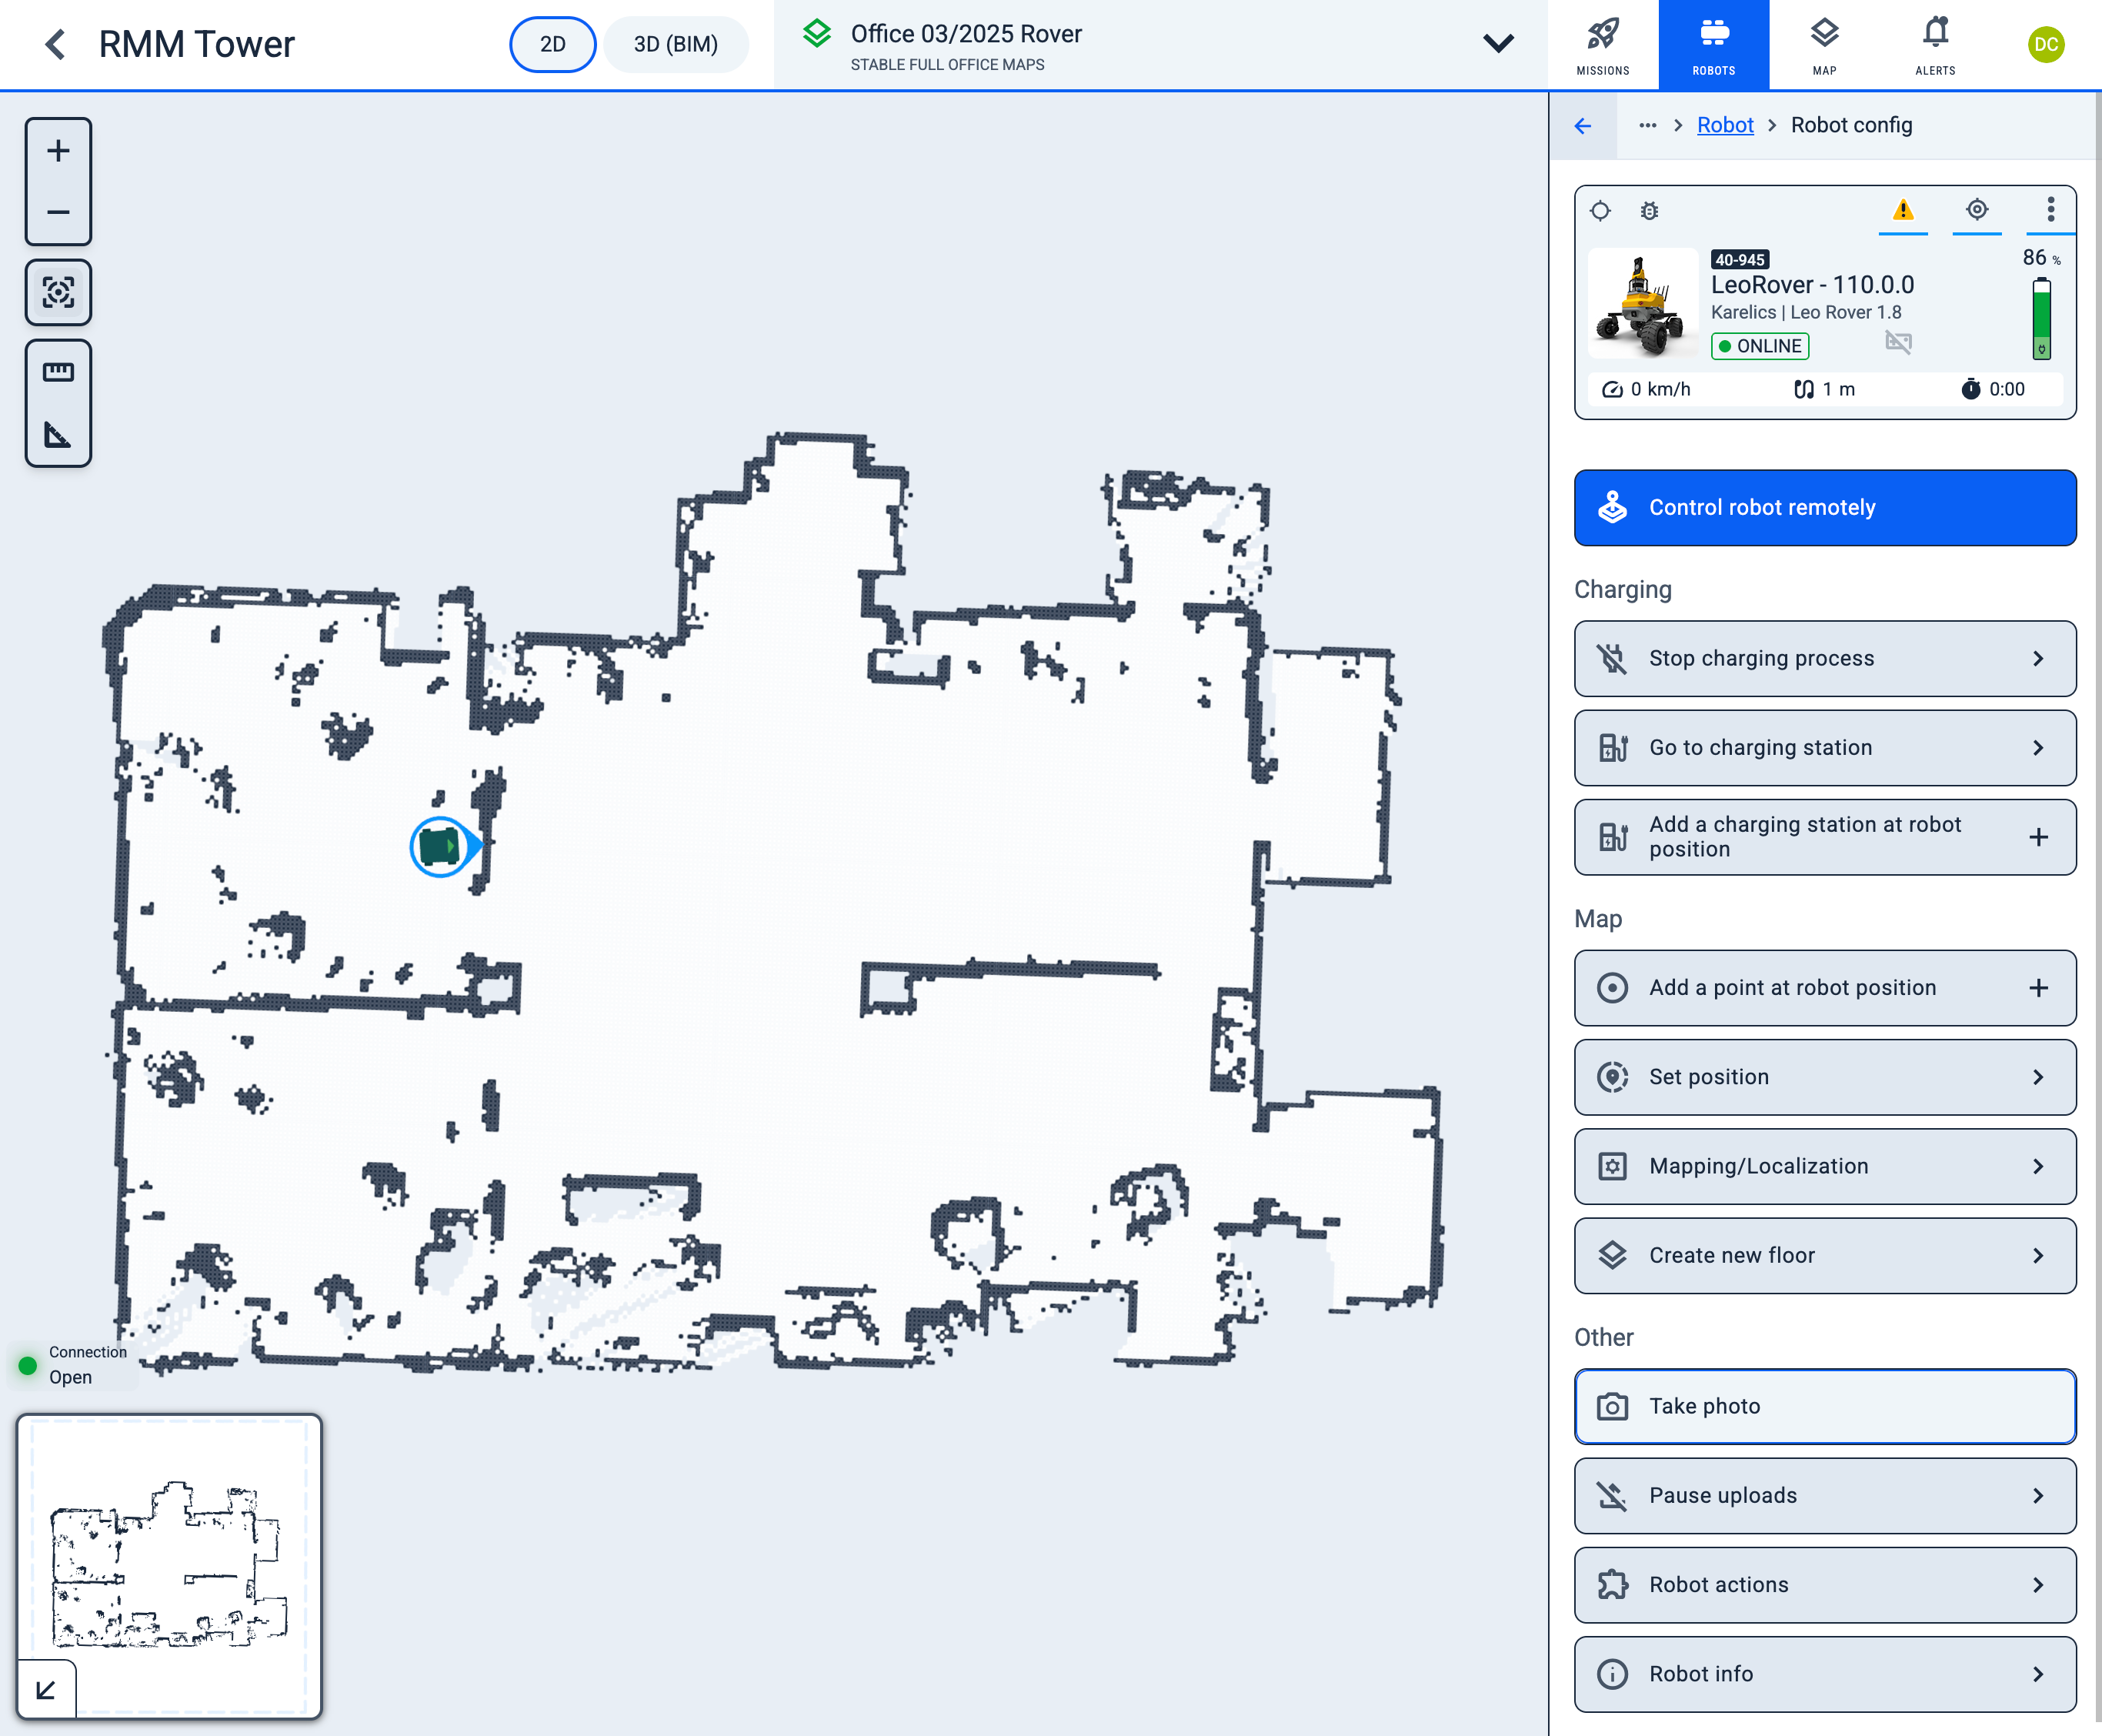
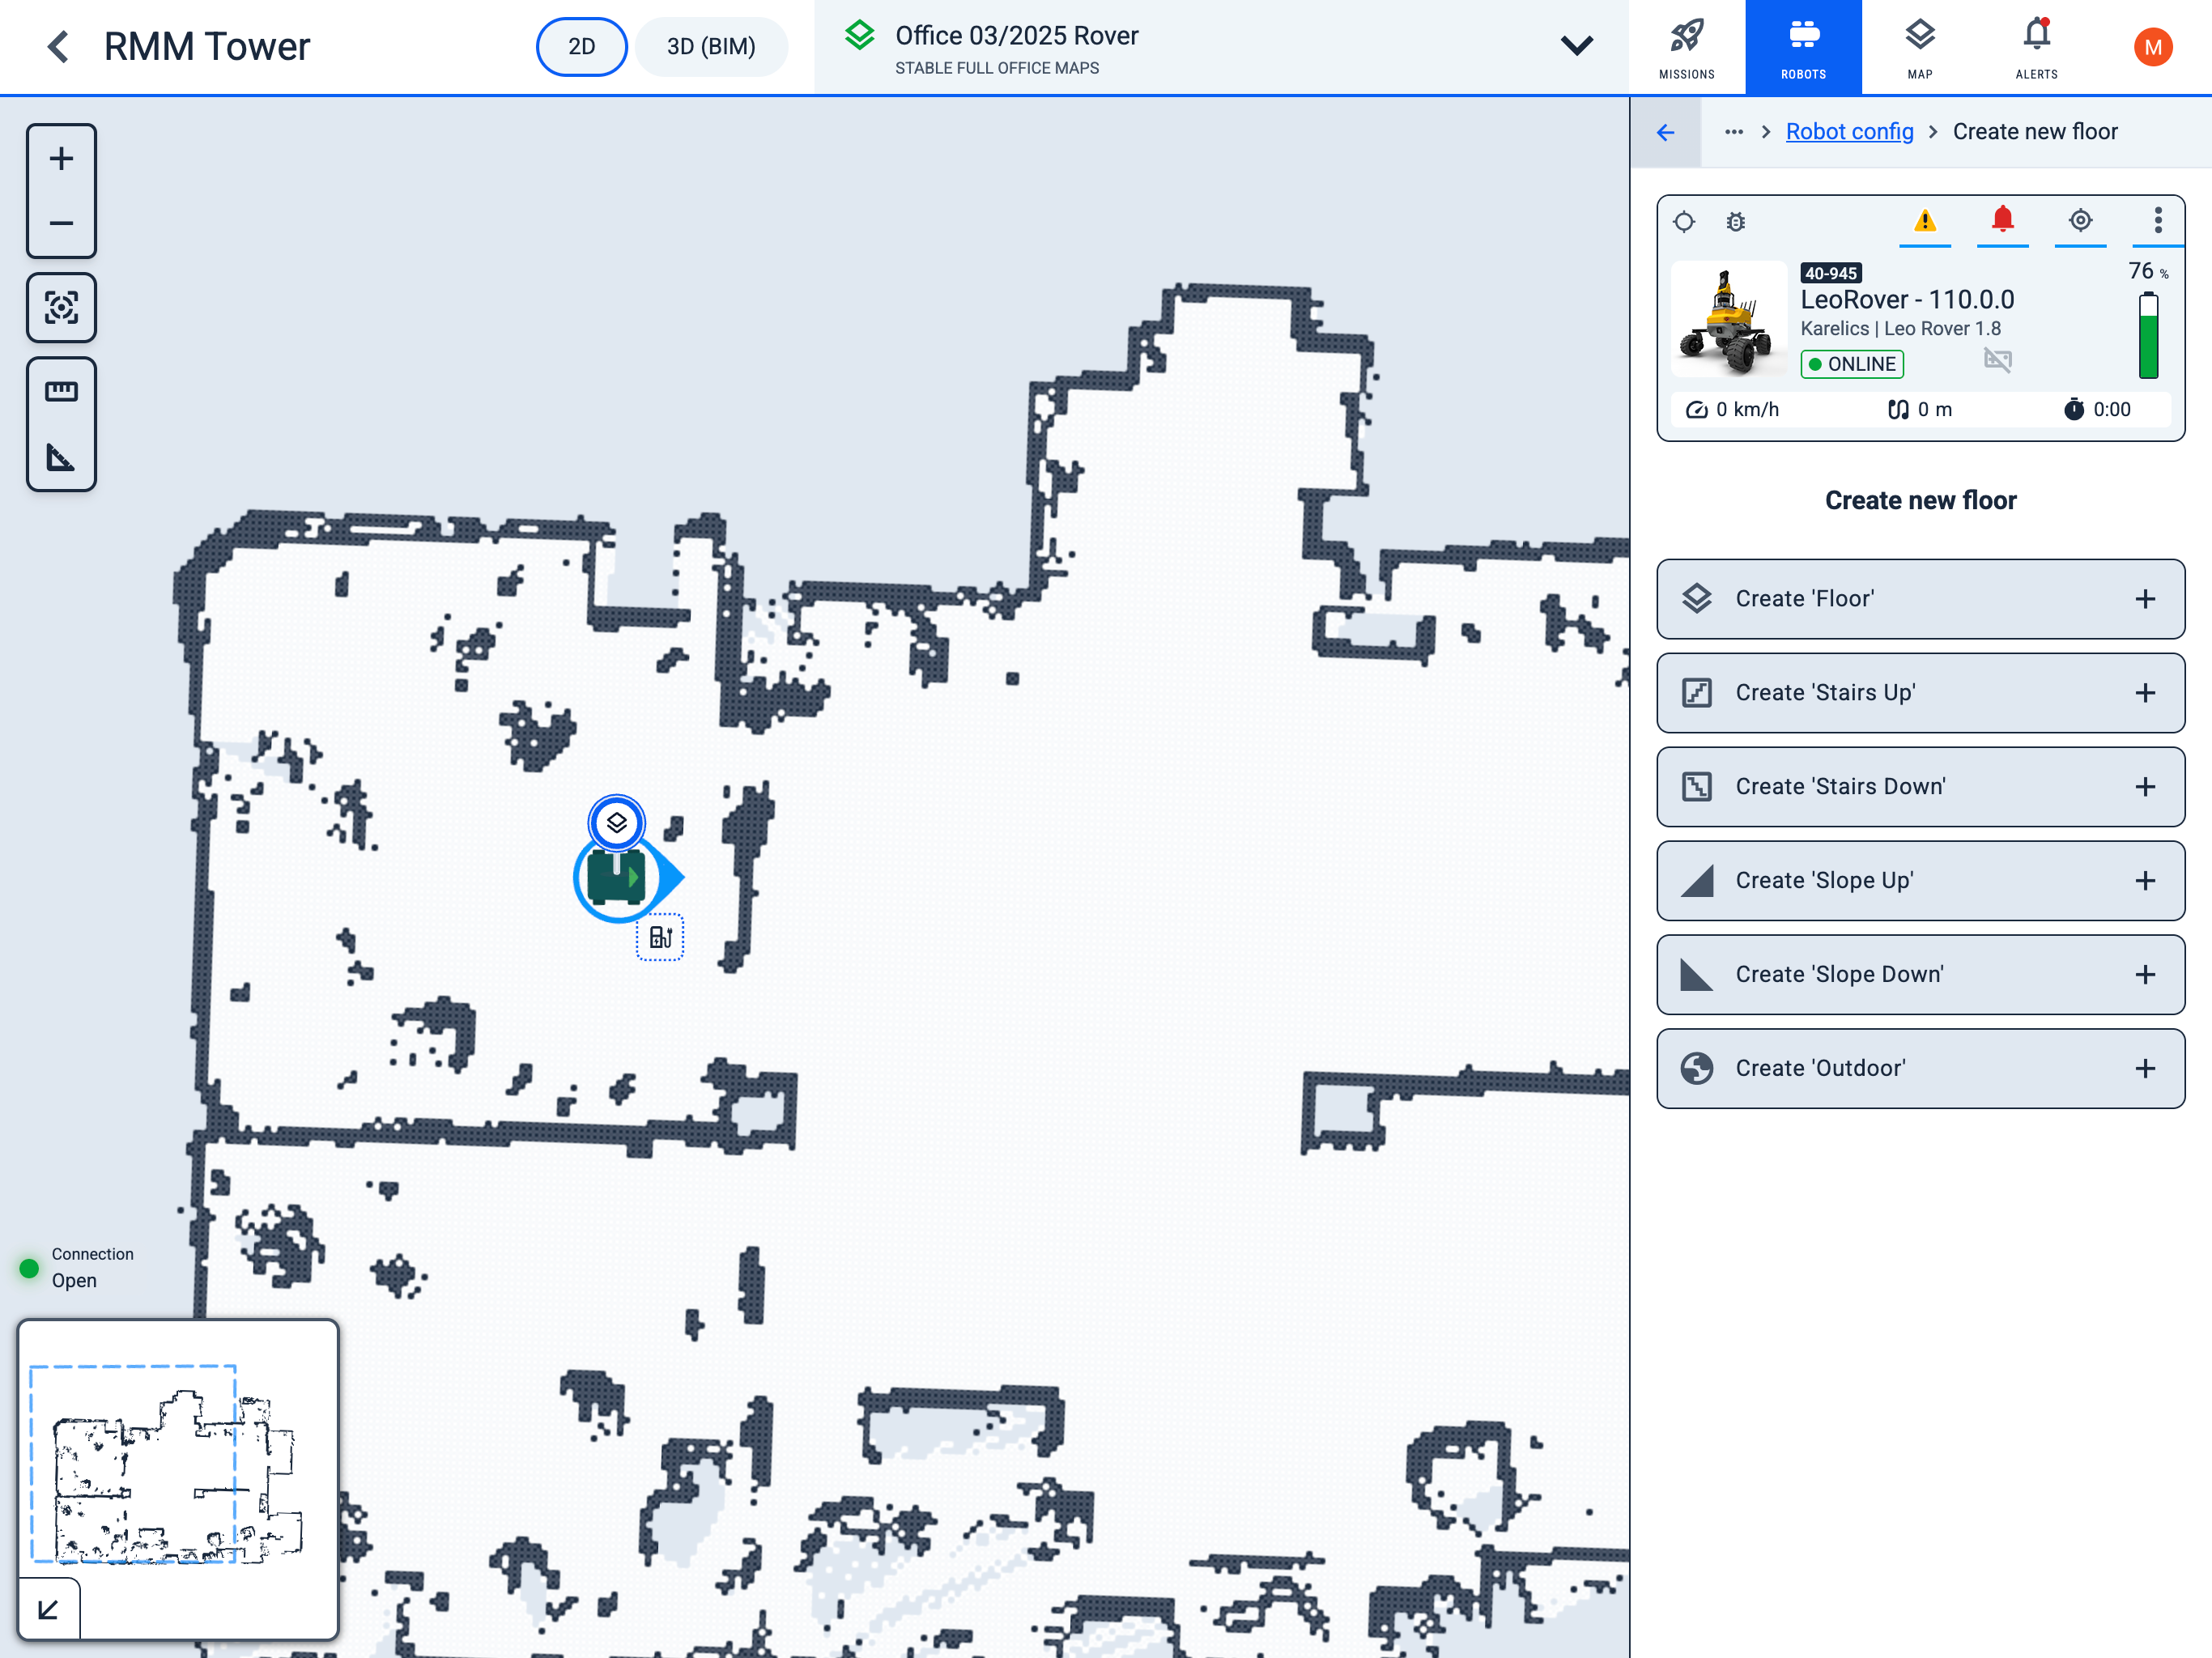
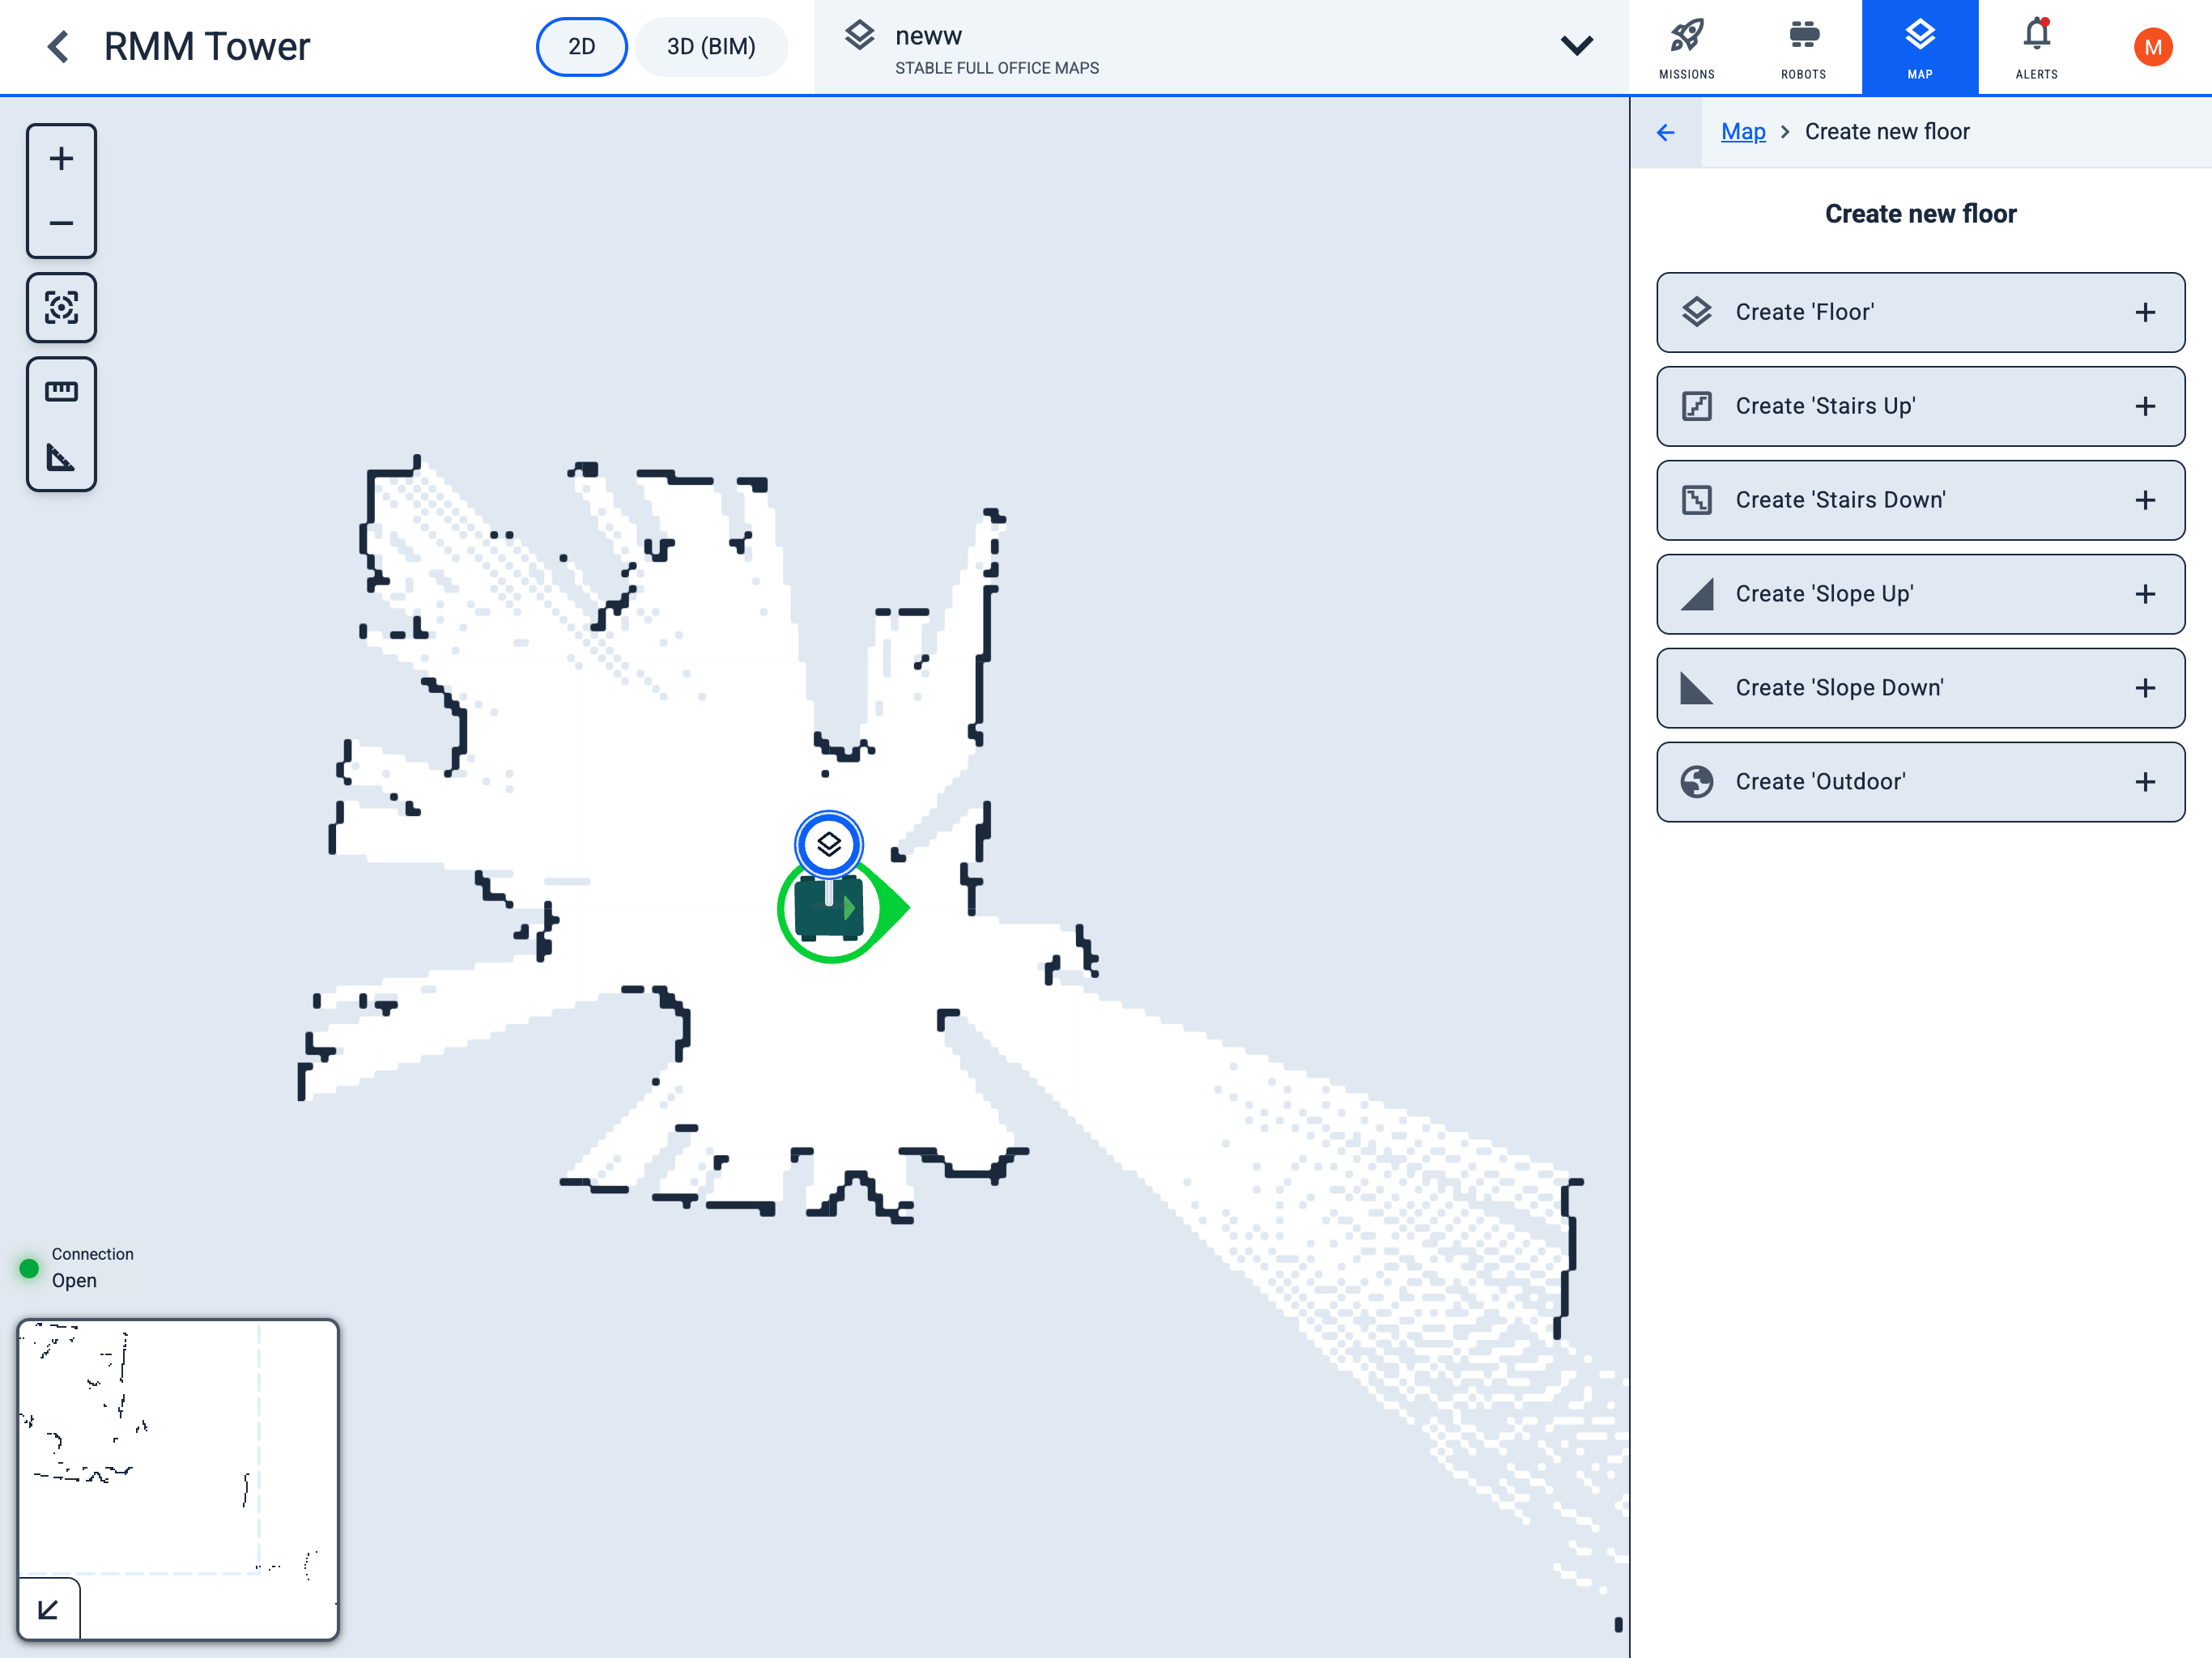
Operator Hub → Current Project → Workspace → Robots → Current Robot → Configuration → Create new floor
Choose what type of floor
- layersaddFloor - Main type of 2D map
- stairsaddStairs Up/Down - Stairs up/down connecting different maps
- signal_cellular_4_baraddSlope Up/Down - Slopes up/down connecting different maps
- globeaddOutdoor - Map overlaid on Google Maps
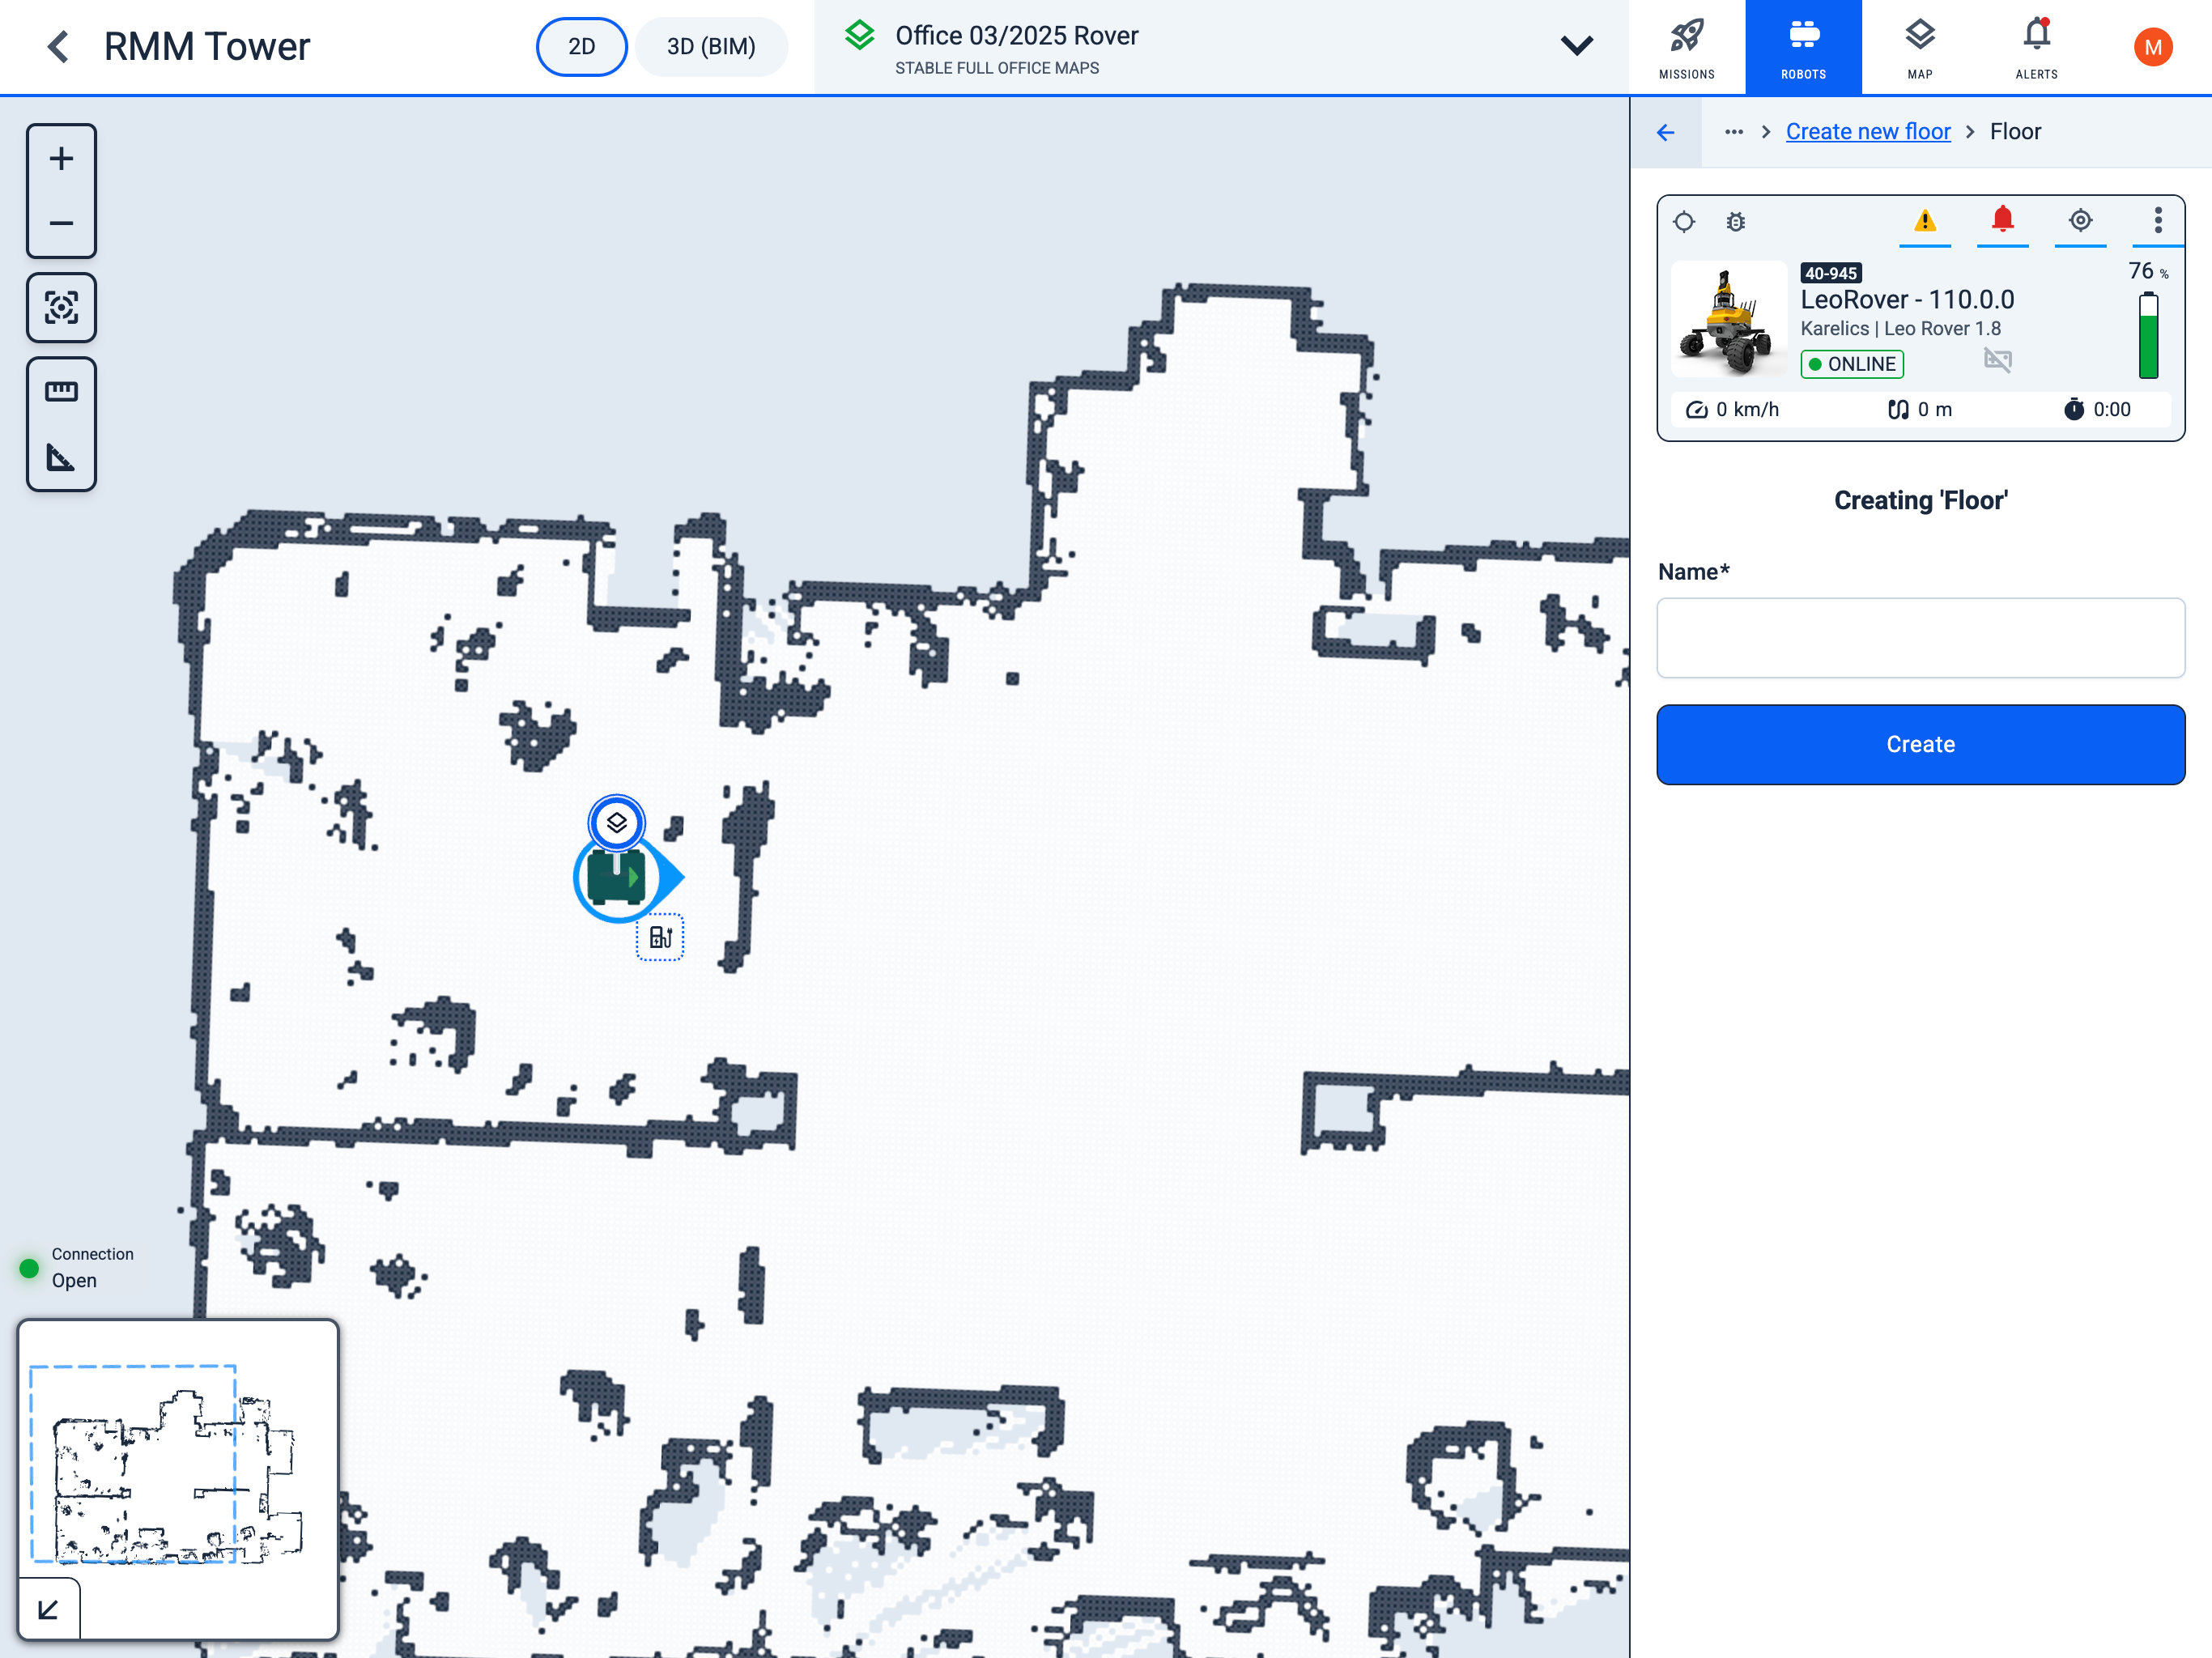
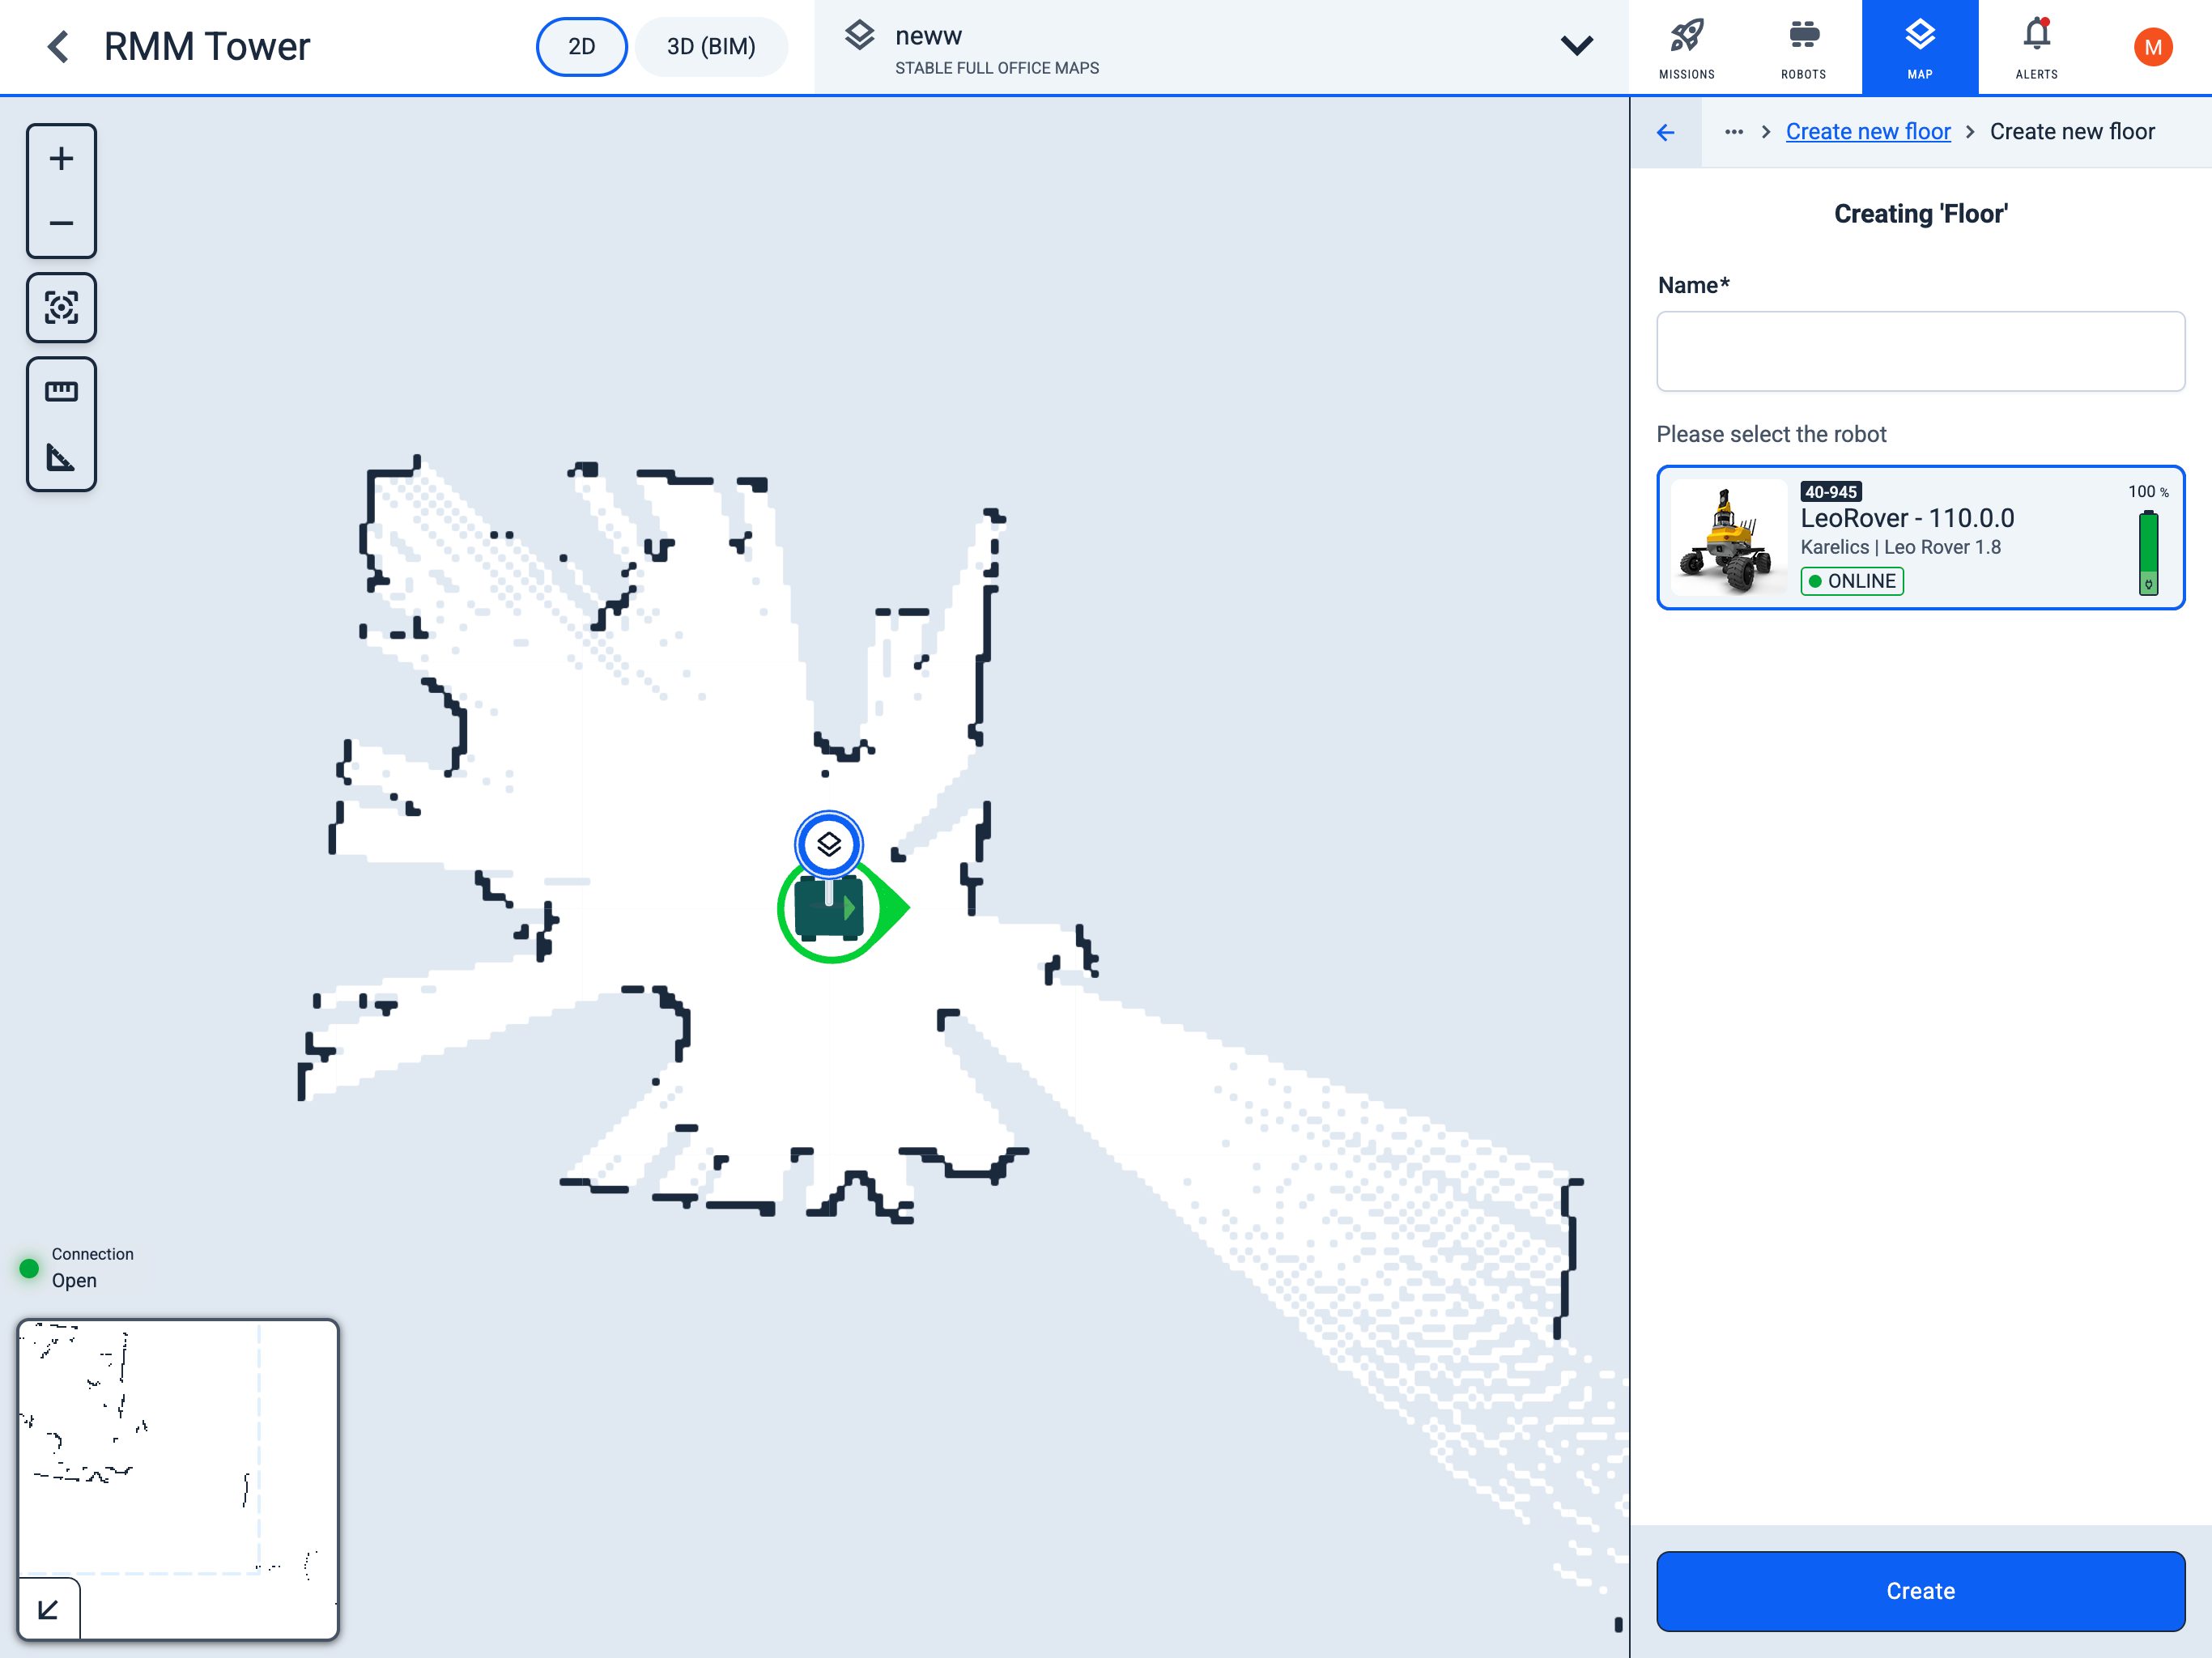
Operator Hub → Current Project → Workspace → Robots → Current Robot → Configuration → Create new floor → Create Floor
Create floor name
- Set a name for the new floor map and save it.
- Next, the mapping window will open, where you can guide the robot throughout the entire area that needs to be displayed on the map. For more details about the mapping process, see Mapping.
Map workspace
Operator Hub → Current Project → Workspace → Map
Click the 'Create new floor' button
Choose what type of floor
- layersaddFloor - Main type of 2D map
- stairsaddStairs Up/Down - Stairs up/down connecting different maps
- signal_cellular_4_baraddSlope Up/Down - Slopes up/down connecting different maps
- globeaddOutdoor - Map overlaid on Google Maps
Create Floor name
- Set a name for the new floor map.
- Select the robot that will create the map.
- Create it by clicking the Create button.
- Next, the mapping window will open, where you can guide the robot throughout the entire area that needs to be displayed on the map. For more details about the mapping process, see Mapping.
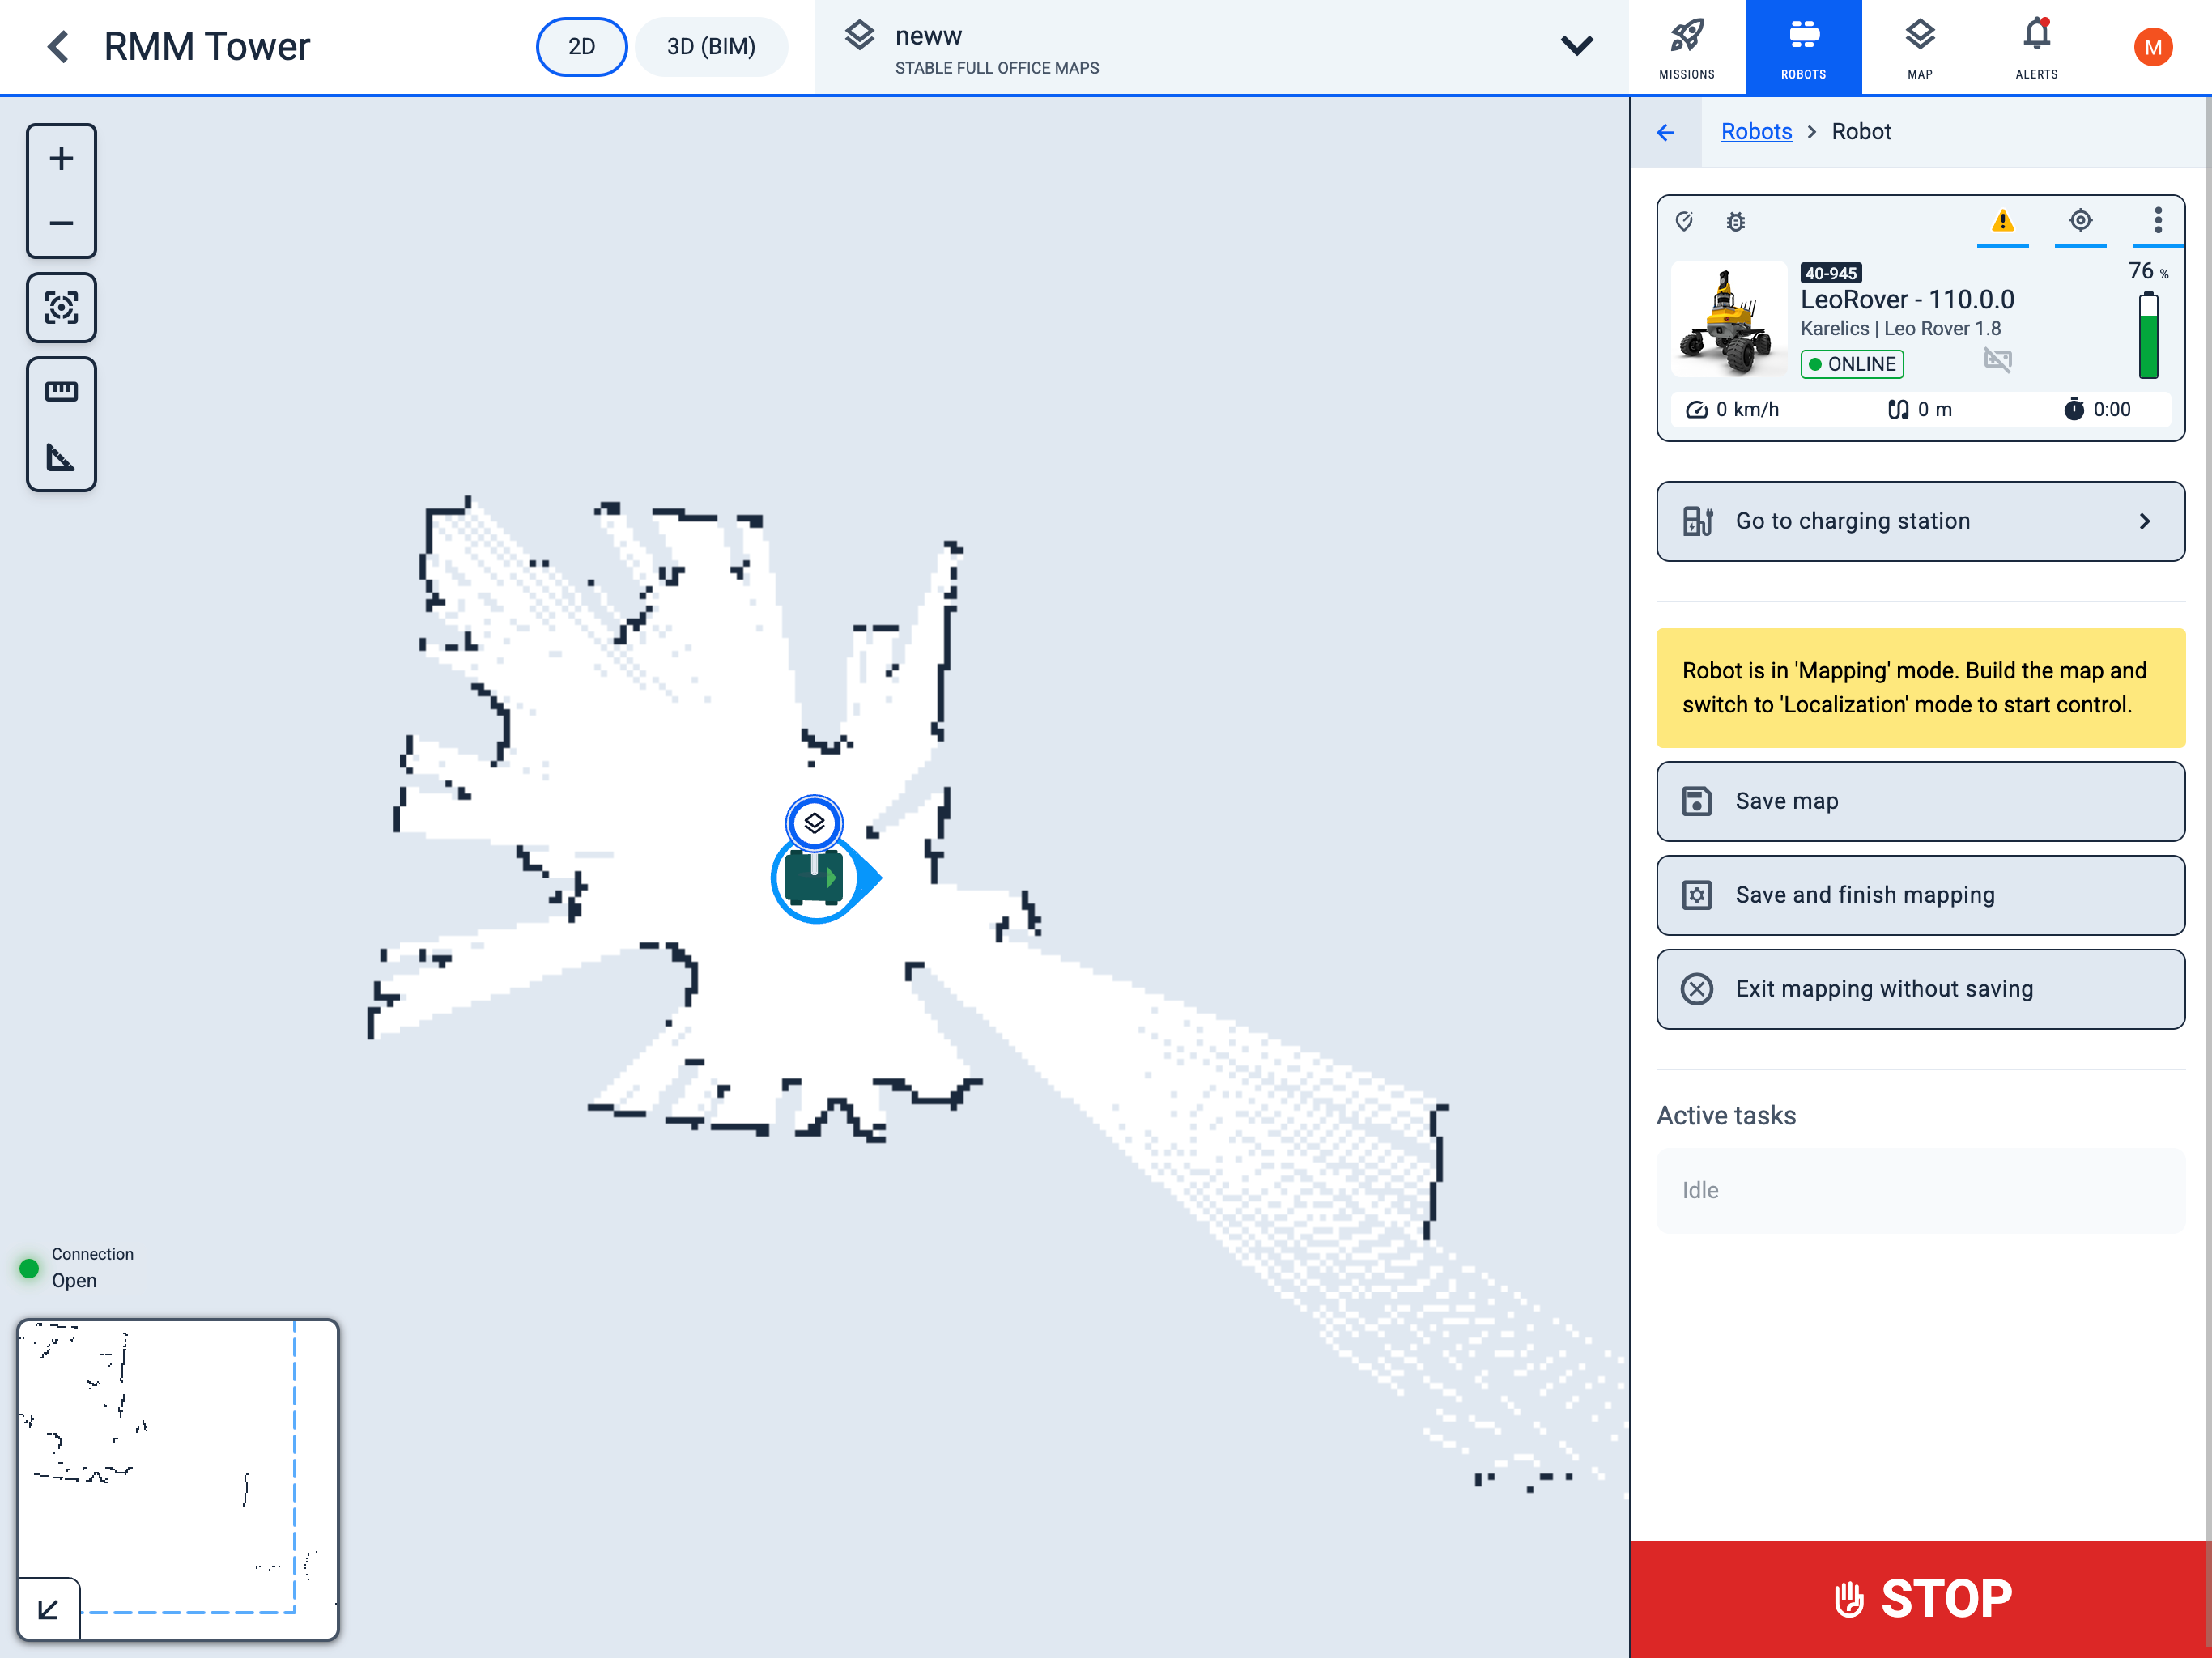
2. Build the map in Mapping mode
Operator Hub → Current Project → Workspace → Robots → Current Robot → Configuration → Mapping/Localization → Mapping
The Mapping mode is used exclusively for creating new floor maps or editing/extending existing maps.
New map Mapping process
- Control the robot and create a map while monitoring the map creation process.
- Drive the robot through the entire area that needs to be captured on the map.
- To save the map as a draft and continue working, press the
Save mapbutton. - To finish and save the map, press the
Save and finish mappingbutton. - To exit mapping mode without saving, press the
Exit mapping without savingbutton. - After completing the map creation, you can manually edit it using the eraser or rotation tool in Edit map.
Process of Mapping over an already created map
- The process is exactly the same, except you start with an already existing map.
- It is recommended to accurately align the robot on the map in advance using Set position.
For the most accurate map creation, it is recommended to drive the robot as close as possible to obstacles and inspect them from all sides. If artifacts appear on the map, you can drive the robot over the same area again.
3. Edit map in Workspace
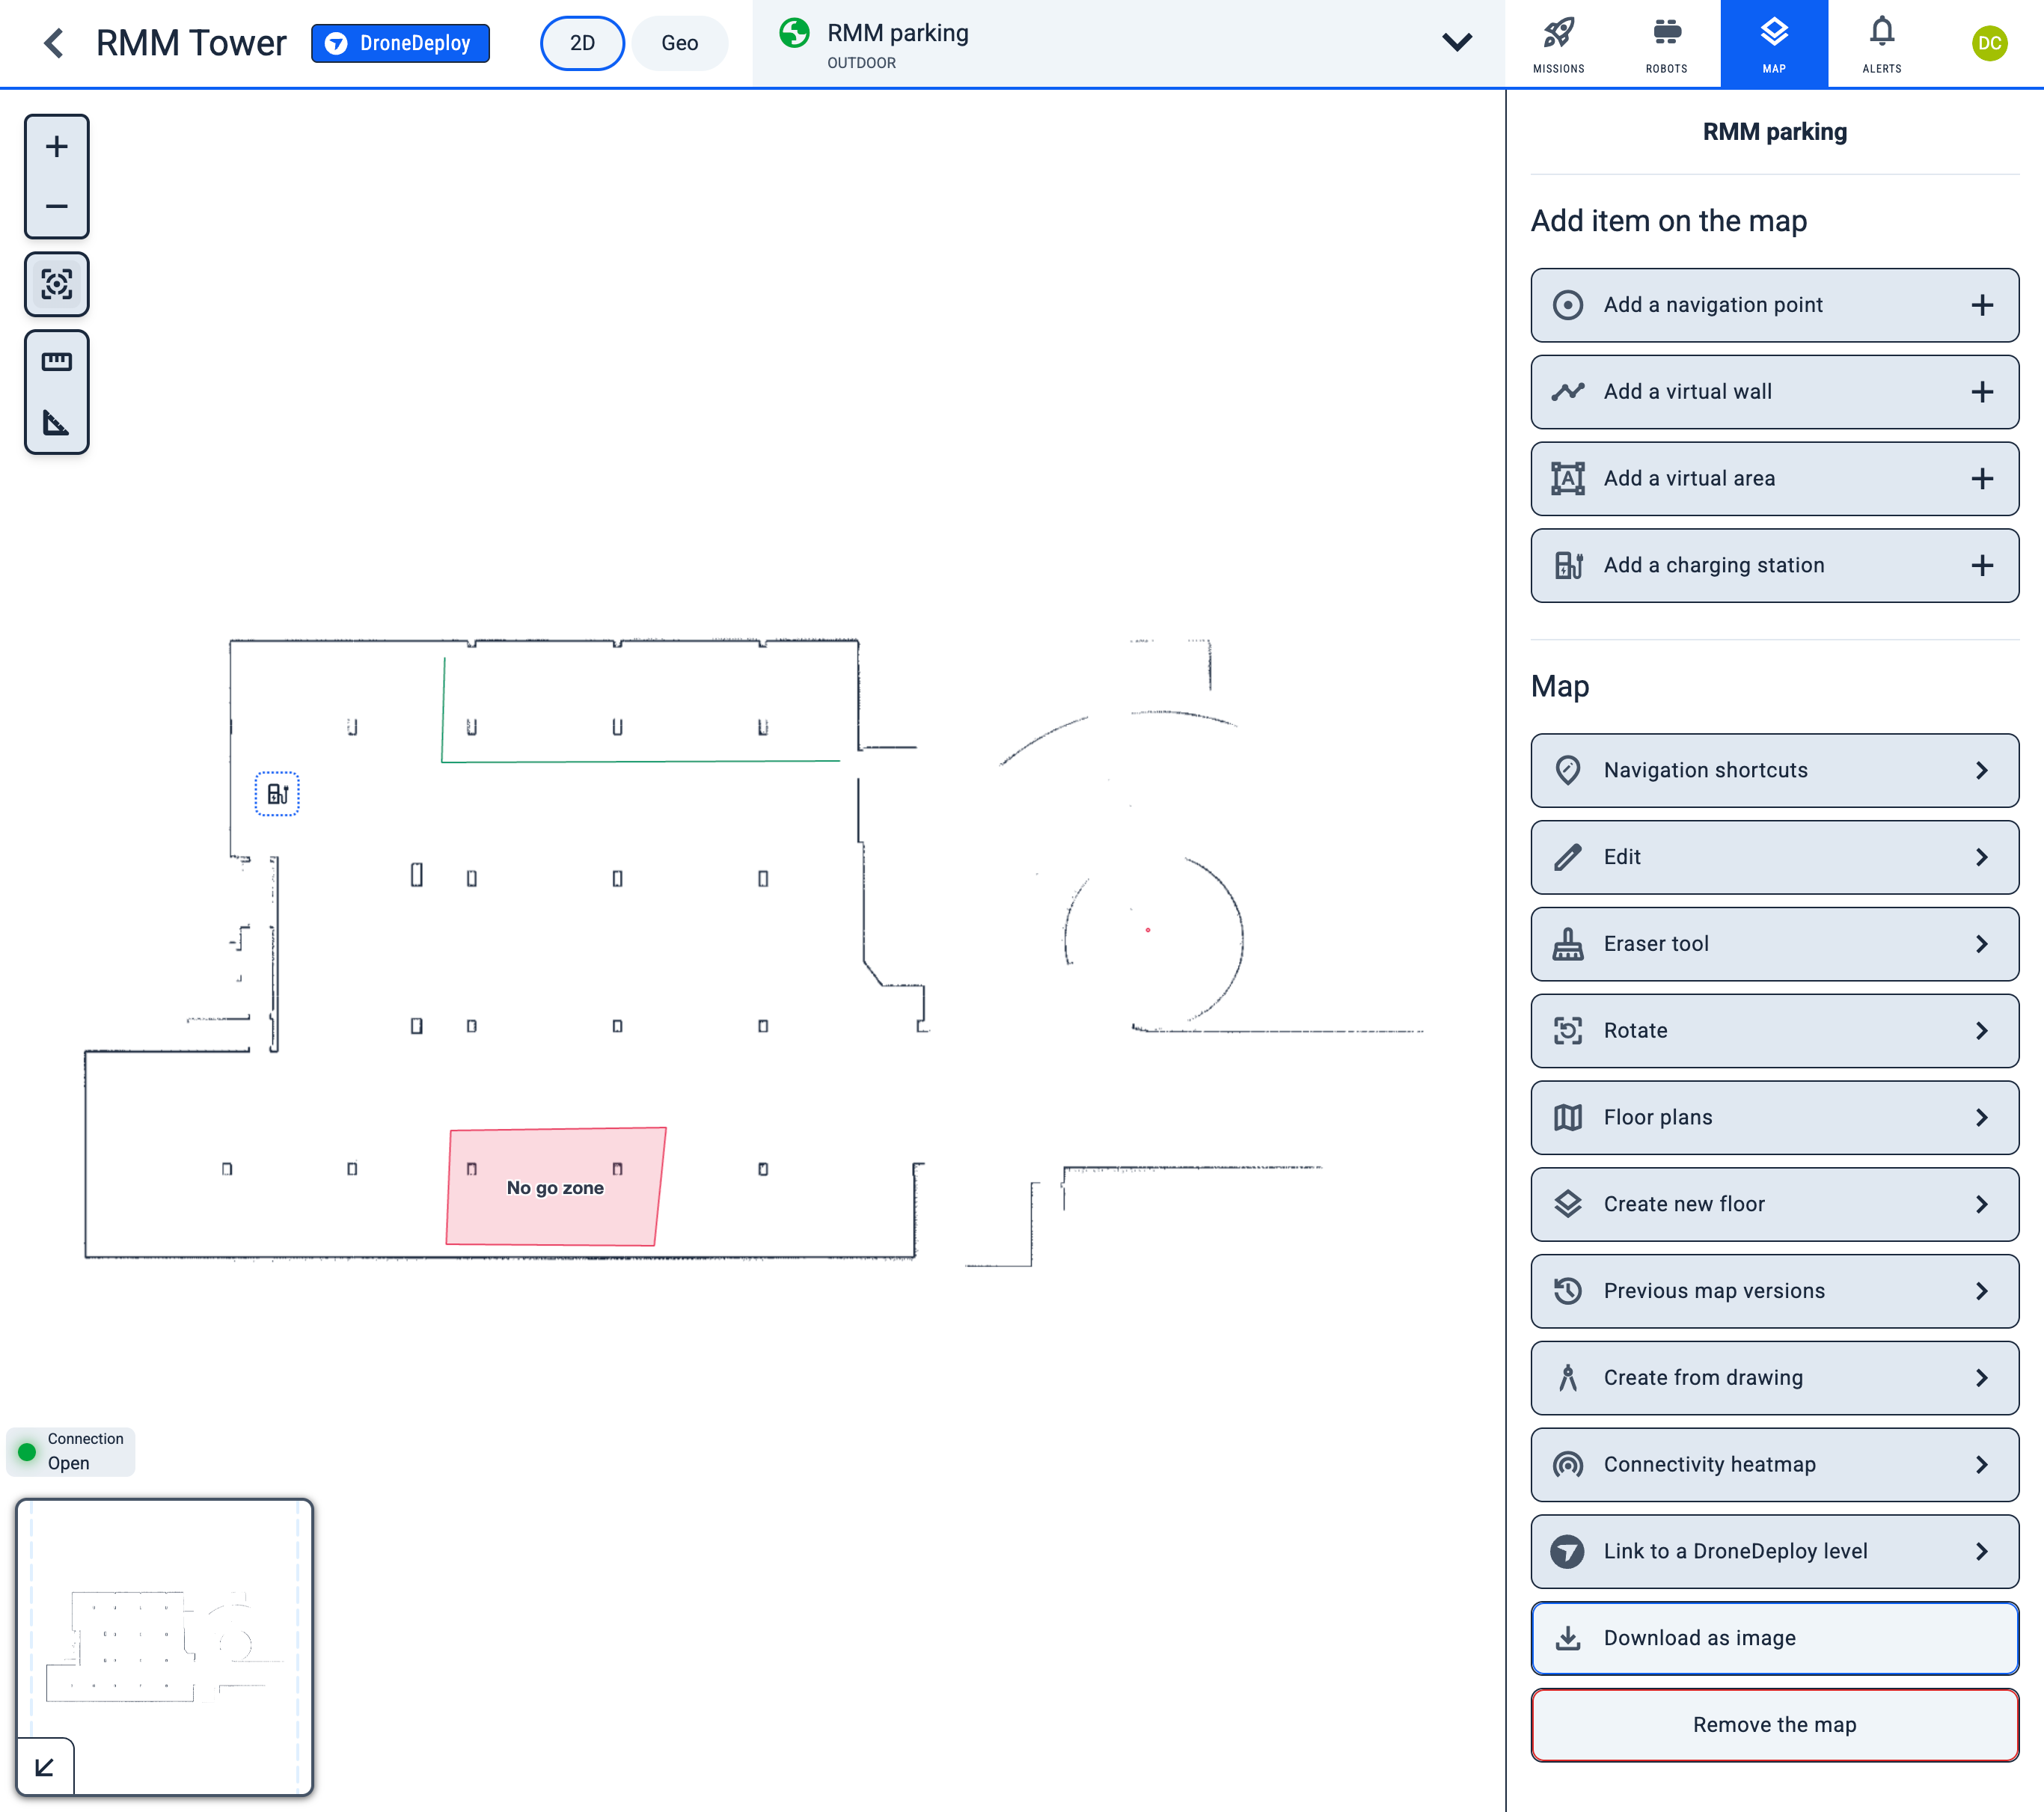
Operator Hub → Current Project → Workspace → Map
- 2D View
- Geo View
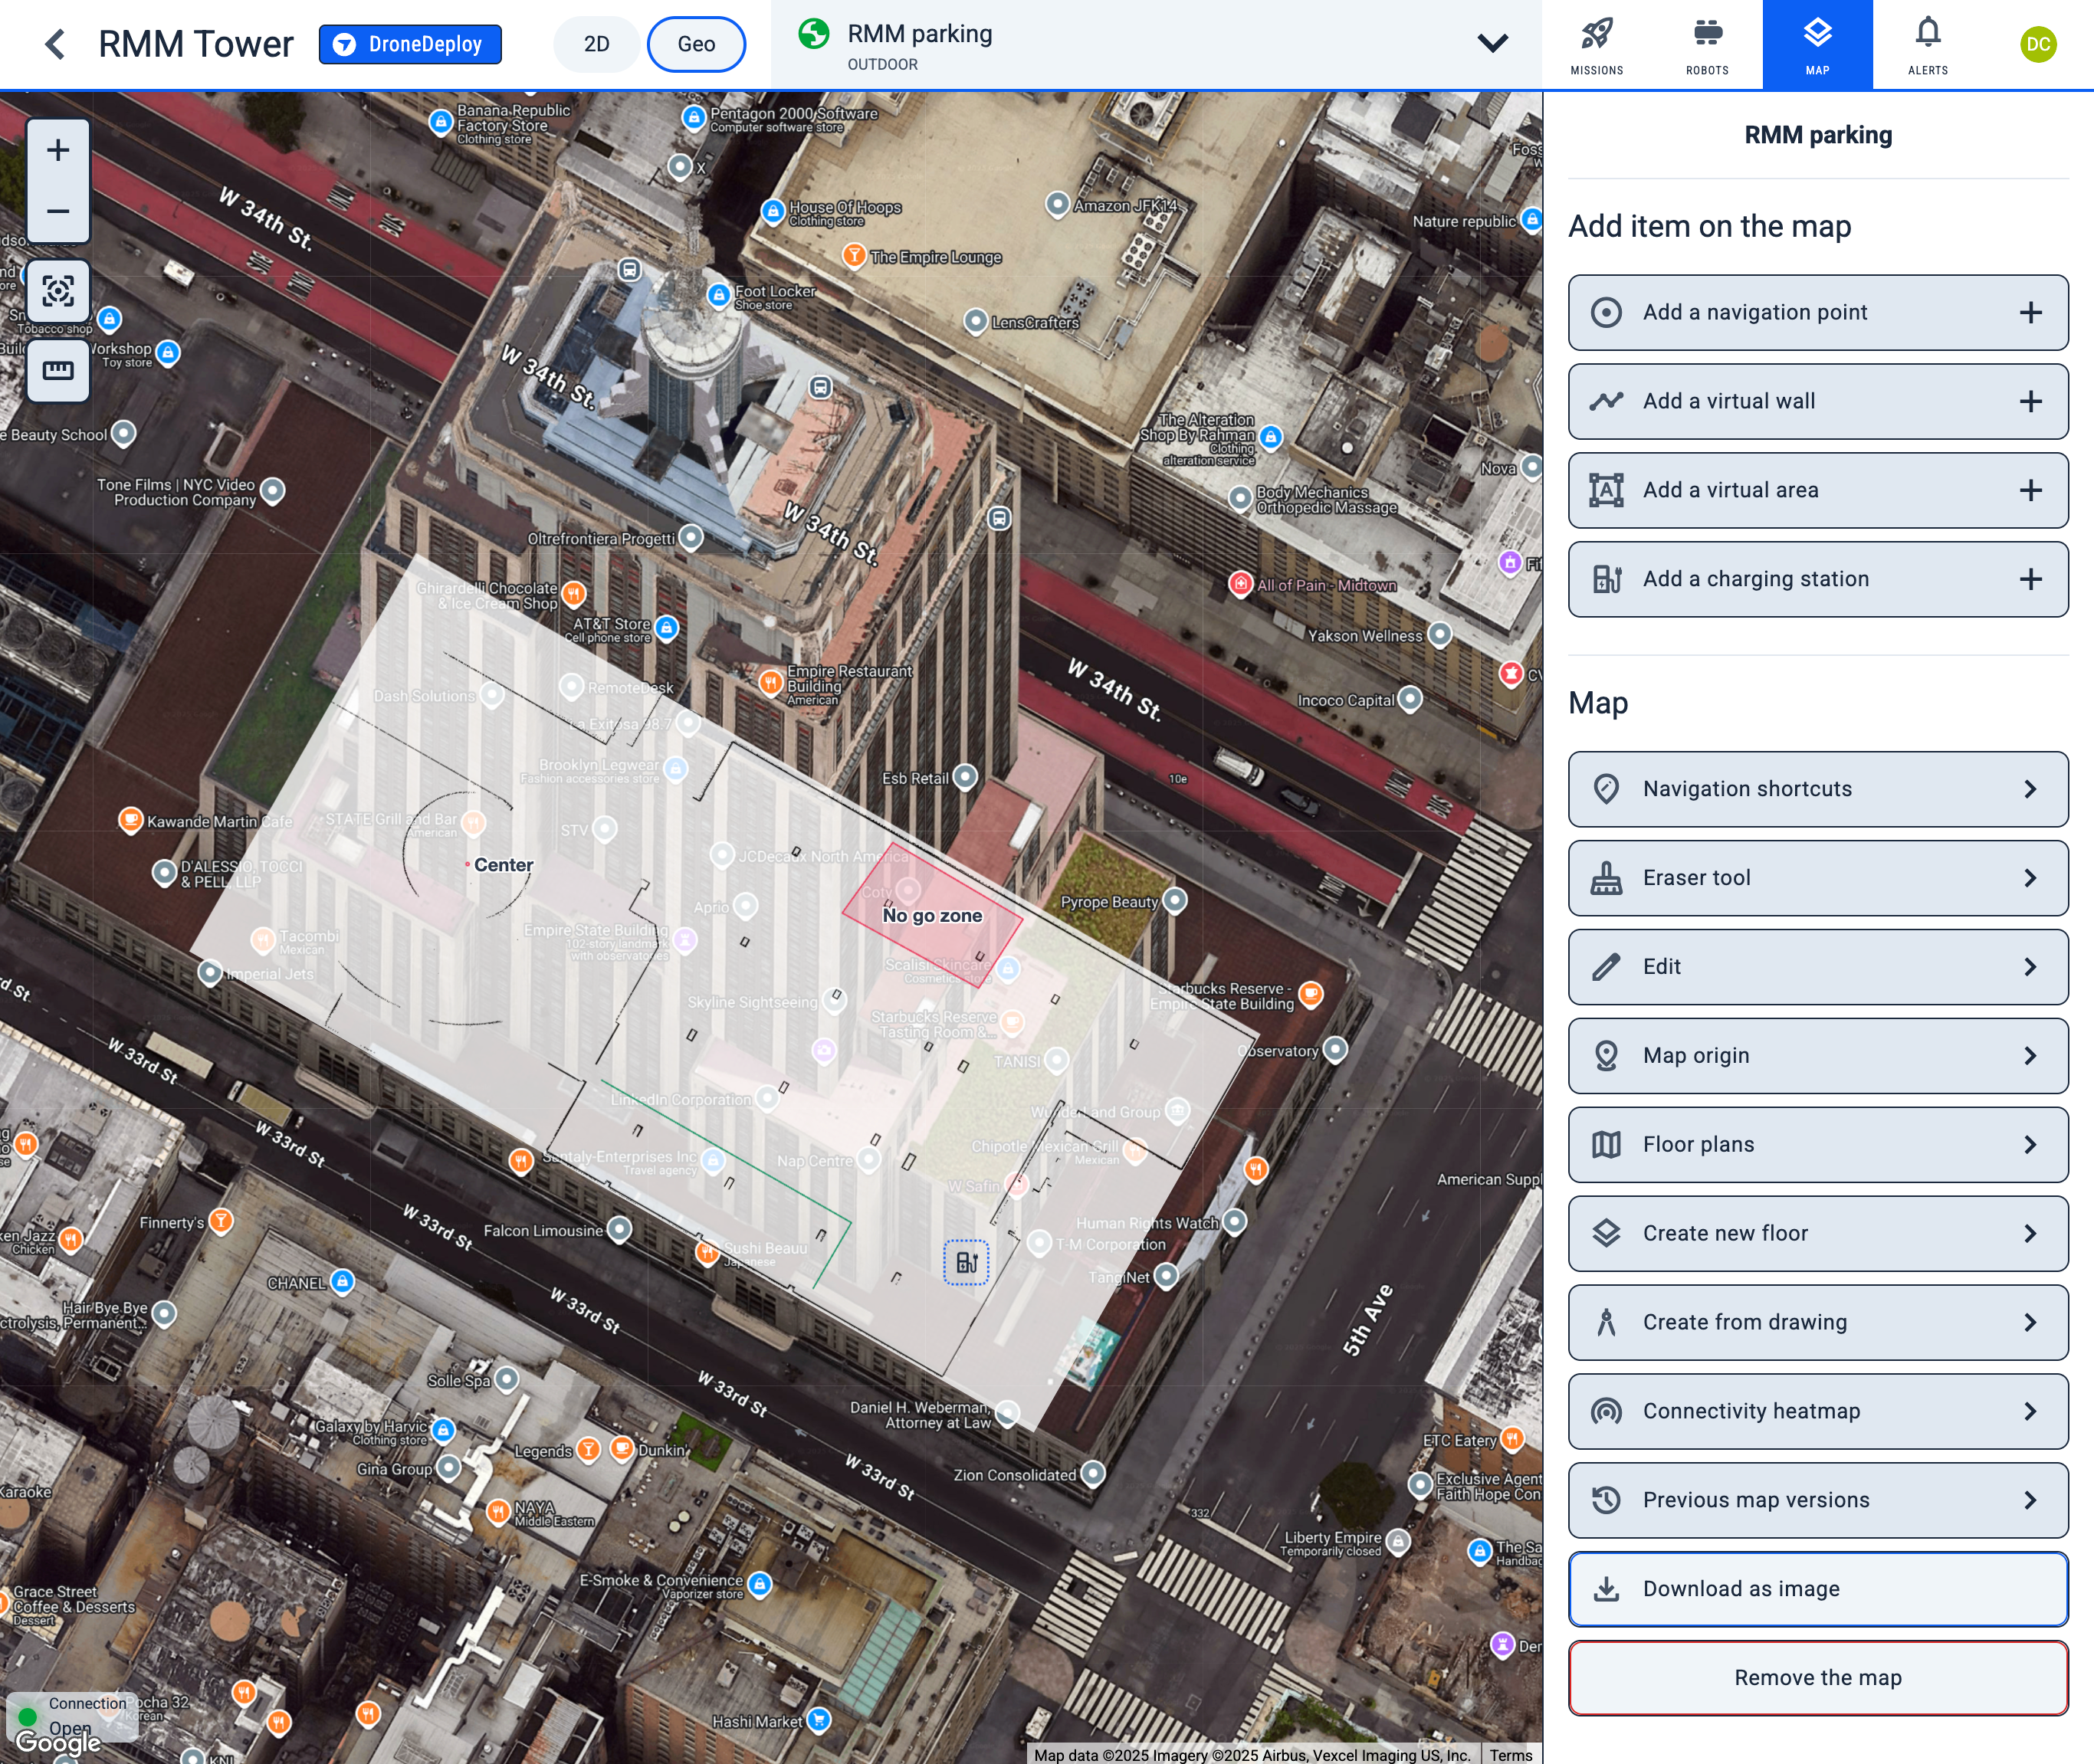
Add item on the map
- adjustaddAdd a navigation point
- timelineaddAdd a virtual wall
- format_shapesaddAdd a virtual area
- ev_stationaddAdd a charging station
Map
- edit_locationchevron_rightNavigation shortcuts
- editchevron_rightEdit
- distancechevron_rightMap origin in Geo view
- mopchevron_rightEraser tool
- frame_reloadchevron_rightRotate
- mapchevron_rightFloor plans
- layerschevron_rightCreate new floor
- historychevron_rightPrevious map versions
- architecturechevron_rightCreate from drawing
- wifi_tetheringchevron_rightConnectivity heatmap
- chevron_rightLink to a DroneDeploy level
- chevron_rightLink to Reality Twin
- download Download map
- delete Remove the map